AWS Site-to-Site VPN single and multiple VPN connection examples
The following diagrams illustrate single and multiple Site-to-Site VPN connections.
Examples
Single Site-to-Site VPN connection
The VPC has an attached virtual private gateway, and your on-premises (remote) network includes a customer gateway device, which you must configure to enable the VPN connection. You must update the VPC route tables so that any traffic from the VPC bound for your network goes to the virtual private gateway.
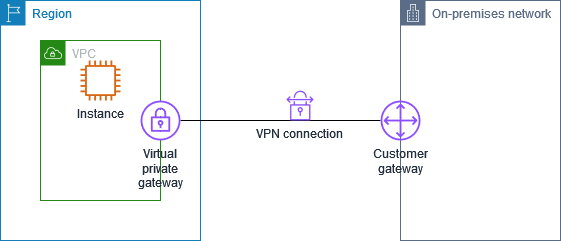
For steps to set up this scenario, see Get started with AWS Site-to-Site VPN.
Single Site-to-Site VPN connection with a transit gateway
The VPC has an attached transit gateway, and your on-premises (remote) network includes a customer gateway device, which you must configure to enable the VPN connection. You must update the VPC route tables so that any traffic from the VPC bound for your network goes to the transit gateway.
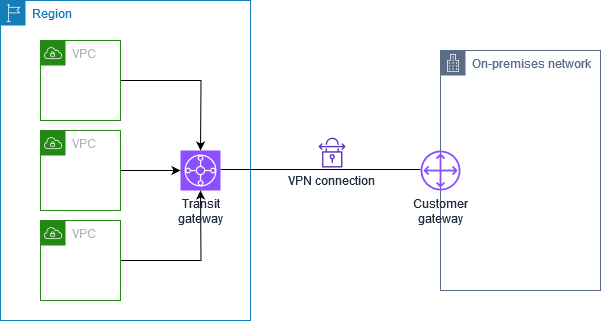
For steps to set up this scenario, see Get started with AWS Site-to-Site VPN.
Multiple Site-to-Site VPN connections
The VPC has an attached virtual private gateway, and you have multiple Site-to-Site VPN connections to multiple on-premises locations. You set up the routing so that any traffic from the VPC bound for your networks is routed to the virtual private gateway.
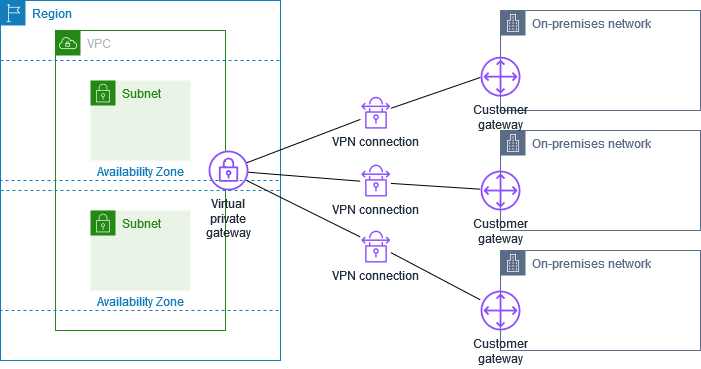
When you create multiple Site-to-Site VPN connections to a single VPC, you can configure a second customer gateway to create a redundant connection to the same external location. For more information, see Redundant AWS Site-to-Site VPN connections for failover.
You can also use this scenario to create Site-to-Site VPN connections to multiple geographic locations and provide secure communication between sites. For more information, see Secure communication between AWS Site-to-Site VPN connections using VPN CloudHub.
Multiple Site-to-Site VPN connections with a transit gateway
The VPC has an attached transit gateway, and you have multiple Site-to-Site VPN connections to multiple on-premises locations. You set up the routing so that any traffic from the VPC bound for your networks is routed to the transit gateway.
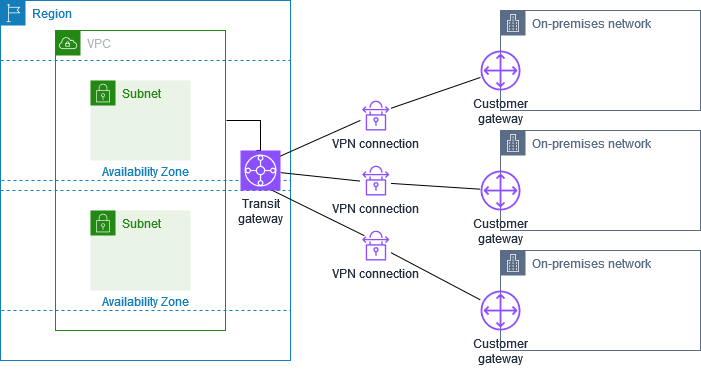
When you create multiple Site-to-Site VPN connections to a single transit gateway, you can configure a second customer gateway to create a redundant connection to the same external location.
You can also use this scenario to create Site-to-Site VPN connections to multiple geographic locations and provide secure communication between sites.
Site-to-Site VPN connection with Direct Connect
The VPC has an attached virtual private gateway, and connects to your on-premises (remote) network through AWS Direct Connect. You can configure an Direct Connect public virtual interface to establish a dedicated network connection between your network to public AWS resources through a virtual private gateway. You set up the routing so that any traffic from the VPC bound for your network routes to the virtual private gateway and the Direct Connect connection.
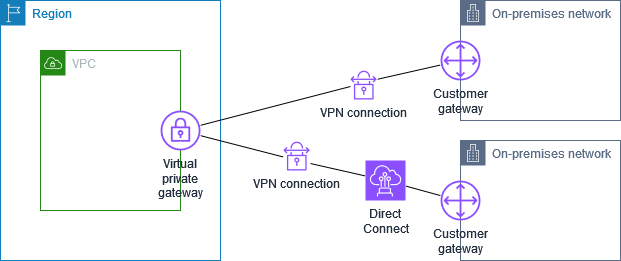
When both Direct Connect and the VPN connection are set up on the same virtual private gateway, adding or removing objects might cause the virtual private gateway to enter the ‘attaching’ state. This indicates a change is being made to internal routing that will switch between Direct Connect and the VPN connection to minimize interruptions and packet loss. When this is complete, the virtual private gateway returns to the ‘attached’ state.
Private IP Site-to-Site VPN connection with Direct Connect
With a private IP Site-to-Site VPN you can encrypt Direct Connect traffic between your on-premises network and AWS without the use of public IP addresses. Private IP VPN over Direct Connect ensures that traffic between AWS and on-premises networks is both secure and private, allowing customers to comply with regulatory and security mandates.
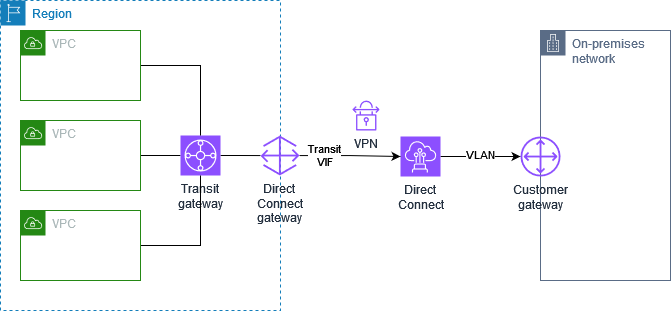
For more information, see the following blog post: Introducing AWS Site-to-Site VPN Private IP VPNs
