Assign a hardware TOTP token in the AWS Management Console
Important
AWS recommends that you use a passkey or security key for MFA to AWS, wherever possible. For more information, see Assign a passkey or security key in the AWS Management Console.
A hardware TOTP token generates a six-digit numeric code based upon a time-based one-time password (TOTP) algorithm. The user must type a valid code from the device when prompted during the sign-in process. Each MFA device assigned to a user must be unique; a user cannot type a code from another user's device to be authenticated. MFA devices cannot be shared across accounts or users.
Hardware TOTP tokens and FIDO security
keys are both physical devices that you purchase. Hardware MFA devices generate TOTP
codes for authentication when you sign in to AWS. They rely on batteries, which may need
replacement and resynchronization with AWS over time. FIDO security keys, which utilize public
key cryptography, do not require batteries and offer a seamless authentication process. We
recommend using FIDO security keys for their phishing resistance, which provides a more secure
alternative to TOTP devices. Additionally, FIDO security keys can support multiple IAM or root
users on the same device, enhancing their utility for account security. For specifications and
purchase information for both device types, see Multi-Factor Authentication
You can enable a hardware TOTP token for an IAM user from the AWS Management Console, the command line, or the IAM API. To enable an MFA device for your AWS account root user, see Enable a hardware TOTP token for the root user (console).
You can register up to eight MFA devices of any combination
of the currently supported MFA
types
Important
We recommend that you enable multiple MFA devices for your users for continued access to your account in case of a lost or inaccessible MFA device.
Note
If you want to enable the MFA device from the command line, use aws iam
enable-mfa-device. To enable the MFA device with the IAM API, use the
EnableMFADevice
operation.
Topics
Permissions required
To manage a hardware TOTP token for your own IAM user while protecting sensitive MFA-related actions, you must have the permissions from the following policy:
Enable a hardware TOTP token for your own IAM user (console)
You can enable your own hardware TOTP token from the AWS Management Console.
Note
Before you can enable a hardware TOTP token, you must have physical access to the device.
To enable a hardware TOTP token for your own IAM user (console)
-
Use your AWS account ID or account alias, your IAM user name, and your password to sign in to the IAM console
. Note
For your convenience, the AWS sign-in page uses a browser cookie to remember your IAM user name and account information. If you previously signed in as a different user, choose Sign in to a different account near the bottom of the page to return to the main sign-in page. From there, you can type your AWS account ID or account alias to be redirected to the IAM user sign-in page for your account.
To get your AWS account ID, contact your administrator.
-
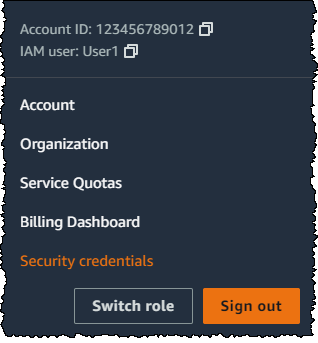
In the navigation bar on the upper right, choose your user name, and then choose Security credentials.
-
On the AWS IAM credentials tab, in the Multi-factor authentication (MFA) section, choose Assign MFA device.
-
In the wizard, type a Device name, choose Hardware TOTP token, and then choose Next.
-
Type the device serial number. The serial number is usually on the back of the device.
-
In the MFA code 1 box, type the six-digit number displayed by the MFA device. You might need to press the button on the front of the device to display the number.

-
Wait 30 seconds while the device refreshes the code, and then type the next six-digit number into the MFA code 2 box. You might need to press the button on the front of the device again to display the second number.
-
Choose Add MFA.
Important
Submit your request immediately after generating the authentication codes. If you generate the codes and then wait too long to submit the request, the MFA device successfully associates with the user but the MFA device becomes out of sync. This happens because time-based one-time passwords (TOTP) expire after a short period of time. If this happens, you can resync the device.
The device is ready for use with AWS. For information about using MFA with the AWS Management Console, see MFA enabled sign-in.
Enable a hardware TOTP token for another IAM user (console)
You can enable a hardware TOTP token for another IAM user from the AWS Management Console.
To enable a hardware TOTP token for another IAM user (console)
Sign in to the AWS Management Console and open the IAM console at https://console.aws.amazon.com/iam/
. -
In the navigation pane, choose Users.
-
Choose the name of the user for whom you want to enable MFA.
-
Choose the Security Credentials tab. Under Multi-factor authentication (MFA), choose Assign MFA device.
-
In the wizard, type a Device name, choose Hardware TOTP token, and then choose Next.
-
Type the device serial number. The serial number is usually on the back of the device.
-
In the MFA code 1 box, type the six-digit number displayed by the MFA device. You might need to press the button on the front of the device to display the number.
-
Wait 30 seconds while the device refreshes the code, and then type the next six-digit number into the MFA code 2 box. You might need to press the button on the front of the device again to display the second number.
-
Choose Add MFA.
Important
Submit your request immediately after generating the authentication codes. If you generate the codes and then wait too long to submit the request, the MFA device successfully associates with the user but the MFA device becomes out of sync. This happens because time-based one-time passwords (TOTP) expire after a short period of time. If this happens, you can resync the device.
The device is ready for use with AWS. For information about using MFA with the AWS Management Console, see MFA enabled sign-in.
Replace a physical MFA device
You can have up to eight MFA devices of any combination of the currently supported MFA types
-
To deactivate the device currently associated with a user, see Deactivate an MFA device.
-
To add a replacement hardware TOTP token for an IAM user, follow the steps in the procedure Enable a hardware TOTP token for another IAM user (console) earlier in this topic.
-
To add a replacement hardware TOTP token for the AWS account root user, follow the steps in the procedure Enable a hardware TOTP token for the root user (console) earlier in this topic.
