Try the AWS IoT Core quick connect tutorial
In this tutorial, you'll create your first thing object, connect a device to it, and watch it send MQTT messages.
You can expect to spend 15-20 minutes on this tutorial.
This tutorial is best for people who want to quickly get started with AWS IoT to see how it works in a limited scenario. If you're looking for an example that will get you started so that you can explore more features and services, try Explore AWS IoT Core in hands-on tutorials.
In this tutorial, you'll download and run software on a device that connects to a thing resource in AWS IoT Core as part of a very small IoT solution. The device can be an IoT device, such as a Raspberry Pi, or it can also be a computer that is running Linux, OS and OSX, or Windows. If you're looking to connect a Long Range WAN (LoRaWAN) device to AWS IoT, refer to the tutorial >Connecting devices and gateways to AWS IoT Core for LoRaWAN.
If your device supports a browser that can run the AWS IoT console
Note
If your device doesn't have a compatible browser, follow this tutorial on a computer. When the procedure asks you to download the file, download it to your computer, and then transfer the downloaded file to your device by using Secure Copy (SCP) or a similar process.
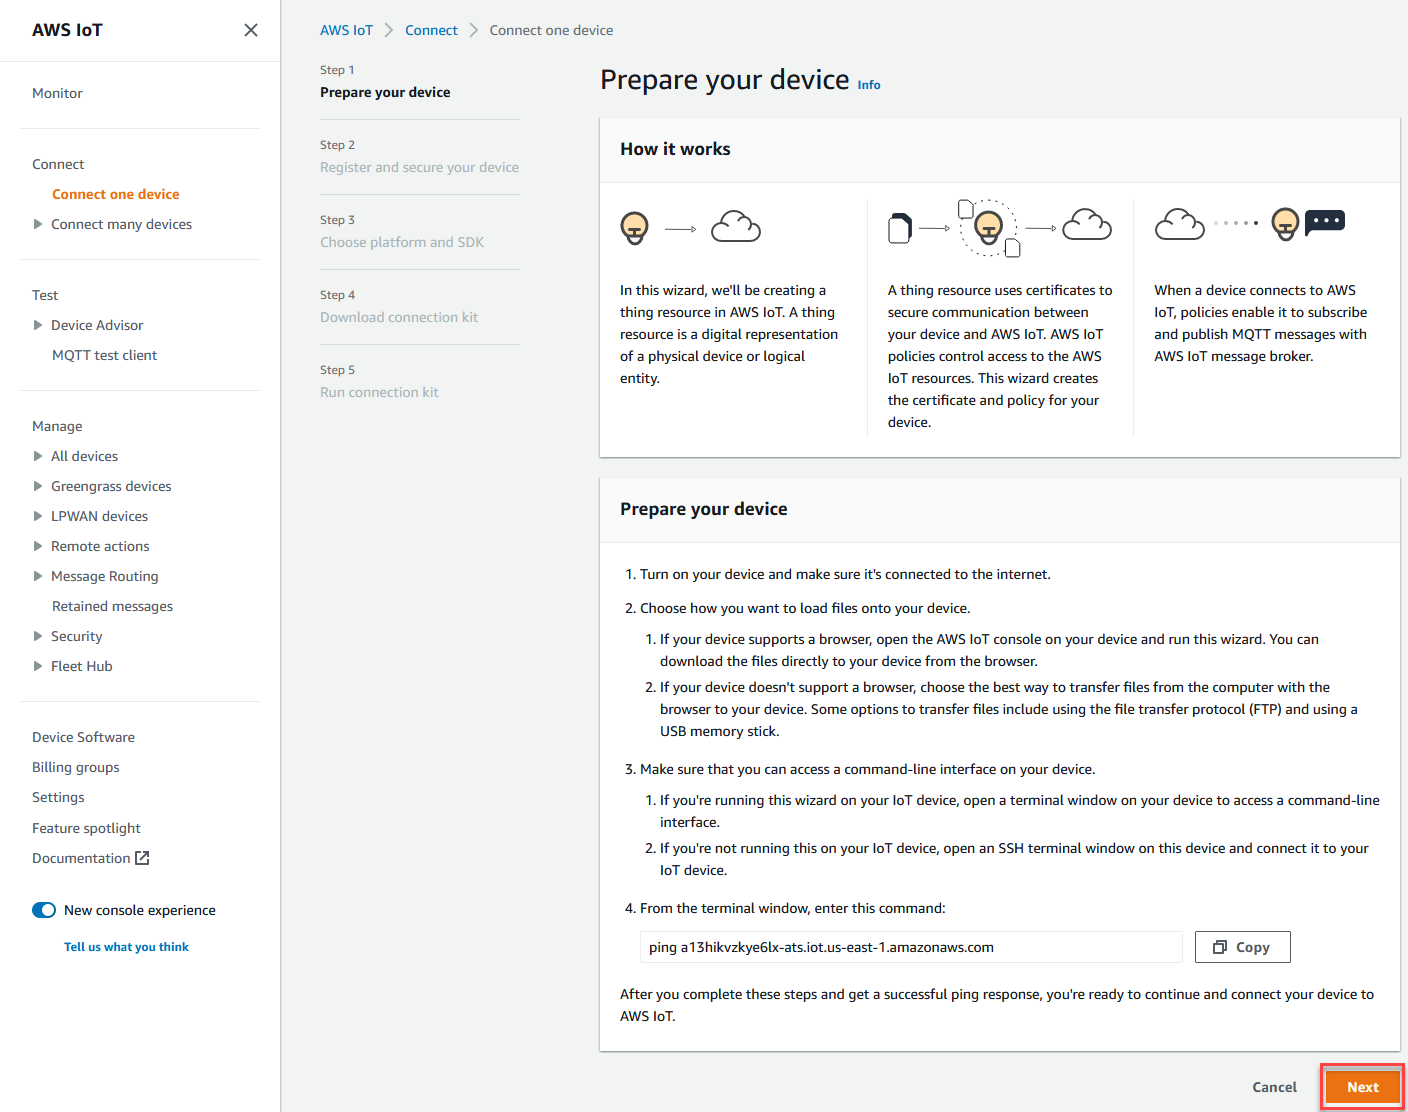
The tutorial requires your IoT device to communicate with port 8443 on your AWS account's device data endpoint. To test whether it can access that port, try the procedures in Test connectivity with your device data endpoint.
Step 1. Start the tutorial
If possible, complete this procedure on your device; otherwise, be ready to transfer a file to your device later in this procedure.
To start the tutorial, sign in to the AWS IoT
console

Step 2. Create a thing object
-
In the Prepare your device section, follow the on-screen instructions to prepare your device for connecting to AWS IoT.
-
In the Register and secure your device section, choose Create a new thing or Choose an existing thing. In the Thing name field, enter the name for your thing object. The thing name used in this example is
TutorialTestThingImportant
Double-check your thing name before you continue.
A thing name can't be changed after the thing object is created. If you want to change a thing name, you must create a new thing object with the correct thing name and then delete the one with the incorrect name.
In the Additional configurations section, customize your thing resource further using the optional configurations listed.
After you provide your thing object a name and select any additional configurations, choose Next.

-
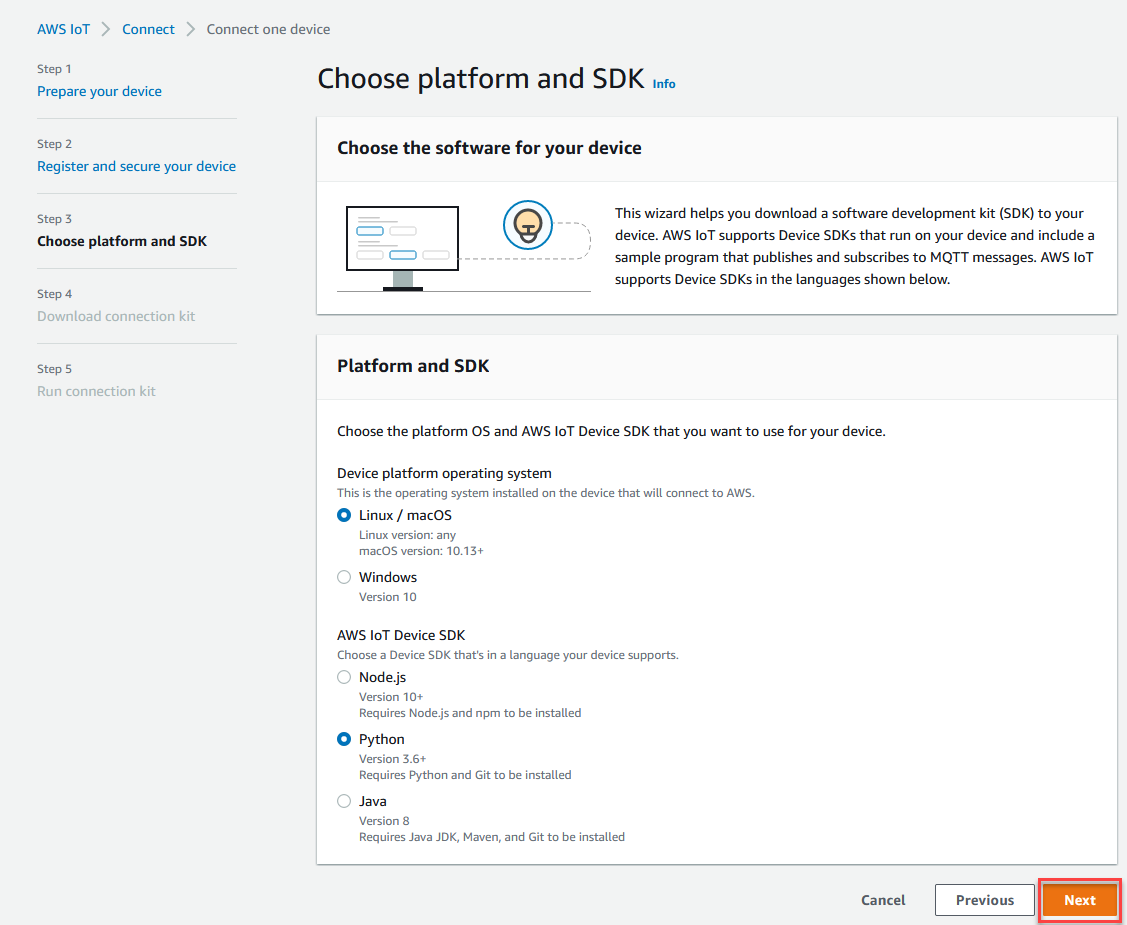
In the Choose platform and SDK section, choose the platform and the language of the AWS IoT Device SDK that you want to use. This example uses the Linux/OSX platform and the Python SDK. Make sure that you have python3 and pip3 installed on your target device before you continue to the next step.
Note
Be sure to check the list of prerequisite software required by your chosen SDK at the bottom of the console page.
You must have the required software installed on your target computer before you continue to the next step.
After you choose the platform and device SDK language, choose Next.
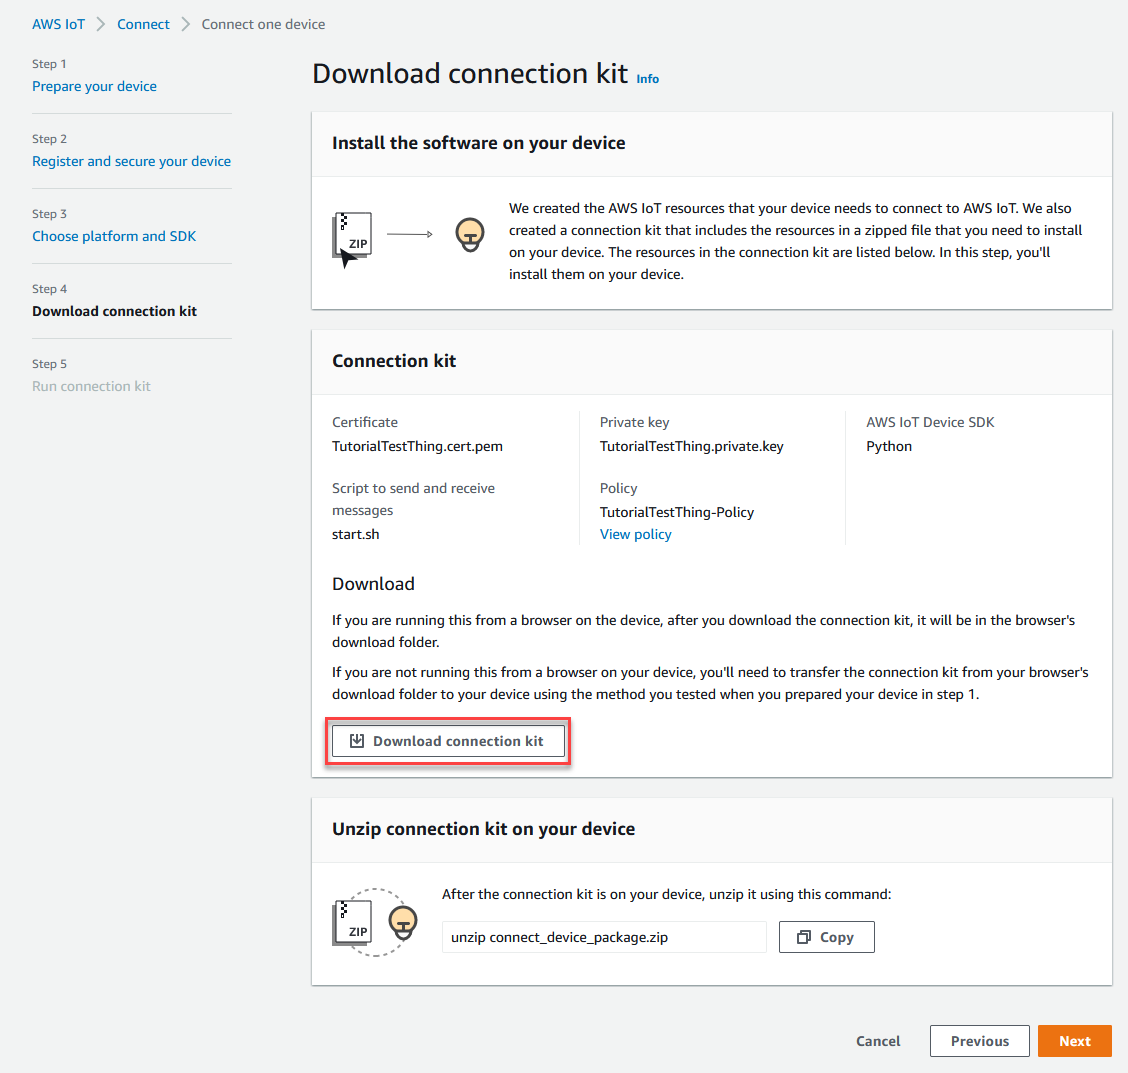
Step 3. Download files to your device
This page appears after AWS IoT has created the connection kit, which includes the following files and resources that your device requires:
-
The thing's certificate files used to authenticate the device
-
A policy resource to authorize your thing object to interact with AWS IoT
-
The script to download the AWS Device SDK and run the sample program on your device
-
When you're ready to continue, choose the Download connection kit for button to download the connection kit for the platform that you chose earlier.
-
If you're running this procedure on your device, save the connection kit file to a directory from which you can run command line commands.
If you're not running this procedure on your device, save the connection kit file to a local directory and then transfer the file to your device.
-
In the Unzip connection kit on your device section, enter unzip connect_device_package.zip in the directory where the connection kit files are located.
If you're using a Windows PowerShell command window and the unzip command doesn't work, replace unzip with expand-archive, and try the command line again.
-
After you have the connection kit file on the device, continue the tutorial by choosing Next.

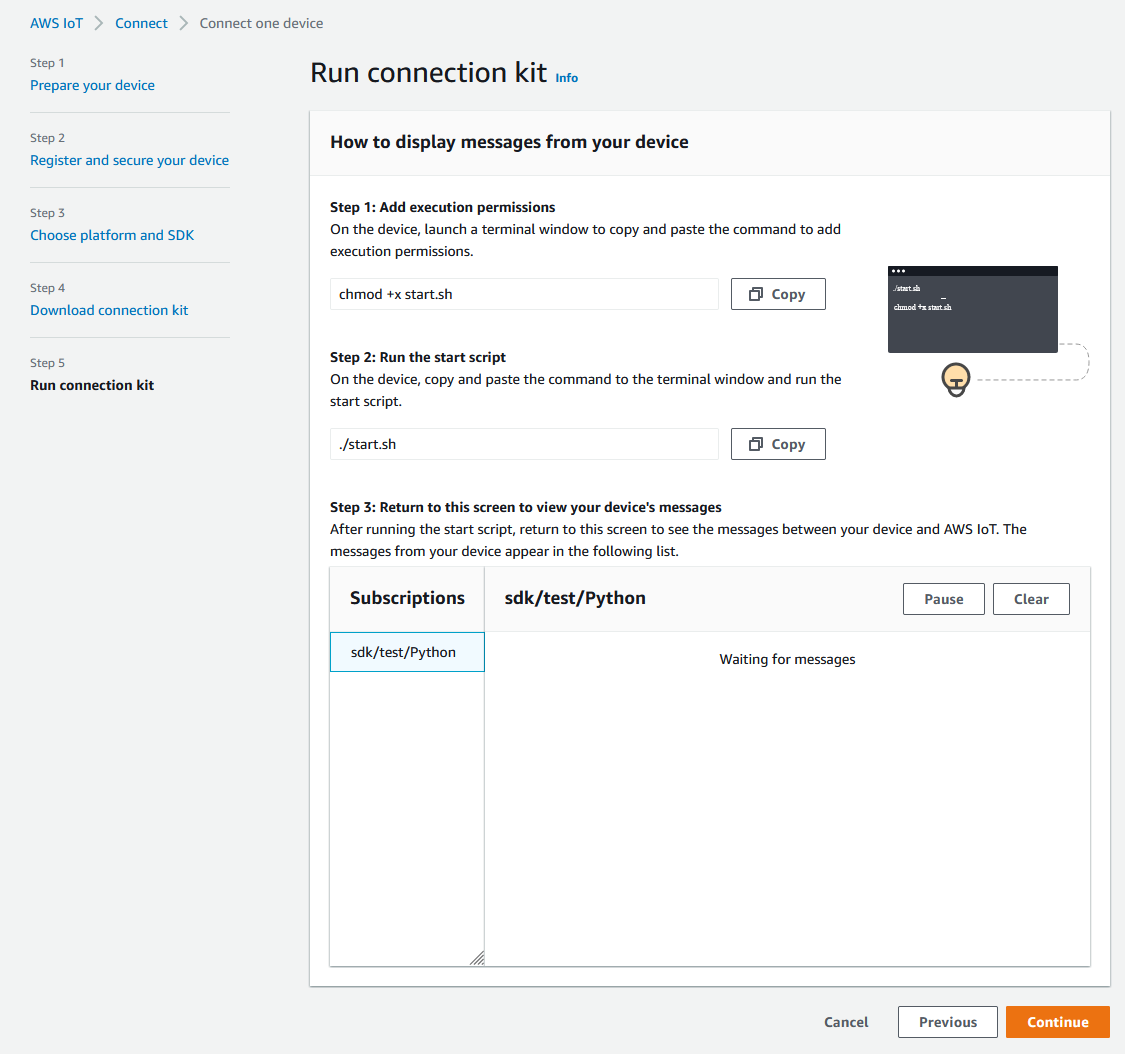
Step 4. Run the sample
You do this procedure in a terminal or command window on your device while you follow the directions displayed in the console. The commands you see in the console are for the operating system you chose in Step 2. Create a thing object. Those shown here are for the Linux/OSX operating systems.
-
In a terminal or command window on your device, in the directory with the connection kit file, perform the steps shown in the AWS IoT console.
-
After you enter the command from Step 2 in the console, you should see an output in the device's terminal or command window that is similar to the following. This output is from the messages the program is sending to and then receiving back from AWS IoT Core.
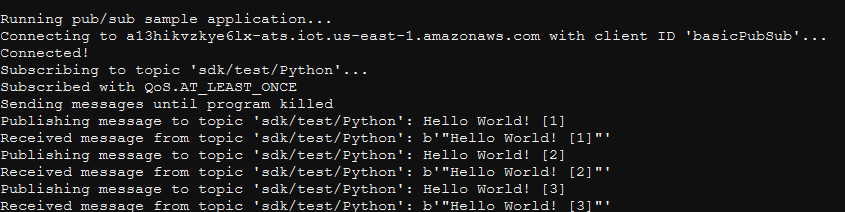
While the sample program is running, the test message
Hello
                            World!
will appear as well. The test message appears in the terminal or command window on your device.Note
For more information about topic subscription and publish, see the example code of your chosen SDK.
-
To run the sample program again, you can repeat the commands from Step 2 in the console of this procedure.
-
(Optional) If you want to see the messages from your IoT client in the AWS IoT console
, open the MQTT test client on the Test page of the AWS IoT console. If you chose Python SDK, then in the MQTT test client, in Topic filter, enter the topic, such as sdk/test/to subscribe to the messages from your device. The topic filters are case sensitive and depend on the programming language of the SDK you chose in Step 1. For more information about topic subscription and publish, see the code example of your chosen SDK.python -
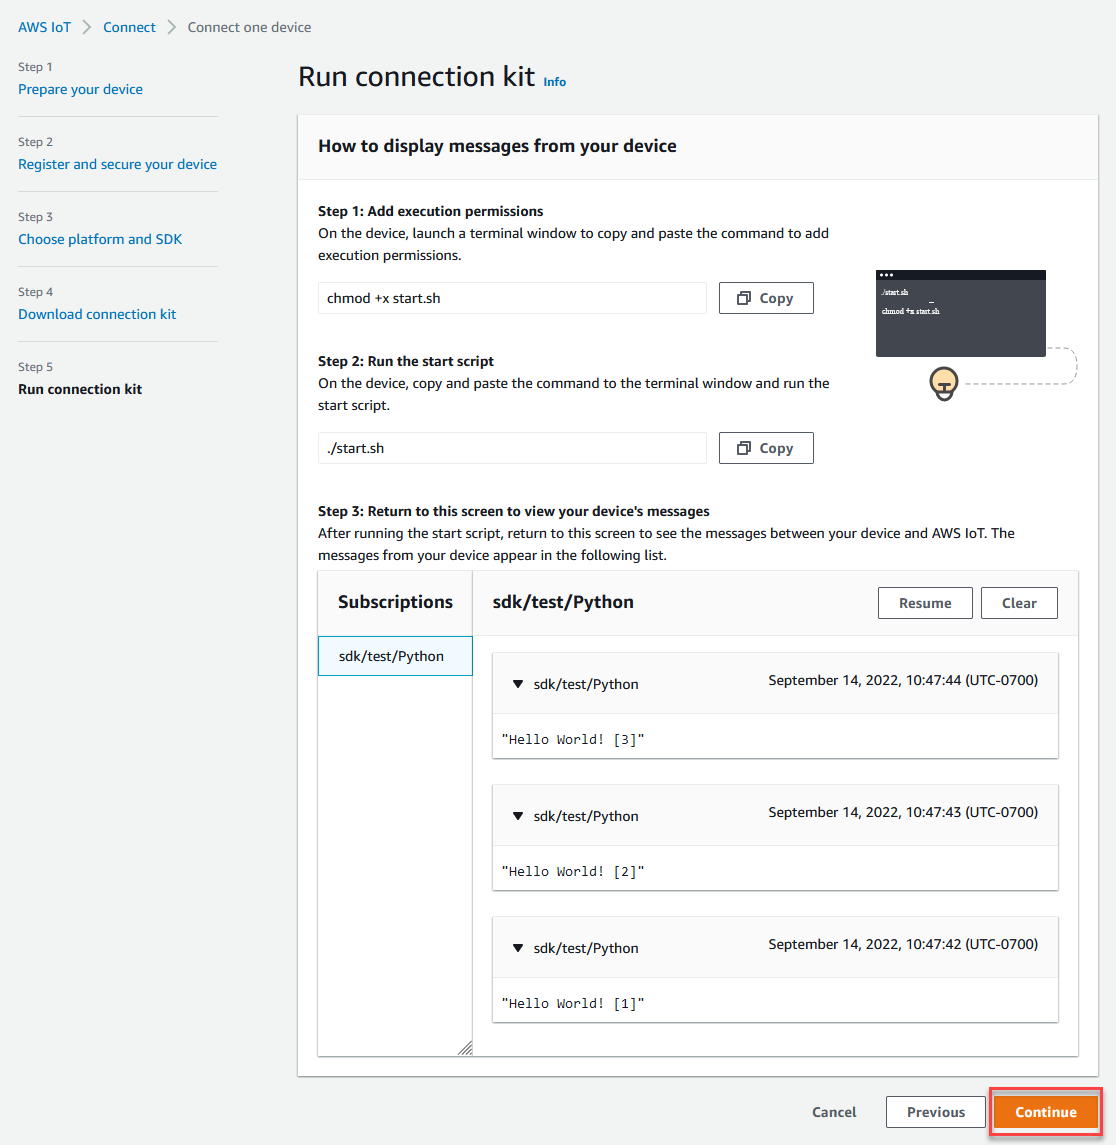
After you subscribe to the test topic, run ./start.sh on your device. For more information, see View MQTT messages with the AWS IoT MQTT client.
After you run ./start.sh, messages appear in the MQTT client, similar to the following:
{
  "message": "Hello World!" [1]
}
The
sequencenumber encased in[]increments by one each time a newHello World!message is received and stops when you end the program. -
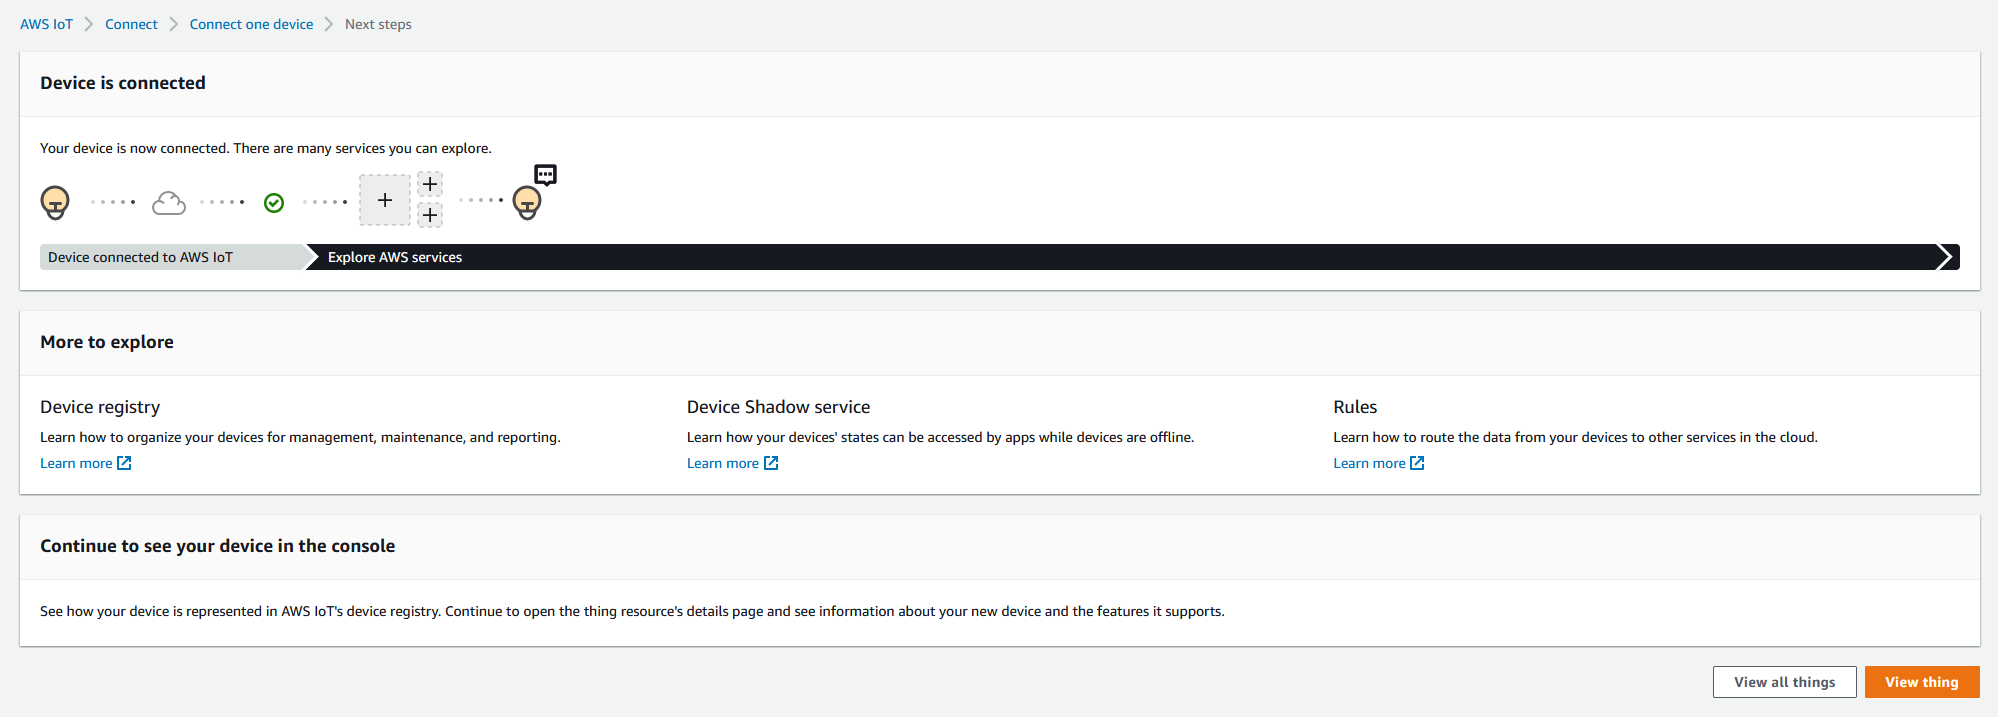
To finish the tutorial and see a summary, in the AWS IoT console, choose Continue.
-
A summary of your AWS IoT quick connect tutorial will now appear.
Step 5. Explore further
Here are some ideas to explore AWS IoT further after you complete the quick start.
-
View MQTT messages in the MQTT test client
From the AWS IoT console
, you can open the MQTT client on the Test page of the AWS IoT console. In the MQTT test client, subscribe to #, and then, on your device, run the program ./start.sh as described in the previous step. For more information, see View MQTT messages with the AWS IoT MQTT client. -
Run tests on your devices with Device Advisor
Use Device Advisor to test if your devices can securely and reliably connect to, and interact with, AWS IoT.
-
Interactive tutorial
To start the interactive tutorial, from the Learn page of the AWS IoT console, in the See how AWS IoT works tile, choose Start the tutorial.
-
Get ready to explore more tutorials
This quick start gives you just a sample of AWS IoT. If you want to explore AWS IoT further and learn about the features that make it a powerful IoT solution platform, start preparing your development platform by Explore AWS IoT Core in hands-on tutorials.
