Tutorial: Connecting a device to AWS IoT Core by using the AWS IoT Device SDK
This tutorial demonstrates how to connect a device to AWS IoT Core so that it can send and receive data to and from AWS IoT. After you complete this tutorial, your device will be configured to connect to AWS IoT Core and you'll understand how devices communicate with AWS IoT.
In this tutorial, you will:
This tutorial takes about an hour to complete.
Before you start this tutorial, make sure that you have:
-
Completed Getting started with AWS IoT Core
In the section of that tutorial where you must Configure your device, select the Connect a Raspberry Pi or other device option for your device and use the Python language options to configure your device.
Keep open the terminal window you use in that tutorial because you'll also use it in this tutorial.
-
A device that can run the AWS IoT Device SDK v2 for Python.
This tutorial shows how to connect a device to AWS IoT Core by using Python code examples, which require a relatively powerful device.
If you are working with resource-constrained devices, these code examples might not work on them. In that case, you might have more success by Tutorial: Using the AWS IoT Device SDK for Embedded C tutorial.
Prepare your device for AWS IoT
In Getting started with AWS IoT Core, you prepared your device and AWS account so they could communicate. This section reviews the aspects of that preparation that apply to any device connection with AWS IoT Core.
For a device to connect to AWS IoT Core:
-
You must have an AWS account.
The procedure in Set up your AWS account describes how to create an AWS account if you don’t already have one.
-
In that account, you must have the following AWS IoT resources defined for the device in your AWS account and Region.
The procedure in Create AWS IoT resources describes how to create these resources for the device in your AWS account and Region.
-
A device certificate registered with AWS IoT and activated to authenticate the device.
The certificate is often created with, and attached to, an AWS IoT thing object. While a thing object is not required for a device to connect to AWS IoT, it makes additional AWS IoT features available to the device.
-
A policy attached to the device certificate that authorizes it to connect to AWS IoT Core and perform all the actions that you want it to.
-
-
An internet connection that can access your AWS account’s device endpoints.
The device endpoints are described in AWS IoT device data and service endpoints and can be seen in the settings page of the AWS IoT console
. -
Communication software such as the AWS IoT Device SDKs provide. This tutorial uses the AWS IoT Device SDK v2 for Python
.
Review the MQTT protocol
Before we talk about the sample app, it helps to understand the MQTT protocol. The MQTT protocol offers some advantages over other network communication protocols, such as HTTP, which makes it a popular choice for IoT devices. This section reviews the key aspects of MQTT that apply to this tutorial. For information about how MQTT compares to HTTP, see Choosing a protocol for your device communication.
MQTT uses a publish/subscribe communication model
The MQTT protocol uses a publish/subscribe communication model with its host. This model differs from the request/response model that HTTP uses. With MQTT, devices establish a session with the host that is identified by a unique client ID. To send data, devices publish messages identified by topics to a message broker in the host. To receive messages from the message broker, devices subscribe to topics by sending topic filters in subscription requests to the message broker.
MQTT supports persistent sessions
The message broker receives messages from devices and publishes messages to devices that have subscribed to them. With persistent sessions —sessions that remain active even when the initiating device is disconnected—devices can retrieve messages that were published while they were disconnected. On the device side, MQTT supports Quality of Service levels (QoS) that ensure the host receives messages sent by the device.
Review the pubsub.py Device SDK sample app
This section reviews the pubsub.py sample app from the AWS IoT Device SDK v2 for Python used in this tutorial. Here,
we'll review how it connects to AWS IoT Core to publish and subscribe to MQTT messages. The
next section presents some exercises to help you explore how a device connects and
communicates with AWS IoT Core.
The pubsub.py sample app demonstrates these aspects of an MQTT connection with AWS IoT Core:
Communication protocols
The pubsub.py sample demonstrates an MQTT connection using the MQTT
and MQTT over WSS protocols. The AWS common
runtime (AWS CRT)
MQTT
The pubsub.py sample calls mtls_from_path (shown
here) in the mqtt_connection_buildermtls_from_path uses X.509
certificates and TLS v1.2 to authenticate the device. The AWS CRT library
handles the lower-level details of that connection.
mqtt_connection = mqtt_connection_builder.mtls_from_path(
    endpoint=args.endpoint,
    cert_filepath=args.cert,
    pri_key_filepath=args.key,
    ca_filepath=args.ca_file,
    client_bootstrap=client_bootstrap,
    on_connection_interrupted=on_connection_interrupted,
    on_connection_resumed=on_connection_resumed,
    client_id=args.client_id,
    clean_session=False,
    keep_alive_secs=6
)
endpointYour AWS account’s IoT device endpoint
In the sample app, this value is passed in from the command line.
cert_filepathThe path to the device’s certificate file
In the sample app, this value is passed in from the command line.
pri_key_filepathThe path to the device’s private key file that was created with its certificate file
In the sample app, this value is passed in from the command line.
ca_filepathThe path to the Root CA file. Required only if the MQTT server uses a certificate that's not already in your trust store.
In the sample app, this value is passed in from the command line.
client_bootstrapThe common runtime object that handles socket communication activities
In the sample app, this object is instantiated before the call to
mqtt_connection_builder.mtls_from_path.on_connection_interruptedon_connection_resumedThe callback functions to call when the device’s connection is interrupted and resumed
client_idThe ID that uniquely identifies this device in the AWS Region
In the sample app, this value is passed in from the command line.
clean_sessionWhether to start a new persistent session, or, if one is present, reconnect to an existing one
keep_alive_secsThe keep alive value, in seconds, to send in the
CONNECTrequest. A ping will automatically be sent at this interval. If the server doesn't receive a ping after 1.5 times this value, it assumes that the connection is lost.
MQTT over WSS
The pubsub.py sample calls websockets_with_default_aws_signing
(shown here) in the mqtt_connection_builderwebsockets_with_default_aws_signing
creates an MQTT connection over WSS using Signature V4 to authenticate the device.
mqtt_connection = mqtt_connection_builder.websockets_with_default_aws_signing(
    endpoint=args.endpoint,
    client_bootstrap=client_bootstrap,
    region=args.signing_region,
    credentials_provider=credentials_provider,
    websocket_proxy_options=proxy_options,
    ca_filepath=args.ca_file,
    on_connection_interrupted=on_connection_interrupted,
    on_connection_resumed=on_connection_resumed,
    client_id=args.client_id,
    clean_session=False,
    keep_alive_secs=6
)
endpointYour AWS account’s IoT device endpoint
In the sample app, this value is passed in from the command line.
client_bootstrapThe common runtime object that handles socket communication activities
In the sample app, this object is instantiated before the call to
mqtt_connection_builder.websockets_with_default_aws_signing.regionThe AWS signing Region used by Signature V4 authentication. In
pubsub.py, it passes the parameter entered in the command line.In the sample app, this value is passed in from the command line.
credentials_providerThe AWS credentials provided to use for authentication
In the sample app, this object is instantiated before the call to
mqtt_connection_builder.websockets_with_default_aws_signing.websocket_proxy_optionsHTTP proxy options, if using a proxy host
In the sample app, this value is initialized before the call to
mqtt_connection_builder.websockets_with_default_aws_signing.ca_filepathThe path to the Root CA file. Required only if the MQTT server uses a certificate that's not already in your trust store.
In the sample app, this value is passed in from the command line.
on_connection_interruptedon_connection_resumedThe callback functions to call when the device’s connection is interrupted and resumed
client_idThe ID that uniquely identifies this device in the AWS Region.
In the sample app, this value is passed in from the command line.
clean_sessionWhether to start a new persistent session, or, if one is present, reconnect to an existing one
keep_alive_secsThe keep alive value, in seconds, to send in the
CONNECTrequest. A ping will automatically be sent at this interval. If the server doesn't receive a ping after 1.5 times this value, it assumes the connection is lost.
HTTPS
What about HTTPS? AWS IoT Core supports devices that publish HTTPS requests.
From a programming perspective, devices send HTTPS requests to AWS IoT Core
as would any other application. For an example of a Python program that
sends an HTTP message from a device, see the HTTPS code example using Python’s requests library.
This example sends a message to AWS IoT Core using HTTPS such that AWS IoT Core
interprets it as an MQTT message.
While AWS IoT Core supports HTTPS requests from devices, be sure to review the information about Choosing a protocol for your device communication so that you can make an informed decision on which protocol to use for your device communications.
Persistent sessions
In the sample app, setting the clean_session parameter to
False indicates that the connection should be persistent. In
practice, this means that the connection opened by this call reconnects to an
existing persistent session, if one exists. Otherwise, it creates and connects to a
new persistent session.
With a persistent session, messages that are sent to the device are stored by the message broker while the device is not connected. When a device reconnects to a persistent session, the message broker sends to the device any stored messages to which it has subscribed.
Without a persistent session, the device will not receive messages that are sent while the device isn't connected. Which option to use depends on your application and whether messages that occur while a device is not connected must be communicated. For more information, see MQTT persistent sessions.
Quality of Service
When the device publishes and subscribes to messages, the preferred Quality of Service (QoS) can be set. AWS IoT supports QoS levels 0 and 1 for publish and subscribe operations. For more information about QoS levels in AWS IoT, see MQTT Quality of Service (QoS) options.
The AWS CRT runtime for Python defines these constants for the QoS levels that it supports:
Python Quality of Service levels | |||||||||||||||||||||||||||||||||||||||||||||||||||||||||||||||||||||||||||||||||||||||||||||||||||
|---|---|---|---|---|---|---|---|---|---|---|---|---|---|---|---|---|---|---|---|---|---|---|---|---|---|---|---|---|---|---|---|---|---|---|---|---|---|---|---|---|---|---|---|---|---|---|---|---|---|---|---|---|---|---|---|---|---|---|---|---|---|---|---|---|---|---|---|---|---|---|---|---|---|---|---|---|---|---|---|---|---|---|---|---|---|---|---|---|---|---|---|---|---|---|---|---|---|---|---|
| MQTT QoS level | Python symbolic value used by SDK | Description | |||||||||||||||||||||||||||||||||||||||||||||||||||||||||||||||||||||||||||||||||||||||||||||||||
| QoS level 0 | mqtt.QoS.AT_MOST_ONCE |
Only one attempt to send the message will be made, whether it is received or not. The message might not be sent at all, for example, if the device is not connected or there's a network error. | |||||||||||||||||||||||||||||||||||||||||||||||||||||||||||||||||||||||||||||||||||||||||||||||||
| QoS level 1 | mqtt.QoS.AT_LEAST_ONCE |
The message is sent repeatedly until a PUBACK
acknowledgement is received. |
|||||||||||||||||||||||||||||||||||||||||||||||||||||||||||||||||||||||||||||||||||||||||||||||||
In the sample app, the publish and subscribe requests are
made with a QoS level of 1 (mqtt.QoS.AT_LEAST_ONCE).
-
QoS on publish
When a device publishes a message with QoS level 1, it sends the message repeatedly until it receives a
PUBACKresponse from the message broker. If the device isn't connected, the message is queued to be sent after it reconnects. -
QoS on subscribe
When a device subscribes to a message with QoS level 1, the message broker saves the messages to which the device is subscribed until they can be sent to the device. The message broker resends the messages until it receives a
PUBACKresponse from the device.
Message publish
After successfully establishing a connection to AWS IoT Core, devices can publish
messages. The pubsub.py sample does this by calling the
publish operation of the mqtt_connection
object.
mqtt_connection.publish(
    topic=args.topic,
    payload=message,
    qos=mqtt.QoS.AT_LEAST_ONCE
)
topicThe message's topic name that identifies the message
In the sample app, this is passed in from the command line.
payloadThe message payload formatted as a string (for example, a JSON document)
In the sample app, this is passed in from the command line.
A JSON document is a common payload format, and one that is recognized by other AWS IoT services; however, the data format of the message payload can be anything that the publishers and subscribers agree upon. Other AWS IoT services, however, only recognize JSON, and CBOR, in some cases, for most operations.
qosThe QoS level for this message
Message subscription
To receive messages from AWS IoT and other services and devices, devices subscribe
to those messages by their topic name. Devices can subscribe to individual messages
by specifying a topic name, and to a group of
messages by specifying a topic filter, which can
include wild card characters. The pubsub.py sample uses the code shown
here to subscribe to messages and register the callback functions to process the
message after it’s received.
subscribe_future, packet_id = mqtt_connection.subscribe(
    topic=args.topic,
    qos=mqtt.QoS.AT_LEAST_ONCE,
    callback=on_message_received
)
subscribe_result = subscribe_future.result()
topicThe topic to subscribe to. This can be a topic name or a topic filter.
In the sample app, this is passed in from the command line.
qosWhether the message broker should store these messages while the device is disconnected.
A value of
mqtt.QoS.AT_LEAST_ONCE(QoS level 1), requires a persistent session to be specified (clean_session=False) when the connection is created.callbackThe function to call to process the subscribed message.
The mqtt_connection.subscribe function returns a future and a packet
ID. If the subscription request was initiated successfully, the packet ID returned
is greater than 0. To make sure that the subscription was received and registered by
the message broker, you must wait for the result of the asynchronous operation to
return, as shown in the code example.
The callback function
The callback in the pubsub.py sample processes
the subscribed messages as the device receives them.
def on_message_received(topic, payload, **kwargs):
    print("Received message from topic '{}': {}".format(topic, payload))
    global received_count
    received_count += 1
    if received_count == args.count:
        received_all_event.set()
topic-
The message’s topic
This is the specific topic name of the message received, even if you subscribed to a topic filter.
payload-
The message payload
The format for this is application specific.
kwargsPossible additional arguments as described in
mqtt.Connection.subscribe.
In the pubsub.py sample,
on_message_received only displays the
topic and its payload. It also counts the messages
received to end the program after the limit is reached.
Your app would evaluate the topic and the payload to determine what actions to perform.
Device disconnection and reconnection
The pubsub.py sample includes callback
functions that are called when the device is disconnected
and when the connection is re-established. What actions
your device takes on these events is application specific.
When a device connects for the first time, it must subscribe to topics to receive. If a device's session is present when it reconnects, its subscriptions are restored, and any stored messages from those subscriptions are sent to the device after it reconnects.
If a device's session no longer exists when it reconnects, it must resubscribe to its subscriptions. Persistent sessions have a limited lifetime and can expire when the device is disconnected for too long.
Connect your device and communicate with AWS IoT Core
This section presents some exercises to help you explore different aspects of
connecting your device to AWS IoT Core. For these exercises, you’ll use the MQTT test clientpubsub.py
In this section, you'll:
For these exercises, you'll start from the pubsub.py sample
program.
Note
These exercises assume that you completed the Getting started with AWS IoT Core tutorials and use the terminal window for your device from that tutorial.
Subscribe to wild card topic filters
In this exercise, you’ll modify the command line used to call
pubsub.py to subscribe to a wild card topic filter and process the
messages received based on the message’s topic.
Exercise procedure
For this exercise, imagine that your device contains a temperature control and a light control. It uses these topic names to identify the messages about them.
-
Before starting the exercise, try running this command from the Getting started with AWS IoT Core tutorials on your device to make sure that everything is ready for the exercise.
cd ~/aws-iot-device-sdk-python-v2/samples python3 pubsub.py --topic topic_1 --ca_file ~/certs/Amazon-root-CA-1.pem --cert ~/certs/device.pem.crt --key ~/certs/private.pem.key --endpointyour-iot-endpointYou should see the same output as you saw in the Getting started tutorial.
-
For this exercise, change these command line parameters.
Action
Command line parameter
Effect
add
--message
""Configure
pubsub.pyto listen onlyadd
--count
2End the program after receiving two messages
change
--topic
device/+/detailsDefine the topic filter to subscribe to
Making these changes to the initial command line results in this command line. Enter this command in the terminal window for your device.
python3 pubsub.py --message "" --count 2 --topic device/+/details --ca_file ~/certs/Amazon-root-CA-1.pem --cert ~/certs/device.pem.crt --key ~/certs/private.pem.key --endpointyour-iot-endpointThe program should display something like this:
Connecting to a3qexamplesffp-ats.iot.us-west-2.amazonaws.com with client ID 'test-24d7cdcc-cc01-458c-8488-2d05849691e1'...
Connected!
Subscribing to topic 'device/+/details'...
Subscribed with QoS.AT_LEAST_ONCE
Waiting for all messages to be received...
If you see something like this on your terminal, your device is ready and listening for messages where the topic names start with
deviceand end with/detail. So, let's test that. -
Here are a couple of messages that your device might receive.
Topic name
Message payload
device/temp/details{ "desiredTemp": 20, "currentTemp": 15 }device/light/details{ "desiredLight": 100, "currentLight": 50 } -
Using the MQTT test client in the AWS IoT console, send the messages described in the previous step to your device.
-
Open the MQTT test client
in the AWS IoT console. -
In Subscribe to a topic, in the Subscription topic field, enter the topic filter:
device/+/details, and then choose Subscribe to topic. -
In the Subscriptions column of the MQTT test client, choose device/+/details.
-
For each of the topics in the preceding table, do the following in the MQTT test client:
-
In Publish, enter the value from the Topic name column in the table.
-
In the message payload field below the topic name, enter the value from the Message payload column in the table.
-
Watch the terminal window where
pubsub.pyis running and, in the MQTT test client, choose Publish to topic.
You should see that the message was received by
pubsub.pyin the terminal window. -
-
Exercise result
With this, pubsub.py, subscribed to the messages using a wild card
topic filter, received them, and displayed them in the terminal window. Notice how
you subscribed to a single topic filter, and the callback function was called to
process messages having two distinct topics.
Process topic filter subscriptions
Building on the previous exercise, modify the pubsub.py sample app to
evaluate the message topics and process the subscribed messages based on the
topic.
Exercise procedure
To evaluate the message topic
-
Copy
pubsub.pytopubsub2.py. -
Open
pubsub2.pyin your favorite text editor or IDE. -
In
pubsub2.py, find theon_message_receivedfunction. -
In
on_message_received, insert the following code after the line that starts withprint("Received messageand before the line that starts withglobal received_count.topic_parsed = False if "/" in topic: parsed_topic = topic.split("/") if len(parsed_topic) == 3: # this topic has the correct format if (parsed_topic[0] == 'device') and (parsed_topic[2] == 'details'): # this is a topic we care about, so check the 2nd element if (parsed_topic[1] == 'temp'): print("Received temperature request: {}".format(payload)) topic_parsed = True if (parsed_topic[1] == 'light'): print("Received light request: {}".format(payload)) topic_parsed = True if not topic_parsed: print("Unrecognized message topic.") -
Save your changes and run the modified program by using this command line.
python3 pubsub2.py --message "" --count 2 --topic device/+/details --ca_file ~/certs/Amazon-root-CA-1.pem --cert ~/certs/device.pem.crt --key ~/certs/private.pem.key --endpointyour-iot-endpoint -
In the AWS IoT console, open the MQTT test client
. -
In Subscribe to a topic, in the Subscription topic field, enter the topic filter:
device/+/details, and then choose Subscribe to topic. -
In the Subscriptions column of the MQTT test client, choose device/+/details.
-
For each of the topics in this table, do the following in the MQTT test client:
Topic name
Message payload
device/temp/details{ "desiredTemp": 20, "currentTemp": 15 }device/light/details{ "desiredLight": 100, "currentLight": 50 }-
In Publish, enter the value from the Topic name column in the table.
-
In the message payload field below the topic name, enter the value from the Message payload column in the table.
-
Watch the terminal window where
pubsub.pyis running and, in the MQTT test client, choose Publish to topic.
You should see that the message was received by
pubsub.pyin the terminal window. -
You should see something similar to this in your terminal window.
Connecting to a3qexamplesffp-ats.iot.us-west-2.amazonaws.com with client ID 'test-af794be0-7542-45a0-b0af-0b0ea7474517'...
Connected!
Subscribing to topic 'device/+/details'...
Subscribed with QoS.AT_LEAST_ONCE
Waiting for all messages to be received...
Received message from topic 'device/light/details': b'{ "desiredLight": 100, "currentLight": 50 }'
Received light request: b'{ "desiredLight": 100, "currentLight": 50 }'
Received message from topic 'device/temp/details': b'{ "desiredTemp": 20, "currentTemp": 15 }'
Received temperature request: b'{ "desiredTemp": 20, "currentTemp": 15 }'
2 message(s) received.
Disconnecting...
Disconnected!
Exercise result
In this exercise, you added code so the sample app would recognize and process multiple messages in the callback function. With this, your device could receive messages and act on them.
Another way for your device to receive and process multiple messages is to subscribe to different messages separately and assign each subscription to its own callback function.
Publish messages from your device
You can use the pubsub.py sample app to publish messages from your device. While it will publish messages as it is, the messages can't be read as JSON documents. This exercise modifies the sample app to be able to publish JSON documents in the message payload that can be read by AWS IoT Core.
Exercise procedure
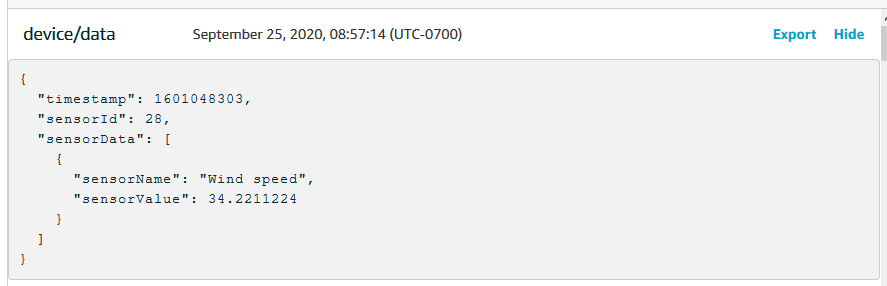
In this exercise, the following message will be sent with the
device/data topic.
{
    "timestamp": 1601048303,
    "sensorId": 28,
    "sensorData": [
        {
        "sensorName": "Wind speed",
        "sensorValue": 34.2211224
        }
    ]
}
To prepare your MQTT test client to monitor the messages from this exercise
-
In Subscribe to a topic, in the Subscription topic field, enter the topic filter:
device/data, and then choose Subscribe to topic. -
In the Subscriptions column of the MQTT test client, choose device/data.
-
Keep the MQTT test client window open to wait for messages from your device.
To send JSON documents with the pubsub.py sample app
-
On your device, copy
pubsub.pytopubsub3.py. -
Edit
pubsub3.pyto change how it formats the messages it publishes.-
Open
pubsub3.pyin a text editor. -
Locate this line of code:
message = "{} [{}]".format(message_string, publish_count) -
Change it to:
message = "{}".format(message_string) -
Locate this line of code:
message_json = json.dumps(message) -
Change it to:
message = "{}".json.dumps(json.loads(message)) -
Save your changes.
-
-
On your device, run this command to send the message two times.
python3 pubsub3.py --ca_file ~/certs/Amazon-root-CA-1.pem --cert ~/certs/device.pem.crt --key ~/certs/private.pem.key --topic device/data --count 2 --message '{"timestamp":1601048303,"sensorId":28,"sensorData":[{"sensorName":"Wind speed","sensorValue":34.2211224}]}' --endpointyour-iot-endpoint -
In the MQTT test client, check to see that it has interpreted and formatted the JSON document in the message payload, such as this:
By default, pubsub3.py also subscribes to the messages it sends.
You should see that it received the messages in the app’s output. The terminal
window should look something like this.
Connecting to a3qEXAMPLEsffp-ats.iot.us-west-2.amazonaws.com with client ID 'test-5cff18ae-1e92-4c38-a9d4-7b9771afc52f'...
Connected!
Subscribing to topic 'device/data'...
Subscribed with QoS.AT_LEAST_ONCE
Sending 2 message(s)
Publishing message to topic 'device/data': {"timestamp":1601048303,"sensorId":28,"sensorData":[{"sensorName":"Wind speed","sensorValue":34.2211224}]}
Received message from topic 'device/data': b'{"timestamp":1601048303,"sensorId":28,"sensorData":[{"sensorName":"Wind speed","sensorValue":34.2211224}]}'
2 message(s) received.
Disconnecting...
Disconnected!
Exercise result
With this, your device can generate messages to send to AWS IoT Core to test basic connectivity and provide device messages for AWS IoT Core to process. For example, you could use this app to send test data from your device to test AWS IoT rule actions.
Review the results
The examples in this tutorial gave you hands-on experience with the basics of how devices can communicate with AWS IoT Core—a fundamental part of your AWS IoT solution. When your devices are able to communicate with AWS IoT Core, they can pass messages to AWS services and other devices on which they can act. Likewise, AWS services and other devices can process information that results in messages sent back to your devices.
When you are ready to explore AWS IoT Core further, try these tutorials:
