Amazon Monitron is no longer open to new customers. Existing customers can
continue to use the service as normal. For capabilities similar to Amazon
Monitron, see our blog post
Using tags with your project
A tag is a key-value pair that you can use to categorize your projects. For example, if you have multiple projects, you might categorize them by purpose, owner, location, or any other factor.
Use tags to:
-
Organize your projects. You can search and filter by tag. For example, you could add tags such as ‘test lab’ or ‘paint shop' to easily find those projects.
-
Identify and organize your AWS resources. Many AWS services support tagging, so you can assign the same tag to resources in different services to indicate that the resources are related. For example, you can tag a project and the Amazon Simple Storage Service (Amazon S3) bucket that stores related data with the same tag.
-
Control access to your resources. You can use tags in AWS Identity and Access Management (IAM) polices that control access to Amazon Monitron projects. You can attach these policies to an IAM role or user to enable tag-based access control. For more information, see Controlling access using tags in the IAM user Guide.
Each tag key must be unique within a project.
The following restrictions also apply to Amazon Monitron project tags:
-
The maximum number of tags per project is 50.
-
The maximum length of a tag key is 128 characters.
-
The maximum length of a tag value is 256 characters.
-
Valid characters for keys and values are a–z, A–Z, space, _ . : / = + - and @.
-
Tag keys and values are case sensitive.
-
The
aws:prefix is reserved for AWS use. -
If you plan to use your tagging schema across multiple services and resources, remember that other services might have different restrictions for valid characters. Refer to the documentation for that service.
Topics
Adding a tag to a project when you create it
To add a tag to a project when creating it
-
Open the Amazon Monitron console at https://console.aws.amazon.com/monitron
. -
Choose Create Project.
-
In the navigation pane, choose the project you want.
-
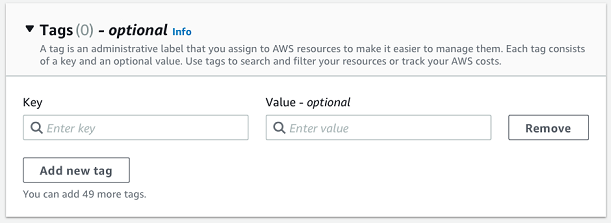
Expand the Tags section.

-
Choose Add new tag.

-
Enter the key-value pair for your tag.
The key must be unique for the project. The value is optional.
-
Choose Add new tag.
-
To add more tags, repeat steps 2 and 3.
-
To remove a tag, choose Remove.

-
Remove blank tag entries and then choose Next.

Adding a tag to a project after it’s been created
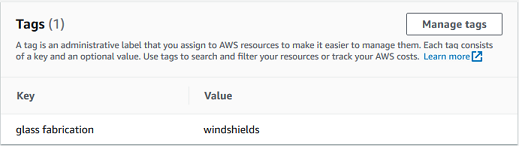
You can add a tag to a project on the project detail page.
To add a tag to an existing project
-
Open the Amazon Monitron console at https://console.aws.amazon.com/monitron
. -
Choose Create Project.
-
In the navigation pane, choose Projects, and then choose the project you want.
-
Under Tags, choose Manage tags.
-
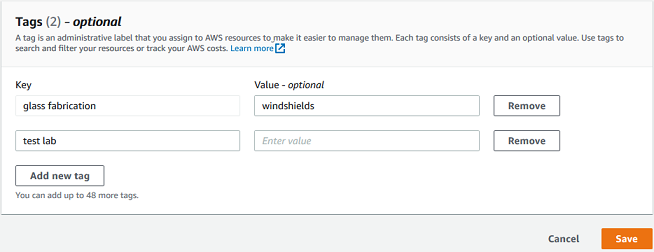
Choose Add new tag

-
Enter the key-value pair for your tag.
Note
Remember that the key must be unique for the project. The value is optional.
-
Choose Save.
Modifying or removing a tag
You can modify a tag value, but not a tag key. To change a tag key, remove the tag, then create a new tag with a different key. You can also remove any tag. You modify or remove tags on the project detail page.
To modify or remove a tag
-
Open the Amazon Monitron console at https://console.aws.amazon.com/monitron
. -
Choose Create Project.
-
In the navigation pane, choose Projects, and then choose the project you want.
-
Under Tags, choose Manage tags.
-
To modify the tag value, make the change. To remove the tag, choose Remove next to the tag.
-
Choose Save.
