Install NoSQL Workbench for DynamoDB
Follow these steps to install NoSQL Workbench and DynamoDB local on a supported platform.
- Windows
-
To install NoSQL Workbench on Windows
-
Run the NoSQL Workbench installer application and choose the setup language. Then choose OK to begin the setup. For more information about downloading NoSQL Workbench, see Download NoSQL Workbench for DynamoDB.
-
Choose Next to continue the setup, and then choose Next on the following screen.
-
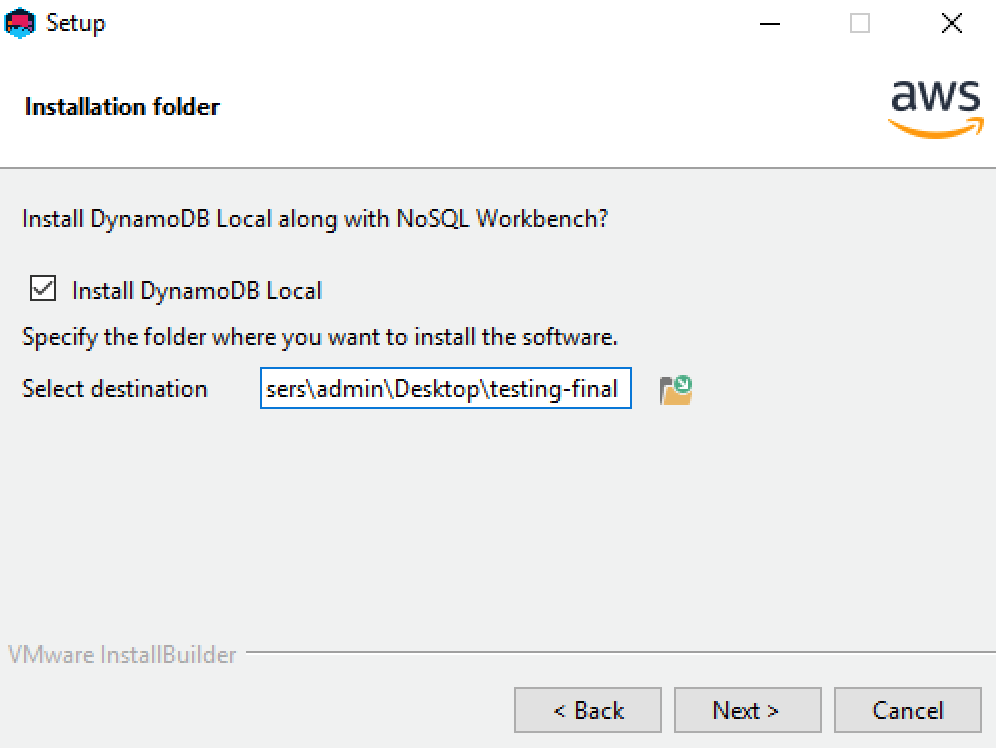
By default, the Install DynamoDB Local check box is selected to include DynamoDB local as part of the installation. Keeping this option selected ensures that DynamoDB local will be installed, and the destination path will be the same as the installation path of NoSQL Workbench. Clearing the check box for this option will skip the installation of DynamoDB local, and the installation path will be for NoSQL Workbench only.
Choose the destination where you want the software installed, and choose Next.
Note
If you opted to not include DynamoDB local as part of the setup, clear the Install DynamoDB Local check box, choose Next, and skip to step 6. You can download DynamoDB local separately as a standalone installation at a later time. For more information, see Setting up DynamoDB local (downloadable version) .
-
Choose the port number for DynamoDB local to use. The default port is 8000. After you enter the port number, choose Next.
-
Choose Next to begin setup.
-
When the setup has completed, choose Finish to close the setup screen.
-
Open the application in your installation path, such as /programs/DynamoDBWorkbench/.
-
- macOS
-
To install NoSQL Workbench on macOS
-
Run the NoSQL Workbench installer application and choose the setup language. Then choose OK to begin the setup. For more information about downloading NoSQL Workbench, see Download NoSQL Workbench for DynamoDB.
-
Choose Next to continue the setup, and then choose Next on the following screen.
-
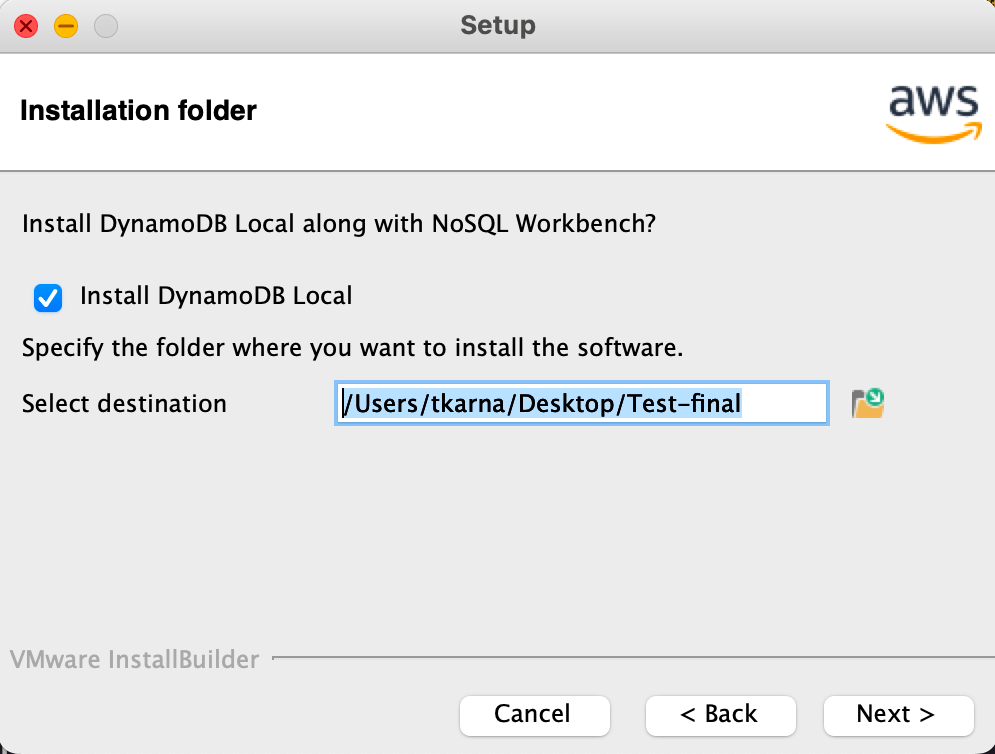
By default, the Install DynamoDB local check box is selected to include DynamoDB local as part of the installation. Keeping this option selected ensures that DynamoDB local will be installed, and the destination path will be the same as the installation path of NoSQL Workbench. Clearing this option will skip the installation of DynamoDB local, and the installation path will be for NoSQL Workbench only.
Choose the destination where you want the software installed, and choose Next.
Note
If you opted to not include DynamoDB local as part of the setup, clear the Install DynamoDB local check box, choose Next, and skip to step 6. You can download DynamoDB local separately as a standalone installation at a later time. For more information, see Setting up DynamoDB local (downloadable version) .
-
Choose the port number for DynamoDB local to use. The default port is 8000. After you enter the port number, choose Next.
-
Choose Next to begin setup.
-
When the setup has completed, choose Finish to close the setup screen.
-
Open the application in your installation path, such as /Applications/DynamoDBWorkbench/.
Note
NoSQL Workbench for macOS performs auto-updates. To get notification about updates, enable notification access to NoSQL Workbench in System Preferences > Notifications.
-
- Linux
-
To install NoSQL Workbench on Linux
-
Run the NoSQL Workbench installer application and choose the setup language. Then choose OK to begin the setup. For more information about downloading NoSQL Workbench, see Download NoSQL Workbench for DynamoDB.
-
Choose Forward to continue the setup, and choose Forward on the following screen.
-
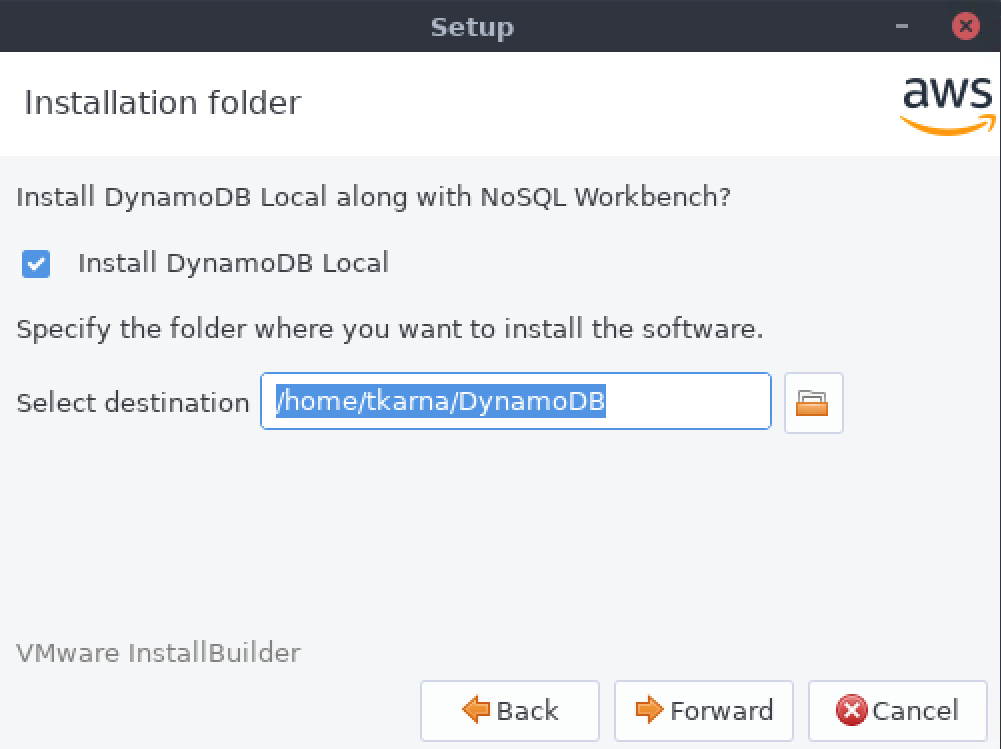
By default, the Install DynamoDB local check box is selected to include DynamoDB local as part of the installation. Keeping this option selected ensures that DynamoDB local will be installed, and the destination path will be the same as the installation path of NoSQL Workbench. Clearing this option will skip the installation of DynamoDB local, and the installation path will be for NoSQL Workbench only.
Choose the destination where you want the software installed, and choose Forward.
Note
If you opted to not include DynamoDB local as part of the setup, clear the Install DynamoDB local check box, choose Forward, and skip to step 6. You can download DynamoDB local separately as a standalone installation at a later time. For more information, see Setting up DynamoDB local (downloadable version) .
-
Choose the port number for DynamoDB local to use. The default port is 8000. After you enter the port number entered, choose Forward.
-
Choose Forward to begin setup.
-
When the setup has completed, choose Finish to close the setup screen.
-
Open the application in your installation path, such as /usr/local/programs/DynamoDBWorkbench/.
To start an AppImage on Linux
Make the AppImage file executable:
chmod +x noSQL-workbench-linux.AppImage
Replace noSQL-workbench-linux.AppImage with the actual file name of the AppImage you downloaded.
Run the AppImage:
./noSQL-workbench-linux.AppImage
This will launch the NoSQL Workbench application.
Note
Depending on your Linux distribution, you may need to install additional dependencies for the AppImage to run properly. If you encounter any issues, refer to the documentation provided by the AppImage developers or seek support from the community.
-
Note
If you opted to install DynamoDB local as part of the installation of NoSQL Workbench, DynamoDB local will be preconfigured with default options. To edit the default options, modify the DDBLocalStart script located in the /resources/DDBLocal_Scripts/ directory. You can find this in the path that you provided during installation. To learn more about DynamoDB local options, see DynamoDB local usage notes .
If you opted to install DynamoDB local as part of the NoSQL Workbench installation, you will have access to a toggle to enable and disable DynamoDB local as shown in the following image.

