Updating DNS records for a domain managed by GoDaddy
If GoDaddy is your DNS provider, use the following instructions to update your DNS records in the GoDaddy UI to finish connecting your Amplify app to your GoDaddy domain.
To add a custom domain managed by GoDaddy
-
Before you can update your DNS records with GoDaddy, complete steps one through nine of the procedure Adding a custom domain managed by a third-party DNS provider.
-
Log in to your GoDaddy account.
-
In your list of domains, find the domain to add and choose Manage DNS.
-
On the DNS page, GoDaddy displays a list of records for your domain in the DNS Records section. You need to add two new CNAME records.
-
Create the first CNAME record to point your subdomains to the Amplify domain.
-
In the DNS Records section, choose Add New Record.
-
For Type, choose CNAME.
-
For Name, enter only the subdomain. For example, if your subdomain is www.example.com, enter www for Name.
-
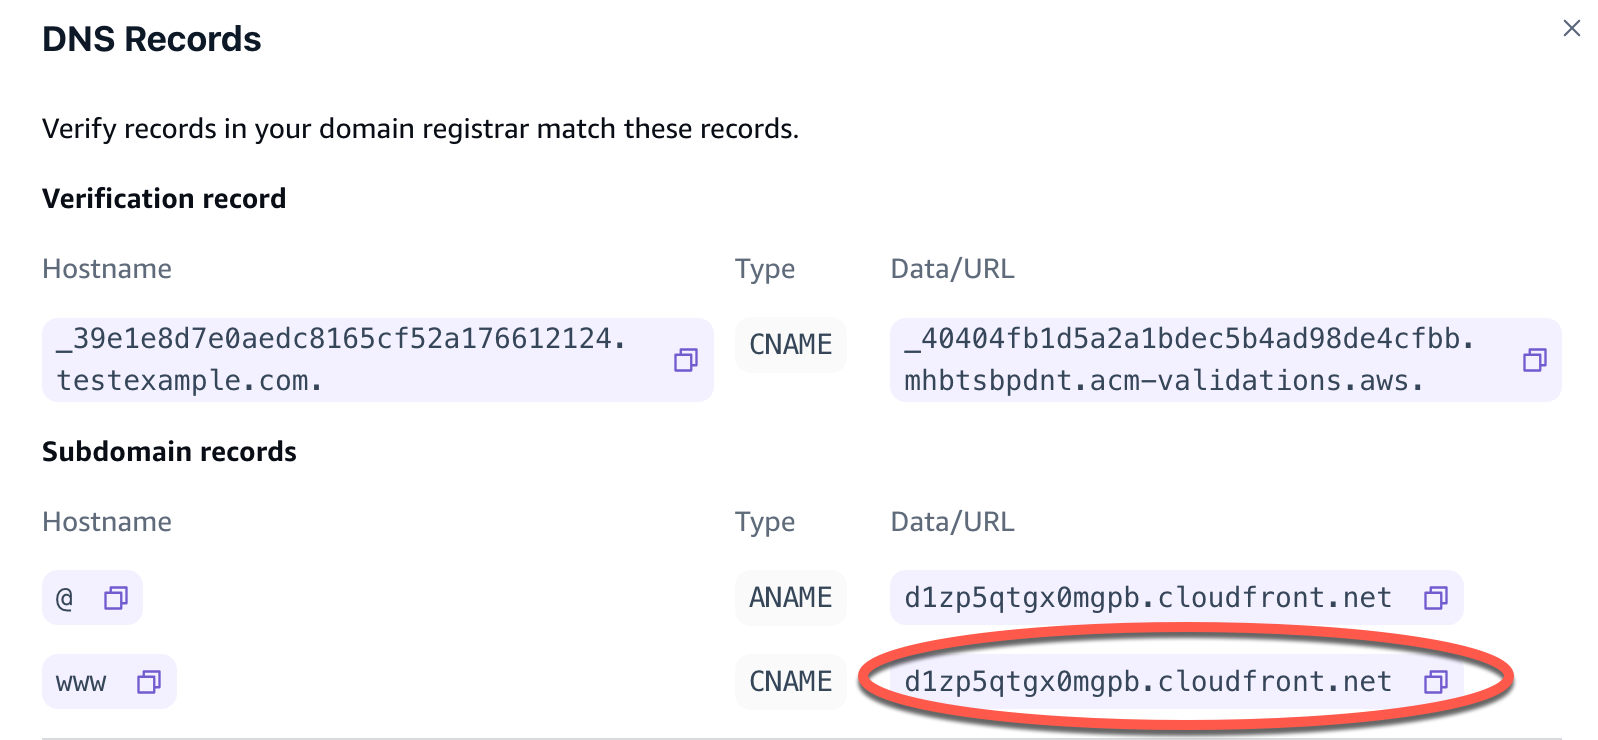
For Value, look at your DNS records in the Amplify console and then enter the value. If the Amplify console displays the domain for your app as d111111abcdef8.cloudfront.net, enter
d111111abcdef8.cloudfront.netfor Value.The following screenshot shows the location of the domain name record to use.

-
Choose Save.
-
-
Create the second CNAME record to point to the AWS Certificate Manager (ACM) validation server. A single validated ACM generates an SSL/TLS certificate for your domain.
-
For Type, choose CNAME.
-
For Name, enter the subdomain.
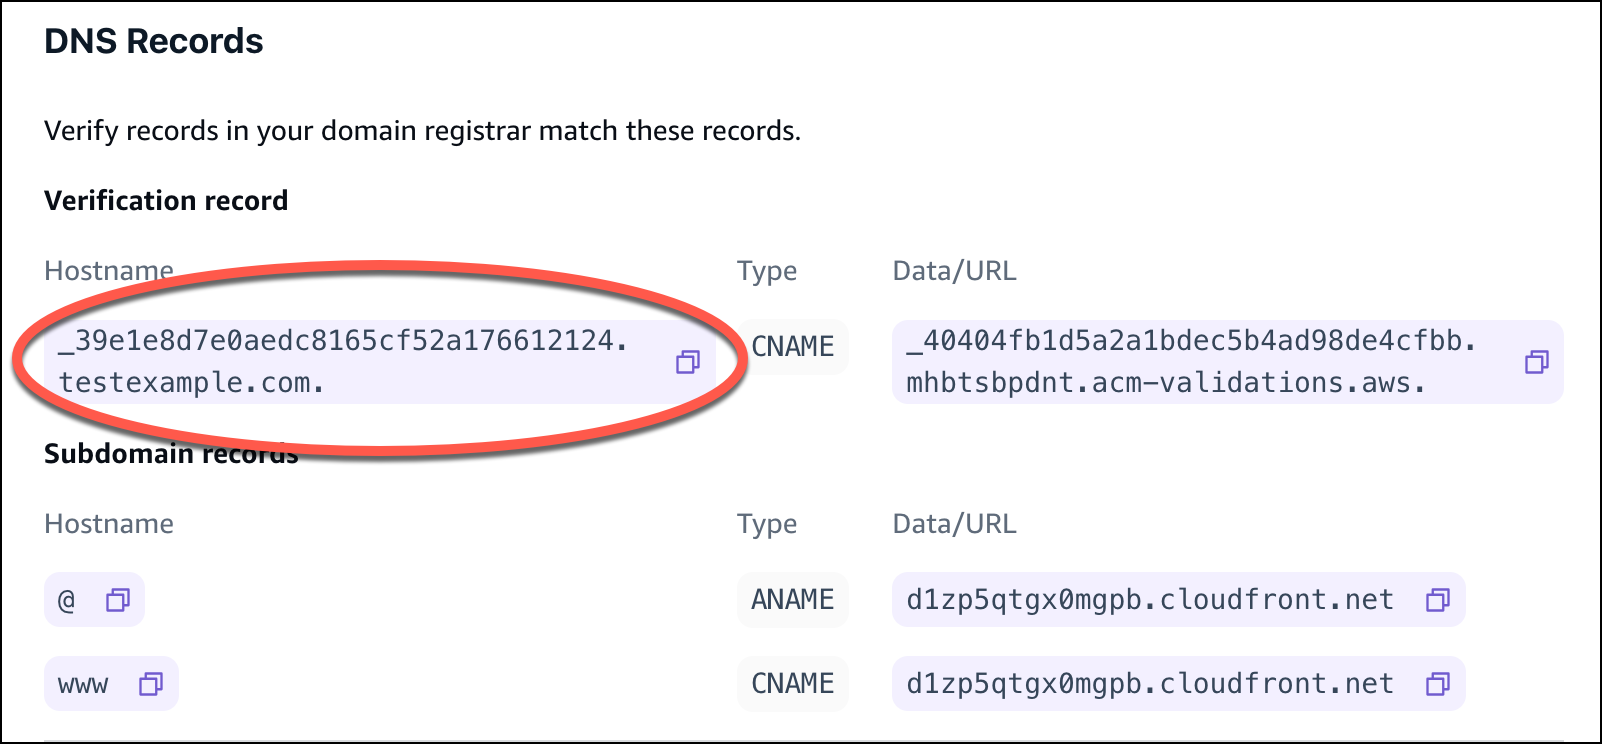
For example, if the DNS record in the Amplify console for verifying ownership of your subdomain is _c3e2d7eaf1e656b73f46cd6980fdc0e.example.com, enter only
_c3e2d7eaf1e656b73f46cd6980fdc0efor Name.The following screenshot shows the location of the verification record to use.

-
For Value, enter the ACM validation certificate.
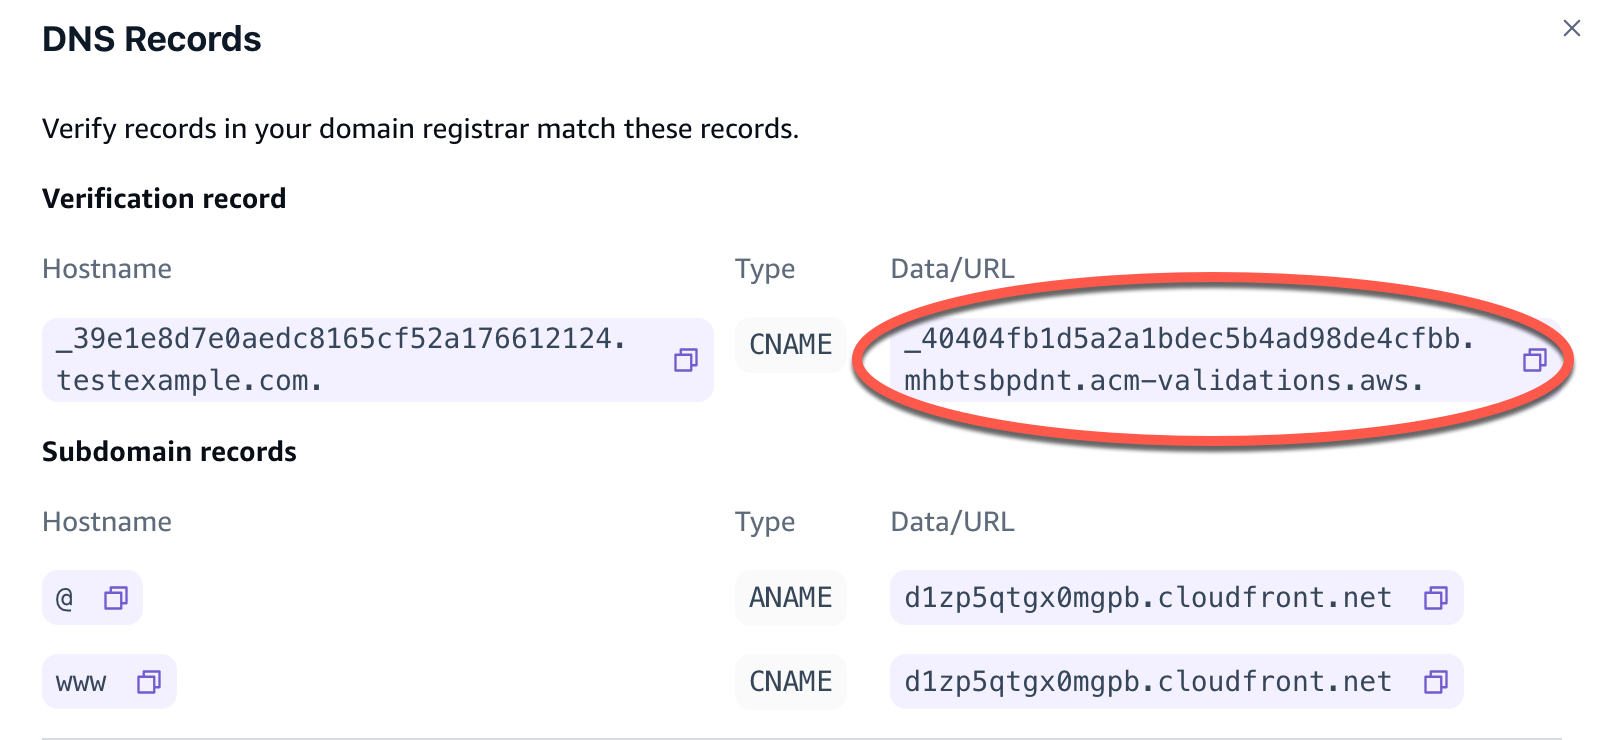
For example, if the validation server is _cjhwou20vhu2exampleuw20vuyb2ovb9.j9s73ucn9vy.acm-validations.aws, enter _cjhwou20vhu2exampleuw20vuyb2ovb9.j9s73ucn9vy.acm-validations.aws for Value.
The following screenshot shows the location of the ACM verification record to use.

-
Choose Save.
Note
The default Amplify certificate generated by AWS Certificate Manager (ACM) is valid for 13 months and renews automatically as long as your app is hosted with Amplify. Amplify can't renew the certificate if the CNAME verification record has been modified or deleted. You must delete and add the domain again in the Amplify console.
-
-
This step is not required for subdomains. GoDaddy doesn’t support ANAME/ALIAS records. For DNS providers that do not have ANAME/ALIAS support, we strongly recommend migrating your DNS to Amazon Route 53. For more information, see Configuring Amazon Route 53 as your DNS service.
If you want to keep GoDaddy as your provider and update the root domain, add Forwarding and set up a domain forward:
-
On the DNS page, locate the menu at the top of the page and choose Forwarding.
-
In the Domain section, choose Add Forwarding.
-
Choose http://, and then enter the name of your subdomain to forward to (for example, www.example.com) for the Destination URL.
-
For Forward Type, choose Temporary (302).
-
Choose, Save.
-