Adding a custom domain managed by a third-party DNS provider
If you are not using Amazon Route 53 to manage your domain, you can add a custom domain managed by a third-party DNS provider to your app deployed with Amplify.
If you are using GoDaddy, see Updating DNS records for a domain managed by GoDaddy for instructions specific to this provider.
To add a custom domain managed by a third-party DNS provider
-
Sign in to the AWS Management Console and open the Amplify console
. -
Choose your app that you want to add a custom domain to.
-
In the navigation pane, choose Hosting, Custom domains.
-
On the Custom domains page, choose Add domain.
-
Enter the name of your root domain. For example, if the name of your domain is https://example.com, enter
example.com. -
Amplify detects that you are not using a Route 53 domain and gives you the option to create a hosted zone in Route 53.
-
To create a hosted zone in Route 53
-
Choose Create hosted zone on Route 53.
-
Choose Configure domain.
-
Hosted zone name servers are displayed in the console. Go to your DNS provider's website and add the name servers to your DNS settings.
-
Select I have added the above name servers to my domain registry.
-
Proceed to step seven.
-
-
To continue with manual configuration
-
Choose Manual configuration
-
Choose Configure domain.
-
Proceed to step seven.
-
-
-
By default, Amplify automatically creates two subdomain entries for your domain. For example, if your domain name is example.com, you will see the subdomains https://www.example.com and https://example.com with a redirect set up from the root domain to the www subdomain.
(Optional) You can modify the default configuration if you want to add subdomains only. To change the default configuration, choose Rewrites and redirects from the navigation pane and configure your domain.
-
Choose the SSL/TLS certificate to use. You can either use the default managed certificate that Amplify provisions for you, or a custom third-party certificate that you have imported into AWS Certificate Manager.
-
Use the default Amplify managed certificate.
-
Choose Amplify managed certificate.
-
-
Use a custom third-party certificate.
-
Choose Custom SSL certificate.
-
Select the certificate to use from the list.
-
-
-
Choose Add domain.
-
If you chose Create hosted zone on Route 53 in step six, proceed to step 15.
If you chose Manual configuration, in step six, you must update your DNS records with your third-party domain provider.
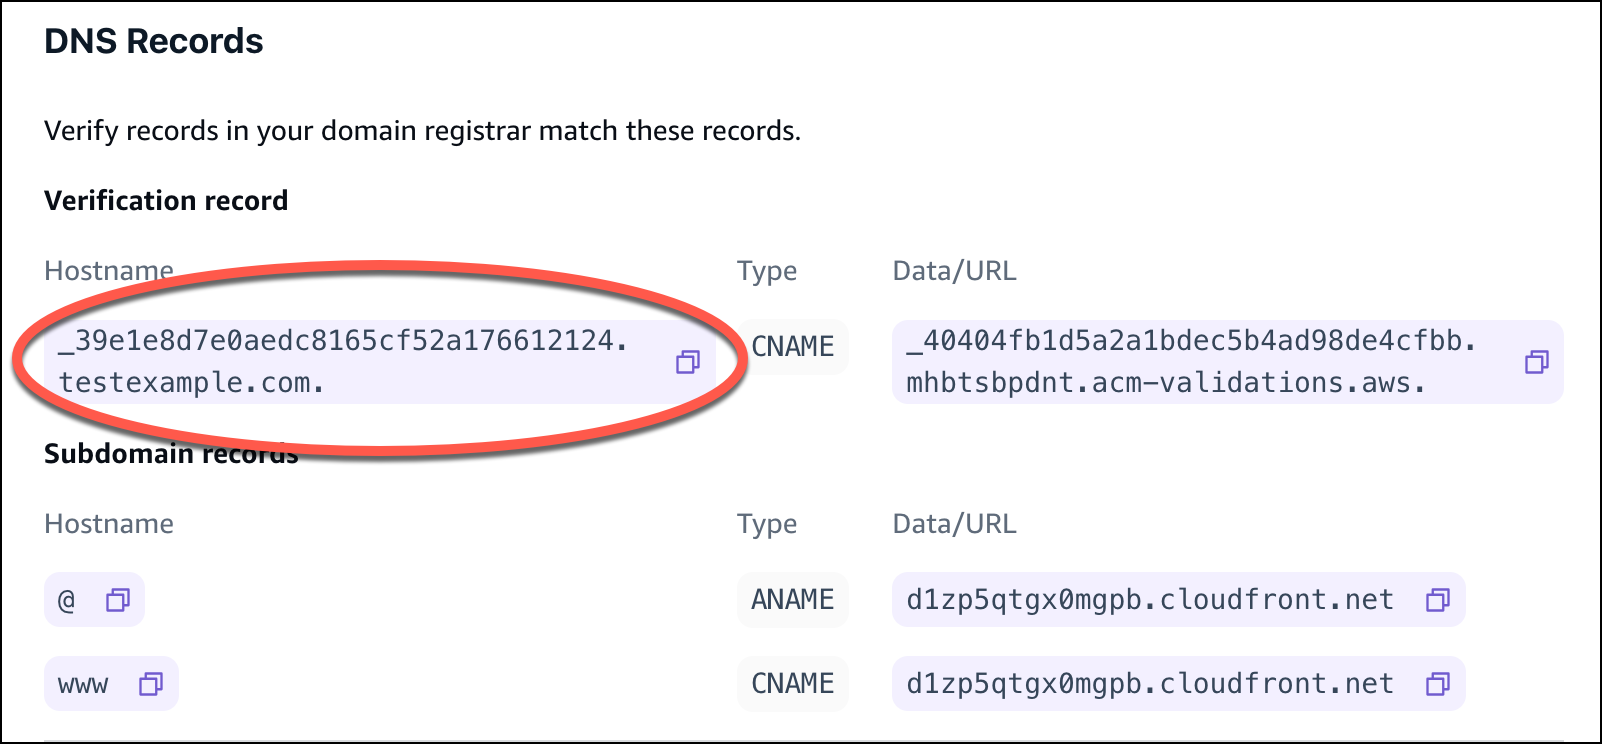
On the Actions menu, choose View DNS records. The following screenshot shows the DNS records displayed in the console.

-
Do one of the following:
-
If you're using GoDaddy, go to Updating DNS records for a domain managed by GoDaddy.
-
If you're using a different third-party DNS provider, go to the next step in this procedure.
-
-
Go to your DNS provider's website, log in to your account, and locate the DNS management settings for your domain. You will configure two CNAME records.
-
Configure the first CNAME record to point your subdomain to the AWS validation server.
If the Amplify console displays a DNS record for verifying ownership of your subdomain such as _c3e2d7eaf1e656b73f46cd6980fdc0e.example.com, enter only
_c3e2d7eaf1e656b73f46cd6980fdc0efor the CNAME record subdomain name.The following screenshot shows the location of the verification record to use.
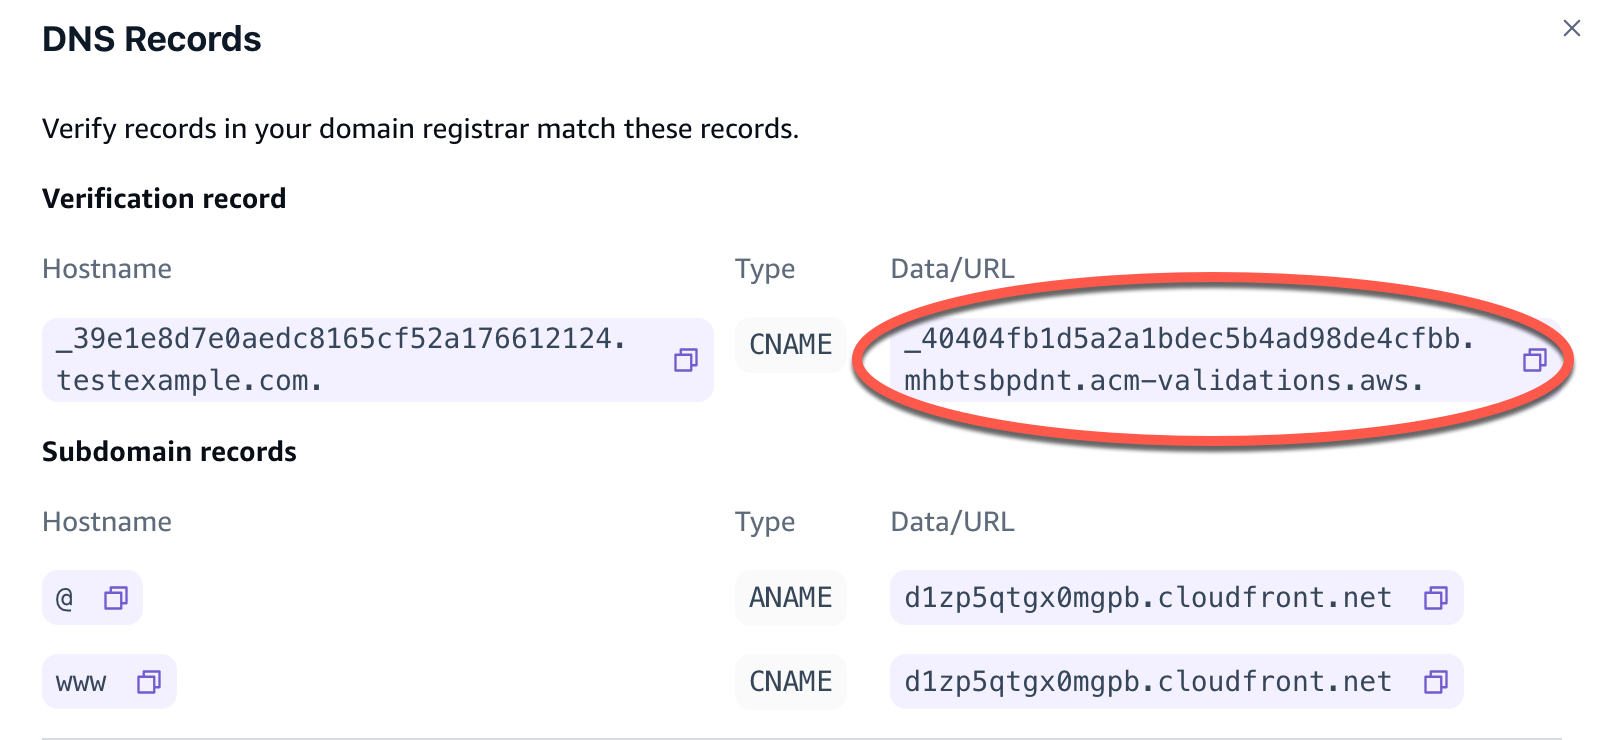
If the the Amplify console displays an ACM validation server record such as _cjhwou20vhu2exampleuw20vuyb2ovb9.j9s73ucn9vy.acm-validations.aws, enter
_cjhwou20vhu2exampleuw20vuyb2ovb9.j9s73ucn9vy.acm-validations.awsfor the CNAME record value.The following screenshot shows the location of the ACM verification record to use.
Amplify uses this information to verify ownership of your domain and generate an SSL/TLS certificate for your domain. Once Amplify validates ownership of your domain, all traffic will be served using HTTPS/2.
Note
The default Amplify certificate generated by AWS Certificate Manager (ACM) is valid for 13 months and renews automatically as long as your app is hosted with Amplify. Amplify can't renew the certificate if the CNAME verification record has been modified or deleted. You must delete and add the domain again in the Amplify console.
Important
It is important that you perform this step soon after adding your custom domain in the Amplify console. The AWS Certificate Manager (ACM) immediately starts attempting to verify ownership. Over time, the checks become less frequent. If you add or update your CNAME records a few hours after you create your app, this can cause your app to get stuck in the pending verification state.
-
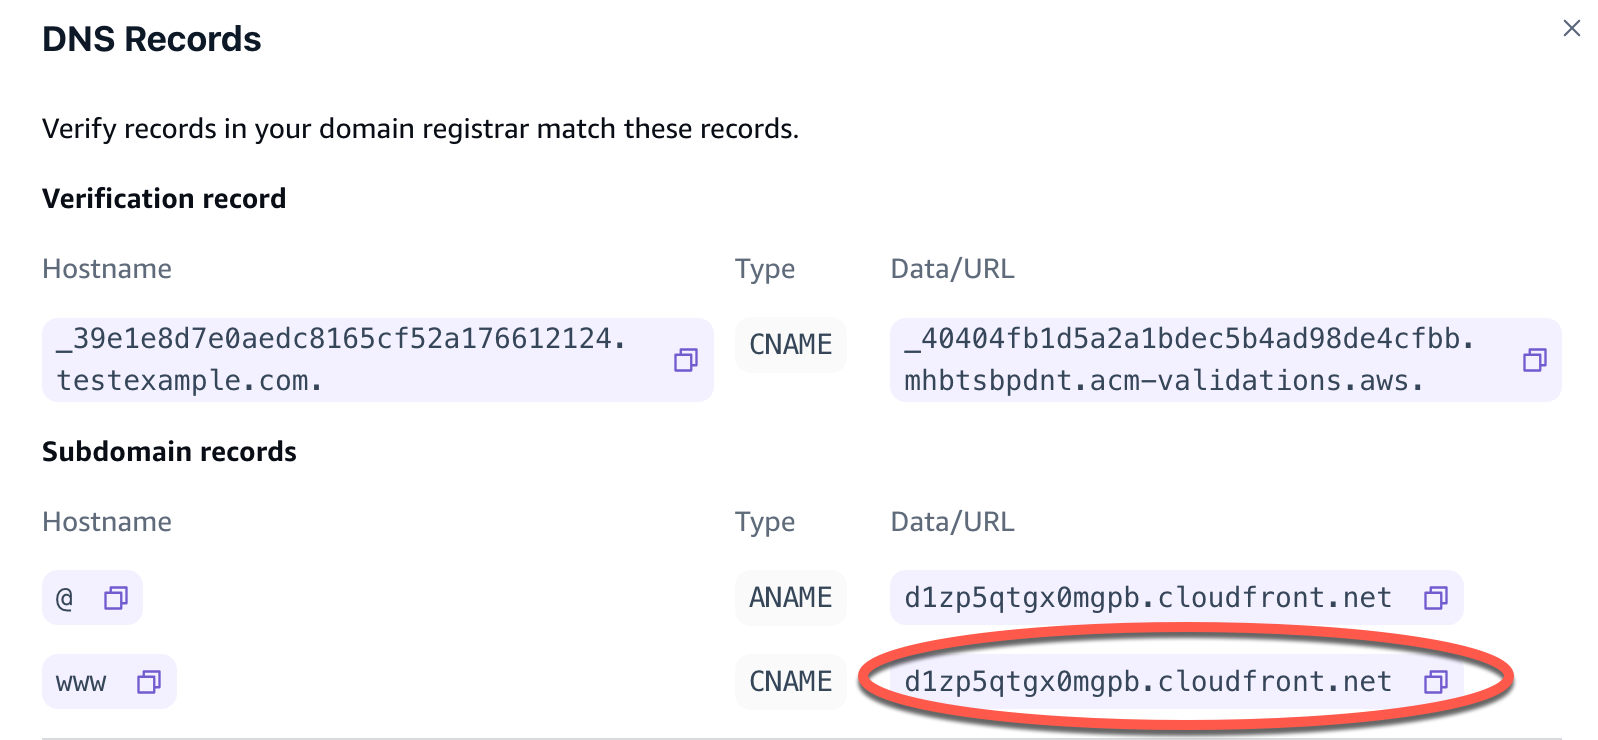
Configure a second CNAME record to point your subdomains to the Amplify domain. For example, if your subdomain is www.example.com, enter www for the subdomain name.
If the Amplify console displays the domain for your app as d111111abcdef8.cloudfront.net, enter
d111111abcdef8.cloudfront.netfor the Amplify domain.If you have production traffic, we recommended you update this CNAME record after your domain status shows as AVAILABLE in the Amplify console.
The following screenshot shows the location of the domain name record to use.
-
Configure the ANAME/ALIAS record to point to the root domain of your app (for example https://example.com). An ANAME record points the root of your domain to a hostname. If you have production traffic, we recommended that you update your ANAME record after your domain status shows as AVAILABLE in the console. For DNS providers that don't have ANAME/ALIAS support, we strongly recommend migrating your DNS to Route 53. For more information, see Configuring Amazon Route 53 as your DNS service.
Note
Verification of domain ownership and DNS propagation for third-party domains can take up to 48 hours. For help resolving errors that occur, see Troubleshooting custom domains.
