Get started with AppFabric for productivity (preview) for end users
| The AWS AppFabric for productivity feature is in preview and is subject to change. |
This section is intended for end users of SaaS applications who want to enable AWS AppFabric for productivity (preview) to improve their task management and workflow efficiency. Follow these steps to connect your applications and authorize AppFabric to surface cross-app insights and help you complete actions (such as send an email or schedule a meeting) from your preferred applications. You can connect applications such as Asana, Atlassian Jira Suite, Google Workspace, Microsoft 365, Miro, Slack, Smartsheet, and more. After you authorize AppFabric to access your content, AppFabric brings cross-app insights and actions directly within your preferred apps — helping you work more efficiently and stay within your current workflows.
AppFabric for productivity uses generative AI that is powered by Amazon Bedrock. AppFabric will generate insights and
actions only after receiving your explicit permission. You authorize each individual application
to remain in full control of which content is used. AppFabric will not use your data to train or
improve the underlying large language models used to generate insights. For more information,
please see Amazon Bedrock FAQs
Topics
Prerequisites
Before beginning, ensure you have the following:
-
Credentials to sign in to AppFabric: To start using AppFabric for productivity, you will need federated sign-in credentials (user name and password) for one of the following providers: Asana, Google Workspace, Microsoft 365, or Slack. Signing in to AppFabric helps us identify you as a user across each application you enable AppFabric for productivity. After signing in, you can connect your applications to start generating insights.
-
Credentials to connect your applications: Cross-app insights and actions are only generated based on applications that you authorize. You will need sign-in credentials (user name and password) for each of the applications you want to authorize. Supported applications include Asana, Atlassian Jira Suite, Google Workspace, Microsoft 365, Miro, Slack, and Smartsheet.
Step 1. Sign in to AppFabric
Connect applications to AppFabric to bring your content and insights directly within your preferred applications.
-
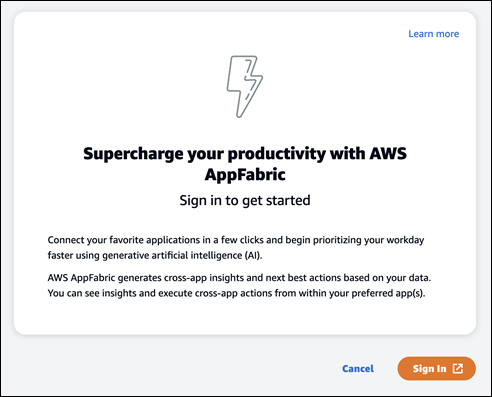
Every application will use AppFabric for productivity in different ways to bring you richer app experiences. Due to this, every application will have a different entry point to reach the AppFabric for productivity home page below. The home page sets context about the process to enable AppFabric and first prompts you to sign in. Every application you want to enable AppFabric in will reach this screen.
-
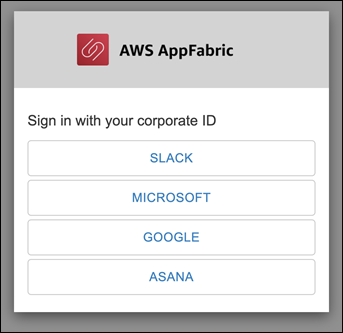
Sign in with your credentials from one of these providers: Asana, Google Workspace, Microsoft 365, or Slack. For the best experience, we recommend signing in using the same provider for each application you enable AppFabric in. For instance, if you choose Google Workspace credentials in App1, we recommend choosing Google Workspace in App2, as well as every other time you need to sign back in. If you sign in with a different provider, you’ll need to restart the process of connecting applications.
-
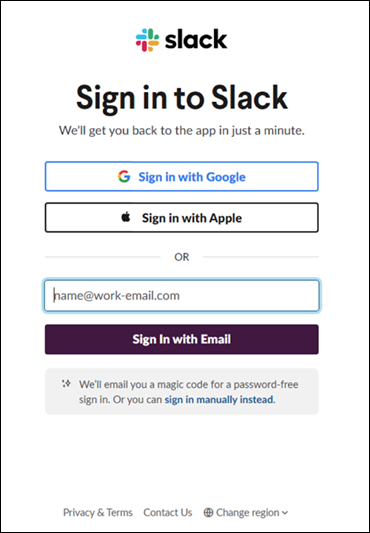
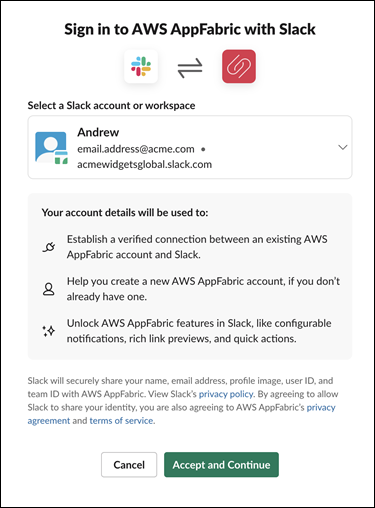
If prompted, enter your sign-in credentials and accept signing into AppFabric from this provider.
Step 2. Provide consent for the app to display insights
After signing in, AppFabric will display a consent page asking if you allow AppFabric to display cross-app insights and actions inside the application you’re enabling AppFabric for productivity in. For example, do you allow AppFabric to take your Google Workspace emails and calendar events and display them in Asana. You only need to complete this consent step one time per application that you enable AppFabric in.

Step 3. Connect your applications to generate insights and actions
After you complete the consent page, you're taken to the Connect applications page where you can connect, disconnect, or reconnect individual applications that are ultimately used to generate your cross-app insights and actions. In most cases, after you’ve signed in and provided consent, you'll continue to use this page to manage your connected applications.
To connect an application, choose the Connect button next to any application that you use.

You will need to provide your sign-in credentials for the application, and allow AppFabric permission to access your data to generate insights and complete actions.

After you successfully connect an application, the Status for that application will change from “Not Connected” to “Connected”. Reminder: you need to complete this authorization step for every application you want to be used for generating insights and actions.
After you connect an application, it's not connected forever. You'll need to periodically re-connect applications. We do this to ensure we still have your permission to generate insights.
The possible application statuses are:
-
Connected - AppFabric is authorized and is generating insights using your data from this application.
-
Not Connected - AppFabric isn't generating insights using data from this application. You can connect to begin generating insights.
-
Authorization failed. Please reconnect. - There may be an authorization failure with a specific application. If you see this error, try reconnecting your application using the Connect button.

The set up is complete and you can return to your application. It can take at least a few hours to start seeing insights inside your applications.
As needed, you can navigate back to this page to manage your connected applications. If you choose to Disconnect an application, AppFabric will stop using data from that application or gathering new data to generate new insights. Data from disconnected applications will be automatically be deleted within 7 days if you choose to not reconnect the application in that time.
Step 4. Start seeing insights and execute cross-app actions in your application
After you connect your applications with AppFabric, you'll have access to valuable insights and the ability to perform cross-app actions directly from your preferred application. Note: this functionality is not guaranteed in each app and entirely dependent on which AppFabric for productivity features the application developer has chosen to enable.
Cross-app insights
AppFabric for productivity offers two types of insights:
-
Actionable insights: AppFabric analyzes information from your emails, calendar events, tasks, and messages across your connected apps and generates key insights that may be important for you to prioritize. Additionally, AppFabric may generate recommended actions (such as send email, schedule meeting, and create task) that you can edit and execute while staying in your preferred application. For example, you may receive an insight saying there’s a customer escalation to deal with and a suggested next action to schedule a meeting with your customer.
-
Meeting preparation insights: This feature helps you best prepare for upcoming meetings. AppFabric will analyze your upcoming meetings and generate a concise summary about the meeting purpose. Additionally, it will surface relevant artifacts (such as emails, messages, and tasks) from your connected applications that will be useful to help you efficiently prepare for the meeting without switching between apps to find content.
Cross-app actions
For certain insights, AppFabric may also generate recommended actions such as sending an email, scheduling a meeting, or creating a task. When generating actions, AppFabric may pre-populate certain fields based on the content and context of your connected applications. For example, AppFabric may generate a suggested email response or task name based on the insight. When you click on a suggested action, you will be taken to an AppFabric owned user interface where you can edit the pre-populated content before executing the action. AppFabric will not execute actions without user review and input first as generative AI and the underlying large language models (LLM) may hallucinate from time to time.
Note
You have the responsibility to validate and confirm the AppFabric LLM outputs. AppFabric does not
guarantee the accuracy or quality of its LLM outputs. For more information, see AWS Responsible AI
Policy
Create emails (Google Workspace, Microsoft 365)
AppFabric allows you to edit and send an email from within your preferred application. We support basic email fields including the From, To, Cc/Bcc, Email Subject Line, and Email Body Message. AppFabric may generate content in these fields to help you reduce the time to complete the task. After you're done editing the email, choose Send to send the email.
The following fields are required to send an email:
-
At least one of recipient emails (To, CC and BCC) is required, and must be valid email addresses.
-
Subject line and Message fields.

After the email is sent, you'll see a confirmation that the email has been sent. Additionally, you'll see a link to view the email in the designated application. You can use this link to quickly navigate to the application and verify the email has been sent.

Create calendar events (Google Workspace, Microsoft 365)
AppFabric allows you to edit and create a calendar event from within your preferred application. We support basic calendar event fields including the Event Title, Location, Start/End Time and Date, Invitee list, and Event details. AppFabric may generate content in these fields to help you reduce the time to complete the task. After you're done editing the calendar event, choose Create to create the event.
The following fields are required to create a calendar event:
-
Title, Starts, Ends and Description fields.
-
Starts time and date must not be earlier than Ends time and date.
-
Invite field is optional, but requires valid email addresses if provided.

After calendar event is sent, you'll see a confirmation that the event has been created. Additionally, you'll see a link to view the event in the designated application. You can use this link to quickly navigate to the application and verify the event was created.

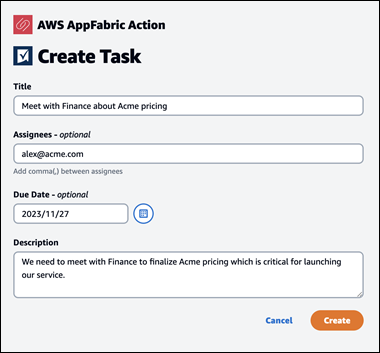
Create tasks (Asana)
AppFabric allows you to edit and create a task in Asana from within your preferred application. We support basic task fields such as Task Name, Task Owner, Due Date, and Task Description. AppFabric may generate content in these fields to help you reduce the time to create the task. After you're done editing the task, choose Create to create the task. Tasks are created in the applicable Asana workspace or project or task, as suggested by the LLM.
The following fields are required to create an Asana task:
-
Title and Description fields.
-
Assignee must be valid email address if modified.

After the task is created, you'll see a confirmation that the task has been created in Asana. Additionally, you'll see a link to view the task in Asana. You can use this link to quickly navigate to the application to verify the task was created, or move it to the appropriate Asana workspace or project or task.

Create tasks (Smartsheet)
AppFabric allows you to edit and create a task in Smartsheet from within your preferred application. We support basic task fields such as Task Name, Task Owner, Due Date, and Task Description. AppFabric may generate content in these fields to help you reduce the time to create the task. After you're done editing the task, choose Create to create the task. For Smartsheet tasks, AppFabric will create a new private Smartsheet sheet and populate any created tasks. This is done to help centralize AppFabric generated actions in a single place in a structured manner.
The following fields are required to create an Smartsheet task:
-
Title and Description fields.
-
Assignee must be valid email address if provided.
After the task is created, you'll see a confirmation that the task has been created in Smartsheet. Additionally, you'll see a link to view the task in Smartsheet. You can use this link to quickly navigate to the application to view the task in the created Smartsheet sheet. All future Smartsheet tasks will be populated in this sheet. If the sheet is deleted, AppFabric will create a new one.

