Configure federated access to Amazon Athena for Microsoft AD FS users using an ODBC client
To set up federated access to Amazon Athena for Microsoft Active Directory Federation Services
(AD FS) users using an ODBC client, you first establish trust between AD FS and your AWS
account. With this trust in place, your AD users can federate into AWS using their AD credentials and assume permissions of an
AWS Identity and Access Management
To create this trust, you add AD FS as a SAML provider to your AWS account and create an IAM role that federated users can assume. On the AD FS side, you add AWS as a relying party and write SAML claim rules to send the right user attributes to AWS for authorization (specifically, Athena and Amazon S3).
Configuring AD FS access to Athena involves the following major steps:
1. Setting up an IAM SAML provider and role
3. Creating Active Directory users and groups
4. Configuring the AD FS ODBC connection to Athena
1. Setting up an IAM SAML provider and role
In this section, you add AD FS as a SAML provider to your AWS account and create an IAM role that your federated users can assume.
To set up a SAML provider
Sign in to the AWS Management Console and open the IAM console at https://console.aws.amazon.com/iam/
. -
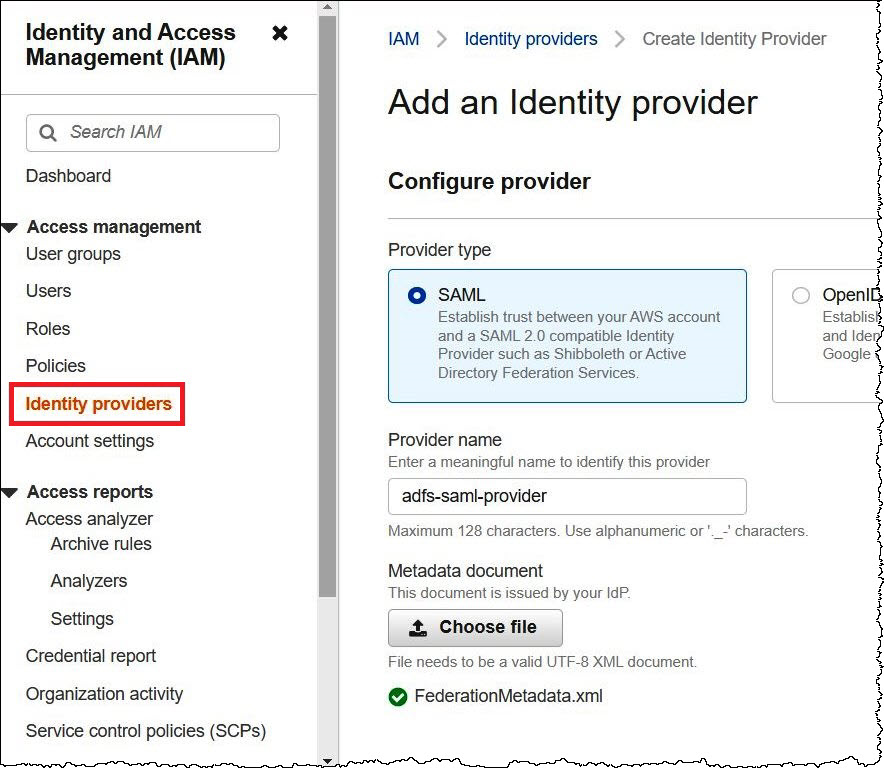
In the navigation pane, choose Identity providers.
-
Choose Add provider.
-
For Provider type, choose SAML.
-
For Provider name, enter
adfs-saml-provider. -
In a browser, enter the following address to download the federation XML file for your AD FS server. To perform this step, your browser must have access to the AD FS server.
https://adfs-server-name/federationmetadata/2007-06/federationmetadata.xml -
In the IAM console, for Metadata document, choose Choose file, and then upload the federation metadata file to AWS.
-
To finish, choose Add provider.
Next, you create the IAM role that your federated users can assume.
To create an IAM role for federated users
-
In the IAM console navigation pane, choose Roles.
-
Choose Create role.
-
For Trusted entity type, choose SAML 2.0 federation.
-
For SAML 2.0-based provider, choose the adfs-saml-provider provider that you created.
-
Choose Allow programmatic and AWS Management Console access, and then choose Next.

-
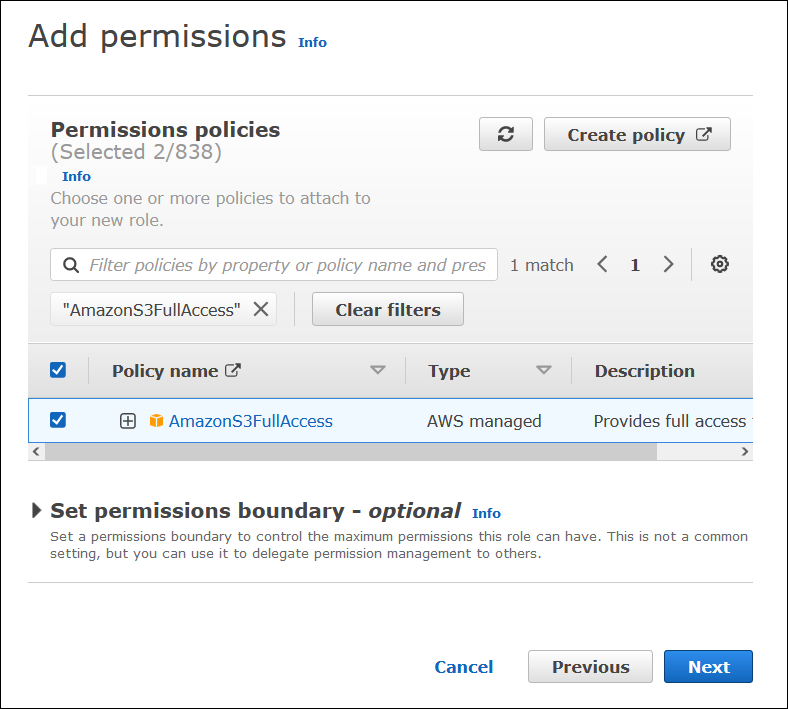
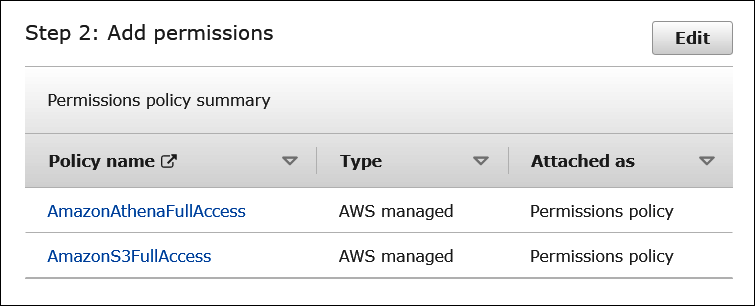
On the Add permissions page, filter for the IAM permissions policies that you require for this role, and then select the corresponding check boxes. This tutorial attaches the
AmazonAthenaFullAccessandAmazonS3FullAccesspolicies.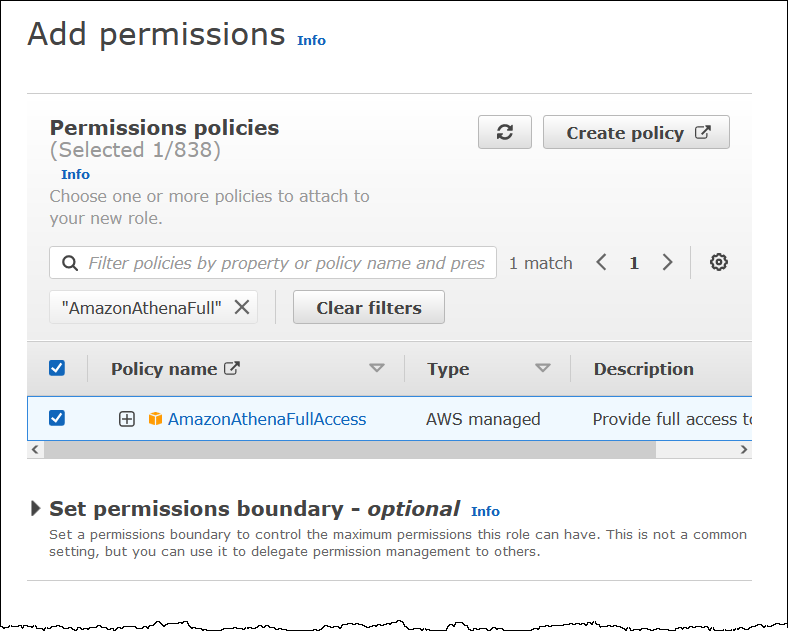
-
Choose Next.
-
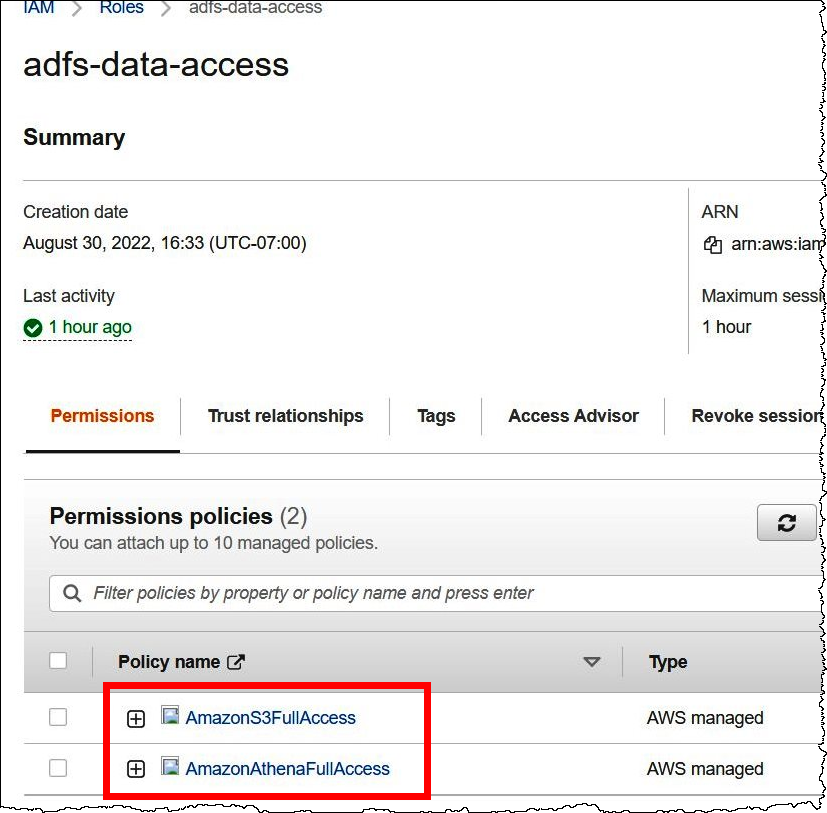
On the Name, review, and create page, for Role name, enter a name for the role. This tutorial uses the name adfs-data-access.
In Step 1: Select trusted entities, the Principal field should be automatically populated with
"Federated:" "arn:aws:iam::. Theaccount_id:saml-provider/adfs-saml-provider"Conditionfield should contain"SAML:aud"and"https://signin.aws.amazon.com/saml".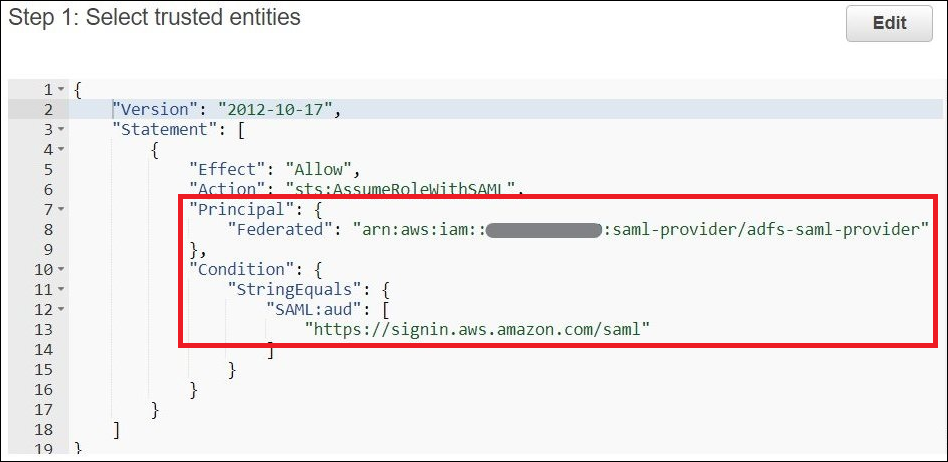
Step 2: Add permissions shows the policies that you have attached to the role.
-
Choose Create role. A banner message confirms creation of the role.
-
On the Roles page, choose the name of the role that you just created. The summary page for the role shows the policies that have been attached.
2. Configuring AD FS
Now you are ready to add AWS as a relying party and write SAML claim rules so that you can send the right user attributes to AWS for authorization.
SAML-based federation has two participant parties: the IdP (Active Directory) and the relying party (AWS), which is the service or application that uses authentication from the IdP.
To configure AD FS, you first add a relying party trust, then you configure SAML claim rules for the relying party. AD FS uses claim rules to form a SAML assertion that is sent to a relying party. The SAML assertion states that the information about the AD user is true, and that it has authenticated the user.
Adding a relying party trust
To add a relying party trust in AD FS, you use the AD FS server manager.
To add a relying party trust in AD FS
-
Sign in to the AD FS server.
-
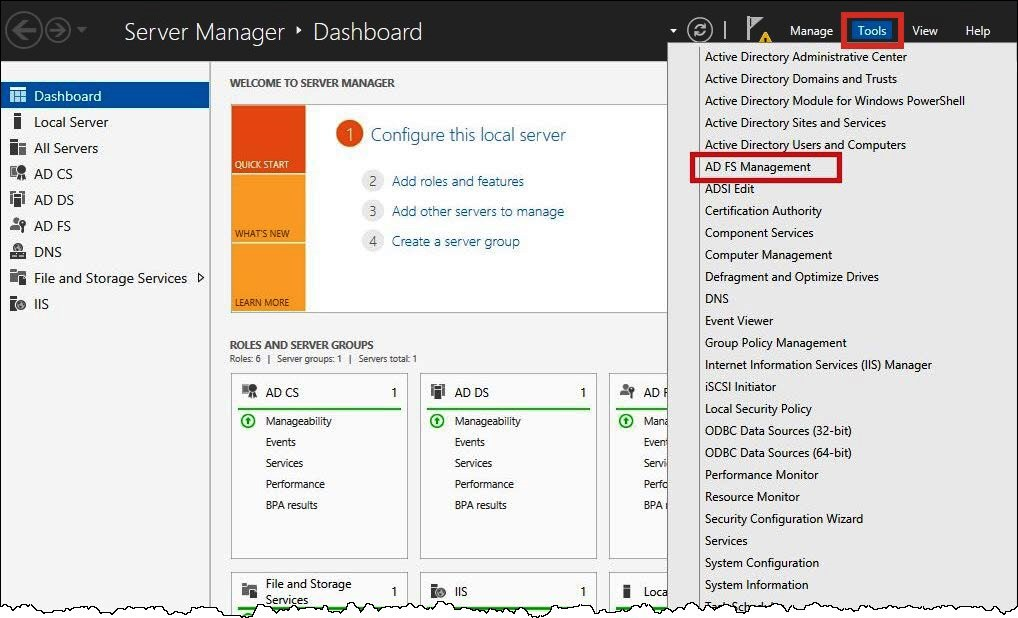
On the Start menu, open Server Manager.
-
Choose Tools, and then choose AD FS Management.
-
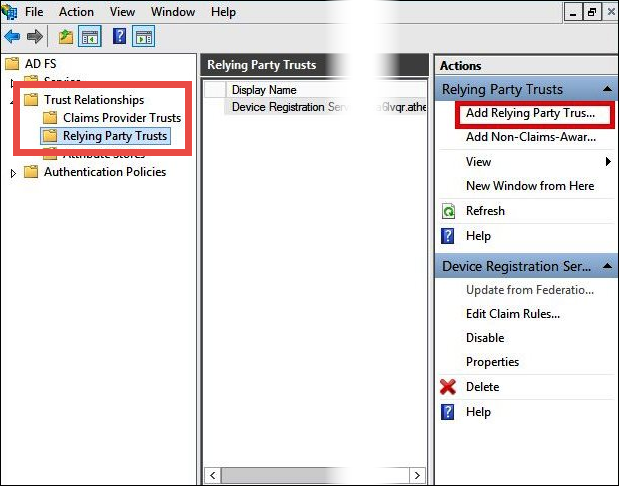
In the navigation pane, under Trust Relationships, choose Relying Party Trusts.
-
Under Actions, choose Add Relying Party Trust.
-
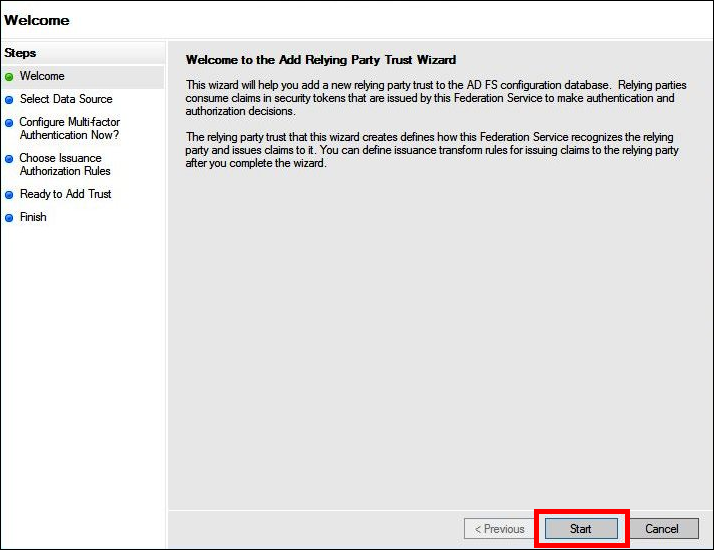
On the Add Relying Party Trust Wizard page, choose Start.
-
On the Select Data Source screen, select the option Import data about the relying party published online or on a local network.
-
For Federation metadata address (host name or URL), enter the URL
https://signin.aws.amazon.com/static/saml-metadata.xml -
Choose Next.

-
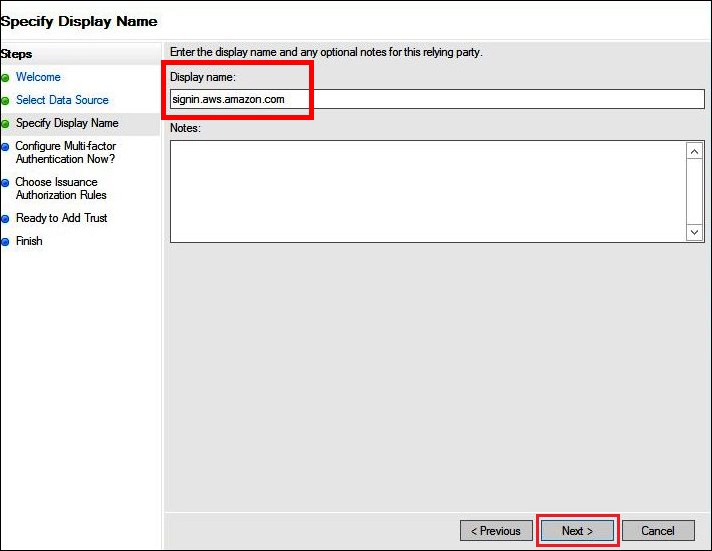
On the Specify Display Name page, for Display name, enter a display name for your relying party, and then choose Next.
-
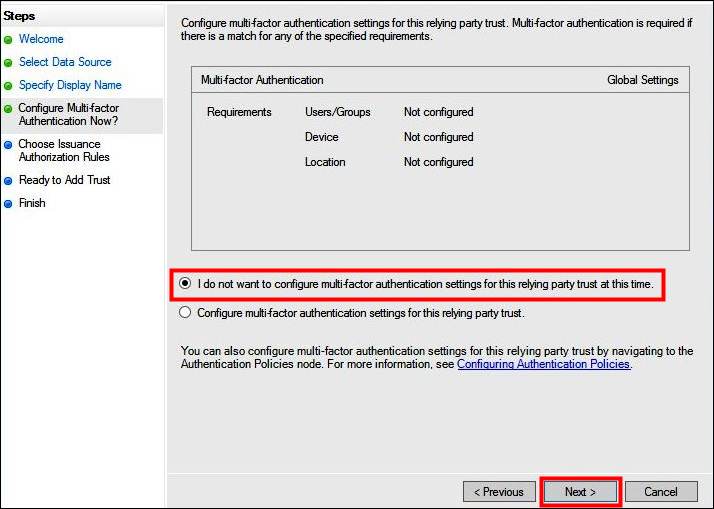
On the Configure Multi-factor Authentication Now page, this tutorial selects I do not want to configure multi-factor authentication for this relying party trust at this time.
For increased security, we recommend that you configure multi-factor authentication to help protect your AWS resources. Because it uses a sample dataset, this tutorial doesn't enable multi-factor authentication.
-
Choose Next.
-
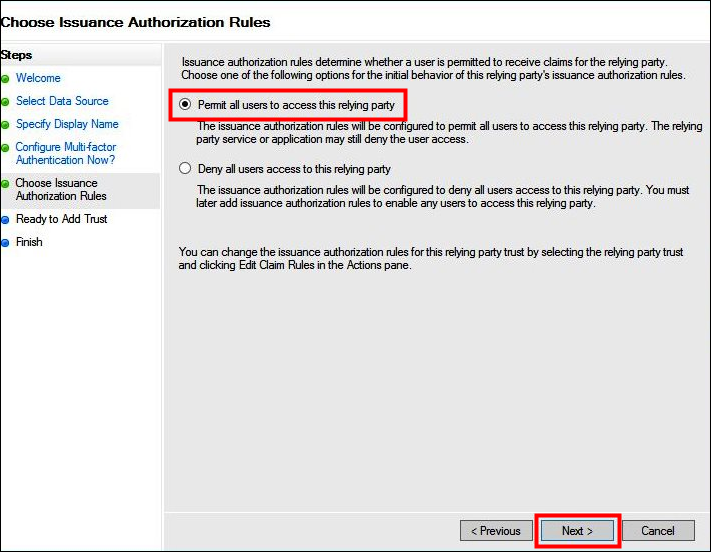
On the Choose Issuance Authorization Rules page, select Permit all users to access this relying party.
This option allows all users in Active Directory to use AD FS with AWS as a relying party. You should consider your security requirements and adjust this configuration accordingly.
-
Choose Next.
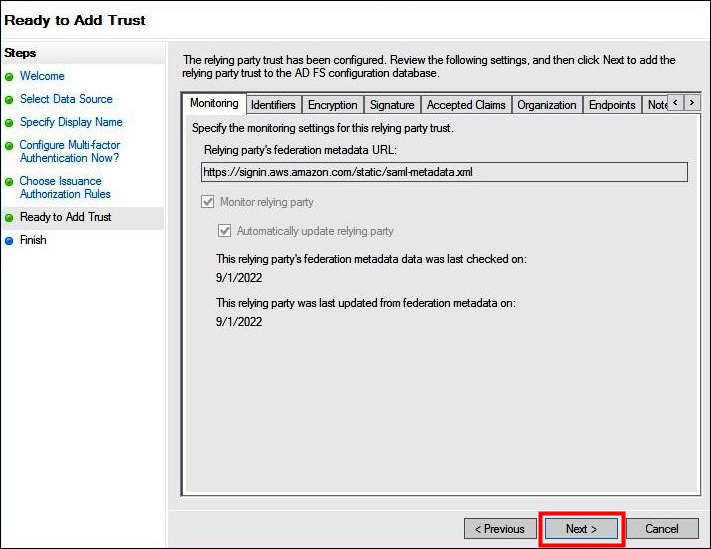
-
On the Ready to Add Trust page, choose Next to add the relying party trust to the AD FS configuration database.
-
On the Finish page, choose Close.

Configuring SAML claim rules for the relying party
In this task, you create two sets of claim rules.
The first set, rules 1–4, contains AD FS claim rules that are required to
assume an IAM role based on AD group membership. These are the same rules that you
create if you want to establish federated access to the AWS Management Console
The second set, rules 5–6, are claim rules required for Athena access control.
To create AD FS claim rules
-
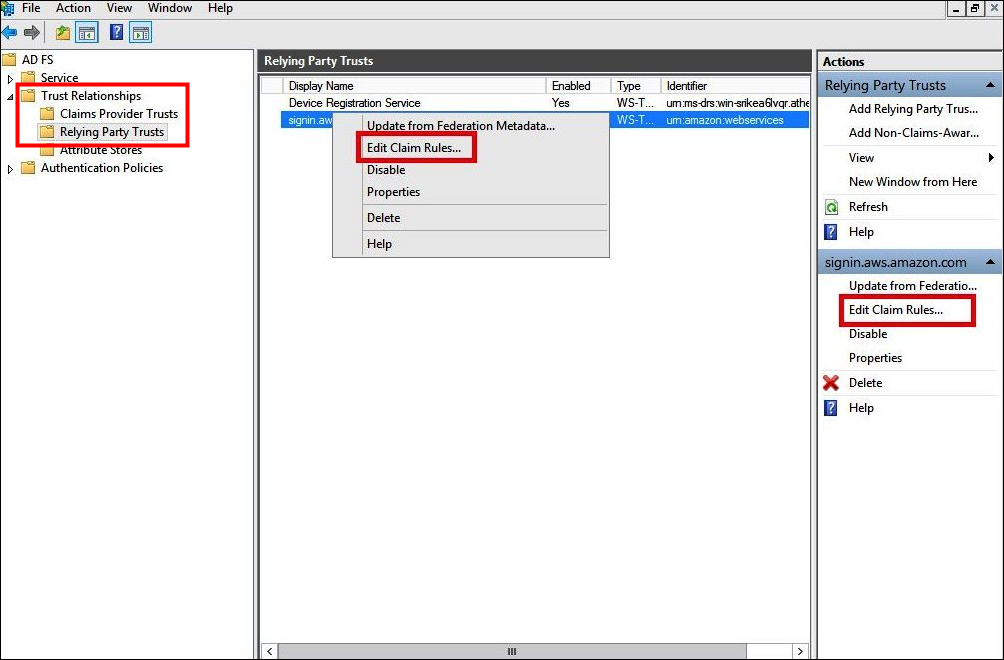
In the AD FS Management console navigation pane, choose Trust Relationships, Relying Party Trusts.
-
Find the relying party that you created in the previous section.
-
Right-click the relying party and choose Edit Claim Rules, or choose Edit Claim Rules from the Actions menu.
-
Choose Add Rule.
-
On the Configure Rule page of the Add Transform Claim Rule Wizard, enter the following information to create claim rule 1, and then choose Finish.
-
For Claim Rule name, enter
NameID. -
For Rule template, use Transform an Incoming Claim.
-
For Incoming claim type, choose Windows account name.
-
For Outgoing claim type, choose Name ID.
-
For Outgoing name ID format, choose Persistent Identifier.
-
Select Pass through all claim values.

-
-
Choose Add Rule, and then enter the following information to create claim rule 2, and then choose Finish.
-
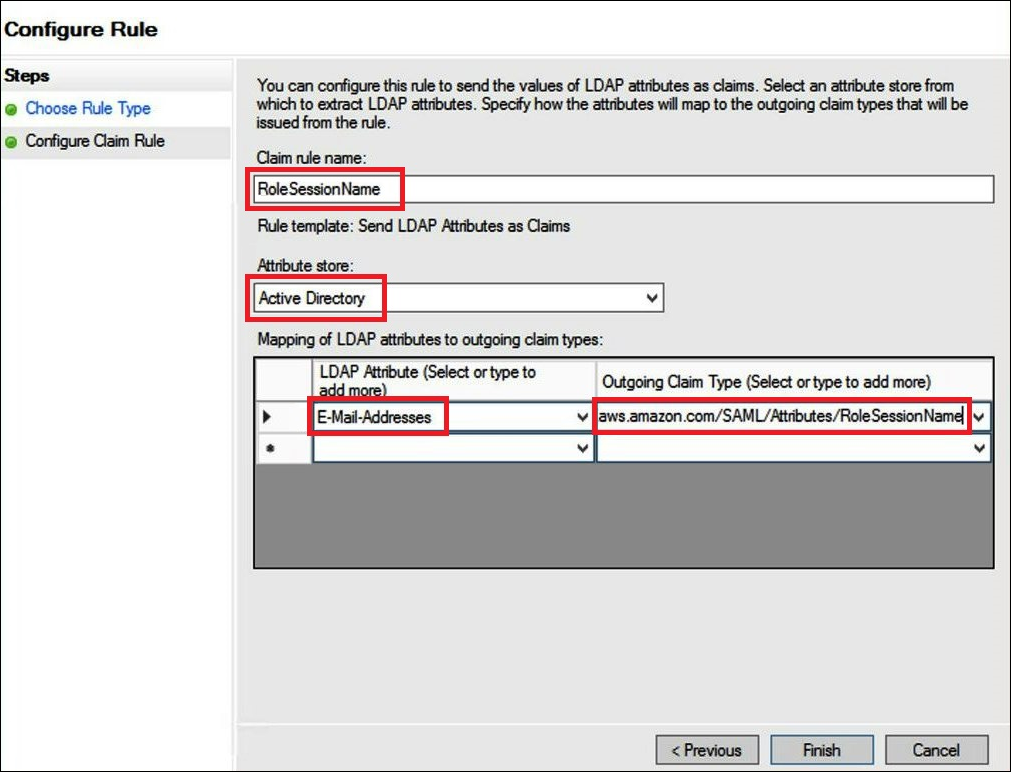
For Claim rule name, enter
RoleSessionName. -
For Rule template, use Send LDAP Attribute as Claims.
-
For Attribute store, choose Active Directory.
-
For Mapping of LDAP attributes to outgoing claim types, add the attribute
E-Mail-Addresses. For the Outgoing Claim Type, enterhttps://aws.amazon.com/SAML/Attributes/RoleSessionName.
-
-
Choose Add Rule, and then enter the following information to create claim rule 3, and then choose Finish.
-
For Claim rule name, enter
Get AD
                                    Groups
. -
For Rule template, use Send Claims Using a Custom Rule.
-
For Custom rule, enter the following code:
c:[Type == "http://schemas.microsoft.com/ws/2008/06/identity/claims/windowsaccountname",
 Issuer == "AD AUTHORITY"]=> add(store = "Active Directory", types = ("http://temp/variable"),
 query = ";tokenGroups;{0}", param = c.Value);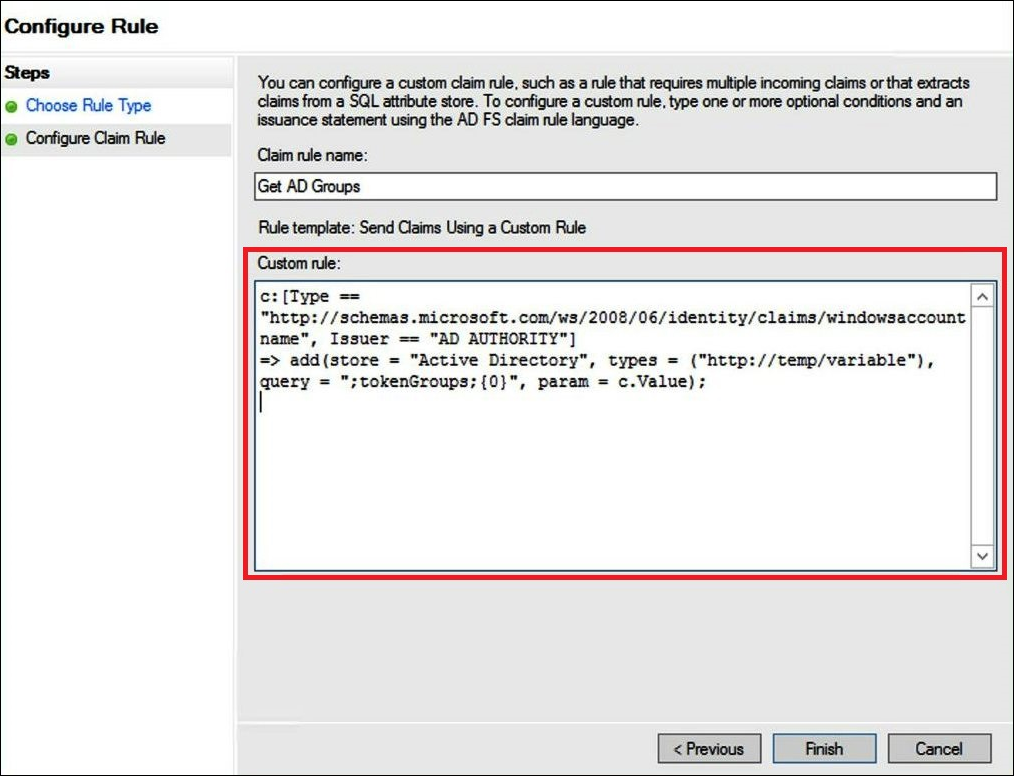
-
-
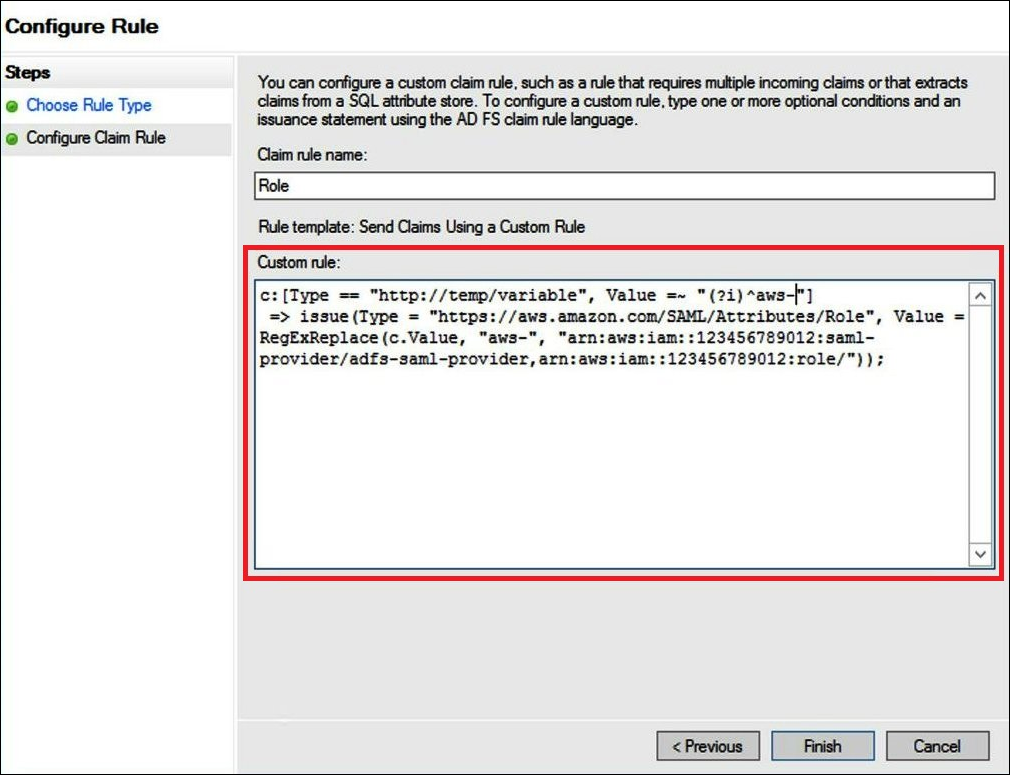
Choose Add Rule. Enter the following information to create claim rule 4, and then choose Finish.
-
For Claim rule name, enter
Role. -
For Rule template, use Send Claims Using a Custom Rule.
-
For Custom rule, enter the following code with your account number and name of the SAML provider that you created earlier:
c:[Type == "http://temp/variable", Value =~ "(?i)^aws-"]=> issue(Type = "https://aws.amazon.com/SAML/Attributes/Role",
Value = RegExReplace(c.Value, "aws-", "arn:aws:iam::AWS_ACCOUNT_NUMBER:saml-provider/adfs-saml-provider,arn:aws:iam:: AWS_ACCOUNT_NUMBER:role/"));
-
3. Creating Active Directory users and groups
Now you are ready to create AD users that will access Athena, and AD groups to place them in so that you can control levels of access by group. After you create AD groups that categorize patterns of data access, you add your users to those groups.
To create AD users for access to Athena
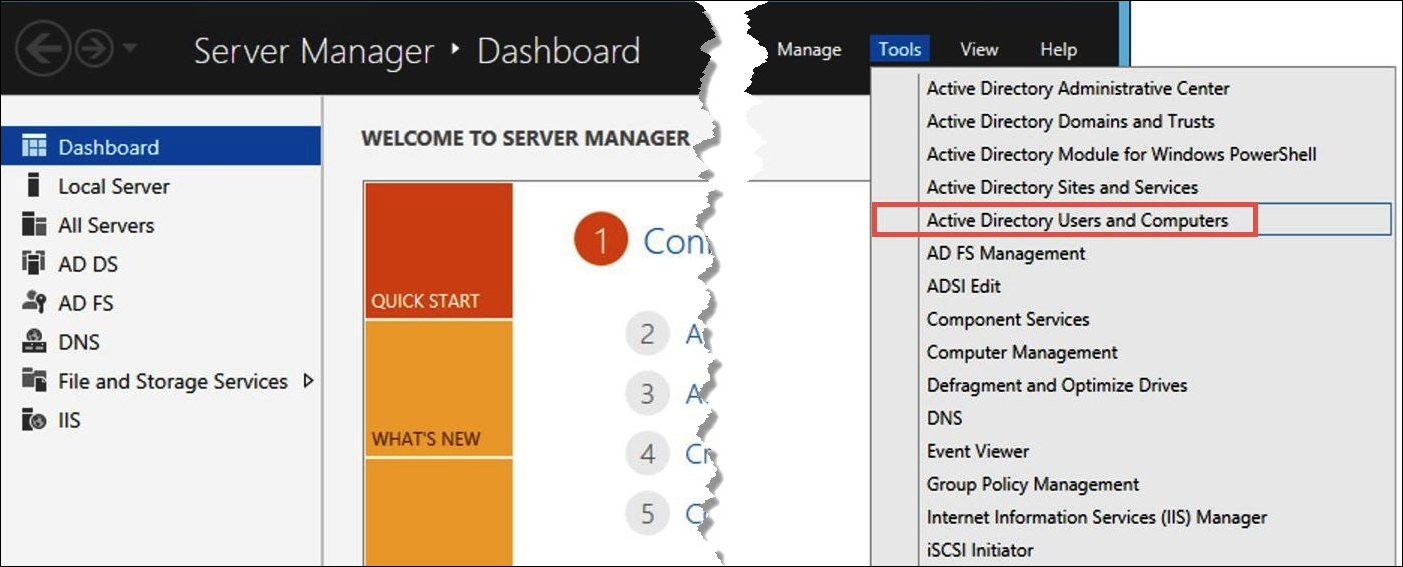
-
On the Server Manager dashboard, choose Tools, and then choose Active Directory Users and Computers.
-
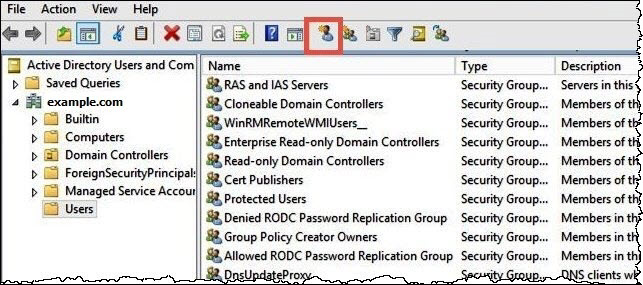
In the navigation pane, choose Users.
-
On the Active Directory Users and Computers tool bar, choose the Create user option.
-
In the New Object – User dialog box, for First name, Last name, and Full name, enter a name. This tutorial uses
Jane Doe.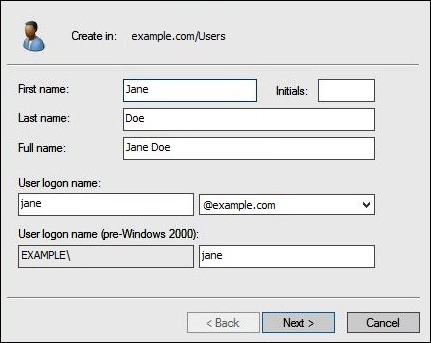
-
Choose Next.
-
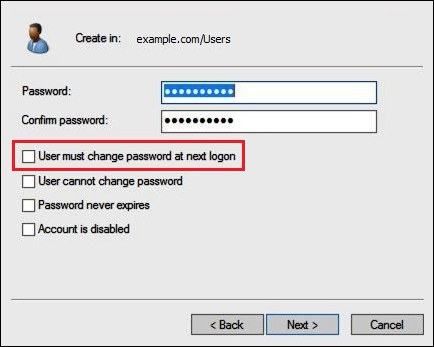
For Password, enter a password, and then retype to confirm.
For simplicity, this tutorial deselects User must change password at next sign on. In real-world scenarios, you should require newly created users to change their password.
-
Choose Next.
-
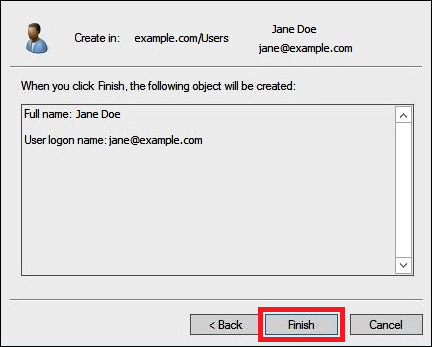
Choose Finish.
-
In Active Directory Users and Computers, choose the user name.
-
In the Properties dialog box for the user, for E-mail, enter an email address. This tutorial uses
jane@example.com.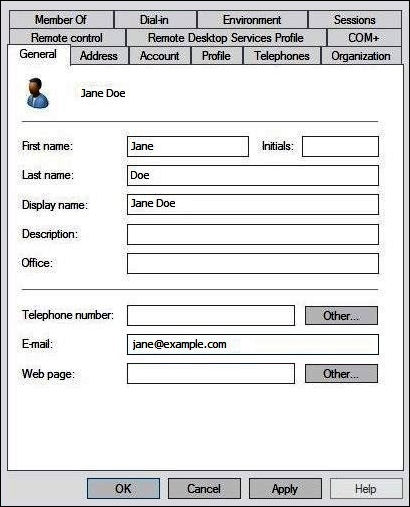
-
Choose OK.
Create AD groups to represent data access patterns
You can create AD groups whose members assume the adfs-data-access
IAM role when they log in to AWS. The following example creates an AD group
called aws-adfs-data-access.
To create an AD group
-
On the Server Manager Dashboard, from the Tools menu, choose Active Directory Users and Computers.
-
On the tool bar, choose the Create new group option.

-
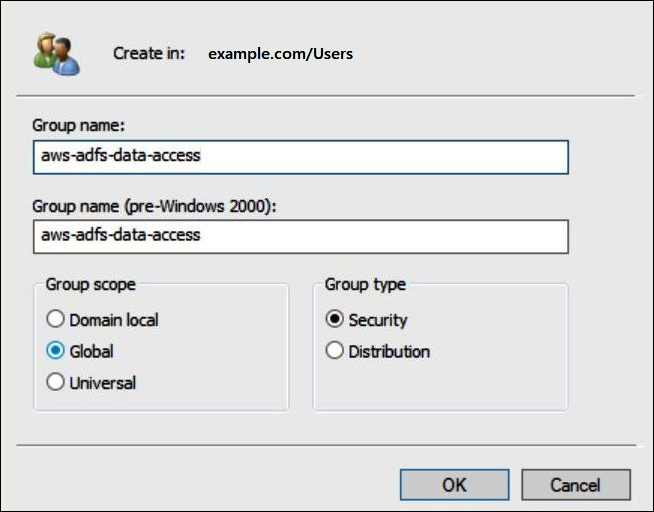
In the New Object - Group dialog box, enter the following information:
-
For Group name, enter
aws-adfs-data-access. -
For Group scope, select Global.
-
For Group type, select Security.
-
-
Choose OK.
Add AD users to appropriate groups
Now that you have created both an AD user and an AD group, you can add the user to the group.
To add an AD user to an AD group
-
On the Server Manager Dashboard, on the Tools menu, choose Active Directory Users and Computers.
-
For First name and Last name, choose a user (for example, Jane Doe).
-
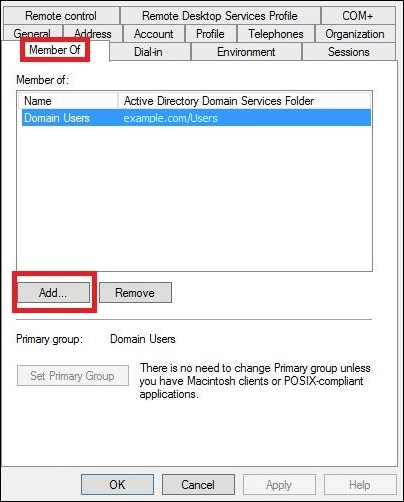
In the Properties dialog box for the user, on the Member Of tab, choose Add.
-
Add one or more AD FS groups according to your requirements. This tutorial adds the aws-adfs-data-access group.
-
In the Select Groups dialog box, for Enter the object names to select, enter the name of the AD FS group that you created (for example,
aws-adfs-data-access), and then choose Check Names.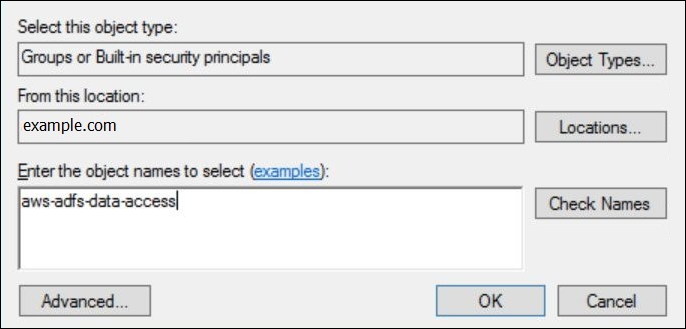
-
Choose OK.
In the Properties dialog box for the user, the name of the AD group appears in the Member of list.

-
Choose Apply, then choose OK.
4. Configuring the AD FS ODBC connection to Athena
After you have created your AD users and groups, you are ready to use the ODBC Data Sources program in Windows to configure your Athena ODBC connection for AD FS.
To configure the AD FS ODBC connection to Athena
-
Install the ODBC driver for Athena. For download links, see Connect to Amazon Athena with ODBC.
-
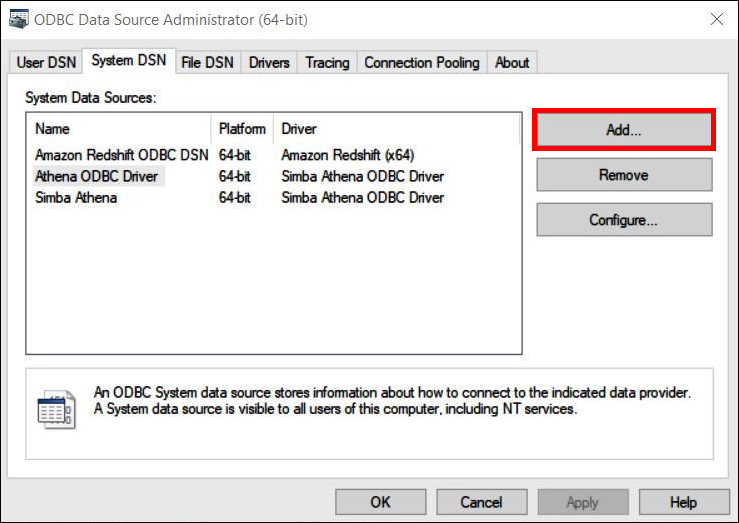
In Windows, choose Start, ODBC Data Sources.
-
In the ODBC Data Source Administrator program, choose Add.
-
In the Create New Data Source dialog box, choose Simba Athena ODBC Driver, and then choose Finish.

-
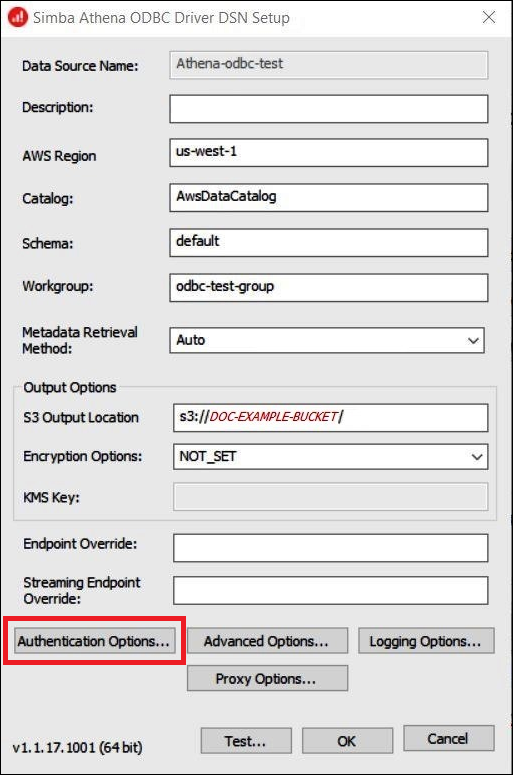
In the Simba Athena ODBC Driver DSN Setup dialog box, enter the following values:
-
For Data Source Name, enter a name for your data source (for example,
Athena-odbc-test). -
For Description, enter a description for your data source.
-
For AWS Region, enter the AWS Region that you are using (for example,
us-west-1). -
For S3 Output Location, enter the Amazon S3 path where you want your output to be stored.
-
-
Choose Authentication Options.
-
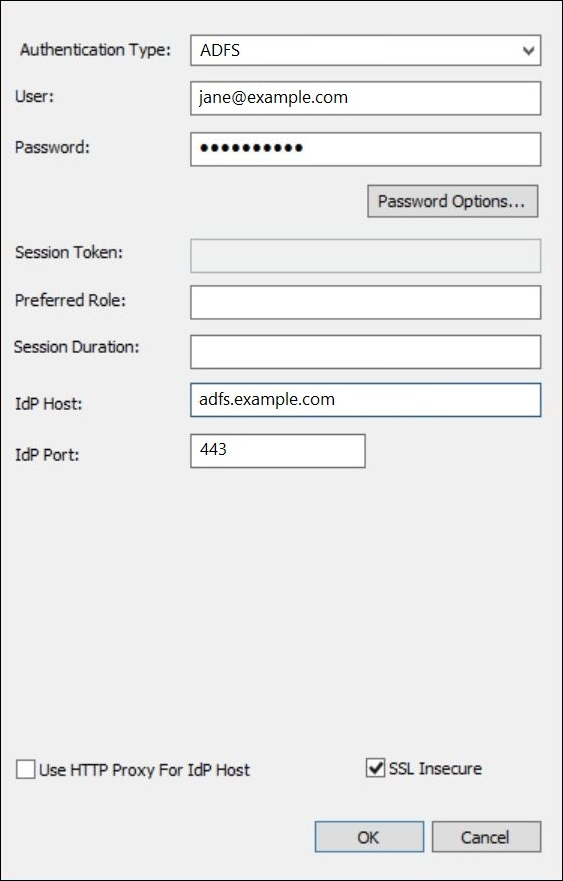
In the Authentication Options dialog box, specify the following values:
-
For Authentication Type, choose ADFS.
-
For User, enter the user's email address (for example,
jane@example.com). -
For Password, enter the user's ADFS password.
-
For IdP Host, enter the AD FS server name (for example,
adfs.example.com). -
For IdP Port, use the default value 443.
-
Select the SSL Insecure option.
-
-
Choose OK to close Authentication Options.
-
Choose Test to test the connection, or OK to finish.
