Configure single sign-on using ODBC, SAML 2.0, and the Okta Identity Provider
To connect to data sources, you can use Amazon Athena with identity providers (IdPs) like PingOne, Okta, OneLogin, and others. Starting with Athena ODBC driver version 1.1.13 and Athena JDBC driver version 2.0.25, a browser SAML plugin is included that you can configure to work with any SAML 2.0 provider. This topic shows you how to configure the Amazon Athena ODBC driver and the browser-based SAML plugin to add single sign-on (SSO) capability using the Okta identity provider.
Prerequisites
Completing the steps in this tutorial requires the following:
-
Athena ODBC driver version 1.1.13 or later. Versions 1.1.13 and later include browser SAML support. For download links, see Connecting to Amazon Athena with ODBC.
-
An IAM Role that you want to use with SAML. For more information, see Creating a role for SAML 2.0 federation in the IAM User Guide.
-
An Okta account. For information, visit okta.com
.
Creating an app integration in Okta
First, use the Okta dashboard to create and configure a SAML 2.0 app for single sign-on to Athena.
To use the Okta dashboard to set up single sign-on for Athena
-
Login to the Okta admin page on
okta.com. -
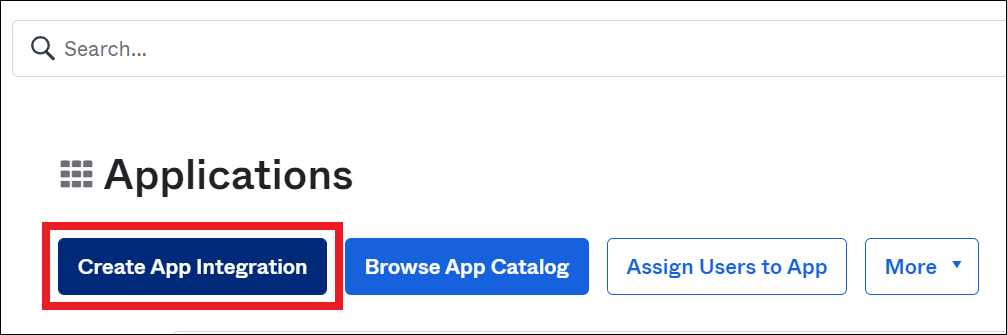
In the navigation pane, choose Applications, Applications.
-
On the Applications page, choose Create App Integration.
-
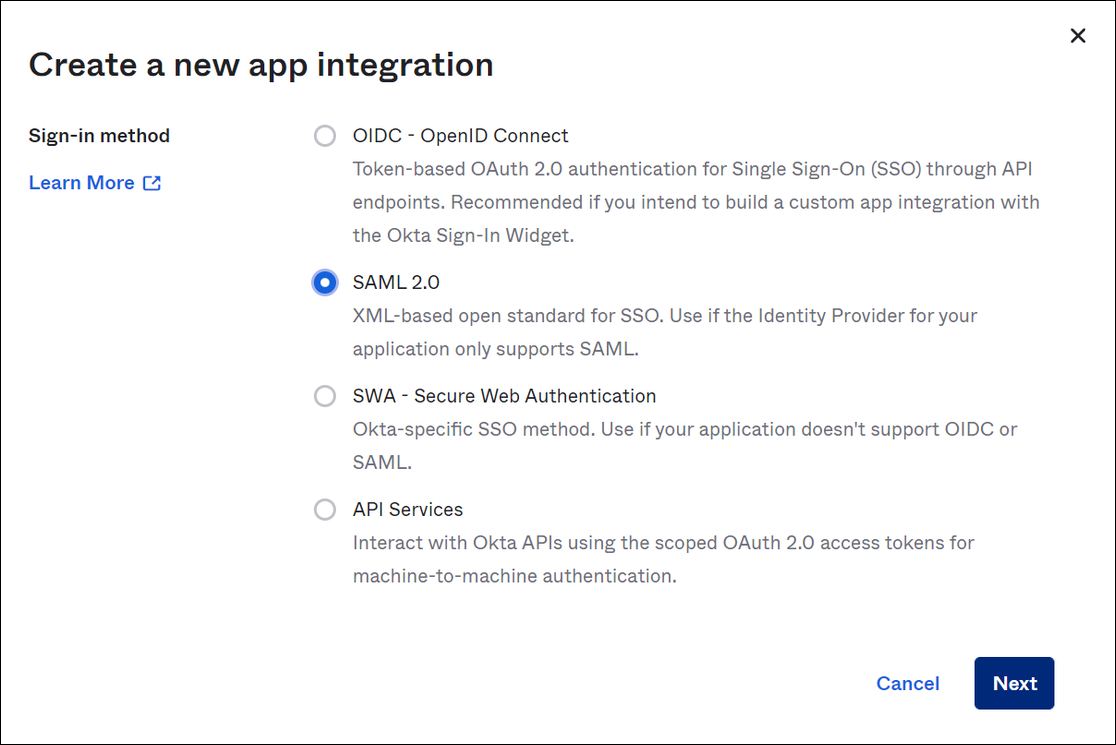
In the Create a new app integration dialog box, for Sign-in method, select SAML 2.0, and then choose Next.
-
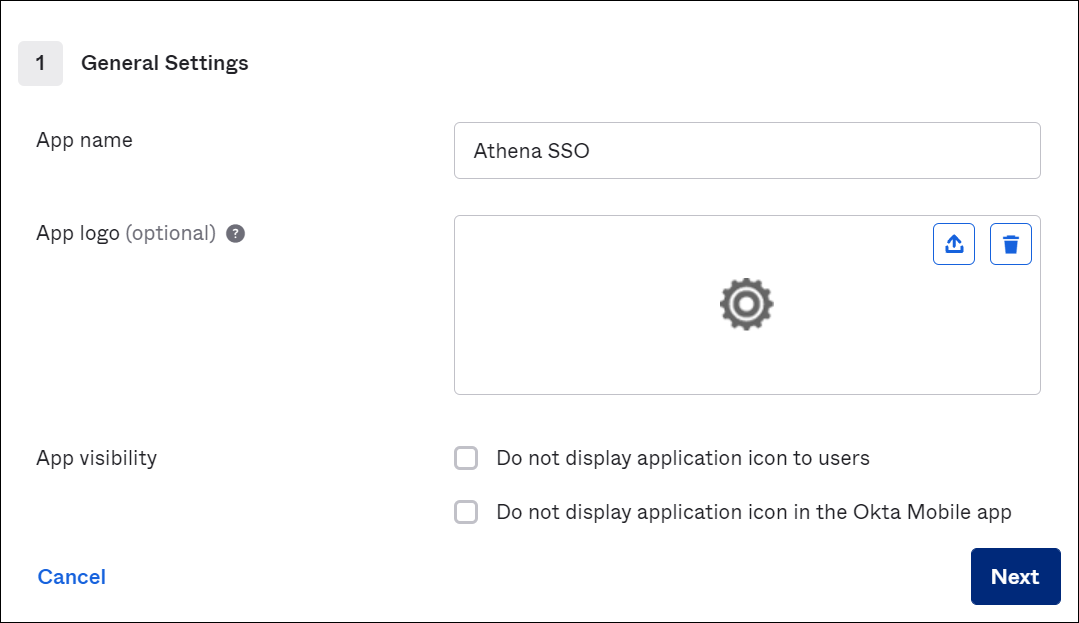
On the Create SAML Integration page, in the General Settings section, enter a name for the application. This tutorial uses the name Athena SSO.
-
Choose Next.
-
On the Configure SAML page, in the SAML Settings section, enter the following values:
-
For Single sign on URL, enter
http://localhost:7890/athena -
For Audience URI, enter
urn:amazon:webservices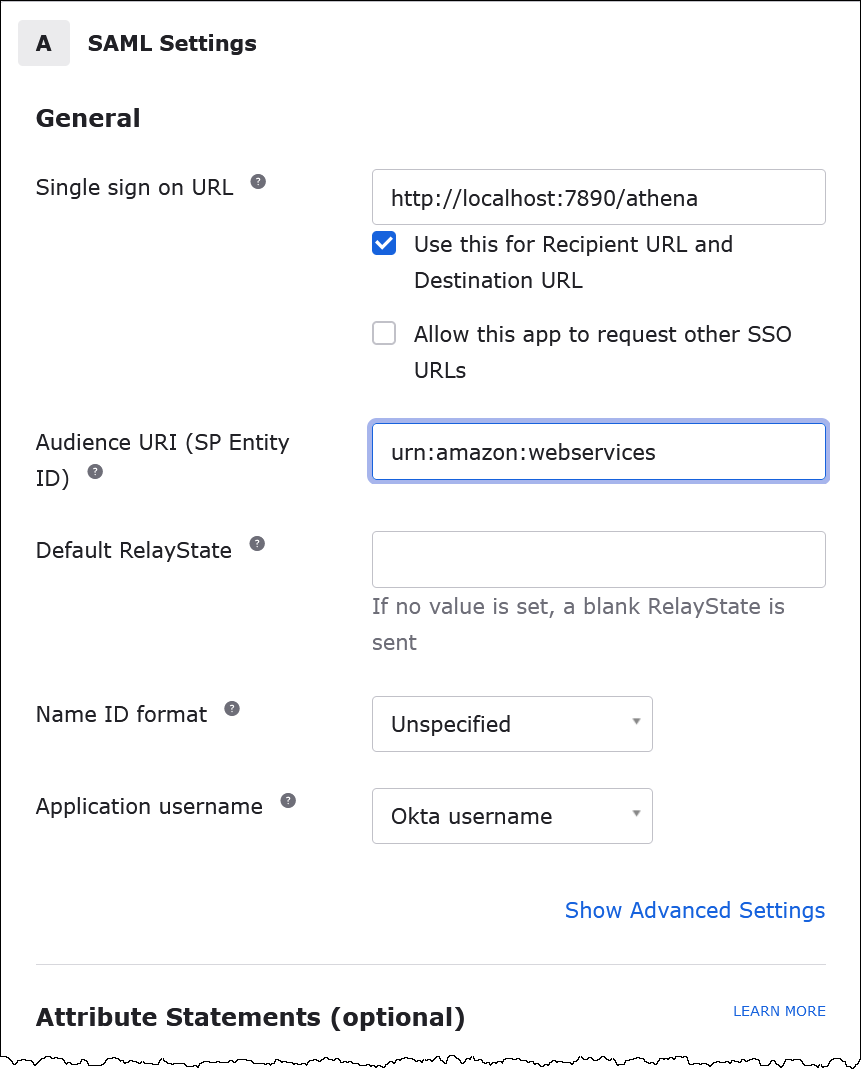
-
-
For Attribute Statements (optional), enter the following two name/value pairs. These are required mapping attributes.
-
For Name, enter the following URL:
https://aws.amazon.com/SAML/Attributes/RoleFor Value, enter the name of your IAM role. For information about the IAM role format, see Configuring SAML assertions for the authentication response in the IAM User Guide.
-
For Name, enter the following URL:
https://aws.amazon.com/SAML/Attributes/RoleSessionNameFor Value, enter
user.email.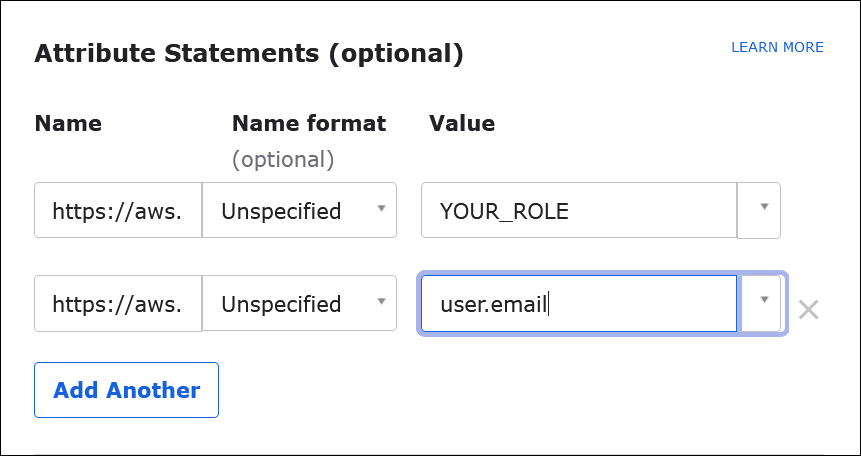
-
-
Choose Next, and then choose Finish.
When Okta creates the application, it also creates your login URL, which you will retrieve next.
Getting the login URL from the Okta dashboard
Now that your application has been created, you can obtain its login URL and other metadata from the Okta dashboard.
To get the login URL from the Okta dashboard
-
In the Okta navigation pane, choose Applications, Applications.
-
Choose the application for which you want to find the login URL (for example, AthenaSSO).
-
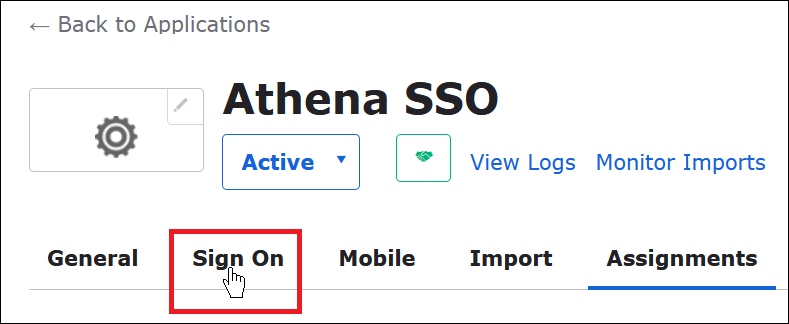
On the page for your application, choose Sign On.
-
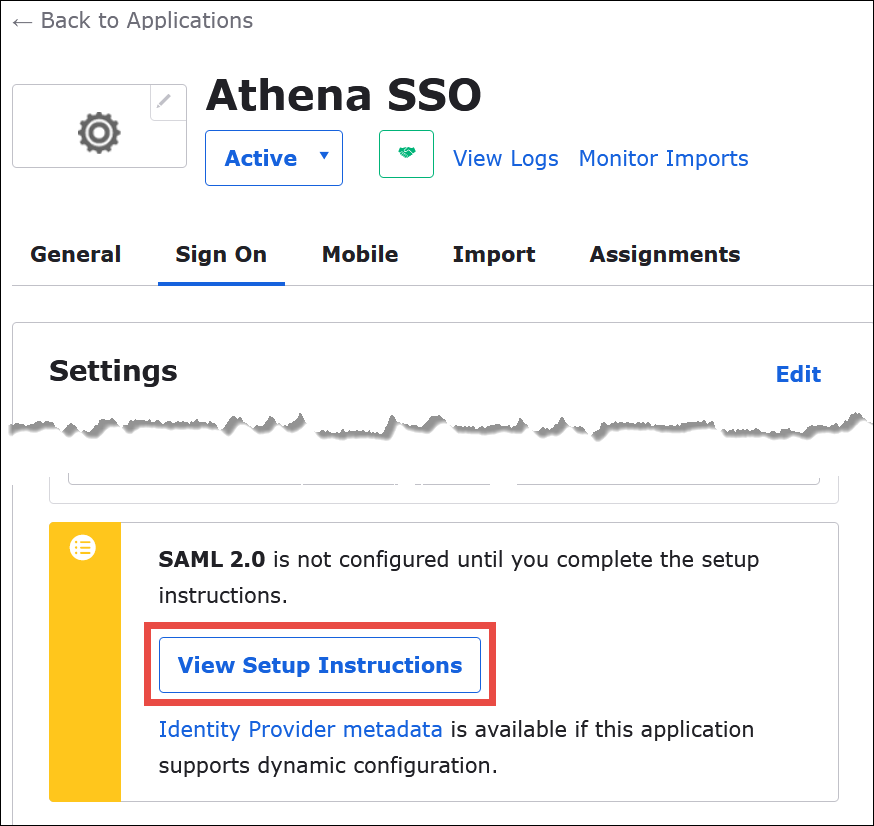
Choose View Setup Instructions.
-
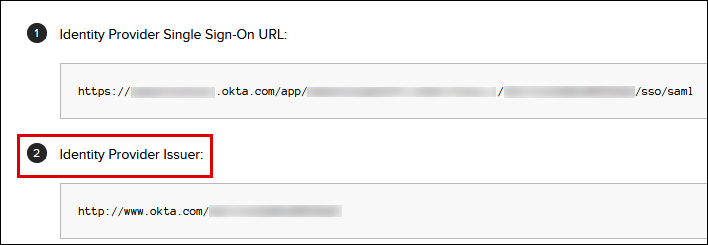
On the How to Configure SAML 2.0 for Athena SSO page, find the URL for Identity Provider Issuer. Some places in the Okta dashboard refer to this URL as the SAML issuer ID.
-
Copy or store the value for Identity Provider Single Sign-On URL.
In the next section, when you configure the ODBC connection, you will provide this value as the Login URL connection parameter for the browser SAML plugin.
Configuring the browser SAML ODBC connection to Athena
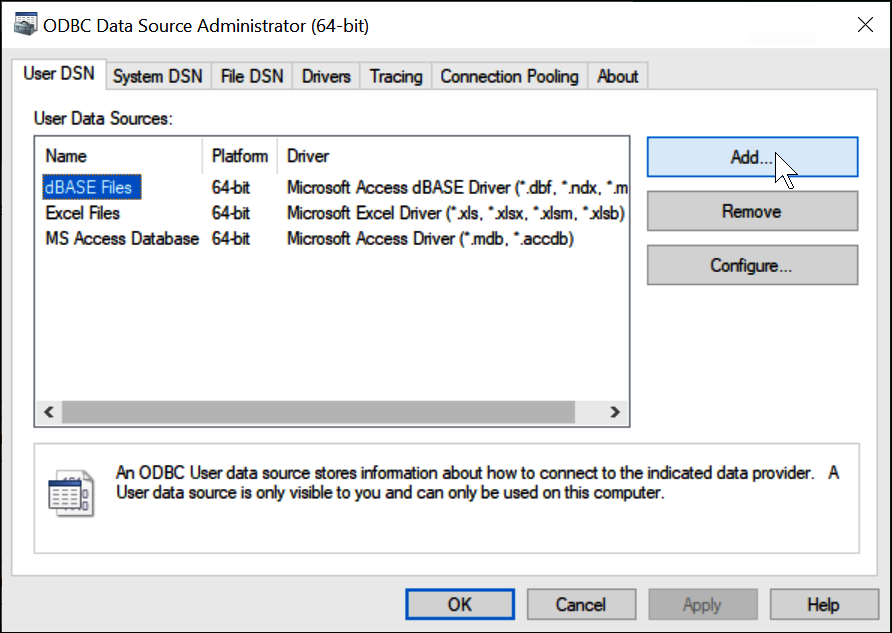
Now you are ready to configure the browser SAML connection to Athena using the ODBC Data Sources program in Windows.
To configure the browser SAML ODBC connection to Athena
-
In Windows, launch the ODBC Data Sources program.
-
In the ODBC Data Source Administrator program, choose Add.
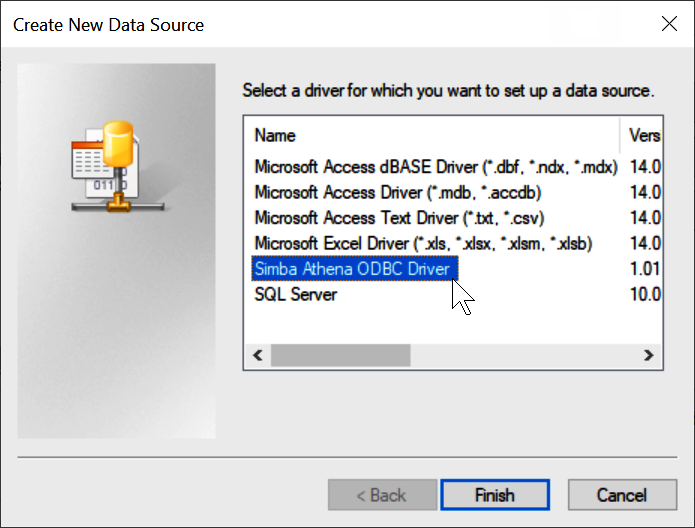
-
Choose Simba Athena ODBC Driver, and then choose Finish.
-
In the Simba Athena ODBC Driver DSN Setup dialog, enter the values described.
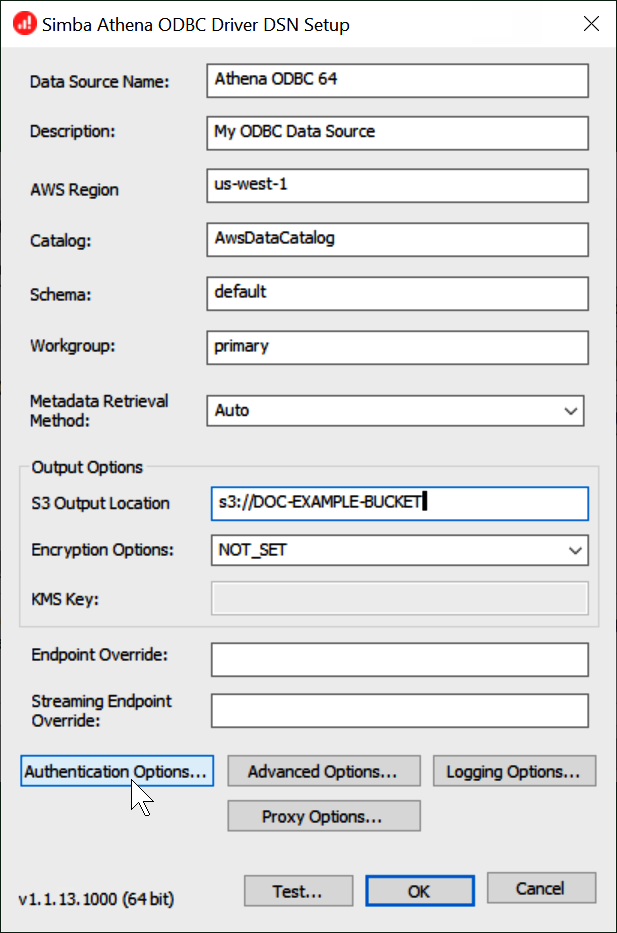
-
For Data Source Name, enter a name for your data source (for example, Athena ODBC 64).
-
For Description, enter a description for your data source.
-
For AWS Region, enter the AWS Region that you are using (for example,
us-west-1). -
For S3 Output Location, enter the Amazon S3 path where you want your output to be stored.
-
-
Choose Authentication Options.
-
In the Authentication Options dialog box, choose or enter the following values.
-
For Authentication Type, choose BrowserSAML.
-
For Login URL, enter the Identity Provider Single Sign-On URL that you obtained from the Okta dashboard.
-
For Listen Port, enter 7890.
-
For Timeout (sec), enter a connection timeout value in seconds.
-
-
Choose OK to close Authentication Options.
-
Choose Test to test the connection, or OK to finish.
