Run a query and save query results with the console
After you choose or save a query, you can run a query on an event data store.
When you run a query, you have the option to save the query results to an Amazon S3
bucket. When you run queries in CloudTrail Lake, you incur charges based on the amount of data
scanned by the query. There are no additional CloudTrail Lake charges for saving query results
to an S3 bucket, however, there are S3 storage charges. For more information about S3
pricing, see Amazon S3 pricing
When you save query results, the query results may display in the CloudTrail console before they are viewable in the S3 bucket since CloudTrail delivers the query results after the query scan completes. While most queries complete within a few minutes, depending on the size of your event data store, it can take considerably longer for CloudTrail to deliver query results to your S3 bucket. CloudTrail delivers the query results to the S3 bucket in compressed gzip format. On average, after the query scan completes you can expect a latency of 60 to 90 seconds for every GB of data delivered to the S3 bucket.
To run a query using CloudTrail Lake
-
Sign in to the AWS Management Console and open the CloudTrail console at https://console.aws.amazon.com/cloudtrail/
. -
From the navigation pane, under Lake, choose Query.
-
On the Saved queries or Sample queries tabs, choose a query to run by choosing the Query name.
-
On the Editor tab, for Event data store, choose an event data store from the drop-down list.
-
(Optional) On the Editor tab, choose Save results to S3 to save the query results to an S3 bucket. When you choose the default S3 bucket, CloudTrail creates and applies the required bucket policies. If you choose the default S3 bucket, your IAM policy needs to include permission for the
s3:PutEncryptionConfigurationaction because by default server-side encryption is enabled for the bucket. For more information about saving query results, see Additional information about saved query results.Note
To use a different bucket, specify a bucket name, or choose Browse S3 to choose a bucket. The bucket policy must grant CloudTrail permission to deliver query results to the bucket. For information about manually editing the bucket policy, see Amazon S3 bucket policy for CloudTrail Lake query results.
-
On the Editor tab, choose Run.
Depending on the size of your event data store, and the number of days of data it includes, a query can take several minutes to run. The Command output tab shows the status of a query, and whether a query is finished running. When a query has finished running, open the Query results tab to see a table of results for the active query (the query currently shown in the editor).
Note
Queries that run for longer than one hour might time out. You can still get partial results that were processed before the query timed out. CloudTrail does not deliver partial query results to an S3 bucket. To avoid a time out, you can refine your query to limit the amount of data scanned by specifying a narrower time range.
Additional information about saved query results
After you save query results, you can download the saved query results from the S3 bucket. For more information about finding and downloading saved query results, see Download saved query results.
You can also validate saved query results to determine whether the query results were modified, deleted, or unchanged after CloudTrail delivered the query results. For more information about validating saved query results, see Validate CloudTrail Lake saved query results.
Example: Save query results to an Amazon S3 bucket
This walkthrough shows how you can save query results to an S3 bucket and then download those query results.
To save query results to an Amazon S3 bucket
-
Sign in to the AWS Management Console and open the CloudTrail console at https://console.aws.amazon.com/cloudtrail/
. -
From the navigation pane, under Lake, choose Query.
-
On the Sample queries or Saved queries tabs, choose a query to run by choosing the Query name. In this example, we'll choose the sample query named Investigate user actions.
-
On the Editor tab, for Event data store, choose an event data store from the drop-down list. When you choose the event data store from the list, CloudTrail automatically populates the event data store ID in the
Fromline. -
In this sample query, we'll edit the
userIdentity.ARNvalue to specify a user namedAdmin, and we'll leave the default values foreventTime. When you run a query, you're charged for the amount of data scanned. To help control costs, we recommend that you constrain queries by adding starting and endingeventTimetime stamps to queries.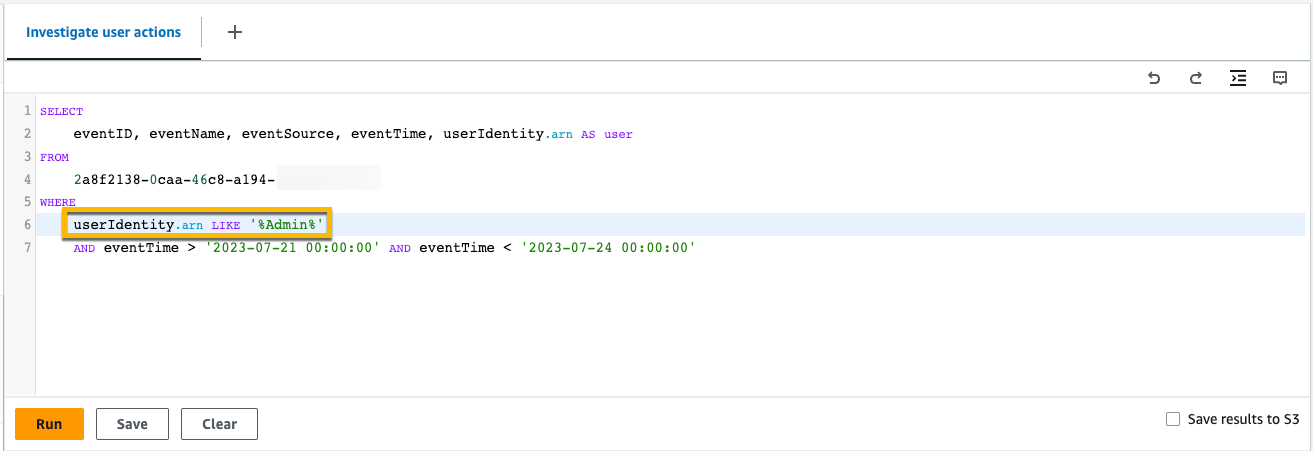
-
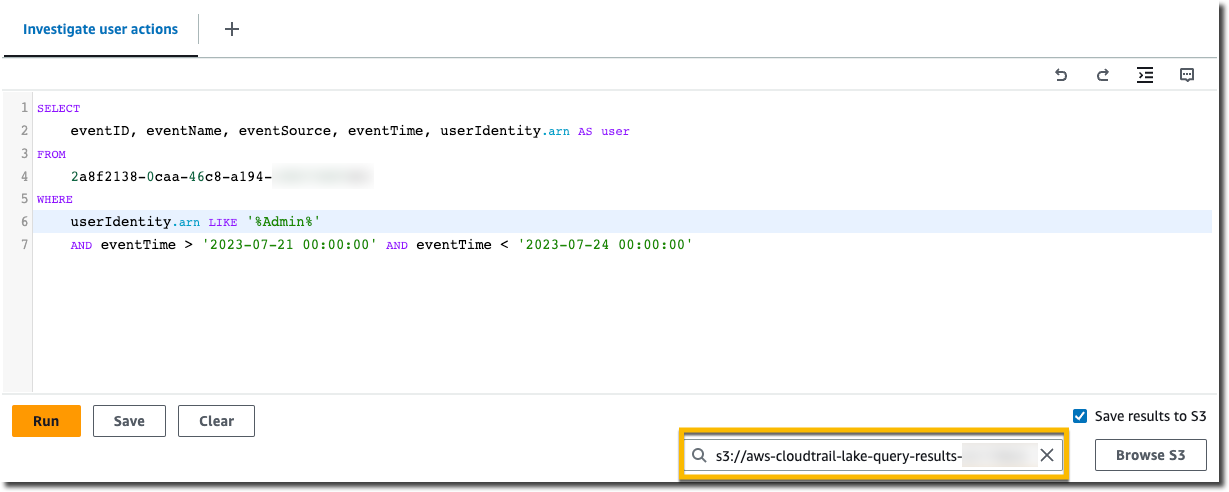
Choose Save results to S3 to save the query results to an S3 bucket. When you choose the default S3 bucket, CloudTrail creates and applies the required bucket policies. If you choose the default S3 bucket, your IAM policy needs to include permission for the
s3:PutEncryptionConfigurationaction because by default server-side encryption is enabled for the bucket. In this example, we'll use the default S3 bucket.Note
To use a different bucket, specify a bucket name, or choose Browse S3 to choose a bucket. The bucket policy must grant CloudTrail permission to deliver query results to the bucket. For information about manually editing the bucket policy, see Amazon S3 bucket policy for CloudTrail Lake query results.
-
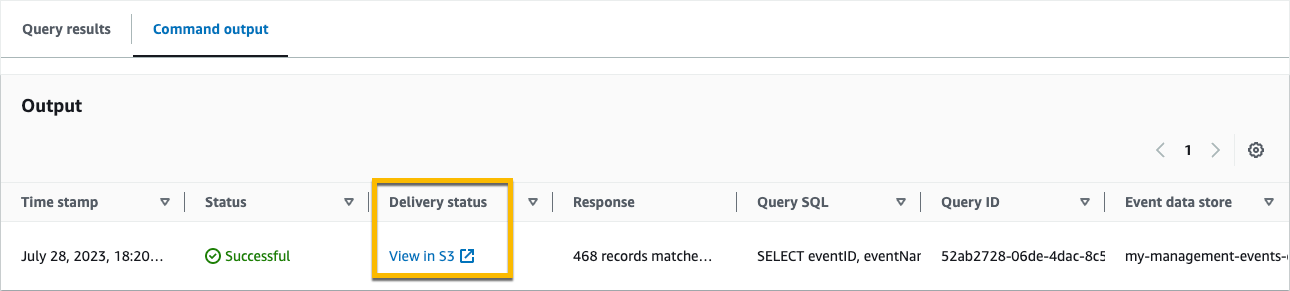
Choose Run. Depending on the size of your event data store, and the number of days of data it includes, a query can take several minutes to run. The Command output tab shows the status of a query, and whether a query is finished running. When a query has finished running, open the Query results tab to see a table of results for the active query (the query currently shown in the editor).
-
When CloudTrail completes delivery of the saved query results to your S3 bucket, the Delivery status column provides a link to the S3 bucket that contains your saved query result files as well as a sign file that you can use to verify your saved query results. Choose View in S3 to view the query result files and sign files in the S3 bucket.
Note
When you save query results, the query results may display in the CloudTrail console before they are viewable in the S3 bucket because CloudTrail delivers the query results after the query scan completes. While most queries complete within a few minutes, depending on the size of your event data store, it can take considerably longer for CloudTrail to deliver query results to your S3 bucket. CloudTrail delivers the query results to the S3 bucket in compressed gzip format. On average, after the query scan completes you can expect a latency of 60 to 90 seconds for every GB of data delivered to the S3 bucket.
-
To download your query results, choose the query result file (in this example,
result_1.csv.gz) and then choose Download.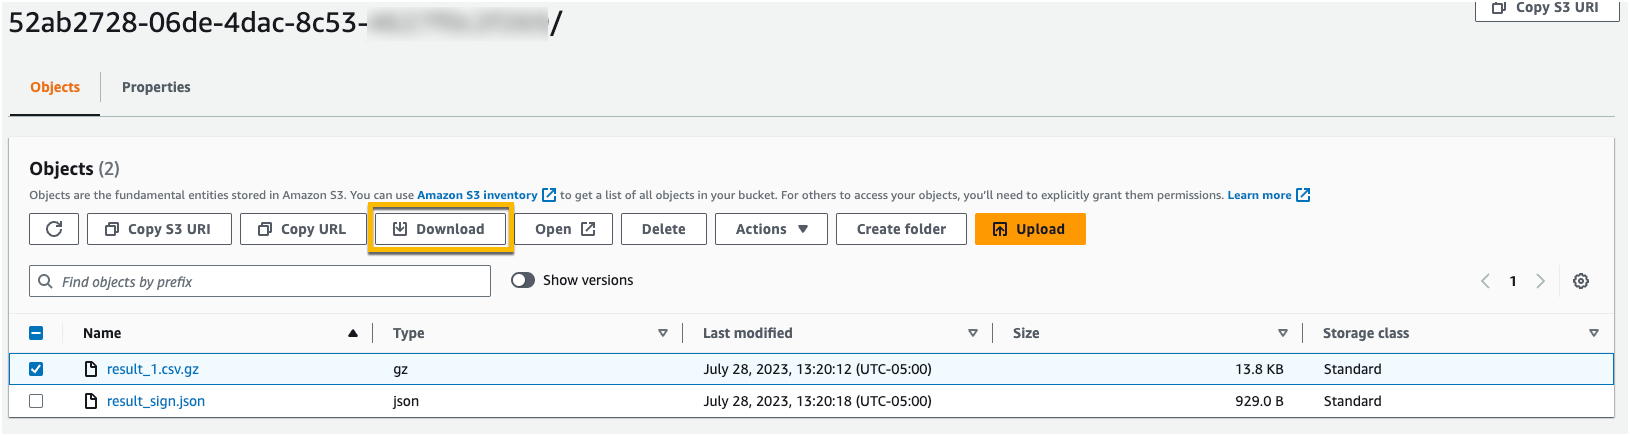
For information about validating saved query results, see Validate CloudTrail Lake saved query results.
