AWS Cloud9 is no longer available to new customers. Existing customers of
AWS Cloud9 can continue to use the service as normal.
Learn more
Managing source control with Git panel
The Git panel extension for AWS Cloud9 provides convenient user interface access to both core and advanced Git commands.
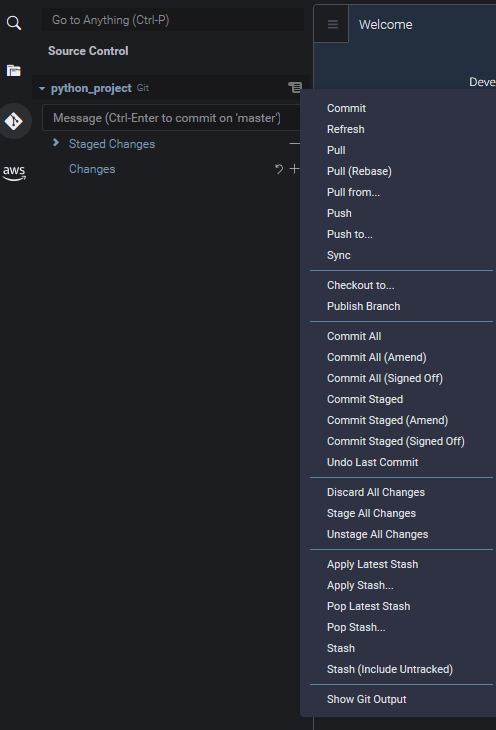
This section demonstrates how to access key Git features for managing source control. The procedures focus on using the Git panel menu to run Git commands against your repository and its content.
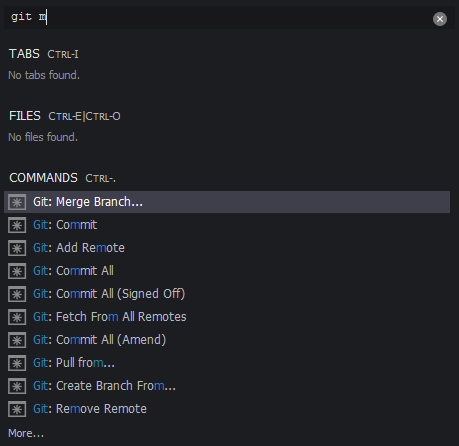
You can also access any supported Git command by starting to enter the name in the Git panel search box:
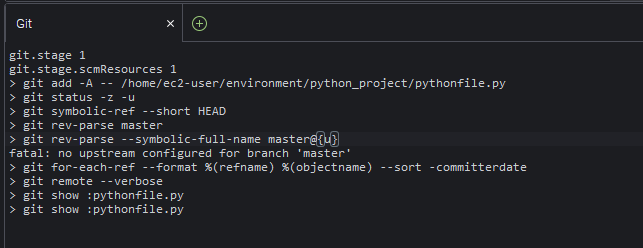
And you can view the actual Git commands that are run when you interact with the Git panel interface. To view command line activity, go to the Git panel menu and choose Show Git Output.
Initialize or clone a Git repository
A Git repository ("repo") contains the complete history of a project from its beginning. A repository consists of all the snapshots of project content that were captured each time you committed staged files to that repo.
Git panel supports both ways of obtaining a Git repository:
-
Initialize an existing directory as a Git repository.
-
Clone an existing repository and copy it to local directory.
Note
The interface options for initializing or cloning a repo are available only if you don't already have a Git repository added to workspace folder in your environment. If you already have a working directory for a repository, the Git panel window displays the status of the working directory and the staging area. The Git panel menu is also available to provide access to Git commands that you can run against the repository.
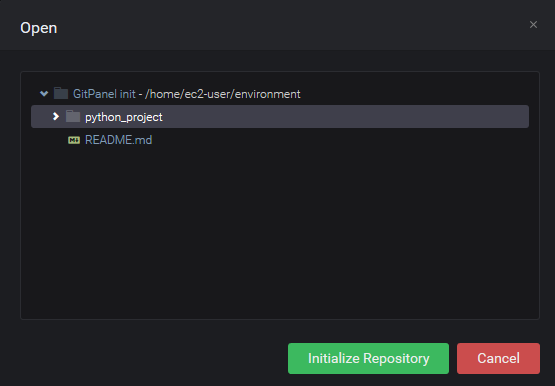
To initialize or clone a repository
-
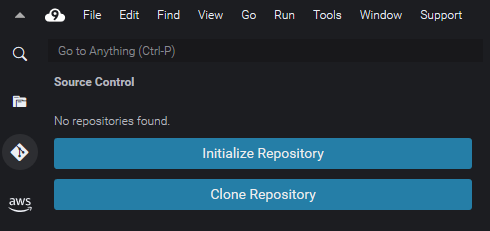
If Git panel isn't already available, access it by choosing Window, Source Control, and then choosing the Git icon.
Note
You can also open Git panel using the keyboard shortcut Ctrl+Shift+G.
-
Choose whether to initialize a new repo or clone an existing one.
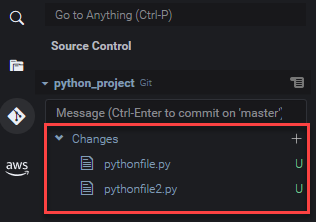
Staging and committing files
After you obtained a Git repository, you can then start to populate it with content using a two-step process:
-
Add untracked or recently modified content to the staging area.
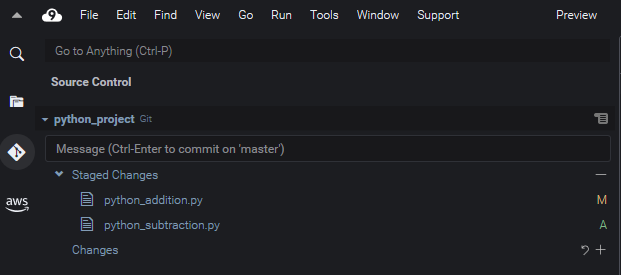
-
Commit files in the staging area to the working directory.
Important
You might not want to commit every file in your working directory to the repository. For
example, you're unlikely to want to add files generated during runtime to your project's
repository. With Git panel, you can mark files to be ignored by adding them to a list in a
.gitignore file.
To update the list in .gitignore, right-click a file that hasn't
been added to the staging area and select Add File to .gitignore.
The IDE opens the .gitignore file and the name of the selected file
is added to the list of ignored files.
For information about using pattern matching in .gitignore to
exclude file types, see the relevant reference in the git-scm.com site
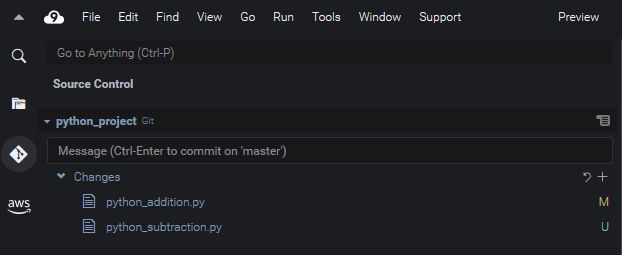
Viewing different file versions
You can compare versions of a file that's been modified after it was staged or committed.
-
Files listed under Changes: Choose the "M" to view the differences between the version in the working directory and the version that was last staged or committed to the repo.
-
Files listed under Staged Changes: Choose the "M" to view the differences between the version in the staging area and the version that was last committed to the repo.
After you choose "M", an IDE window displays the differences between the two versions of the file. One side shows the version that's tracked as current in the repository. The other side shows the modified version that's not yet committed.

Working with branches
Git greatly facilitates workflow management by allowing you to work on new features in branches that are independent of the repo's main branch. You can switch seamlessly between multiple branches while ensuring you always have ready-to-build source code in the main branch.
Create a branch
Creating a branch involves naming the branch and selecting its starting point.
-
In the Git panel menu, choose Checkout to. Alternatively, you can choose the name of the current branch displayed at the bottom of the Git panel.

-
Choose an option for creating a new branch:
-
Create new branch: The new branch starts from the last commit of the current branch.
-
Create new branch from: The new branch starts from the last commit of the branch that you select in a subsequent screen.
-
-
Enter the new branch's name.
-
If you're specifying a specific branch as the starting point for your branch, select one from the list.
After switching to the new branch, you can check the name of the current branch by viewing the bottom of the Git panel.
Note
If you're working with a remote repository, publish the new branch to the upstream remote repository to allow others to access your content.
Switch branches
One of the key advantages of managing source control with Git is that you can jump between different projects simply by switching branches.
Important
You can't switch branches if you have files in the current branch that haven't been committed to your repository. You must first clean your working directory by committing or stashing your work.
-
Choose the name of the current branch at the bottom of the Git panel. Alternatively, go to the Git panel and choose Checkout to.
-
Choose a branch from the list displayed.
After you switch, the repository's working directory is updated with file versions that were most recently committed to the selected branch.
Merge branches
After you've finished working on a feature in a discrete branch, you'll usually want to integrate your changes into the main project. With Git, this kind of integration is facilitated by merging one branch (a feature branch, for example) into another (usually the repository’s main or default branch).
-
To select a branch that you'll merge another branch into, go to the Git panel menu and choose Checkout to.
Alternatively, choose the name of the current branch at the bottom of the Git panel.
-
From the list that's displayed, choose a branch to switch to.
-
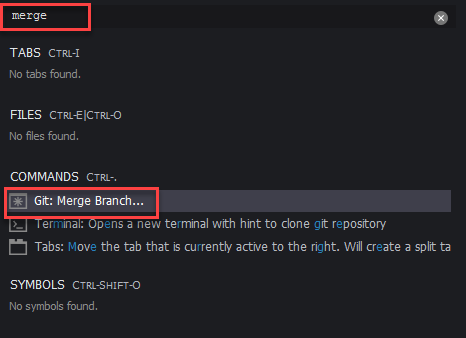
In the Search box for Git panel, start to enter the word "merge".
When Git: Merge Branch displays under the list of Commands, choose it.
-
From the list displayed, choose a branch to merge into the target branch.
If the merge completes without conflicts, the Git panel interface refreshes to show the target branch containing the merged changes.
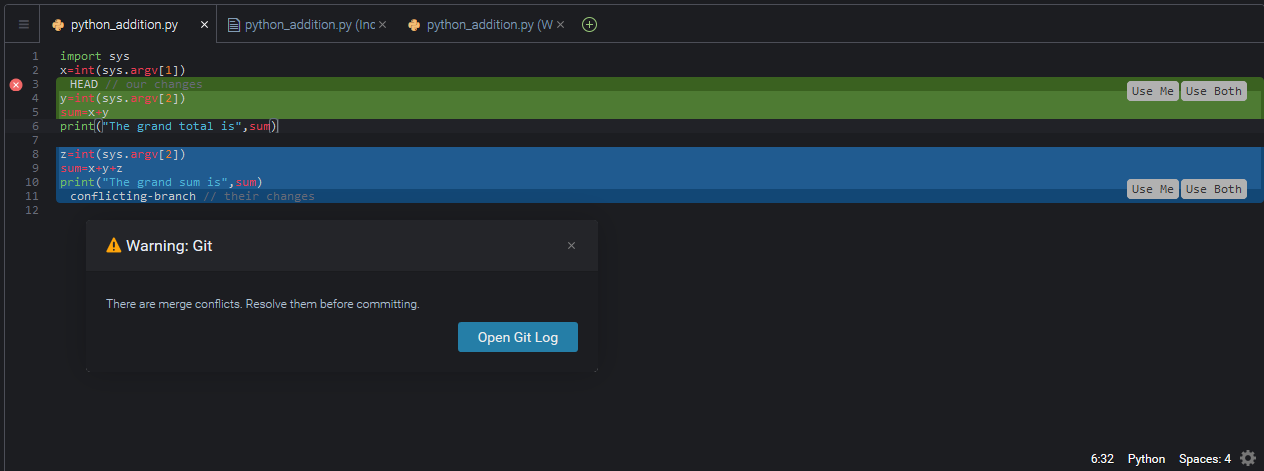
When merging branches, you may encounter merge conflicts that result from incompatible changes that were made to the same content. If this happens, you're warned that you have to resolve the conflicts before committing the merge.
You can use the IDE's code editor window to identify the conflicting content in the two branches and then make changes to resolve the differences.
Working with remote repositories
Remote repositories that are hosted on the Internet or a network facilitate collaboration by allowing team members to share the changes they've committed to their local responsibilities. By using Git commands that upload and download data, you ensure the contents of the "downstream" (local) repository are synched with those of the "upstream" (remote) repository.
Publish a branch to a remote repository
After you create a branch for a local repository, it's private to you and not available to your collaborators until you push it "upstream" to the remote repository.
-
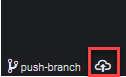
To publish the current branch, go to the Git panel menu and choose Publish Branch. Alternatively, click the cloud symbol that's next to the branch name at the bottom of the Git panel.
-
If required, enter your sign-in credentials to access the remote repository.
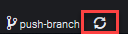
If the branch is successfully published to the remote repository, a synchronize symbol displays next to the branch name at the bottom of the Git panel. Choose it to synchronize the contents of the local and remote repositories.
Push and pull content between local and remote repositories
When using Git to collaborate on a shared project, you typically start by pulling recent
changes by other team members from the remote repository into your local repo. And after you
committed changes to your local repo, you push them to the remote repository so they can be
accessed by the rest of the team. These actions are performed by the commands git
pull and git push.
Note
You need to enter your sign-in credentials when pushing and pulling changes to and from most hosted repositories (such as those on GitHub, for example).
Stashing and retrieving files
With the stash feature of Git, you can switch branches without first having to commit staged or modified files. The stash feature captures the current status of the working directory and staging area and saves it for later use. This feature is useful whenever you're still working on unfinished content and need to switch branches without delay.
Stash work
-
To stash your working directory's current state, go to the Git panel menu and choose one of the following options:
-
Stash: All modified or staged files in working directory are added to the stash. Untracked files aren't added.
-
Stash (include Untracked): All files in the working directory, including those not yet tracked, are added to the stash.
-
-
Enter an optional message that will help you identify the stash for future retrieval.
After stashing, the Git panel interface refreshes to display the working directory that's been cleaned.
Retrieve a stash
-
To retrieve a stash and apply it to your working directory, go to the Git panel menu and choose one of the following options:
-
Apply Stash: Apply a selected stash to your working directory and keep the stash for later use.
-
Pop Stash: Apply a selected stash to your working directory and delete the stash from the stash stack.
Note
You can also choose to apply or pop the last stash that was added to the stash stack.
-
-
Select a stash to apply to the working directory.
The Git panel interface refreshes to display your working directory with the stash applied.
