Add a load balancer with Elastic Load Balancing for AWS CloudHSM(optional)
After you set up SSL/TLS offload with one web server, you can create more web servers and an Elastic Load Balancing load balancer that routes HTTPS traffic to the web servers. A load balancer can reduce the load on your individual web servers by balancing traffic across two or more servers. It can also increase the availability of your website because the load balancer monitors the health of your web servers and only routes traffic to healthy servers. If a web server fails, the load balancer automatically stops routing traffic to it.
Topics
Step 1. Create a subnet for a second web server
Before you can create another web server, you need to create a new subnet in the same VPC that contains your existing web server and AWS CloudHSM cluster.
To create a new subnet
-
Choose Create Subnet.
-
In the Create Subnet dialog box, do the following:
-
For Name tag, type a name for your subnet.
-
For VPC, choose the AWS CloudHSM VPC that contains your existing web server and AWS CloudHSM cluster.
-
For Availability Zone, choose an Availability Zone that is different from the one that contains your existing web server.
-
For IPv4 CIDR block, type the CIDR block to use for the subnet. For example, type
10.0.10.0/24. -
Choose Yes, Create.
-
-
Select the check box next to the public subnet that contains your existing web server. This is different from the public subnet that you created in the previous step.
-
In the content pane, choose the Route Table tab. Then choose the link for the route table.

-
Select the check box next to the route table.
-
Choose the Subnet Associations tab. Then choose Edit.
-
Select the check box next to the public subnet that you created earlier in this procedure. Then choose Save.
Step 2. Create the second web server
Complete the following steps to create a second web server with the same configuration as your existing web server.
To create a second web server
-
Open the Instances
section of the Amazon EC2 console at. -
Select the check box next to your existing web server instance.
-
Choose Actions, Image, and then Create Image.
-
In the Create Image dialog box, do the following:
-
For Image name, type a name for the image.
-
For Image description, type a description for the image.
-
Choose Create Image. This action reboots your existing web server.
-
Choose the View pending image ami-
<AMI
              ID>
link.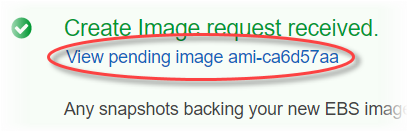
In the Status column, note your image status. When your image status is available (this might take several minutes), go to the next step.
-
-
In the navigation pane, choose Instances.
-
Select the check box next to your existing web server.
-
Choose Actions and choose Launch More Like This.
-
Choose Edit AMI.

-
In the left navigation pane, choose My AMIs. Then clear the text in the search box.
-
Next to your web server image, choose Select.
-
Choose Yes, I want to continue with this AMI (
<image
          name>
- ami-<AMI ID>). -
Choose Next.
-
Select an instance type, and then choose Next: Configure Instance Details.
-
For Step 3: Configure Instance Details, do the following:
-
For Network, choose the VPC that contains your existing web server.
-
For Subnet, choose the public subnet that you created for the second web server.
-
For Auto-assign Public IP, chooseEnable.
-
Change the remaining instance details as preferred. Then choose Next: Add Storage.
-
-
Change the storage settings as preferred. Then choose Next: Add Tags.
-
Add or edit tags as preferred. Then choose Next: Configure Security Group.
-
For Step 6: Configure Security Group, do the following:
-
For Assign a security group, choose Select an existing security group.
-
Select the check box next to the security group named cloudhsm-
<cluster ID>-sg. AWS CloudHSM created this security group on your behalf when you created the cluster. You must choose this security group to allow the web server instance to connect to the HSMs in the cluster. -
Select the check box next to the security group that allows inbound HTTPS traffic. You created this security group previously.
-
(Optional) Select the check box next to a security group that allows inbound SSH (for Linux) or RDP (for Windows) traffic from your network. That is, the security group must allow inbound TCP traffic on port 22 (for SSH on Linux) or port 3389 (for RDP on Windows). Otherwise, you cannot connect to your client instance. If you don't have a security group like this, you must create one and then assign it to your client instance later.
Choose Review and Launch.
-
-
Review your instance details, and then choose Launch.
-
Choose whether to launch your instance with an existing key pair, create a new key pair, or launch your instance without a key pair.
-
To use an existing key pair, do the following:
-
Choose Choose an existing key pair.
-
For Select a key pair, choose the key pair to use.
-
Select the check box next to I acknowledge that I have access to the selected private key file (
<private key file
                  name>
.pem), and that without this file, I won't be able to log into my instance.
-
-
To create a new key pair, do the following:
-
Choose Create a new key pair.
-
For Key pair name, type a key pair name.
-
Choose Download Key Pair and save the private key file in a secure and accessible location.
Warning
You cannot download the private key file again after this point. If you do not download the private key file now, you will be unable to access the client instance.
-
-
To launch your instance without a key pair, do the following:
-
Choose Proceed without a key pair.
-
Select the check box next to I acknowledge that I will not be able to connect to this instance unless I already know the password built into this AMI.
-
Choose Launch Instances.
-
Step 3. Create the load balancer
Complete the following steps to create an Elastic Load Balancing load balancer that routes HTTPS traffic to your web servers.
To create a load balancer
-
Open the Load balancers
section of the Amazon EC2 console. -
Choose Create Load Balancer.
-
In the Network Load Balancer section, choose Create.
-
For Step 1: Configure Load Balancer, do the following:
-
For Name, type a name for the load balancer that you are creating.
-
In the Listeners section, for Load Balancer Port, change the value to
443. -
In the Availability Zones section, for VPC, choose the VPC that contains your web servers.
-
In the Availability Zones section, choose the subnets that contain your web servers.
-
Choose Next: Configure Routing.
-
-
For Step 2: Configure Routing, do the following:
-
For Name, type a name for the target group that you are creating.
-
For Port, change the value to
443. -
Choose Next: Register Targets.
-
-
For Step 3: Register Targets, do the following:
-
In the Instances section, select the check boxes next to your web server instances. Then choose Add to registered.
-
Choose Next: Review.
-
-
Review your load balancer details, then choose Create.
-
When the load balancer has been successfully created, choose Close.
After you complete the preceding steps, the Amazon EC2 console shows your Elastic Load Balancing load balancer.
When your load balancer's state is active, you can verify that the load balancer is
working. That is, you can verify that it's sending HTTPS traffic to your web servers with
SSL/TLS offload with AWS CloudHSM. You can do this with a web browser or a tool such as OpenSSL s_client
To verify that your load balancer is working with a web browser
-
In the Amazon EC2 console, find the DNS name for the load balancer that you just created. Then select the DNS name and copy it.
-
Use a web browser such as Mozilla Firefox or Google Chrome to connect to your load balancer using the load balancer's DNS name. Ensure that the URL in the address bar begins with https://.
Tip
You can use a DNS service such as Amazon Route 53 to route your website's domain name (for example, https://www.example.com/) to your web server. For more information, see Routing Traffic to an Amazon EC2 Instance in the Amazon Route 53 Developer Guide or in the documentation for your DNS service.
-
Use your web browser to view the web server certificate. For more information, see the following:
-
For Mozilla Firefox, see View a Certificate
on the Mozilla Support website. -
For Google Chrome, see Understand Security Issues
on the Google Tools for Web Developers website.
Other web browsers might have similar features that you can use to view the web server certificate.
-
-
Ensure that the certificate is the one that you configured the web server to use.
To verify that your load balancer is working with OpenSSL s_client
-
Use the following OpenSSL command to connect to your load balancer using HTTPS. Replace
<DNS name>with the DNS name of your load balancer.openssl s_client -connect<DNS name>:443Tip
You can use a DNS service such as Amazon Route 53 to route your website's domain name (for example, https://www.example.com/) to your web server. For more information, see Routing Traffic to an Amazon EC2 Instance in the Amazon Route 53 Developer Guide or in the documentation for your DNS service.
-
Ensure that the certificate is the one that you configured the web server to use.
You now have a website that is secured with HTTPS, with the web server's private key stored in an HSM in your AWS CloudHSM cluster. Your website has two web servers and a load balancer to help improve efficiency and availability.
