Setting up CodeCatalyst
There are two types of space that you can set up in CodeCatalyst: spaces that support AWS Builder ID users, and creating a space that supports identity federation, where SSO users and groups are managed in IAM Identity Center. Users in an AWS Builder ID space sign in to CodeCatalyst with their AWS Builder ID, and users in an enterprise space sign in to CodeCatalyst using the SSO portal for the company associated with the space.
The steps to set up and administer a AWS Builder ID space are provided in this guide. To work with a CodeCatalyst AWS Builder ID space, you will set up CodeCatalyst using the user settings and AWS Builder ID that you use to sign in to CodeCatalyst.
The steps to set up and administer a space that supports identity federation are provided in the CodeCatalyst Administrator Guide. To work with spaces that are set up for identity federation, see Setup and administration for CodeCatalyst spaces in the Amazon CodeCatalyst Administrator Guide.
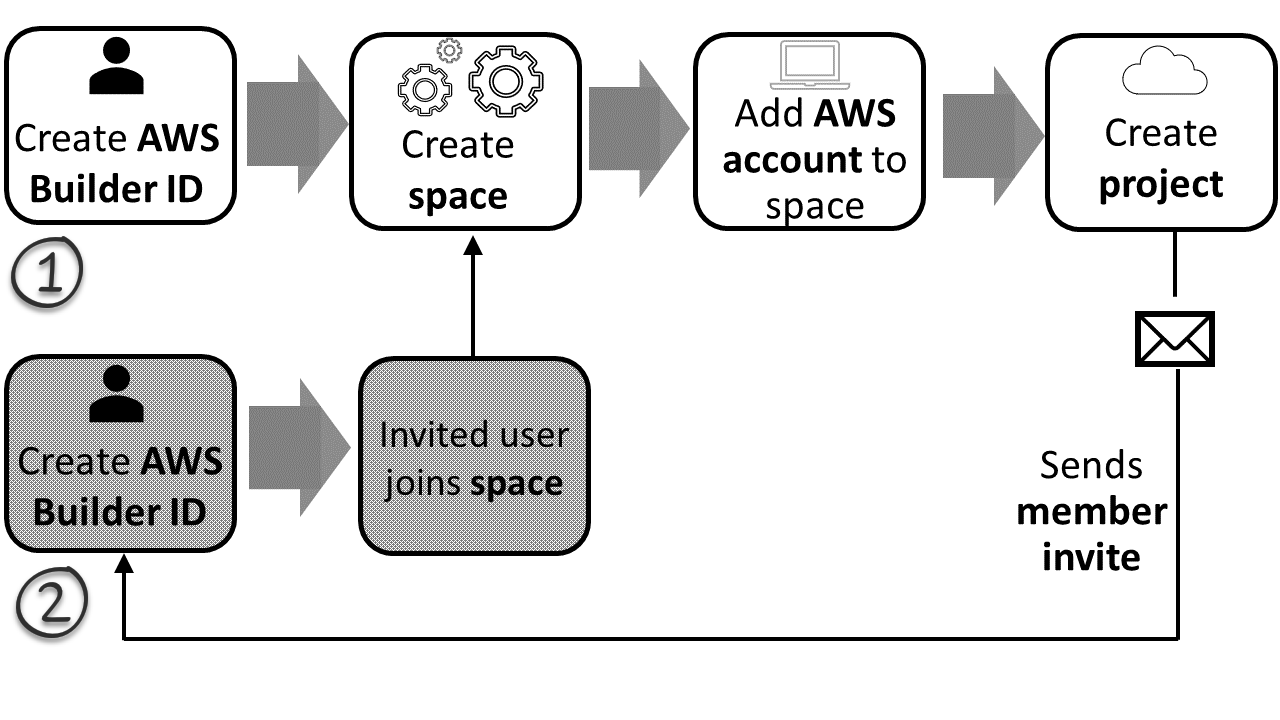
This section provides two common paths for setting up to work in Amazon CodeCatalyst with an AWS Builder ID space: creating a space and a project as the first user, and accepting an invitation to an existing space or project. These setup workflows are necessarily quite different. The following diagram shows both sign-up processes as follows:
There are two common paths for setting up to work in Amazon CodeCatalyst: creating a space and a project as the first user, and accepting an invitation to an existing space or project. These setup workflows are necessarily quite different. The following diagram shows both sign-up processes as follows:
-
In the first case, you create and set up a space for your company, team, or group, and create a project before inviting others to these resources. An AWS account must be provided for billing purposes, where you can still default to the Free tier.
-
In the second case, if you join CodeCatalyst by accepting an invitation to a project, someone else has already created a space and project for you. However, you'll still want to configure your profile so that you're ready to start working with others.
Tip
CodeCatalyst uses spaces to group projects and resources. When you first sign up for CodeCatalyst, you'll be prompted to create a space as well as a project.
Whether you sign up to create a space and project or you sign up as part of accepting an invitation, you create an AWS Builder ID that you will use to log in to CodeCatalyst. To create an AWS Builder ID, you provide the full name, password, and email address that you use to sign in to AWS applications. You use the email and password to sign in to CodeCatalyst after this point. You can also use this AWS Builder ID to log in to other applications that use AWS Builder ID credentials.
In CodeCatalyst and in AWS Builder ID, a profile is generated based on your login information. Your profile contains your CodeCatalyst preferences for language and notification settings in your CodeCatalyst projects.
Tip
If you encounter any problems while signing up for your Amazon CodeCatalyst profile, follow the steps provided on that page. If you need additional help, see Problems signing up.
Topics
- Sign up to create your first space and your development role
- Accepting an invitation and creating your AWS Builder ID
- Sign in with your AWS Builder ID
- Accept an email invitation to sign in with SSO
- Sign in with SSO
- View all spaces and projects for a user
- Viewing and managing CodeCatalyst profiles
- Setting up to use the AWS CLI with CodeCatalyst
