Enable live media streaming in your Amazon Connect instance
Live media streaming (customer audio streams) is not enabled by default. You can enable customer audio streams from the settings page for your instance.
To enable live media streaming
-
Open the Amazon Connect console at https://console.aws.amazon.com/connect/
. -
On the instances page, choose the instance alias. The instance alias is also your instance name, which appears in your Amazon Connect URL. The following image shows the Amazon Connect virtual contact center instances page, with a box around the instance alias.
-
In the navigation pane, choose Data storage.
-
Under Live media streaming, choose Edit. Choose Enable live media streaming.
-
Enter a prefix for the Kinesis Video Streams created for your customer audio. This prefix makes it easier for you to identify the stream with the data.
-
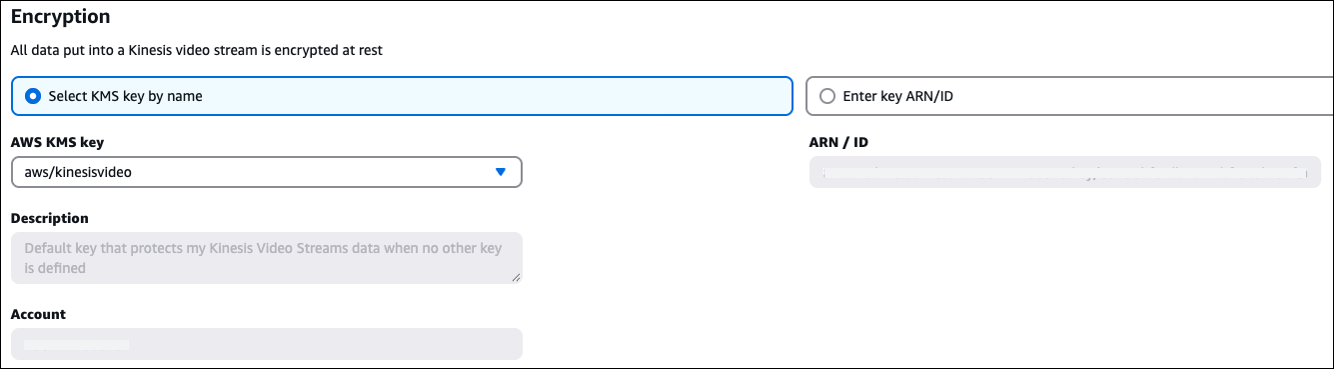
Data is encrypted before it's written to the Kinesis Video Streams stream storage layer, and it's decrypted after it's retrieved from storage. As a result, your data is always encrypted at rest within the Kinesis Video Streams service. Choose the KMS key used to encrypt the data within Kinesis Video Streams as shown in the following image.
When you choose to enter your own key, make note of the following restrictions:
-
The KMS key must be in the same Region as the instance.
-
The KMS key should be either:
A customer managed key
OR
The AWS managed key for Kinesis Video Streams (aws/kinesisvideo).
It should not be any of the AWS managed keys automatically created for other services (for example, aws/connect, aws/lambda, aws/kinesis).
-
The grant provisioned for the key by Amazon Connect shouldn't be revoked. These grants would have
GranteePrincipalof the format:arn:aws:iam::customer-account-id:role/aws-service-role/connect.amazonaws.com/AWSServiceRoleForAmazonConnect_hash_suffix
-
-
Specify a number and unit for the Data retention period.
Important
If you select No data retention, data is not retained and is available to be consumed for only 5 minutes. This is the default minimum time that Kinesis retains data.
Because Amazon Connect uses Kinesis for streaming, Kinesis Video Streams quotas apply.
-
Choose Save under Live media streaming, and then choose Save at the bottom of the page.
After you enable live media streaming, add Start media streaming and Stop media streaming blocks to your flow. Configure those blocks to specify what audio you want to capture. For instructions and an example, see Example flow for testing live media streaming in Amazon Connect.
