Enable outbound campaigns and Customer Profiles
To enable Amazon Connect Customer Profiles and Amazon Connect outbound campaigns
-
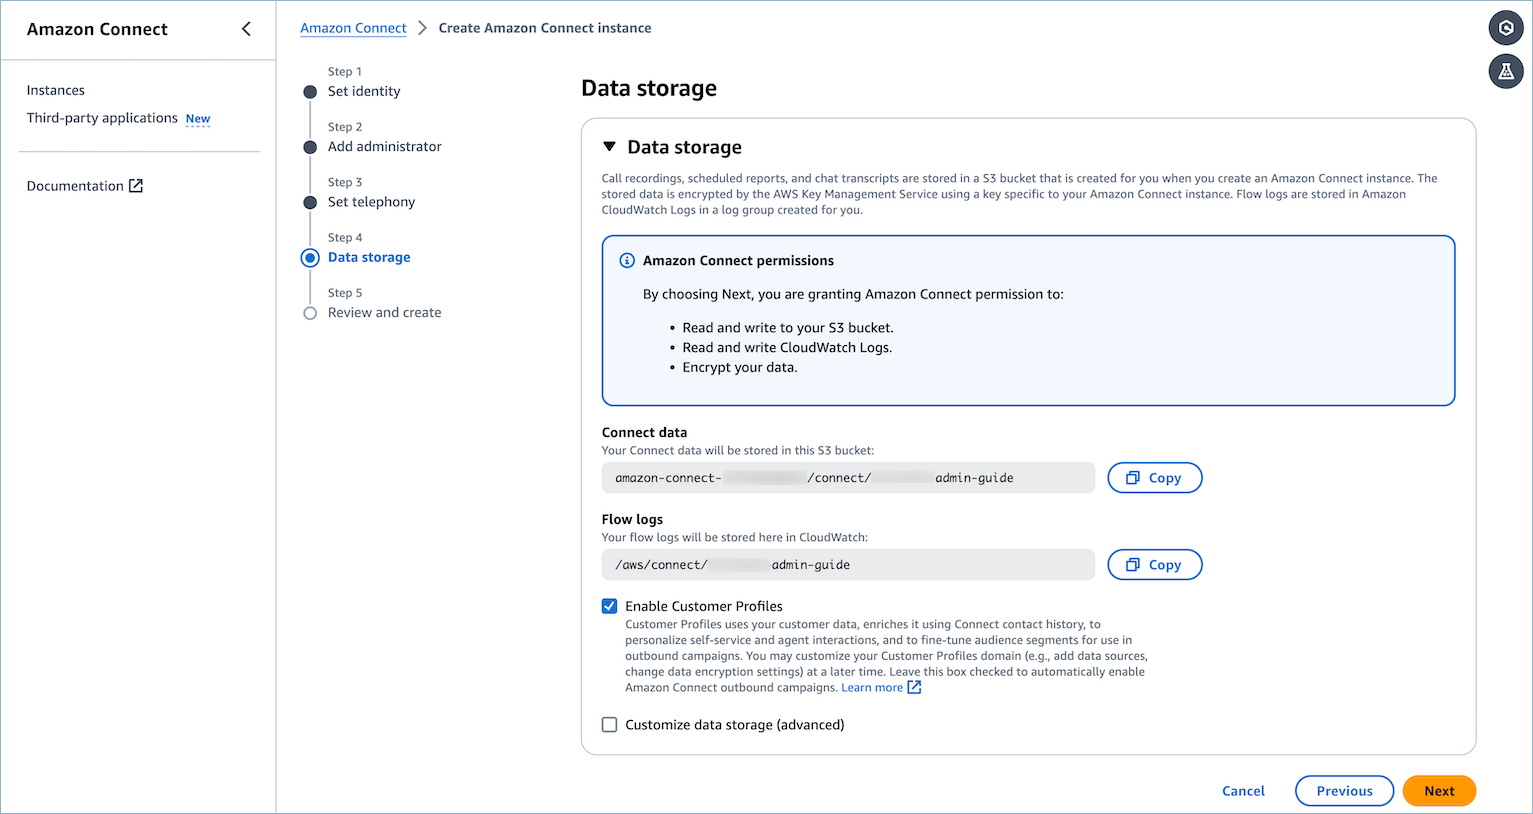
When creating an Amazon Connect instance, when you get to Step 4 - Data storage, keep Enable Customer Profiles selected, as shown in the following image. This option enables Amazon Connect Customer Profiles and outbound campaigns.
-
Select Customize data storage (advanced) to select a customer managed key for Customer Profiles and outbound campaigns from a dropdown list. An AWS owned key is used if you don't provide a custom key.
-
When a Amazon Connect instance is created successfully, outbound campaigns and Customer Profiles is enabled by default.
Existing customers enable outbound campaigns
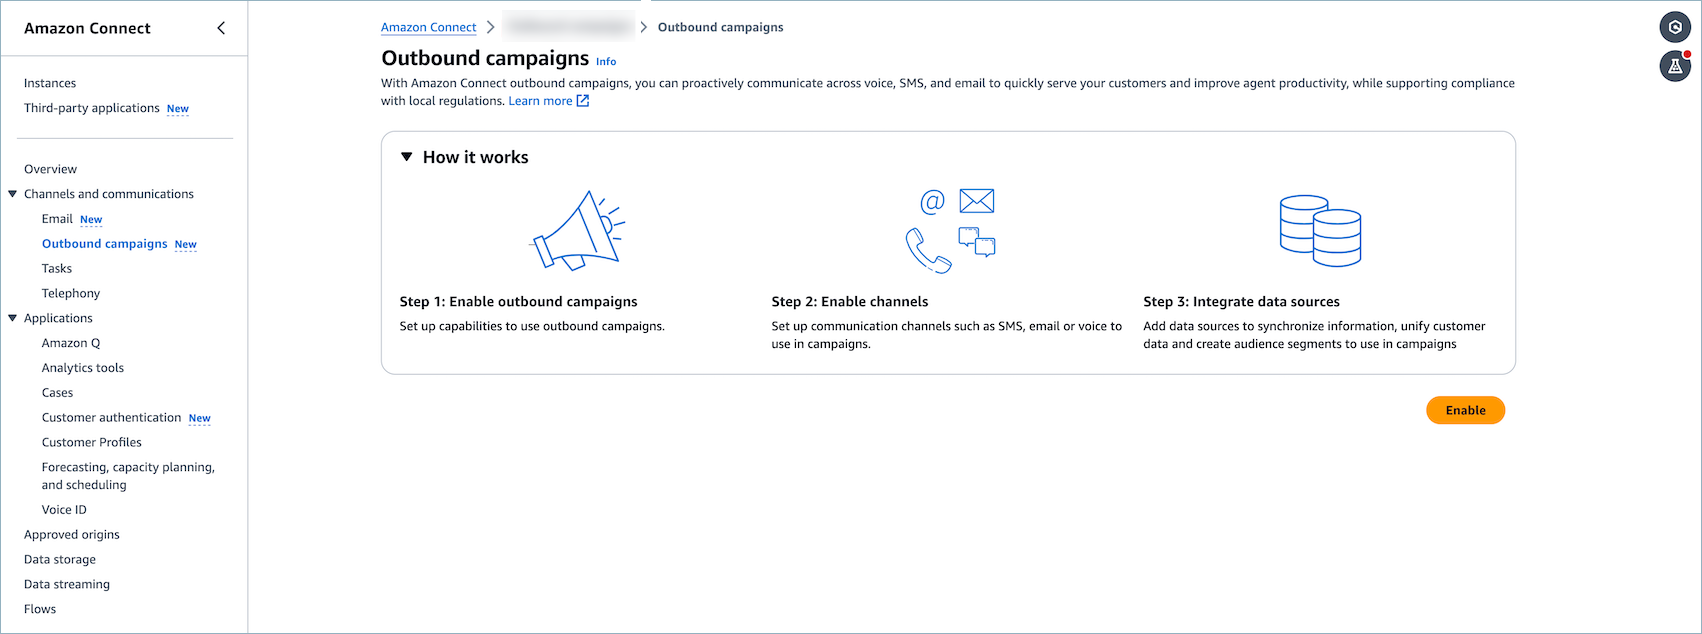
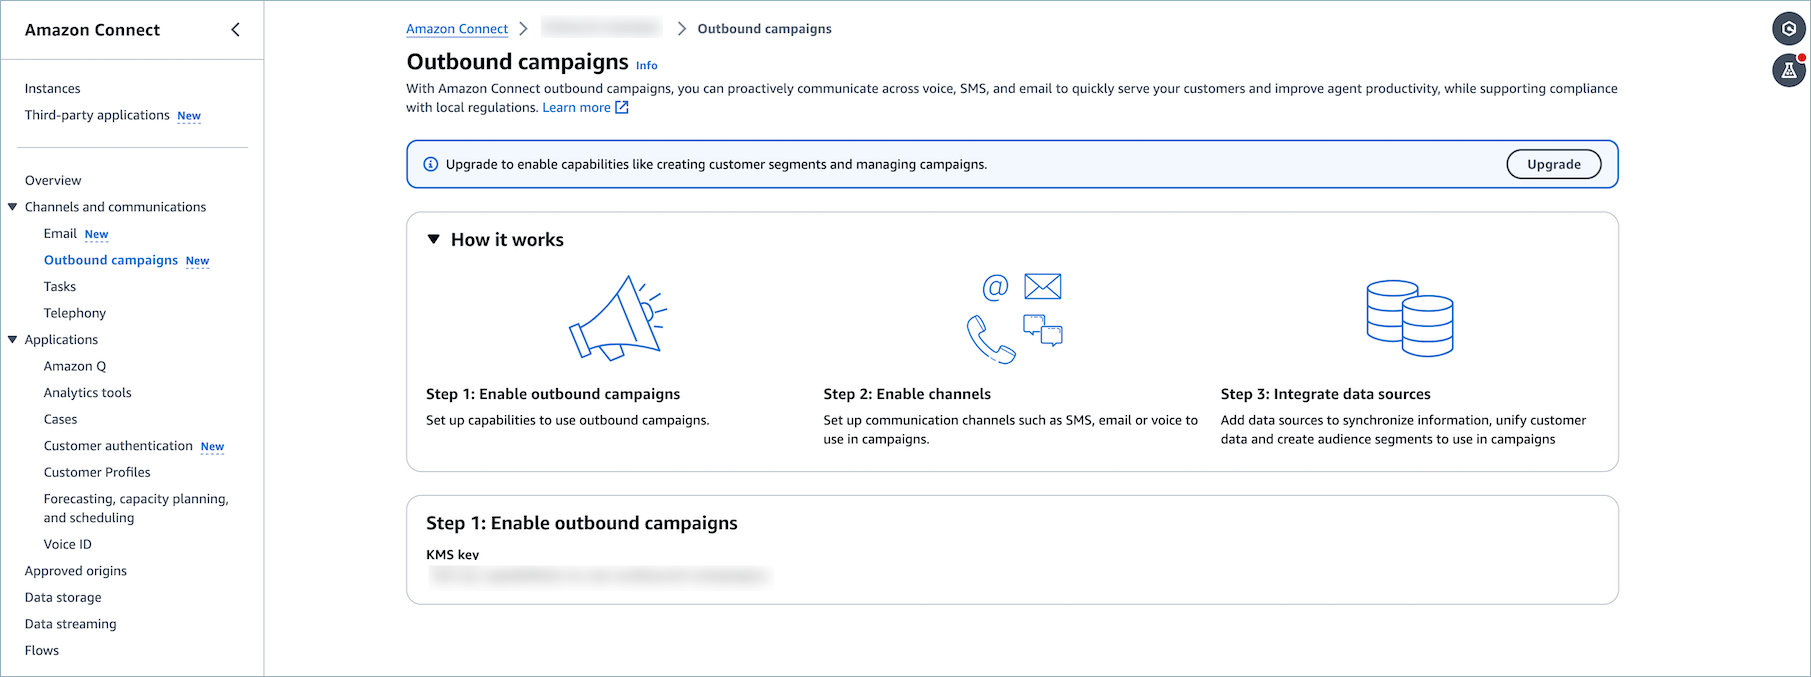
To enable Amazon Connect Outbound campaigns
-
Select the Amazon Connect instance you wish to enable outbound campaigns for.
-
Choose Outbound campaigns in the left navigation pane.
-
If you are setting up outbound campaigns for the first time, you will see an Enable button.
-
Choose Enable to go to the KMS configuration page for outbound campaigns.

Note
The KMS configuration will only be used for the outbound campaigns configuration and the KMS key cannot be updated once it is created.
-
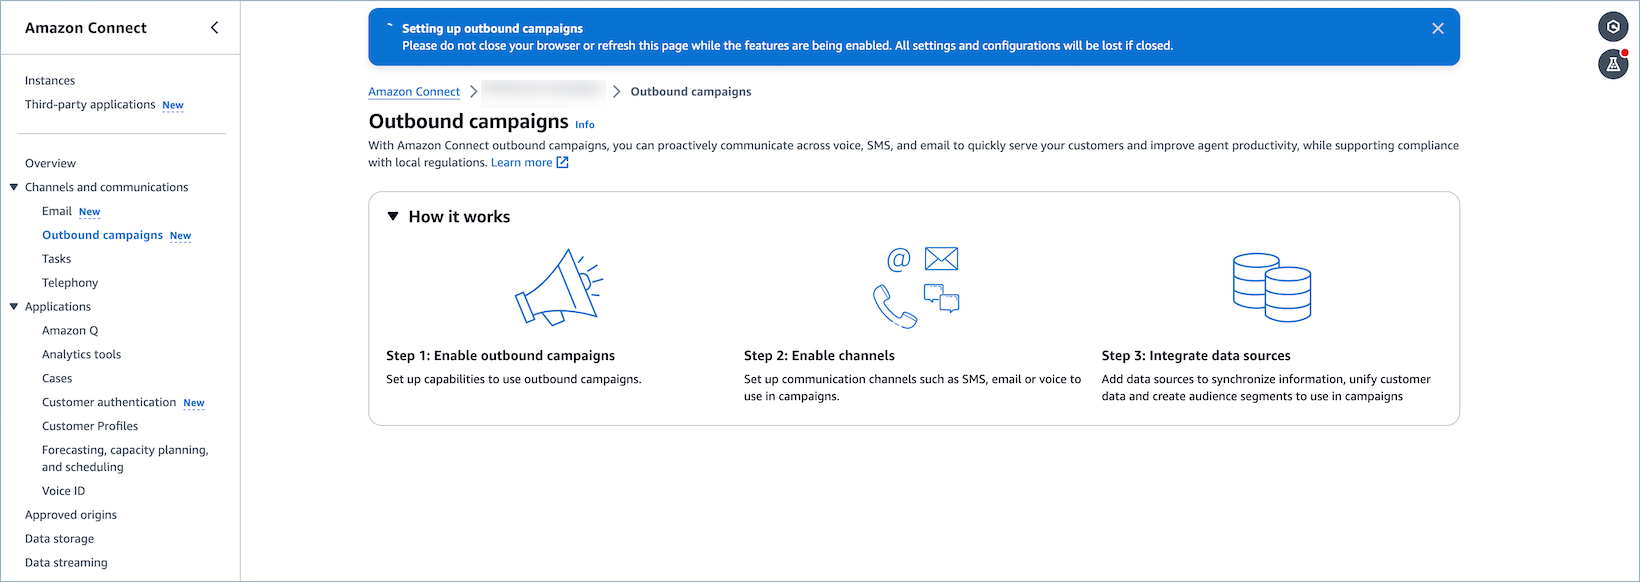
Choose Enable outbound campaigns. Upon enabling outbound campaigns, a Customer Profiles domain, and an Amazon Q in Connect knowledge base with KnowledgeType
MESSAGE_TEMPLATESwill be created if none existed previously. -
You will be redirected to the home page and see a notification bar indicating that resources are being created.
-
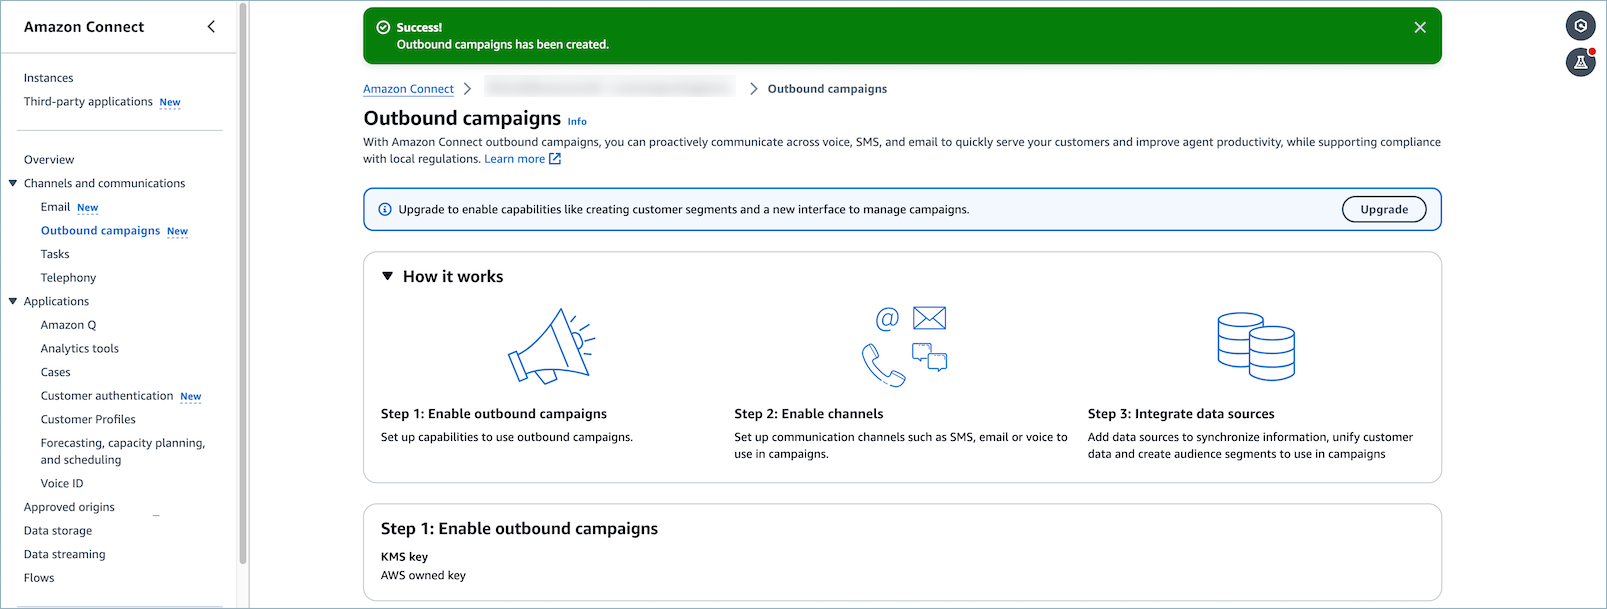
A success banner will be display upon successfully enabling outbound campaigns.
-
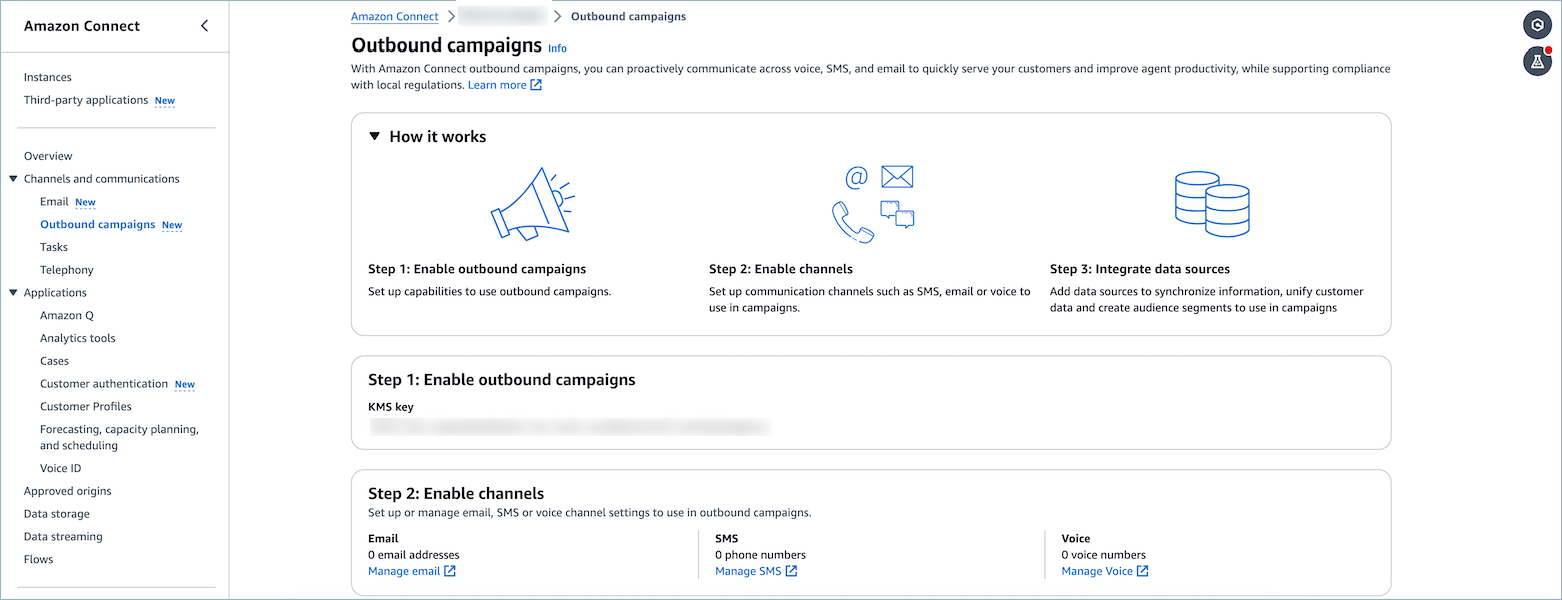
After successfully enabling an outbound campaign, and configuring a KMS key, the KMS (AWS Key Management Service) key that was previously selected for the campaign will be displayed.
-
Choose Manage email to be redirected to the AWS Connect Email console. In the AWS Connect Email console, you can set up and configure your email domain, including verifying the domain, creating email addresses, and managing email sending and receiving settings.
-
Choose Manage SMS to be directed to the AWS End User Messaging SMS console. In the AWS End User Messaging SMS, you can configure and set up SMS phone numbers for your application, including purchasing numbers, managing sender IDs, and configuring SMS messaging settings.
-
Choose Manage voice to be redirected to the Amazon Connect admin website. In the Amazon Connect admin website, you can claim and manage voice phone numbers for your contact center, set up call routing, and configure various voice-related features.
To upgrade outbound campaigns if you have a Amazon Connect instance with outbound campaigns enabled
-
Select the Amazon Connect instance you wish to upgrade outbound campaigns for.
-
Choose Outbound campaigns.
-
If outbound campaigns was previously enabled, the Upgrade button will be displayed.
Note
-
Upgrading outbound campaigns will allow you to use segmentation and orchestration capabilities in the Amazon Connect admin website
-
Upgrading outbound campaigns will update the current outbound campaigns page to new experience.
-
-
Choose Upgrade.
-
After successfully upgrading an outbound campaign, the KMS (AWS Key Management Service) key that was previously selected for the campaign will be displayed.
-
Choose Manage email to be redirected to the Amazon Connect Email console. In the Amazon Connect Email console, you can set up and configure your email domain, including verifying the domain, creating email addresses, and managing email sending and receiving settings.
-
Choose Manage SMS to be directed to the Amazon End User Messaging console. In the End User Messaging console, you can configure and set up SMS phone numbers for your application, including purchasing numbers, managing sender IDs, and configuring SMS messaging settings.
-
Choose Manage voice to be redirected to the Amazon Connect admin website. In the Amazon Connect admin website, you can claim and manage voice phone numbers for your contact center, set up call routing, and configure various voice-related features.
How to delete Outbound campaigns configuration
You can delete the Outbound campaigns configuration by using the Outbound campaigns
DeleteConnectInstanceConfig API. The option to toggle the Outbound campaigns
configuration on/off has been removed. The only way to turn off the Outbound campaigns feature in the
UI is to delete your Amazon Connect instance.
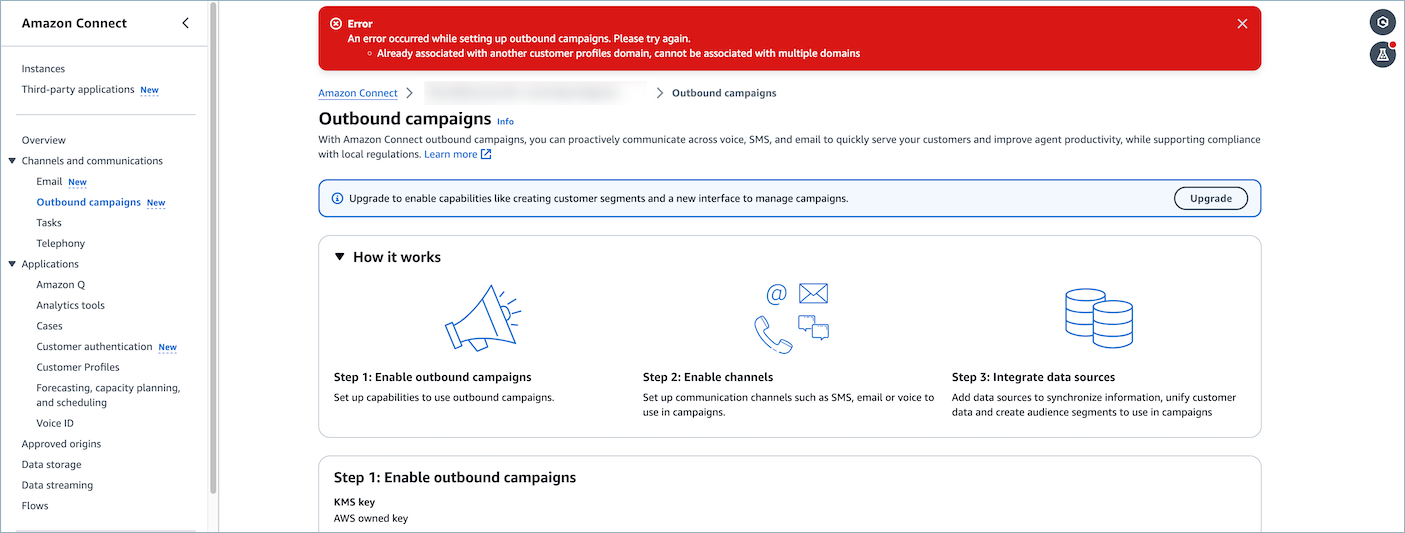
Error state and troubleshooting
When creating instance if you see a warning banner, you are either missing some permissions to enable these features or some failed to be created. You can configure those permissions at a different time.

If you navigate to the Outbound campaigns Settings page and see the following banner, you do not have the required permissions to access total communications limits.
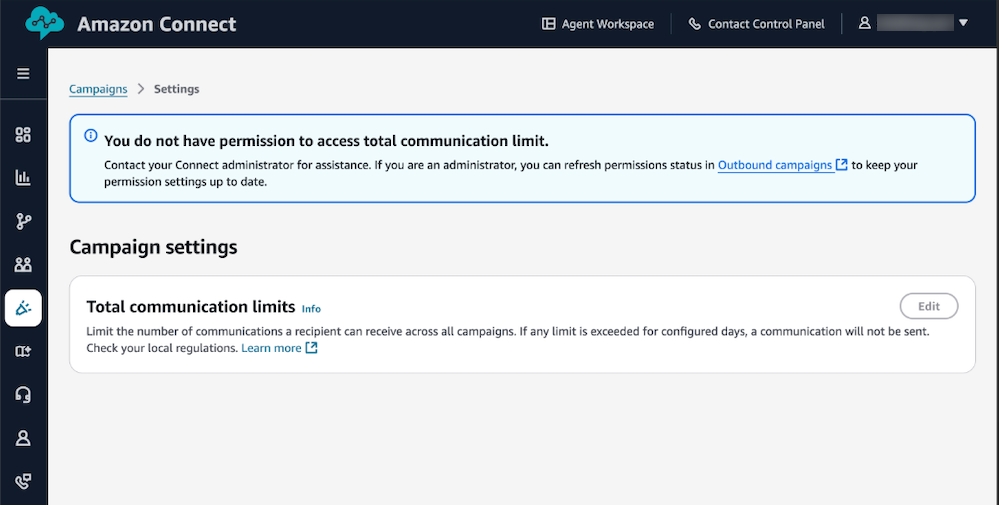
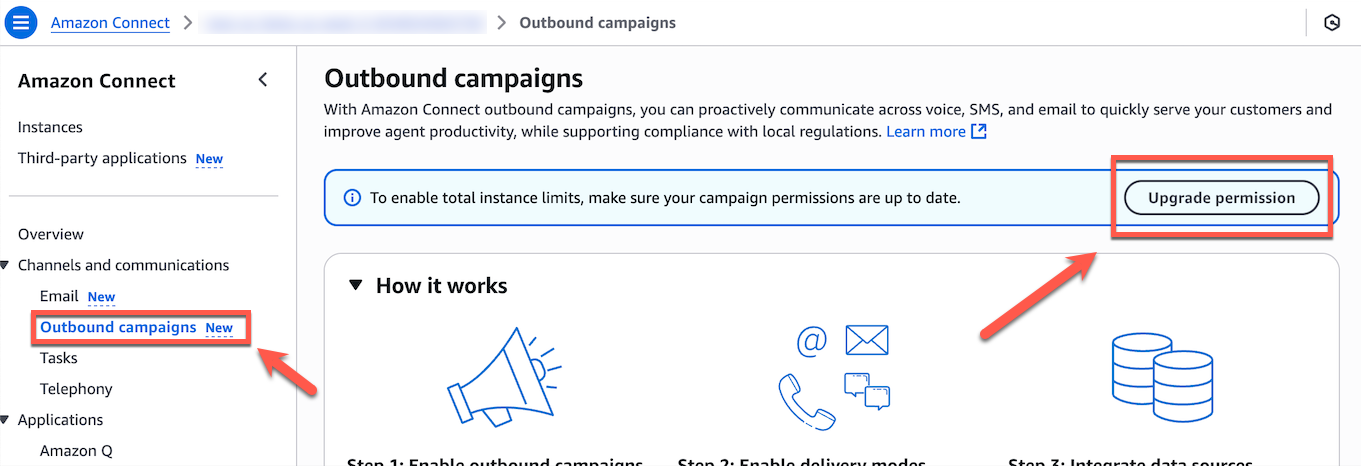
In order to enable total limits permissions, you can navigate to the Amazon Connect admin website and under Outbound campaigns, choose Upgrade permission.
| Error message | Cause | Resolution | Screenshot |
|---|---|---|---|
| Already associated with another customer profiles domain, cannot be associated with multiple domains. | An Outbound campaign can only be associated to one customer profile or one knowledge base at a time. | You can either use the associated Customer Profiles domain, go back to the Customer Profiles domain page, and
re-associate the domain, or you can find out which domain is associated by using the
connect-campaign:ListConnectInstanceIntegrations API to find the Customer Profiles domain
Arn. If needed, you can delete the integration between Outbound campaigns and Customer Profiles and
re-associate it by deleting the integration by using the
connect-campaigns:DeleteConnectInstanceIntegration API. |
|
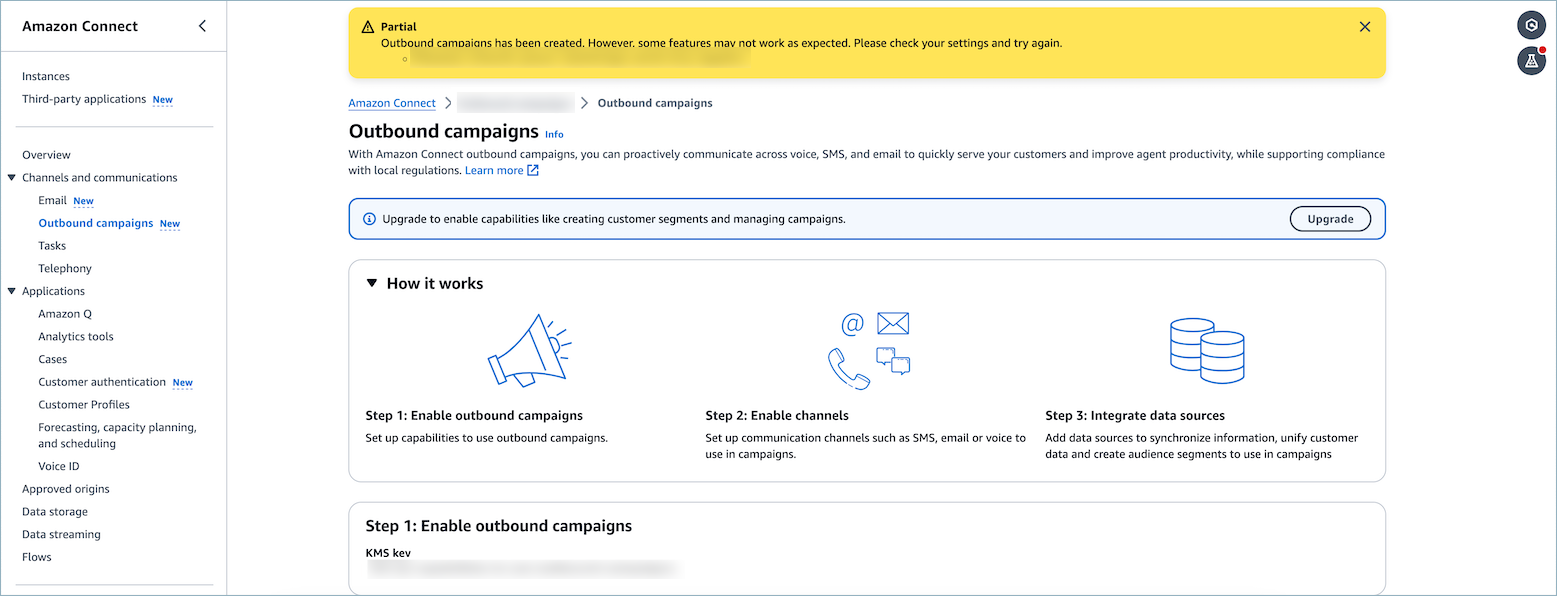
| Outbound campaigns has been created. However, some features may not work as expected. Please check your settings and try again. | A resource failed to configure correctly. However, some resources succeeded. The error message will help indicate to the customer what went wrong. | Follow the instructions on the warn/error banner. |
|
