Import historical data for forecasting in Amazon Connect
Amazon Connect requires sufficient historical data to learn the contact pattern and make good forecasts. By default, it uses historical contact data in Amazon Connect for forecasting. You can import historical data from external applications for Amazon Connect to use for forecasting. When you import data, Amazon Connect uses both its data and the imported data for forecasting. However, the imported data takes precedence over the Amazon Connect data.
When to import data
We recommend importing historical data from external applications in the following use cases:
-
Insufficient historical data in Amazon Connect. If you have less than one year of historical data in Amazon Connect, we strongly recommend that you extract historical data from your previous system and upload the data to Amazon Connect. It is fine to have data split between your Amazon Connect data and uploaded historical data. For example, if you want to generate forecasts on January 1, 2022, and you have nine months of historical in Amazon Connect (from April 1 to December 31, 2021), we recommend importing three additional months of data (from January 1 to March 31, 2022) to make a continuous one-year historical data set available.
-
Incorrect historical data in Amazon Connect. If the historical contact pattern is incorrect (for example, the contact volume is abnormally low on the day of a wide-spread power outage in the contact center), you can import data that is more representative to override historical data and correct for the anomaly.
If you have more than one year of historical data in Amazon Connect, you can choose to skip data import and start creating forecasts.
Important things to know
-
The data file must be a CSV file and it must be in the required format. If the file format and data don't meet the requirements, the upload does not work. We recommend downloading and using the template provided through the Amazon Connect admin website (see step 4 in How to import historical data) to help you prepare the historical data.
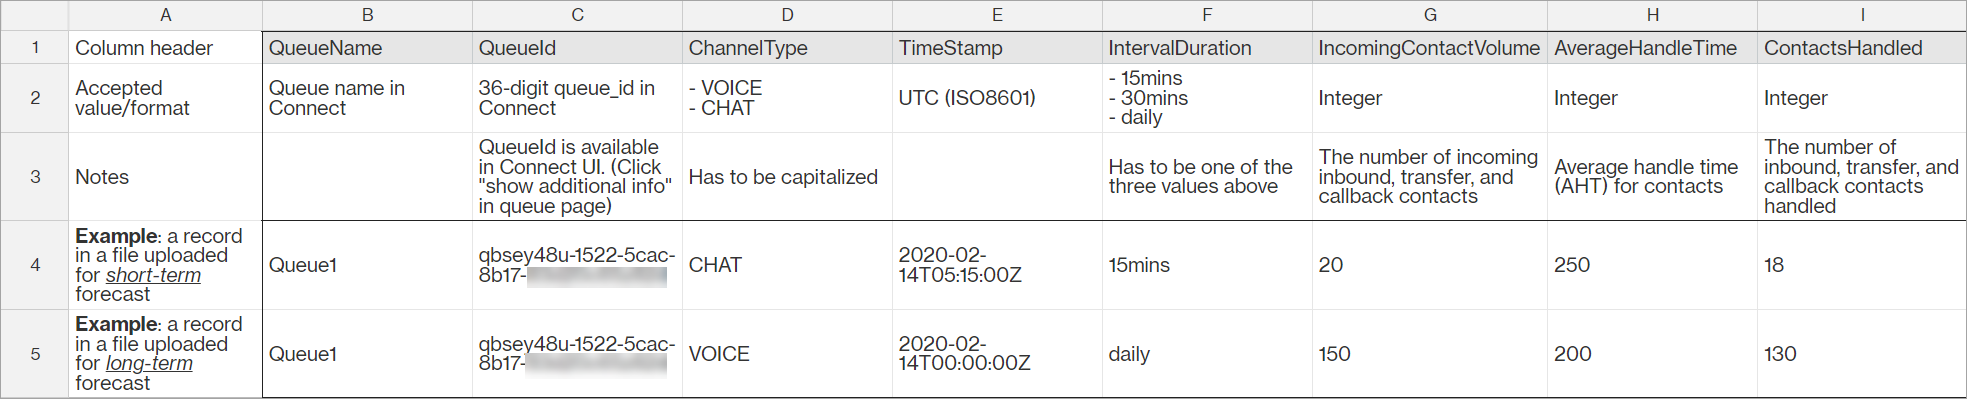
The following image shows an example of the CSV template. There are headings in the first row for
QueueName,QueueId,ChannelType, and so on.
Following are the requirements for imported data:
-
QueueName: Enter the Amazon Connect queue name. -
QueueId: Enter the Amazon Connect queue ID. To find the queue ID in the Amazon Connect admin website, on the left navigation, go to Routing, Queues, choose the queue, select Show additional queue information. The queue ID is the last number after/queue/. -
ChannelType: EnterCHATorVOICE. You must capitalize the channel type. -
TimeStamp: Enter the timestamp in ISO8601 format. ForDailyinterval data, the time value must be midnight in the selected time zone. -
IntervalDuration: Enter15minsor30minsfor short-term forecast, depending on your forecast and schedule interval. Enterdailyfor long-term forecast. -
IncomingContactVolume: Enter the number of inbound, transfer, and callback contacts as an integer. -
AverageHandleTime: Enter the amount of average handle time (in seconds) as type double/decimal. -
ContactsHandled: Enter the number of inbound, transfer, and callback contacts handled as an integer.
-
-
You can import multiple files. You do not have to consolidate all data in one big file. You can divide data by year, queue, interval duration types, and more, per your preference.
If duplicate data are found across multiple files, the last uploaded records are used. For example:
-
You have the original historical data (from Amazon Connect) from 7/1 to 8/1.
-
You uploaded a new historical data file X to override 7/10 to 8/1.
-
You uploaded another new historical file Y to override 7/15 to 8/1.
-
And now, the historical data baseline is: 7/1 to 7/9 from original, 7/10 to 7/14 from file X, 7/15 to 8/1 from file Y.
-
-
You need to upload historical data separately for short-term and long-term forecast.
-
Data aggregated in 15- or 30-minute intervals is used for short-term forecasting.
-
Data aggregated at daily grain is used for long-term forecasting.
-
For example, if you only upload data in 15- or 30-minute interval, you won't be able to generate long-term forecasts.
-
The following special characters are allowed in the CSV file: -, _, ., (, and ). Space is allowed.
The following image shows an example of what the data looks like in a CSV file that has been opened with Excel.
How to import historical data
-
Log in to the Amazon Connect admin website with an account that has security profile permissions for Analytics, Forecasting - Edit.
For more information, see Assign permissions.
-
On the Amazon Connect navigation menu, select Analytics and optimization, Forecasting, and then choose the Import Data tab.
-
Choose Upload data.
-
On the Upload historical data dialog box, choose download the .csv template for historical data.
-
Add historical data to the CSV file, and then choose Upload file to upload it. Choose Apply.
-
If the upload fails, choose download details to view the error log message for more information. The following image of the Forecasts page shows the location of the download details link, next to the Failed status message.

The following image shows the download details file opened by using Notepad. It indicates the error is in Row 2, the QueueId is not valid.

-
If the forecast was uploaded successfully, its Status = Complete and Date uploaded = today.
Delete imported historical data
You can delete previously imported historical data in Amazon Connect.
Note
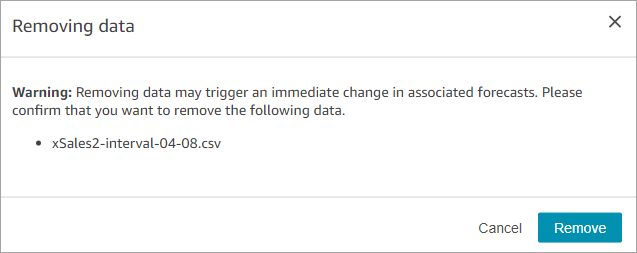
Deleting or adding historical data triggers an immediate change in associated forecasts because this action changes the historical data baseline that the model is trained for.
The following image shows an example warning message about the consequences of removing data.
After the imported historical data is deleted, the last previously uploaded data is used for the baseline. Take the previous example:
-
You have the original historical data (from Amazon Connect) from 7/1 to 8/1.
-
You uploaded a new historical data file X to override 7/10 to 8/1.
-
You uploaded another new historical file Y to override 7/15 to 8/1.
-
And now, the historical data baseline is: 7/1 to 7/9 from original, 7/10 to 7/14 from file X, 7/15 to 8/1 from file Y.
-
If:
-
You deleted file Y, the baseline will be: 7/1 to 7/9 from original, 7/10 to 8/1 from X.
-
You deleted file X, the baseline will be: 7/1 to 7/14 from original, 7/15 to 8/1 is from Y.
-
