Set up integration for Shopify to provide periodic updates to Amazon Connect Customer Profiles
To provide periodic updates to Amazon Connect Customer Profiles, you can integrate with Shopify using Amazon AppIntegrations. You first set up the connection in Amazon Connect and Shopify, and then verify the Shopify integration.
Set up the connection in Amazon Connect and Shopify
-
Open the Amazon Connect console at https://console.aws.amazon.com/connect/
. On the instances page, choose the instance alias. The instance alias is also your instance name, which appears in your Amazon Connect URL. The following image shows the Amazon Connect virtual contact center instances page, with a box around the instance alias.

-
In the navigation pane, choose Customer profiles.
-
On the Customer profiles configuration page, choose Add integration.

-
On the Select source page, choose Shopify. Review the application requirements that are listed on the Select application page.

-
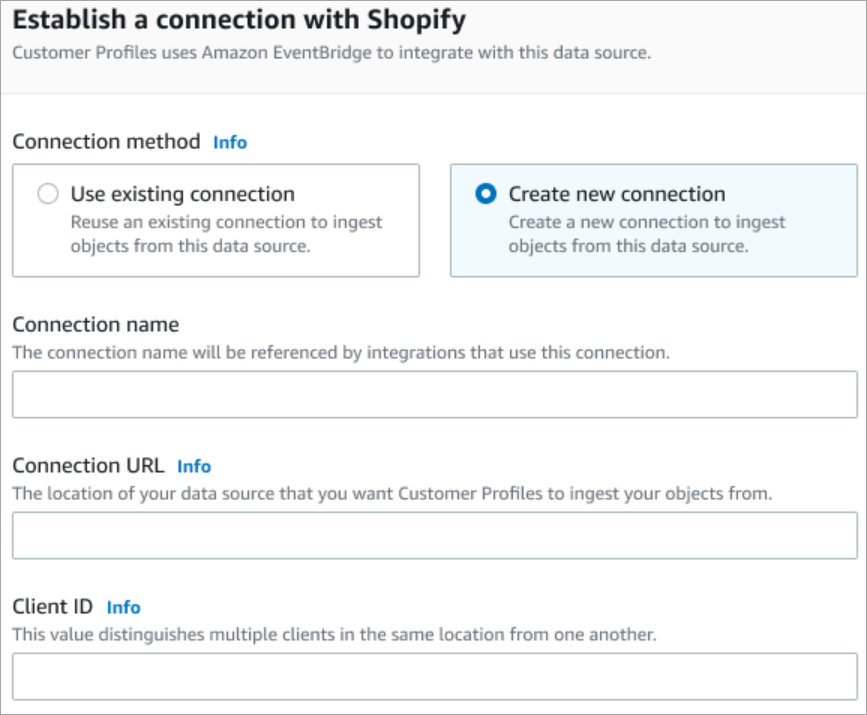
On the Establish connection page, choose one of the following:
-
Use existing connection: This allows you to reuse existing Amazon EventBridge resources that you may have created in your AWS account.
-
Create new connection: Enter the information required by the external application.
-
Connection name: Provide a name for your connection. The connection name is referenced by integrations that use this connection.
-
Connection URL: Enter your application connection URL. This URL is used for deep-linking into the objects created in your external application. The connection URL is the Shopify Partner app URL available on the application website.
To find your Shopify Partner app URL:
-
Log in to your partners.shopify.com account.
-
Go to your app.
-
Copy the URL from your browser.
-
-
Client ID: Enter your application client ID. This is a string that uniquely distinguishes the client in your external application. This client ID is the Source Name available on the application website. You use the ID that you specify here to identify the client that you want Customer Profiles to ingest your objects from. Your client ID may be available after following the Source setup steps.
To find your source name:
-
Log in to your partners.shopify.com account.
-
Go to your app.
-
Copy the source name from your Amazon EventBridge event source.
-
-
-
-
On the Source set up page, copy your AWS account ID to your clipboard, and then choose Log in to Shopify.
-
Use the following instructions to set up Shopify:
-
Log in to partners.shopify.com.
-
Under Amazon EventBridge, choose Create source.
-
Paste in your AWS account ID and select your AWS Region.
-
After you set up the event source destination, return to Customer Profiles. You will see an alert that indicates Amazon Connect has successfully connected with Shopify.
-
-
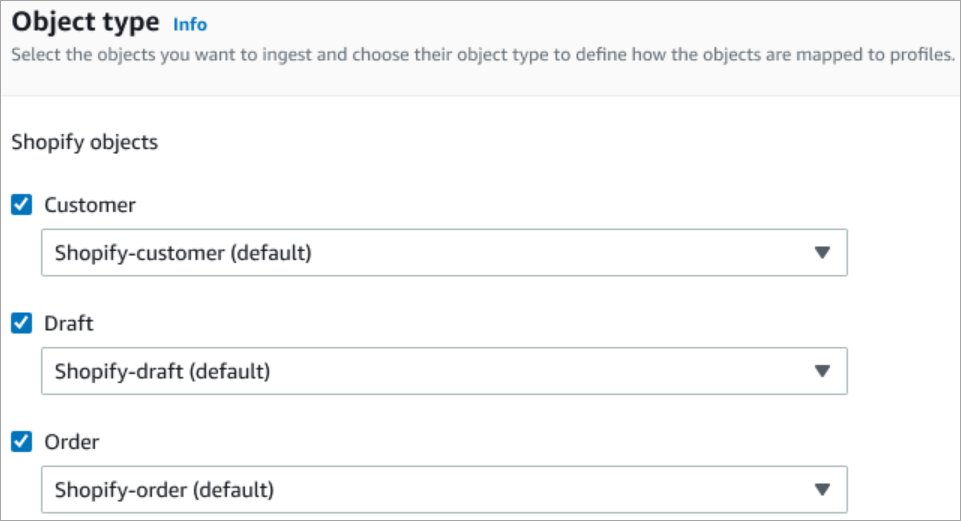
On the Integration options page, choose which source objects you want to ingest and select their object type.
Object types store your ingested data. They also define how objects from your integrations are mapped to profiles when they are ingested. Customer Profiles provides default object type templates you can use that define how attributes in your source objects are mapped to the standard objects in Customer Profiles. You can also use the object mappings that you've created from the PutProfileObjectType.
-
For the Ingestion start date, Customer Profiles starts ingesting records created after the integration is added.
Note
If you need historical records, you can use Amazon S3 as an integration source to import them.
-
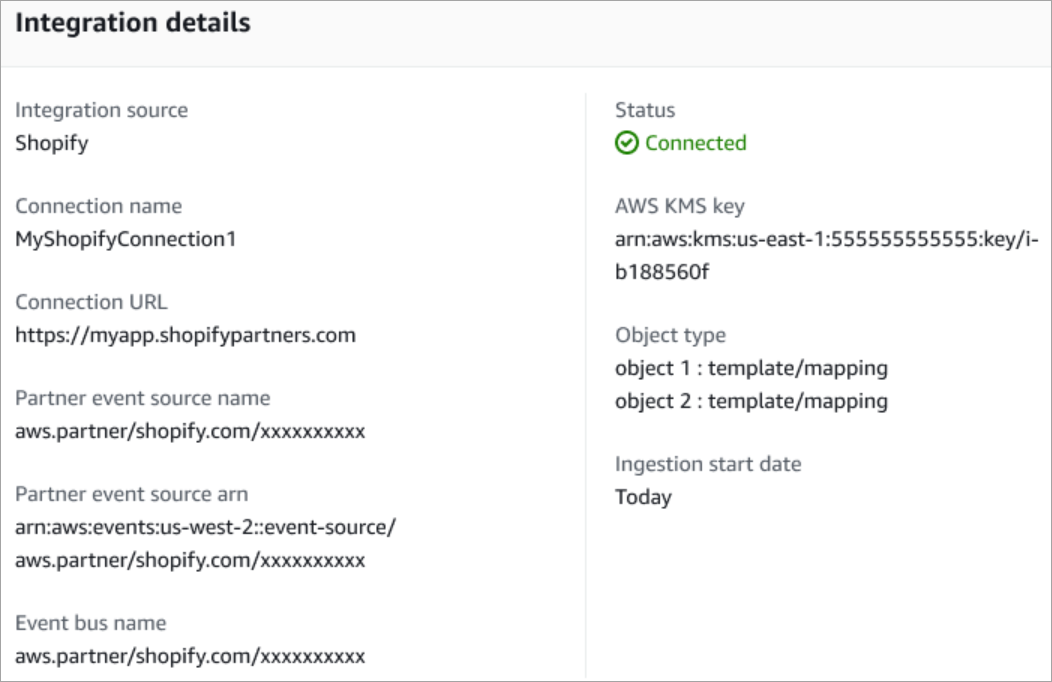
On the Review and integrate page, check that the Connection status says Connected, and then choose Add integration.
Note
After adding this integration, you need to set up webhook subscriptions to allow events to start flowing into this integration.
-
After the integration is set up, back on the Customer profiles configuration page, the Integrations section displays which integrations are currently set up. The Last run and Integration health are not currently available for this type of integration.
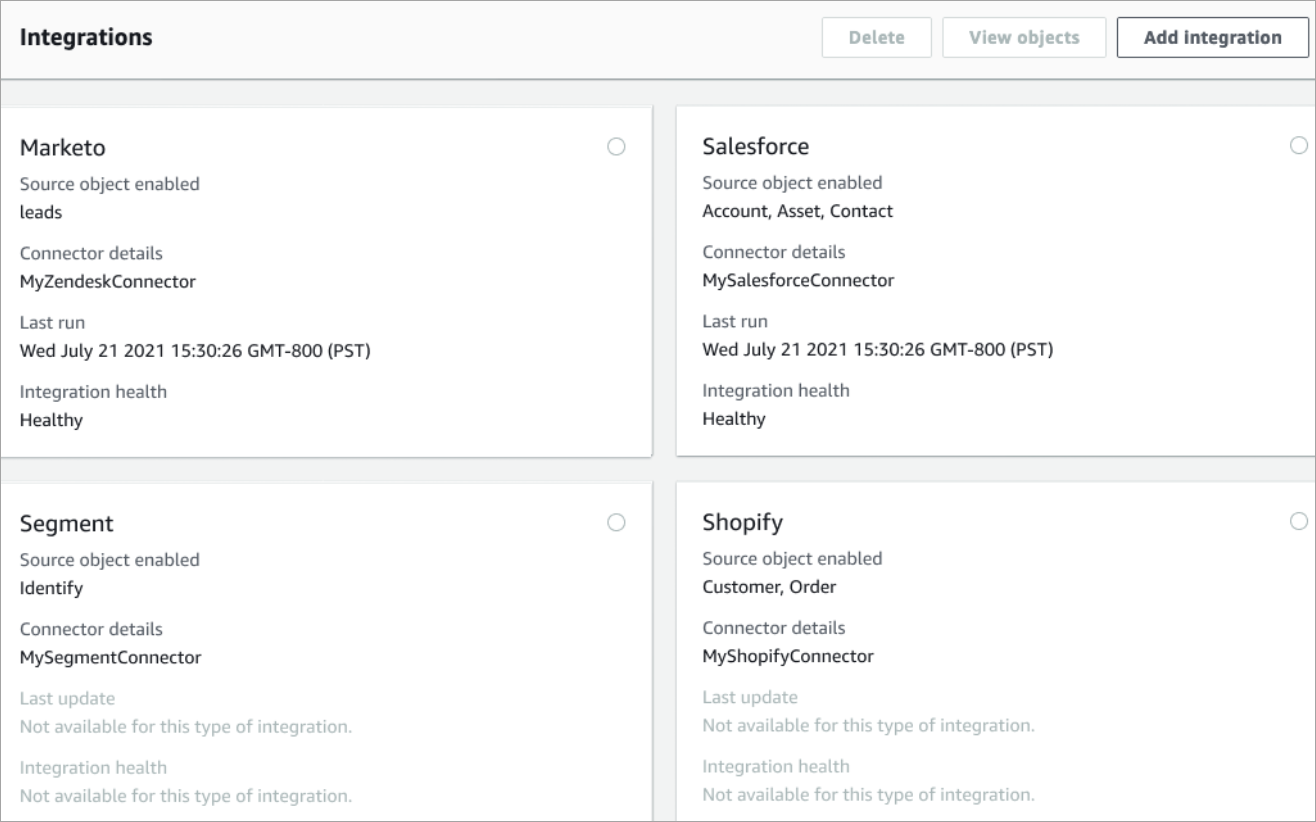
To see what data is being sent, choose the integration and then choose View objects.
-
Go to the next step to use the API to set up webhook subscriptions so events can start flowing into this integration.
Set up webhook subscriptions
-
Use the following URL to make sure your app has the required permissions:
https://{shop}.myshopify.com/admin/oauth/authorize?client_id={api_key}&scope={scopes}&redirect_uri={redirect_uri}&state={nonce}Where:
-
shopis the name of your Shopify store. -
api_keyis the API Key of your Shopify app. You can find this on the Shopify App details page. -
scopesshould have the valueread_customers,read_orders,read_draft_orders. -
redirect_uriis the redirect URI you specified for your app when you created it. For our purposes it can be any valid URL. -
noncecan be any unique value to identify a given authorization request from others. We recommend using a timestamp.
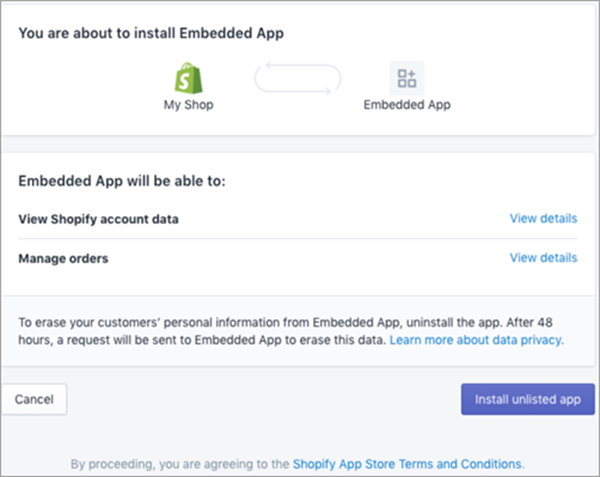
After you have constructed the URL, paste it into your browser. An installation/authorization page similar to the following image is displayed, asking the store owner to give permissions for the defined scope.
-
-
Choose Install unlisted app to install and authorize the app on behalf of your store.
You will be taken to the redirect URI that you entered with an authorization code appended to redirect URI as a query parameter. For example:
https://example.org/some/redirect/uri?code={authorization_code}&hmac=da9d83c171400a41f8db91a950508985&host={base64_encoded_hostname}×tamp=1409617544&state={nonce}&shop={shop_origin}&host={host} -
Copy the
authorization_codefrom this URI. You're going to use it to get a permanent access token in the next steps. -
Go to whatever tool you use to make API calls. For example, CURL
or POSTMAN . -
To get a permanent access token, make a POST request to the Shopify
AdminAPI to this endpoint:https://{shop}.myshopify.com/admin/oauth/access_tokenwith the following request body:
{
    "code": "authorization_code_received_from_redirect_uri",
    "client_id": "your_app_api_key",
    "client_secret": "your_app_api_secret"
}
This request returns the following response:
{ "access_token": "permanent_access_token", "scope": "read_customers,read_orders,read_draft_orders" } -
Note the
access_token. This is a permanent token that has the provided scope from a previous step. Now you are ready to create webhook subscriptions. -
For the following API calls, make sure you set the HTTP header key
X-Shopify-Access-Tokento theaccess_tokenyou received from the earlier call's response. -
To setup webhook subscriptions, make the following POST request for each of the
topicvalues listed in the next step:Endpoint:
https://{shop}.myshopify.com/admin/api/2021-04/webhooks.jsonRequest Body:
{ "webhook": { "topic": "replace_this_with_one_of_the_topics_in_the_list_below", "address": "this_is_the_event_source_arn_generated_when_you_created_the_event_integration", "format": "json" } } -
For each subscription replace the value for
topicwith the following values:-
customers/create -
customers/enable -
customers/update -
draft_orders/create -
draft_orders/update -
orders/cancelled -
orders/create -
orders/fulfilled -
orders/paid -
orders/partially_fulfilled -
orders/updated
-
You're now all set to receive events from your Shopify store. Next, verify your Shopify integration.
Verify your Shopify integration
-
Sign in as Admin to your Shopify Store.
-
In the left navigation menu, choose Customers.
-
Select Add Customer.
-
Enter your customer details. Be sure to enter a phone number and email. These don’t have to belong to a real customer. You will delete this customer entry after verifying the integration.
-
Save the customer object.
-
The event delivery should be almost instantaneous but allow a minute for it to be delivered and to create a customer profile.
-
Open the Amazon Connect agent experience and look up the user by the email or phone number you entered into the Shopify Store. You should be able to see the customer profile with the same email or phone number.
-
If you cannot see the customer profile, then there is a problem with your integration. To troubleshoot:
-
Go to the Amazon EventBridge console.
-
Check whether the EventSource is Active and the matching EventBus exists and is running.
If these are working, contact Support for assistance investigating the issue.
-
Monitor your Customer Profiles integrations
After your connection is established, if it stops working, delete the integration and then re-establish it.
What to do if objects aren't being sent
If an object fails to be sent, choose Flow details to learn more about what's gone wrong.
You may need to delete the configuration and re-connect to the external application.