Managing EMP custom configurations
You can add custom configurations to your EMP package using the
DeploymentScript.xml file that is provided in the root folder of each
created package. Each application works uniquely and implementation for the same application
can work differently across environments.
The DeploymentScript.xml file can handle different methods for running
Windows. This includes running scripted installations and Windows installer files, or it can
use tools such as CMD.exe, PowerShell.exe, and WSH to
achieve specific results.
The following example shows the structure of the DeploymentScript.xml.
<Deployment>
    <Install>
    <!--
        <Programs>
            <Program Order="0">
            <ProcessWindowStyle>Normal</ProcessWindowStyle>
            <Path>Program2</Path>
            <Args>arg2</Args>
            <WaitCondition TimeoutInSeconds="0">None</WaitCondition>
            </Program>
        </Programs>-->
    </Install>
    <Uninstall>
    <!--
        <Programs>
            <Program Order="0">
            <ProcessWindowStyle>Normal</ProcessWindowStyle>
            <Path>Program2</Path>
            <Args>arg2</Args>
            <WaitCondition TimeoutInSeconds="0">None</WaitCondition>
            </Program>
        </Programs>-->
    </Uninstall>
</Deployment>
DeploymentScript.xml element and attribute descriptions:
-
Install — Specifies what to run during the package deployment phase.
-
Programs — Specifies the number of tasks to run.
-
Program — Specifies the details of the task to run. To run more than one task, copy and paste the entire
Programelement and tailor it to the new action. -
Order — Specifies the sequence of the tasks as
0,1,2, and so on. The current release includes only theOrderattribute. -
PreInstall and PostInstall— These attributes are not added by default. You can add them as needed.
-
By default, the programs are run as
PostInstalltasks. This means that they are run towards the end of the EMP package deployment, after the installation of services. ThePostInstallattribute can be explicitly set as follows.<Program Order="0" PostInstall="true">Example scenario: deploy drivers silently as part of the EMP package deployment — The drivers will be deployed after the services have been installed and started, towards the end of the package deployment process. Tasks that install service dependencies must not be run as
PostInstalltasks. -
You can run a
PreInstalltask by adding aPreInstall=“true”attribute and value as follows. This runs the program before the services are installed.<Program Order="0" PreInstall="true">Example scenario: an application's Windows service requires a dependency in Windows features to be enabled on the server on which it is deployed before it can start — A
PreInstallscript can be used to enable the Windows feature so that it is set up and configured as part of the EMP deployment process before the service is started.
-
-
ProcessWindowStyle — This attribute can be set to either
NormalorHiddendepending on the requirements for the visibility of the process run. -
Path — The path to the program to be run.
-
Args — This attribute allows for the passing of arguments to the program that is to be run.
-
WaitCondition — The
TimeoutInSecondsattribute can be set with either aNoneorExitcondition in the<WaitConditions>tag. A program configured with a timeout will display an error to the user if the process fails to close within the specified time. If the timeout is set to0, it waits indefinitely.If a dependency is installed prior to a service starting, you may need to add an
Exitcondition to ensure that the process completes and exits beforeCompatibility.Package.Deployment.exemoves to the next task, or commences services installation:<WaitCondition TimeoutInSeconds="0">Exit</WaitCondition> -
Uninstall — Specifies what to run during the uninstall phase of an EMP package.
Example scenario: migrate local users and groups
Applications that use local users and groups can be migrated by using the
DeploymentScript.xml program tasks. Identify the local users and groups
to be migrated from the legacy source machine. Take note of the users that have been
added to these groups. Create a script that creates these local users and groups on the
target system.
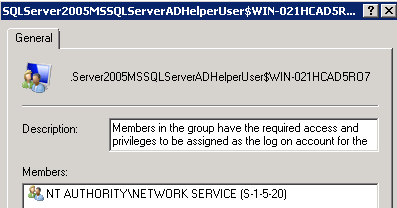
In this scenario, SQL Server 2005 Express creates the following local users and groups when installed natively on Windows Server 2008 R2.

The Network Service account is added to these groups.
The following PowerShell script creates these local users and groups. It is stored in a
file called CreateLocalUsersGroups.ps1.
$groups = New-Object 'system.collections.generic.dictionary[string,string]'

$groups.Add('SQLServer2005MSSQLServerADHelperUser$' + $ENV:COMPUTERNAME, "Members in the group have the required access and privileges to be assigned as the log on account for the associated instance of SQL Server Active Directory Helper in SQL Server 2005.")

$groups.Add('SQLServer2005MSSQLUser$' + $ENV:COMPUTERNAME, "Members in the group have the required access and privileges to be assigned as the log on account for the associated instance of SQL Server and SQL Server FullText Search in SQL Server 2005.")

$groups.Add('SQLServer2005SQLBrowserUser$' + $ENV:COMPUTERNAME, "Members in the group have the required access and privileges to be assigned as the log on account for the associated instance of SQL Server Browser in SQL Server 2005.")

ForEach ($group in $groups.GetEnumerator())
{
$newGroup = New-LocalGroup -Name $group.Key -Description ($group.Value.Substring(0,44) + '...')
Add-LocalGroupMember -Group $newGroup -Member "S-1-5-20"
}
To migrate local users and groups, add this file to the root of the EMP package and
update the DeploymentScript.xml as follows.
<Install>
     </Program>
        <Program Order="0" PreInstall="true">
        <ProcessWindowStyle>Hidden</ProcessWindowStyle>
        <Path>Powershell.exe</Path>
        <Args>"%DefaultDir%\CreateLocalUsersGroups.ps1"</Args>
        <WorkingDirectory>%DefaultDir%</WorkingDirectory>
        <WaitCondition TimeoutInSeconds="0">Exit</WaitCondition>
      </Program>
</Install>
