Categorize Lightsail resources with tags
Use tags in Amazon Lightsail to categorize your resources by purpose, owner, environment, or other criteria. Tags can be added to resources at or after they are created. Follow these steps to add tags to a resource after it’s been created.
Note
For more information about tags, what resources can be tagged, and the restrictions, see Tags.
To add tags to a resource
-
Sign in to the Lightsail console
. -
In the left navigation pane, choose the tab for the resource type that you want to tag. For example, to add a tag to a DNS zone, choose the Networking tab. Or choose the Instances tab to add a tag to an instance.
Note
Instances, container services, CDN distributions, buckets, databases, disks, DNS zones, and load balancers can be tagged using the Lightsail console. However, more Lightsail resources can be tagged using the Lightsail API operations, or the AWS Command Line Interface (AWS CLI) or SDKs. For a full list of Lightsail resources that support tagging, see Tags.
-
Choose the resource that you want to tag.
-
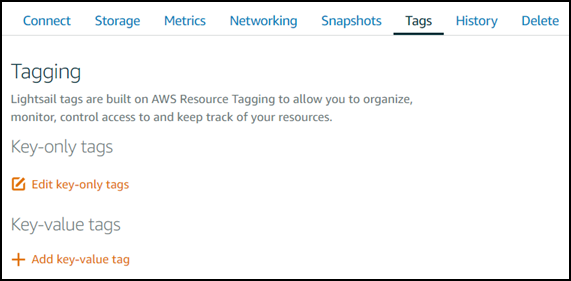
On the management page for the resource that you selected, choose the Tags tab.

-
Choose one of the following options, depending on the type of tag that you want to add:
-
Add key-only tags or Manage tags (if tags have already been added). Enter your new tag into the tag key text box, and press Enter. Choose Save when you’re done entering your tags to add them, or choose Cancel to not add them.

-
Create a key-value tag, then enter a key into the Key text box, and a value into the Value text box. Choose Save when you’re done entering your tags, or choose Cancel to not add them.
Key-value tags can only be added one at a time before saving. To add more than one key-value tag, repeat the previous steps.

-
Next steps
For more information about tasks that you can perform after adding tags to a resource, see the following guides: