Physically installing your hardware appliance
Your appliance has a 1U form factor and fits in a standard International Electrotechnical Commission (IEC) compliant 19-inch rack.
Prerequisites
To install your hardware appliance, you need the following components:
-
Power cables: one required, two recommended.
-
Supported network cabling (depending on which Network Interface Card (NIC) is included in the hardware appliance). Twinax Copper DAC, SFP+ optical module (Intel compatible) or SFP to Base-T copper transceiver.
-
Keyboard and monitor, or a keyboard, video, and mouse (KVM) switch solution.
Note
Before you perform the following procedure, make sure that you meet all of the requirements for the Storage Gateway Hardware Appliance as described in Networking and firewall requirements for the Storage Gateway Hardware Appliance.
To physically install your hardware appliance
-
Unbox your hardware appliance and follow the instructions contained in the box to rack-mount the server.
The following image shows the back of the hardware appliance with ports for connecting power, ethernet, monitor, USB keyboard, and iDRAC.

-
Plug in a power connection to each of the two power supplies. It's possible to plug in to only one power connection, but we recommend power connections to both power supplies for redundancy.
-
Plug an Ethernet cable into the
em1port to provide an always-on internet connection. Theem1port is the first of the four physical network ports on the rear, from left to right.Note
The hardware appliance doesn't support VLAN trunking. Set up the switch port to which you are connecting the hardware appliance as a non-trunked VLAN port.
-
Plug in the keyboard and monitor.
-
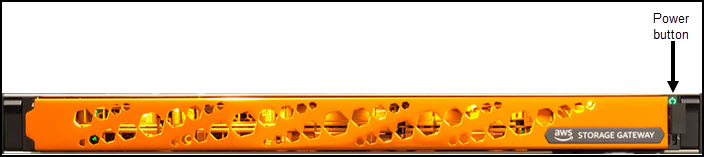
Power on the server by pressing the Power button on the front panel, as shown in the following image.
Next step
Accessing the hardware appliance console
