Setting up a crawler for Amazon S3 event notifications for an Amazon S3 target
Follow these steps to set up a crawler for Amazon S3 event notifications for an Amazon S3 target using the AWS Management Console or AWS CLI.
- AWS Management Console
-
-
Sign in to the AWS Management Console and open the GuardDuty console at https://console.aws.amazon.com/guardduty/
. -
Set your crawler properties. For more information, see Setting Crawler Configuration Options on the AWS Glue console .
-
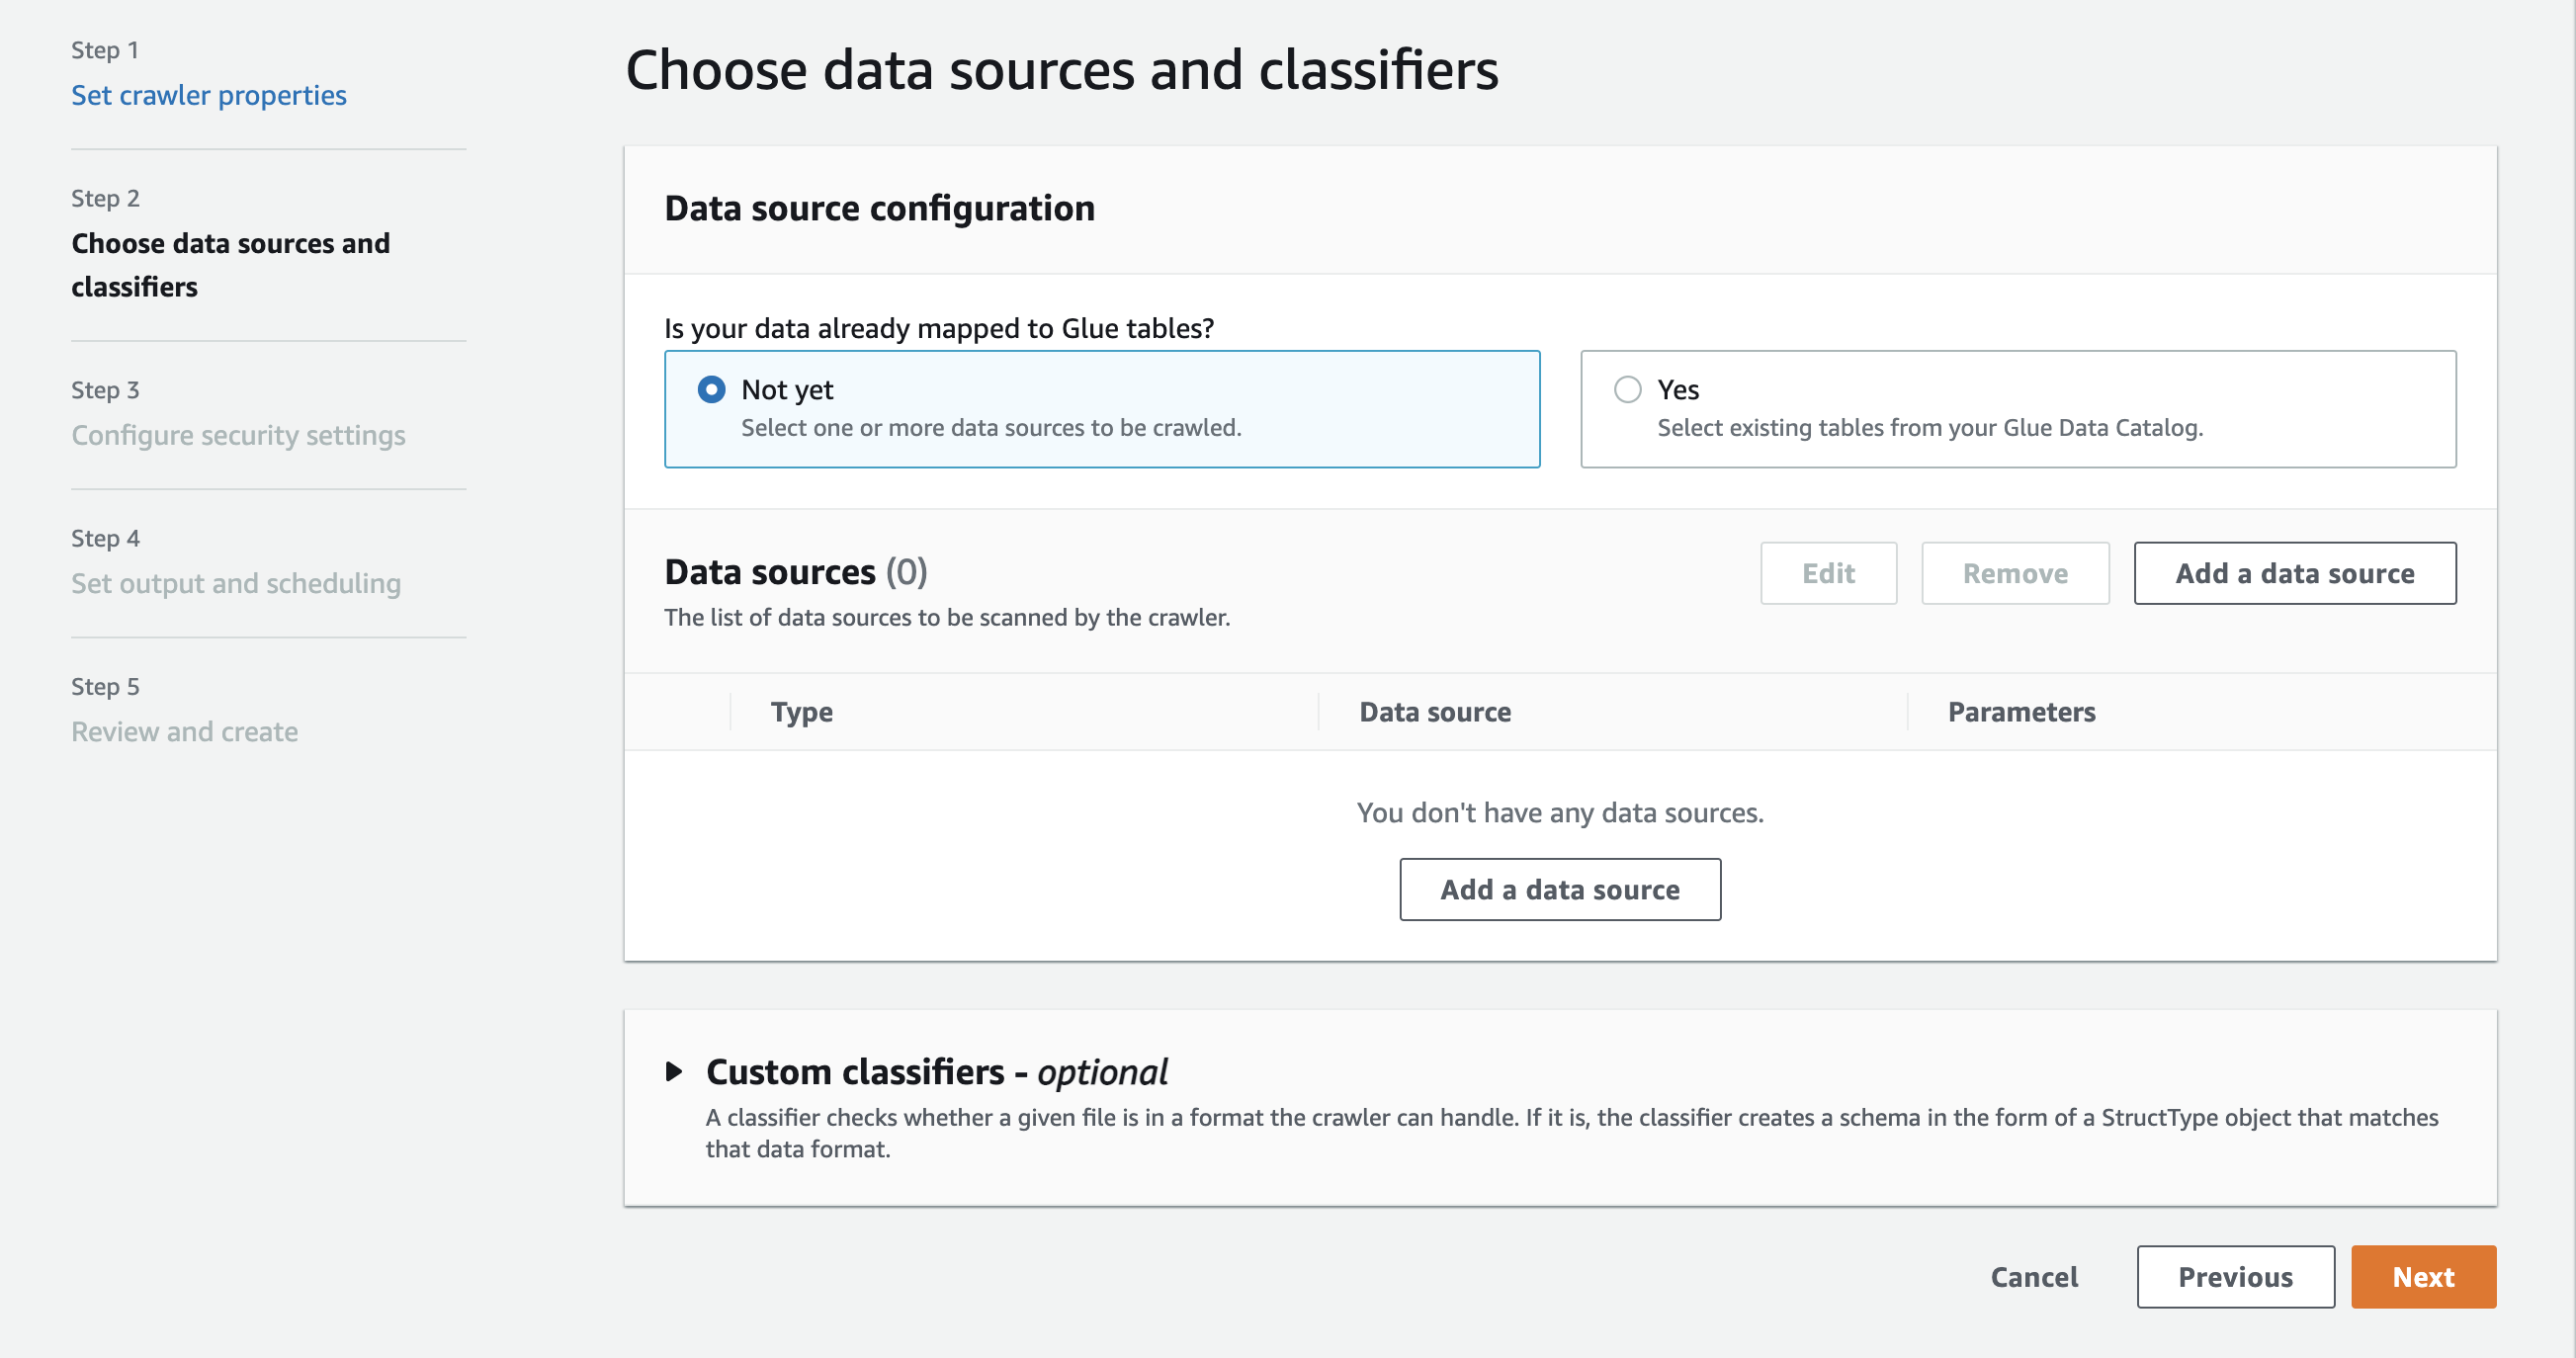
In the section Data source configuration, you are asked Is your data already mapped to AWS Glue tables?
By default Not yet is already selected. Leave this as the default as you are using an Amazon S3 data source and the data is not already mapped to AWS Glue tables.
-
In the section Data sources, choose Add a data source.
-
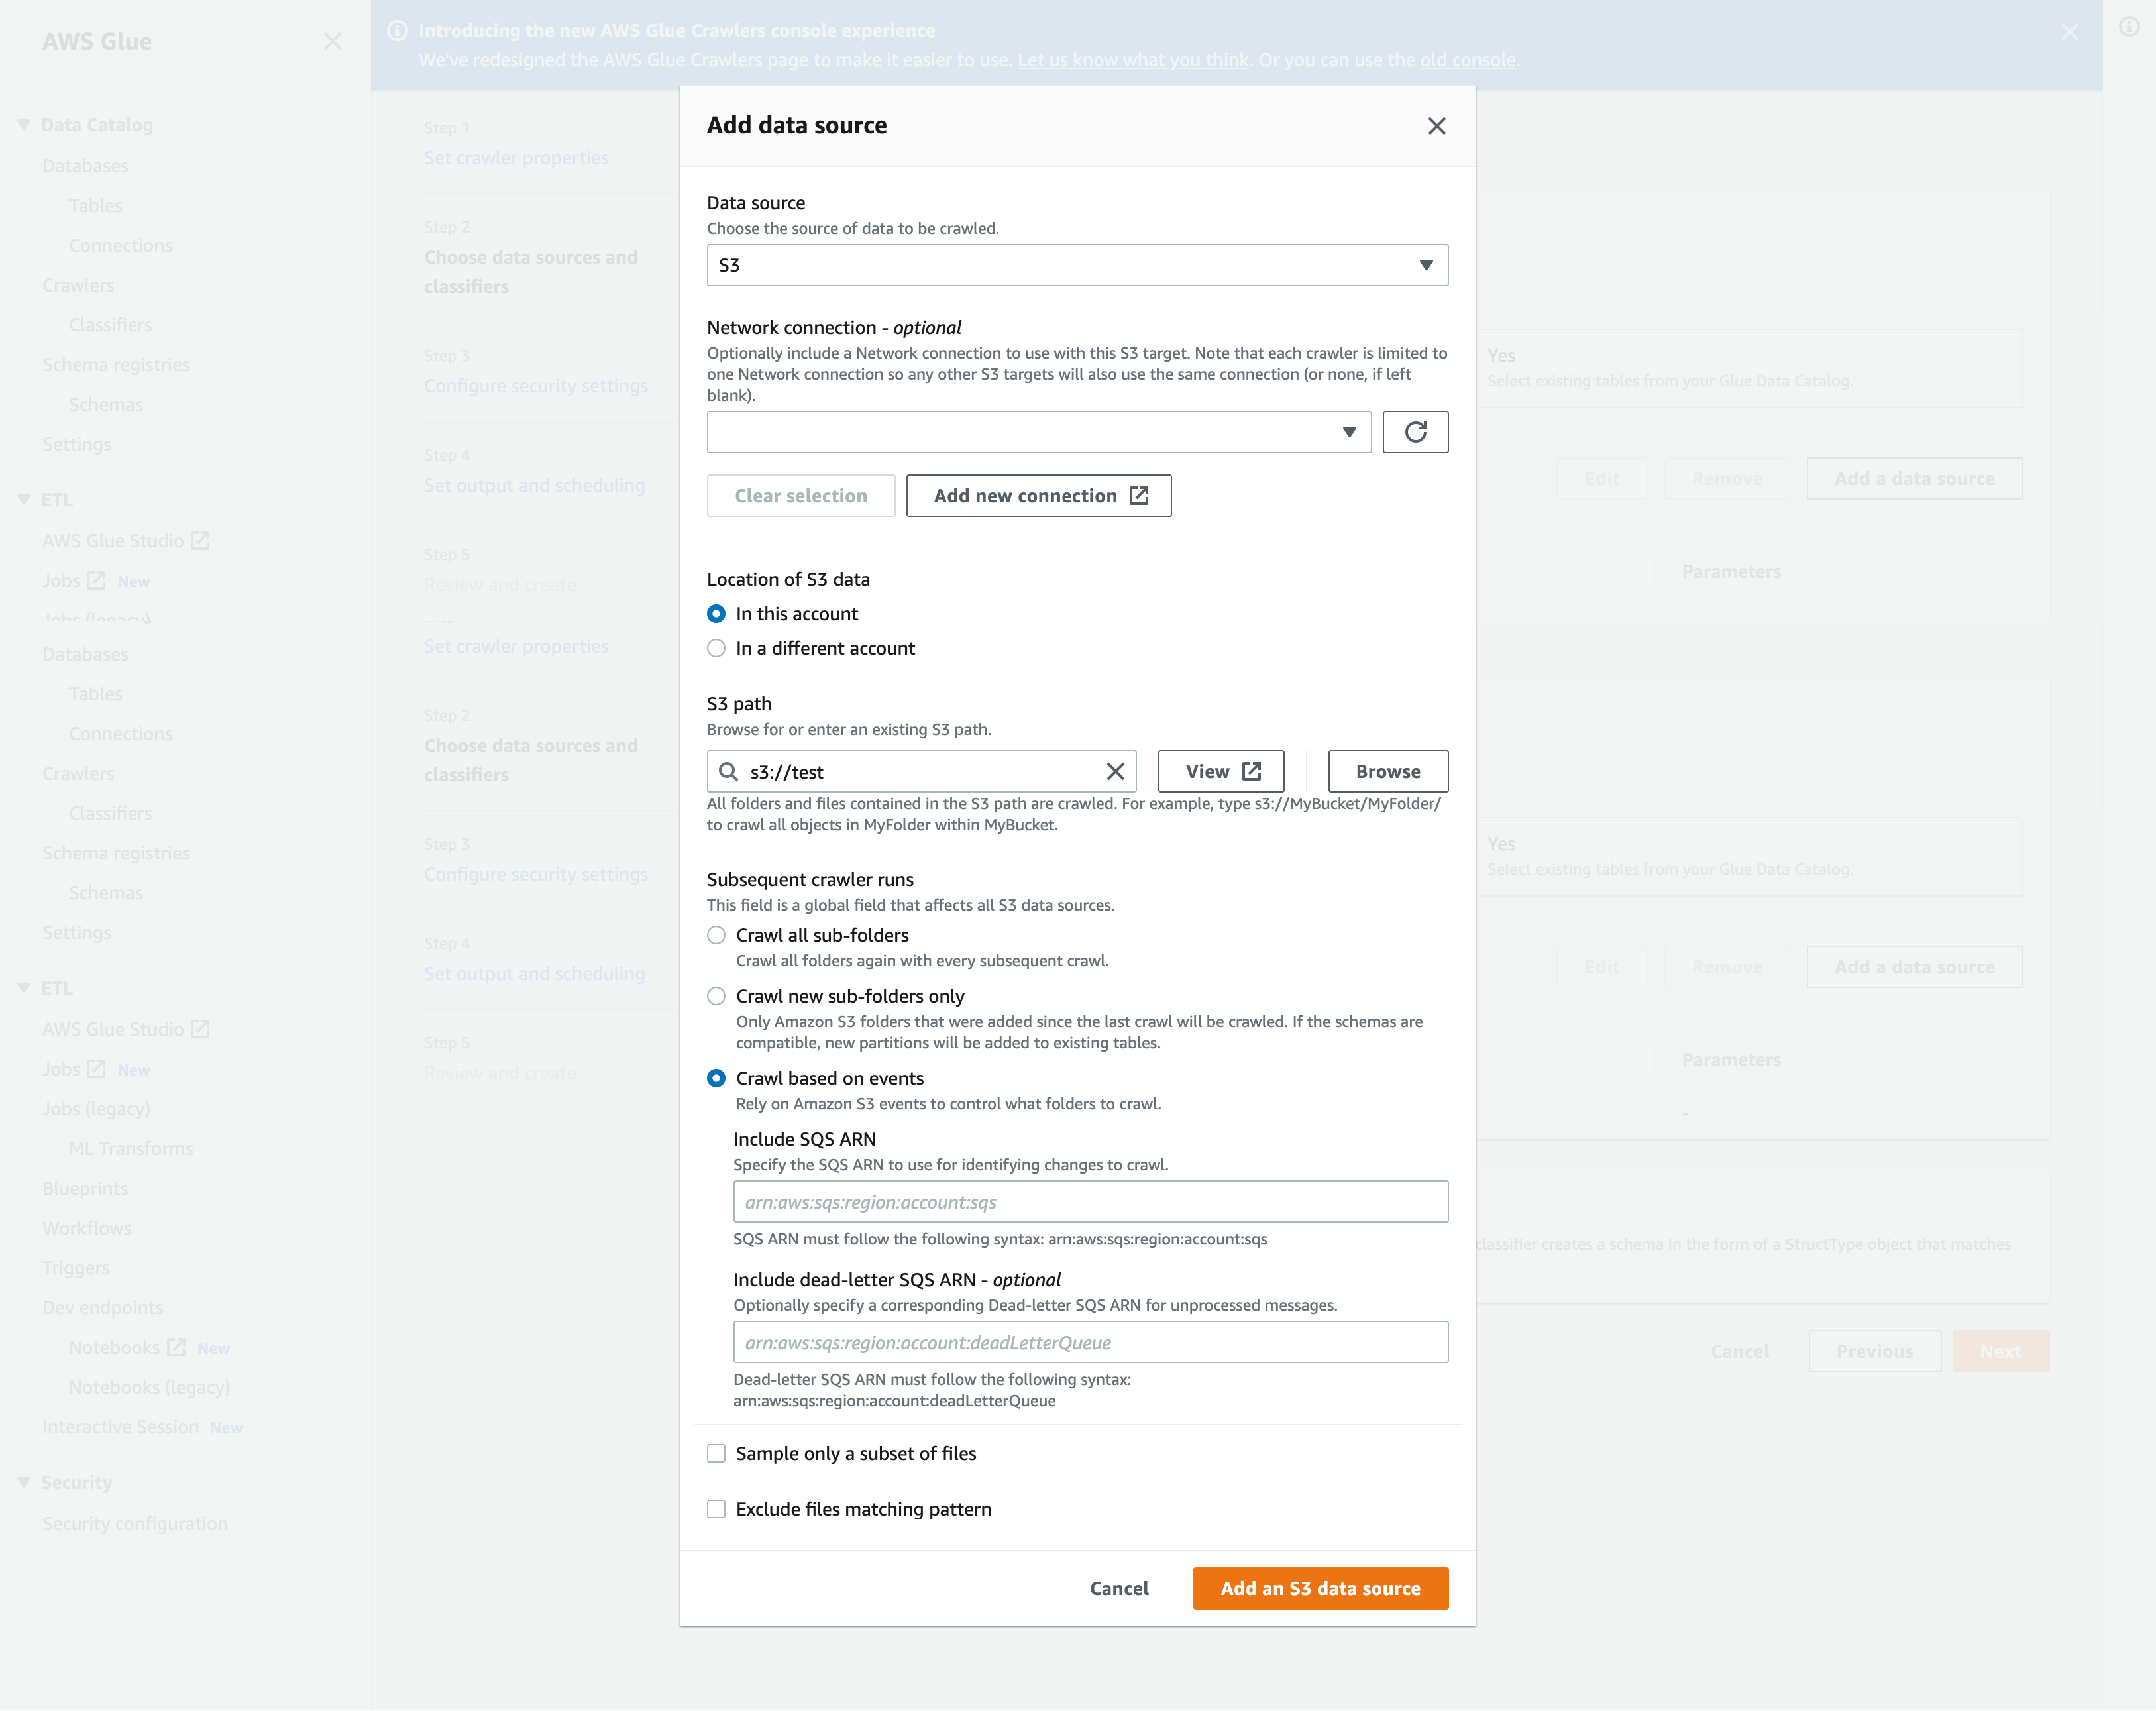
In the Add data source modal, configure the Amazon S3 data source:
-
Data source: By default, Amazon S3 is selected.
-
Network connection (Optional): Choose Add new connection.
-
Location of Amazon S3 data: By default, In this account is selected.
-
Amazon S3 path: Specify the Amazon S3 path where folders and files are crawled.
-
Subsequent crawler runs: Choose Crawl based on events to use Amazon S3 event notifications for your crawler.
-
Include SQS ARN: Specify the data store parameters including the a valid SQS ARN. (For example,
arn:aws:sqs:region:account:sqs). -
Include dead-letter SQS ARN (Optional): Specify a valid Amazon dead-letter SQS ARN. (For example,
arn:aws:sqs:region:account:deadLetterQueue). -
Choose Add an Amazon S3 data source.
-
-
- AWS CLI
-
The following is an example Amazon S3 AWS CLI call to configure a crawler to use event notifications to crawl an Amazon S3 target bucket.
Create Crawler:
aws glue update-crawler \
    --name myCrawler \
    --recrawl-policy RecrawlBehavior=CRAWL_EVENT_MODE \
    --schema-change-policy UpdateBehavior=UPDATE_IN_DATABASE,DeleteBehavior=LOG
    --targets '{"S3Targets":[{"Path":"s3://amzn-s3-demo-bucket/", "EventQueueArn": "arn:aws:sqs:us-east-1:012345678910:MyQueue"}]}'
