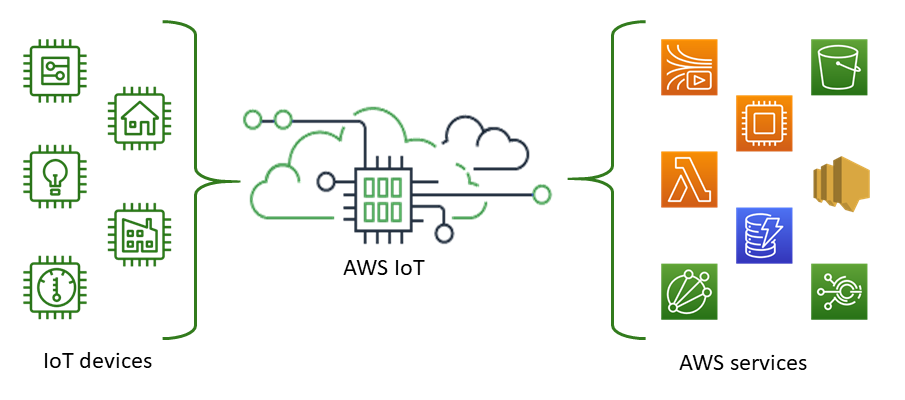
Using AWS IoT 1-Click with the AWS CLI - AWS IoT 1-Click

AWS will discontinue AWS IoT 1-Click service on December 16, 2024. For more information, see AWS IoT 1-Click end-of-life FAQs. For additional support, visit AWS support center.

Using AWS IoT 1-Click with the AWS CLI

To demonstrate the use of the AWS Command Line Interface (AWS CLI), consider the scenario of a disposal company that wants to streamline its dumpster pickup service using AWS IoT 1-Click.

In this scenario, each dumpster is paired with an AWS IoT Enterprise Button. When a dumpster is full, the customer only needs to press the associated button to request that the dumpster be replaced.

Note

All AWS IoT Enterprise Button device IDs start with "G030PM".

The following steps are used by the garbage disposal company to prepare the AWS IoT Enterprise Button for customer use.

To prepare the AWS IoT Enterprise Button for customer use
  1. The only way to set up Wi-Fi for an AWS IoT Enterprise Button is to use the AWS IoT 1-Click mobile app. To install the app, see AWS IoT 1-Click Mobile App. After you install the app, don't press Login to AWS account (as would normally be the case). In this exercise, we want to demonstrate how to use the AWS CLI. If you press Login to AWS account, the initiate-device-claim and finalize-device-claim commands are invoked for you, and we want to "manually" do this using the CLI as shown in the following steps.

  2. For AWS CLI demonstration purposes, instead of pressing Login to AWS account, choose the small round Wi-Fi icon in the upper-right corner. Next, choose Configure Wi-Fi. Scan or enter the device ID and follow the rest of the mobile app's instructions.

  3. If you don't have the AWS CLI installed, follow the instructions in Installing the AWS CLI. To list the available AWS IoT 1-Click AWS CLI commands, run the following two commands.

    aws iot1click-projects help
    aws iot1click-devices help
  4. To associate the now Wi-Fi connected AWS IoT Enterprise Button to the garbage disposal company's AWS account, run the following command using the device ID from your device.

    aws iot1click-devices initiate-device-claim --device-id G030PM0123456789 { "State": "CLAIM_INITIATED" }

    Press the button on the device. After some intermittent flashing of white light, you should see solid green light for about one second. If you don't, repeat the previous Wi-Fi connection procedure.

  5. After you see the solid green light in the previous step, run the following command (using your device's ID value).

    aws iot1click-devices finalize-device-claim --device-id G030PM0123456789 { "State": "CLAIMED" }

    The "State": "CLAIMED" response indicates that the device is successfully registered with the AWS IoT 1-Click service.

    Note

    If the device manufacturer provided a claim code starting with "C-", you can use just the aws iot1click-devices claim-devices-by-claim-code command to claim one or more devices using a single claim code, as shown in the following example.

    aws iot1click-devices claim-devices-by-claim-code --claim-code C-123EXAMPLE { "Total": 9 "ClaimCode": "C-123EXAMPLE" }

    In this example, "Total": 9 indicates that the nine devices associated with claim code C-123EXAMPLE have been successfully claimed by the AWS IoT 1-Click service.

  6. Next, you prepare to create an appropriate AWS IoT 1-Click project for the disposal company by creating a JSON text file named create-project.json. This file contains the following.

    { "projectName": "SeattleDumpsters", "description": "All dumpsters in the Seattle region.", "placementTemplate": { "defaultAttributes": { "City" : "Seattle" }, "deviceTemplates": { "empty-dumpster-request" : { "deviceType": "button" } } } }

    The placementTemplate and deviceTemplates key-value pairs are the attributes that will be applied to all buttons that are part of the SeattleDumpsters project. To create this project, run the following command (which assumes create-project.json is in the current working directory of the AWS CLI command prompt).

    aws iot1click-projects create-project --cli-input-json file://create-project.json

    To view the newly created project, run the following command.

    aws iot1click-projects list-projects { "projects": [ { "arn": "arn:aws:iot1click:us-west-2:012345678901:projects/SeattleDumpsters", "projectName": "SeattleDumpsters", "createdDate": 1563483100, "updatedDate": 1563483100, "tags": {} } ] }

    For greater detail, run the describe-project command, as follows.

    aws iot1click-projects describe-project --project-name SeattleDumpsters { "project": { "arn": "arn:aws:iot1click:us-west-2:012345678901:projects/SeattleDumpsters", "projectName": "SeattleDumpsters", "description": "All dumpsters in the Seattle region.", "createdDate": 1563483100, "updatedDate": 1563483100, "placementTemplate": { "defaultAttributes": { "City": "Seattle" }, "deviceTemplates": { "empty-dumpster-request": { "deviceType": "button", "callbackOverrides": {} } } }, "tags": {} } }
  7. With the project created for the Seattle region, next you create a placement for a particular dumpster (for customer 217), as follows. The escaped quotation marks are necessary for Windows.

    aws iot1click-projects create-placement --project-name SeattleDumpsters --placement-name customer217 --attributes "{\"location\": \"1800 9th Ave Seattle, WA 98101\", \"phone\": \"206-123-4567\"}"

    To view the newly created placement, run the following command.

    aws iot1click-projects list-placements --project-name SeattleDumpsters { "placements": [ { "projectName": "SeattleDumpsters", "placementName": "customer217", "createdDate": 1563488454, "updatedDate": 1563488454 } ] }

    For greater detail, run the describe-placement command, as follows.

    aws iot1click-projects describe-placement --project-name SeattleDumpsters --placement-name customer217 { "placement": { "projectName": "SeattleDumpsters", "placementName": "customer217", "attributes": { "phone": "206-123-4567", "location": "1800 9th Ave Seattle, WA 98101" }, "createdDate": 1563488454, "updatedDate": 1563488454 } }
  8. Although the device is now associated with the disposal company's AWS IoT 1-Click account, it's not associated with the placement. Confirm this by running the following command.

    aws iot1click-projects get-devices-in-placement --project-name SeattleDumpsters --placement-name customer217 { "devices": {} }

    To associate the device with the placement, run the following command.

    aws iot1click-projects associate-device-with-placement --project-name SeattleDumpsters --placement-name customer217 --device-template-name empty-dumpster-request --device-id G030PM0123456789

    To confirm the previous command, run get-devices-in-placement again.

    aws iot1click-projects get-devices-in-placement --project-name SeattleDumpsters --placement-name customer217 { "devices": { "empty-dumpster-request": "G030PM0123456789" } }

    For greater detail, run the describe-device command, as follows (notice the switch from iot1click-projects to iot1click-devices).

    aws iot1click-devices describe-device --device-id G030PM0123456789 { "DeviceDescription": { "Arn": "arn:aws:iot1click:us-west-2:012345678901:devices/G030PM0123456789", "Attributes": { "projectRegion": "us-west-2", "projectName": "SeattleDumpsters", "placementName": "customer217", "deviceTemplateName": "empty-dumpster-request" }, "DeviceId": "G030PM0123456789", "Enabled": false, "RemainingLife": 99.9, "Type": "button", "Tags": {} } }

    Because there's currently only one device, the following command produces similar results.

    aws iot1click-devices list-devices --device-type button { "Devices": [ { "Arn": "arn:aws:iot1click:us-west-2:012345678901:devices/G030PM0123456789", "Attributes": { "projectRegion": "us-west-2", "projectName": "SeattleDumpsters", "placementName": "customer217", "deviceTemplateName": "empty-dumpster-request" }, "DeviceId": "G030PM0123456789", "Enabled": false, "RemainingLife": 99.9, "Type": "button", "Tags": {} } ] }
  9. To verify that the device is functioning properly, run the following command. Adjust the timestamps appropriately, which are in ISO 8061 format.

    aws iot1click-devices list-device-events --device-id G030PM0123456789 --from-time-stamp 2019-07-17T15:45:12.880Z --to-time-stamp 2019-07-19T15:45:12.880Z { "Events": [ { "Device": { "Attributes": {}, "DeviceId": "G030PM0123456789", "Type": "button" }, "StdEvent": "{\"clickType\": \"SINGLE\", \"reportedTime\": \"2019-07-18T23:47:55.015Z\", \"certificateId\": \"fe8798a6c97c62ef8756b80eeefdcf2280f3352f82faa8080c74cc4f4a4d1811\", \"remainingLife\": 99.85000000000001, \"testMode\": false}" } ] }

    Here we see that a single-click event (\"clickType\": \"SINGLE\") occurred on 2019-07-18T23:47:55.015Z. Now double-click the device (two quick button presses in succession), and run the command again. Now notice the double-click event (\"clickType\": \"DOUBLE\"), similar to the following.

    aws iot1click-devices list-device-events --device-id G030PM0123456789 --from-time-stamp 2019-07-17T15:45:12.880Z --to-time-stamp 2019-07-19T15:45:12.880Z { "Events": [ { "Device": { "Attributes": {}, "DeviceId": "G030PM0123456789", "Type": "button" }, "StdEvent": "{\"clickType\": \"SINGLE\", \"reportedTime\": \"2019-07-18T23:47:55.015Z\", \"certificateId\": \"fe8798a6c97c62ef8756b80eeefdcf2280f3352f82faa8080c74cc4f4a4d1811\", \"remainingLife\": 99.85000000000001, \"testMode\": false}" }, { "Device": { "Attributes": {}, "DeviceId": "G030PM0123456789", "Type": "button" }, "StdEvent": "{\"clickType\": \"DOUBLE\", \"reportedTime\": \"2019-07-19T00:14:41.353Z\", \"certificateId\": \"fe8798a6c97c62ef8756b80eeefdcf2280f3352f82faa8080c74cc4f4a4d1811\", \"remainingLife\": 99.8, \"testMode\": false}" } ] }
  10. Each device type has a set of invokable device methods. To list the available methods for your device type, run the get-device-methods command, as follows.

    aws iot1click-devices get-device-methods --device-id G030PM0123456789 { "DeviceMethods": [ { "MethodName": "getDeviceHealthParameters" }, { "MethodName": "setDeviceHealthMonitorCallback" }, { "MethodName": "getDeviceHealthMonitorCallback" }, { "MethodName": "setOnClickCallback" }, { "MethodName": "getOnClickCallback" } ] }

    To invoke one of the available methods, use the invoke-device-method command, as shown next.

    aws iot1click-devices invoke-device-method --cli-input-json file://invoke-device-method.json { "DeviceMethodResponse": "{\"remainingLife\": 99.8}" }

    Here, invoke-device-method.json contains the following.

    { "DeviceId": "G030PM0123456789", "DeviceMethod": { "DeviceType": "device", "MethodName": "getDeviceHealthParameters" } }
    Note

    The get methods (such as getDeviceHealthParameters) don't expect parameters. Therefore, the "DeviceMethodParameters": "" line within the JSON file can't be used (doing so will cause this: An error occurred (InvalidRequestException) when calling the InvokeDeviceMethod operation: A request parameter was invalid.)

  11. By running aws iot1click-devices list-devices --device-type button, you can see that the default value for Enabled is false. The following command sets this key to true.

    aws iot1click-devices update-device-state --device-id G030PM0123456789 --enabled

    To set it back to false, run the previous command, again using the --no-enabled argument.

  12. If customer information changes, you can update a device's placement information as shown next (notice the switch from iot1click-devices to iot1click-projects). Run the following command to view customer217's current information (see attributes).

    aws iot1click-projects describe-placement --project-name SeattleDumpsters --placement-name customer217 { "placement": { "projectName": "SeattleDumpsters", "placementName": "customer217", "attributes": { "phone": "206-123-4567", "location": "1800 9th Ave Seattle, WA 98101" }, "createdDate": 1563488454, "updatedDate": 1563488454 } }

    Next, run the following command to update the customer's phone and location attributes.

    aws iot1click-projects update-placement --cli-input-json file://update-placement.json

    Here update-placement.json contains the following.

    { "projectName": "SeattleDumpsters", "placementName": "customer217", "attributes": { "phone": "206-266-1000", "location": "410 Terry Ave N Seattle, WA 98109" } }

    To review this update, run describe-placement again, as shown.

    aws iot1click-projects describe-placement --project-name SeattleDumpsters --placement-name customer217 { "placement": { "projectName": "SeattleDumpsters", "placementName": "customer217", "attributes": { "phone": "206-266-1000", "location": "410 Terry Ave N Seattle, WA 98109" }, "createdDate": 1563488454, "updatedDate": 1563572842 } }
  13. To update project information, use the update-project command. A project generally contains multiple customer placements. Here is the existing SeattleDumpster project information.

    aws iot1click-projects describe-project --project-name SeattleDumpsters { "project": { "arn": "arn:aws:iot1click:us-west-2:012345678901:projects/SeattleDumpsters", "projectName": "SeattleDumpsters", "description": "All dumpsters in the Seattle region.", "createdDate": 1563483100, "updatedDate": 1563483100, "placementTemplate": { "defaultAttributes": { "City": "Seattle" }, "deviceTemplates": { "empty-dumpster-request": { "deviceType": "button", "callbackOverrides": {} } } }, "tags": {} } }

    To change "All dumpsters in the Seattle region" to "All dumpsters (yard waster, recycling, and garbage) in the Seattle region", run the following command.

    aws iot1click-projects update-project --project-name SeattleDumpsters --description "All dumpsters (yard waste, recycling, garbage) in the Seattle region."

    You can see that the value of the "description" key has been updated for all SeattleDumpsters placements.

    aws iot1click-projects describe-project --project-name SeattleDumpsters { "project": { "arn": "arn:aws:iot1click:us-west-2:012345678901:projects/SeattleDumpsters", "projectName": "SeattleDumpsters", "description": "All dumpsters (yard waste, recycling, garbage) in the Seattle region.", "createdDate": 1563483100, "updatedDate": 1563819039, "placementTemplate": { "defaultAttributes": { "City": "Seattle" }, "deviceTemplates": { "empty-dumpster-request": { "deviceType": "button", "callbackOverrides": {} } } }, "tags": {} } }
  14. You can use tags to apply meta-information to project resources (iot1click-projects) and placement resources (iot1click-devices), as follows.

    aws iot1click-projects tag-resource --cli-input-json file://projects-tag-resource.json

    Here projects-tag-resource.json contains the following.

    { "resourceArn": "arn:aws:iot1click:us-west-2:012345678901:projects/SeattleDumpsters", "tags": { "Account": "45215", "Manager": "Tom Jones" } }

    To list the tags for the project resource, run the following.

    aws iot1click-projects list-tags-for-resource --resource-arn "arn:aws:iot1click:us-west-2:012345678901:projects/SeattleDumpsters" { "tags": { "Manager": "Tom Jones", "Account": "45215" } }

    To see the project tags in context, run the following.

    aws iot1click-projects describe-project --project-name SeattleDumpsters { "project": { "arn": "arn:aws:iot1click:us-west-2:012345678901:projects/SeattleDumpsters", "projectName": "SeattleDumpsters", "description": "All dumpsters (yard waste, recycling, garbage) in the Seattle region.", "createdDate": 1563483100, "updatedDate": 1563819039, "placementTemplate": { "defaultAttributes": { "City": "Seattle" }, "deviceTemplates": { "empty-dumpster-request": { "deviceType": "button", "callbackOverrides": {} } } }, "tags": { "Manager": "Tom Jones", "Account": "45215" } } }

    To discover device Amazon Resource Names (ARN)s, run the following.

    aws iot1click-devices list-devices { "Devices": [ { "Arn": "arn:aws:iot1click:us-west-2:012345678901:devices/G030PM0123456789", "Attributes": { "projectRegion": "us-west-2", "projectName": "SeattleDumpsters", "placementName": "customer217", "deviceTemplateName": "empty-dumpster-request" }, "DeviceId": "G030PM0123456789", "Enabled": true, "RemainingLife": 99.7, "Type": "button", "Tags": {} } ] }

    To add tags to the previous device, run the following.

    aws iot1click-devices tag-resource --cli-input-json file://devices-tag-resource.json

    Here devices-tag-resources.json contains the following (notice the required casing of ResourceArn and Tags).

    { "ResourceArn": "arn:aws:iot1click:us-west-2:012345678901:devices/G030PM0123456789", "Tags": { "Driver": "John Smith", "Driver Phone": "206-123-4567" } }

    To list the tags for the device resource, run the following.

    aws iot1click-devices list-tags-for-resource --resource-arn "arn:aws:iot1click:us-west-2:012345678901:devices/G030PM0123456789" { "Tags": { "Driver Phone": "206-123-4567", "Driver": "John Smith" } }

    To see the device tags in context, run list-devices.

    aws iot1click-devices list-devices { "Devices": [ { "Arn": "arn:aws:iot1click:us-west-2:012345678901:devices/G030PM0123456789", "Attributes": { "projectRegion": "us-west-2", "projectName": "SeattleDumpsters", "placementName": "customer217", "deviceTemplateName": "empty-dumpster-request" }, "DeviceId": "G030PM0123456789", "Enabled": true, "RemainingLife": 99.7, "Type": "button", "Tags": { "Driver Phone": "206-123-4567", "Driver": "John Smith" } } ] }
  15. At this point, you can associate an action with a press of the device's button, such as triggering an AWS Lambda function or sending an Amazon SNS message. You can do this easily using the AWS IoT 1-Click console (the AWS IoT 1-Click Programming Model is also an option). After the appropriate actions are associated with the device, you can take the device to the customer's location and connect it to the their Wi-Fi network by using the same procedure described in steps 1 and 2.

AWS IoT 1-Click device teardown

The following steps describe how to reverse (undo) the previous steps.

  1. To untag a project resource, run the following command.

    aws iot1click-projects untag-resource --resource-arn "arn:aws:iot1click:us-west-2:012345678901:projects/SeattleDumpsters" --tag-keys "Manager"

    This removes the project's Manager tag, as shown next.

    aws iot1click-projects describe-project --project-name SeattleDumpsters { "project": { "arn": "arn:aws:iot1click:us-west-2:012345678901:projects/SeattleDumpsters", "projectName": "SeattleDumpsters", "description": "All dumpsters (yard waste, recycling, garbage) in the Seattle region.", "createdDate": 1563483100, "updatedDate": 1563819039, "placementTemplate": { "defaultAttributes": { "City": "Seattle" }, "deviceTemplates": { "empty-dumpster-request": { "deviceType": "button", "callbackOverrides": {} } } }, "tags": { "Account": "45215" } } }
  2. To untag a device resource, run the following command.

    aws iot1click-devices untag-resource --resource-arn "arn:aws:iot1click:us-west-2:012345678901:devices/G030PM0123456789" --tag-keys "Driver Phone" "Driver"

    This removes the device's tags, as shown next (notice the empty list "Tags": {}).

    aws iot1click-devices list-devices { "Devices": [ { "Arn": "arn:aws:iot1click:us-west-2:012345678901:devices/G030PM0123456789", "Attributes": { "projectRegion": "us-west-2", "projectName": "SeattleDumpsters", "placementName": "customer217", "deviceTemplateName": "empty-dumpster-request" }, "DeviceId": "G030PM0123456789", "Enabled": true, "RemainingLife": 99.7, "Type": "button", "Tags": {} } ] }
  3. To disassociate a device from a placement, run the following command.

    aws iot1click-projects disassociate-device-from-placement --project-name SeattleDumpsters --placement-name customer217 --device-template-name empty-dumpster-request

    As you can see in the following, placement customer217 no longer has a device associated with it.

    aws iot1click-projects get-devices-in-placement --project-name SeattleDumpsters --placement-name customer217 { "devices": {} }
  4. To delete a placement from a project, run the following command.

    aws iot1click-projects delete-placement --project-name SeattleDumpsters --placement-name customer217

    As you can see in the following, project SeattleDumpsters has no placements because placement customer217 was the only placement within SeattleDumpsters.

    aws iot1click-projects list-placements --project-name SeattleDumpsters { "placements": [] }
  5. To delete a project, run the following command.

    aws iot1click-projects delete-project --project-name SeattleDumpsters

    As you can see in the following, all projects are removed because SeattleDumpsters was the only project associated with your AWS IoT 1-Click account.

    aws iot1click-projects list-projects { "projects": [] }

    If, for example, you want to let a friend try out your device using their AWS account, you must first unclaim your device from your AWS IoT 1-Click account, as follows.

    aws iot1click-devices unclaim-device --device-id G030PM0123456789 { "State": "UNCLAIMED" }

    The device can now be used with any AWS IoT 1-Click account.