Appendix C - Create a JITP template
Create a JITP template so that new devices directed to the account are automatically associated with a desired policy, and given a proper thing-name on the AWS console. Follow the steps below to create a template.
-
Open the AWS IoT console
. 
-
In the left navigation pane, select Connect many devices then select Provisioning templates in the drop-down sub-menu.

-
On the provisioning templates management page, select Create provisioning template.

-
On the Create provisioning template page, choose Provisioning devices with unique certificate (JITP) - recommended, then select Next.

-
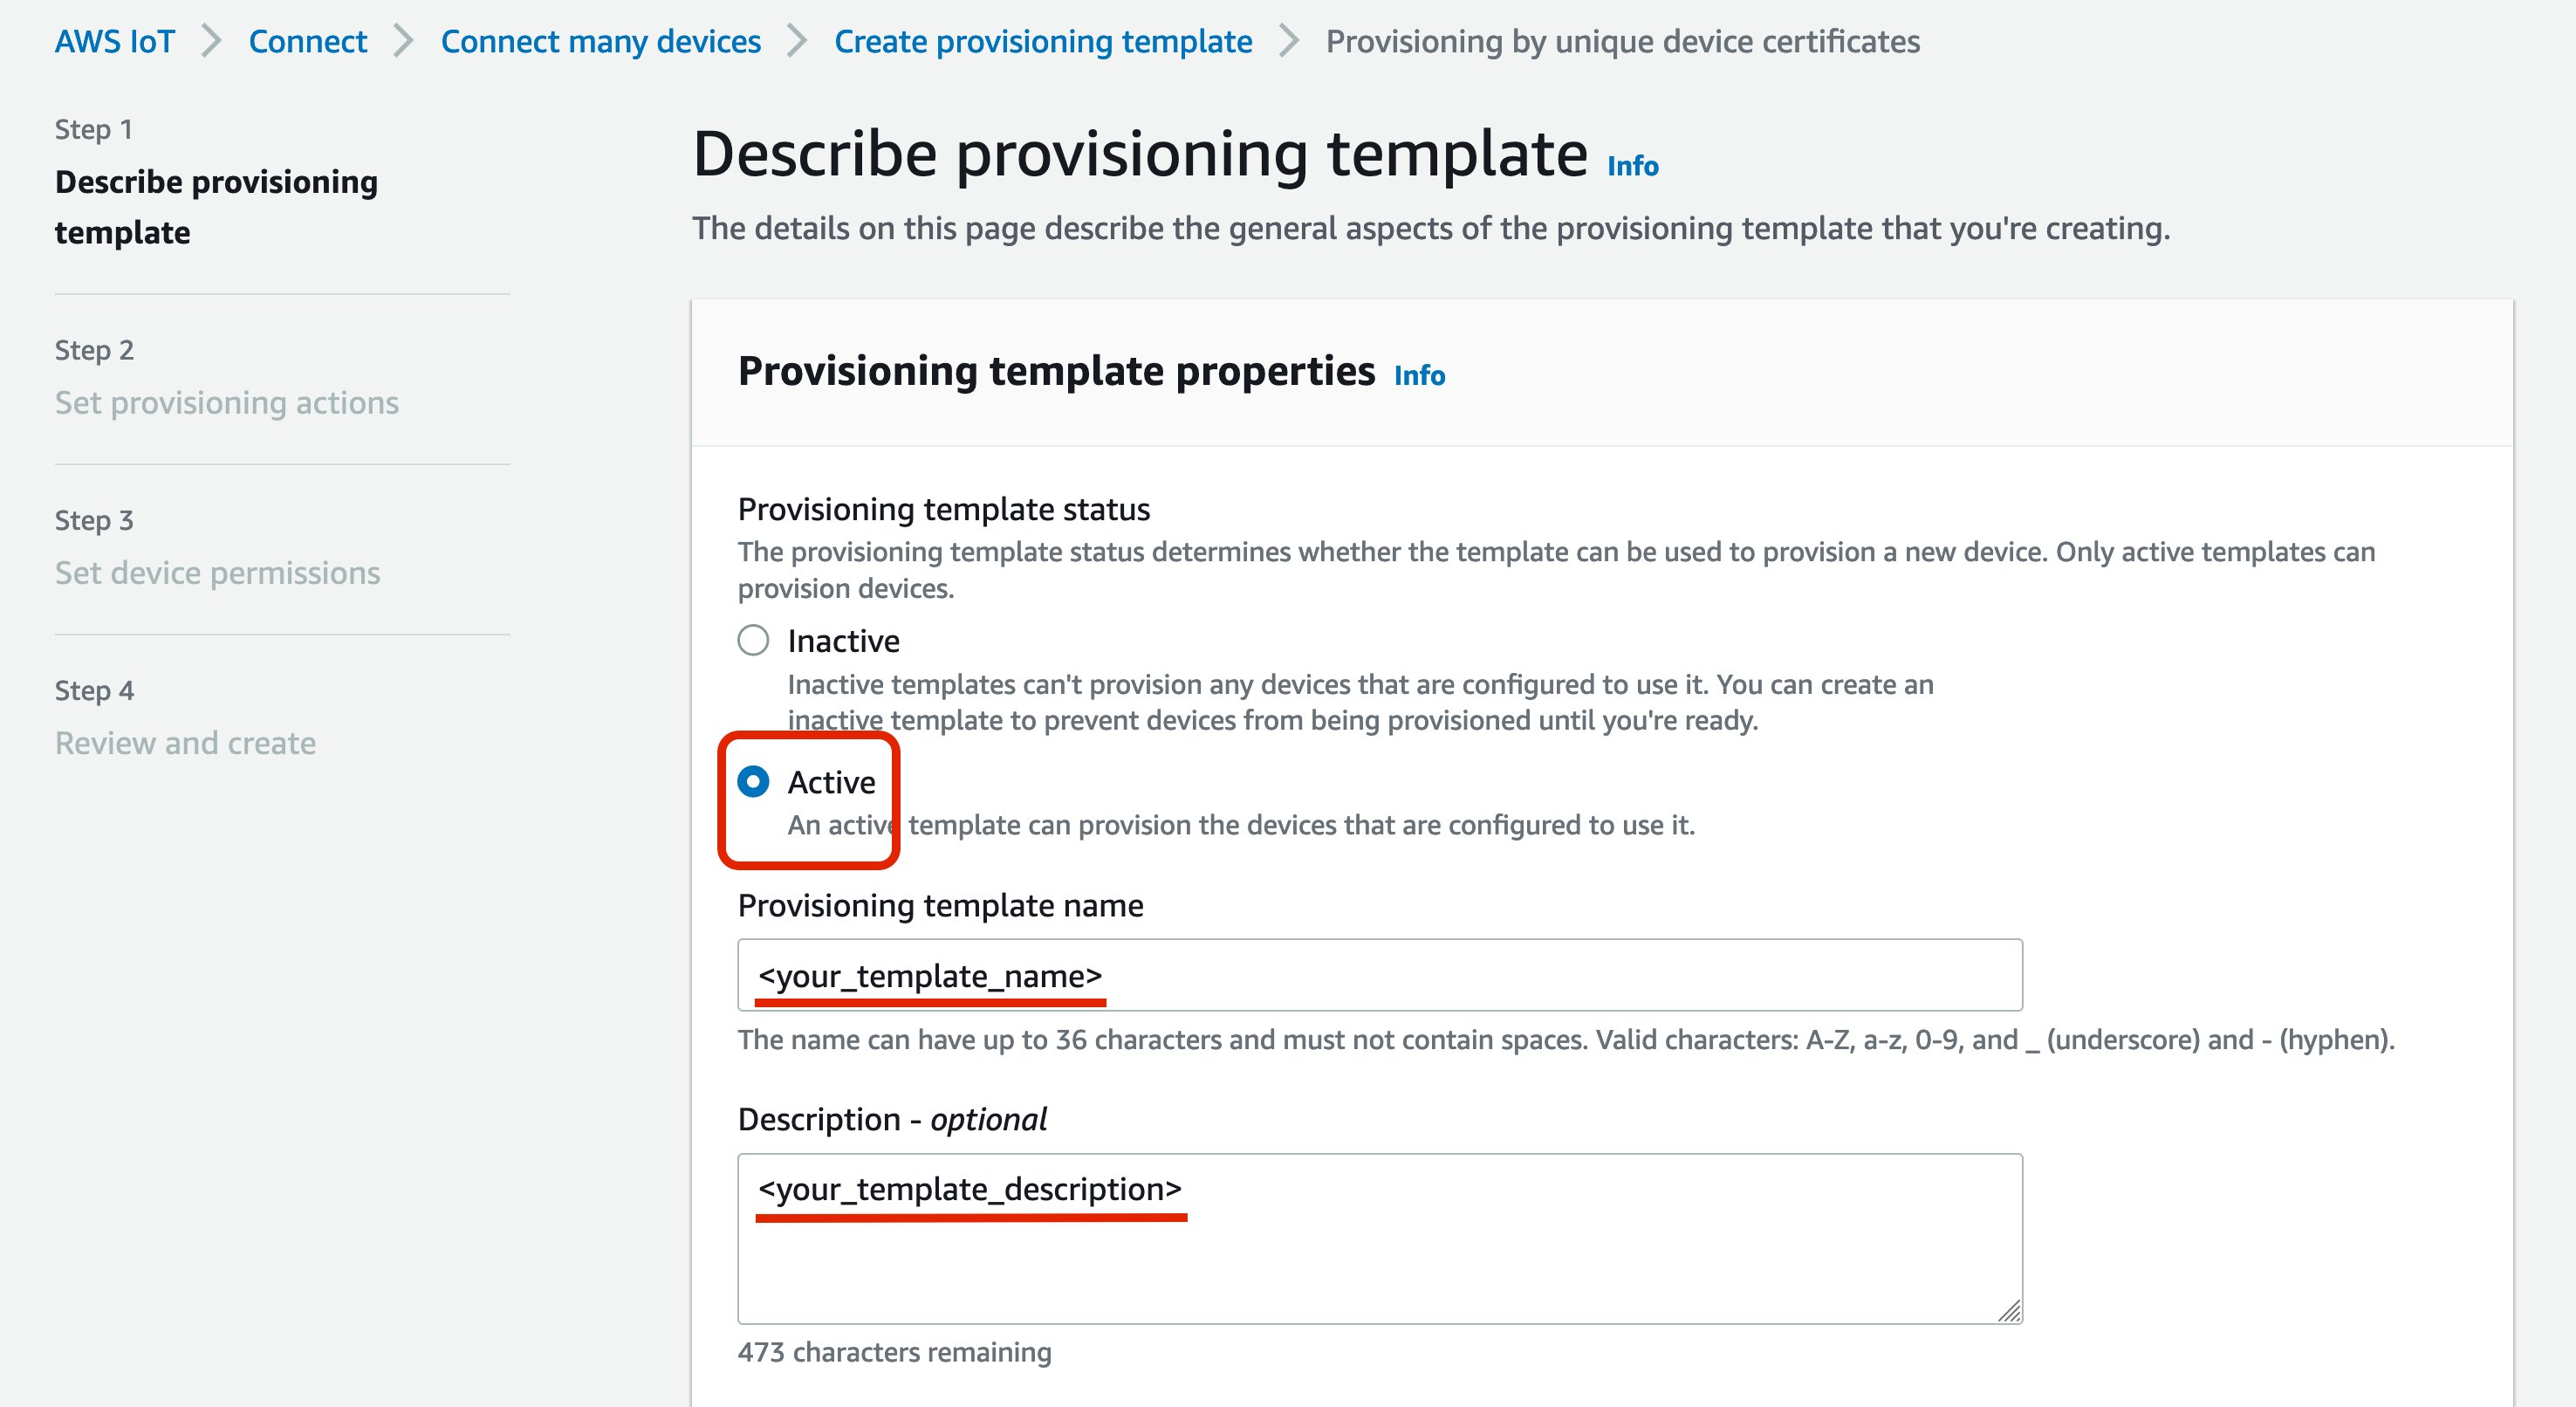
In the JITP template creation wizard, under Describe provisioning template, enter the information for the Provisioning template properties:
Under Provisioning template status, choose Active.
Enter a Provisioning template name.
(Optional) Enter a Description for the template.
-
Under Provisioning role, make sure Attach managed policy to IAM role is checked. (This ensures the IAM role created here and used in device provisioning will have the needed privileges.) Then select Create new role.

(Optional) Instead of creating a new role, you can choose a role that you have previously made. However, to make sure that the role has enough privileges to provision your ExpressLink modules, you must make sure that the role has the AWS managed policies "
AWSIoTThingsRegistration", "AWSIoTLogging", and "AWSIoTRuleActions" attached, or that it has an inline policy with equivalent or greater permissions. See AWS managed policies for AWS IoT for more information. -
In the Create role pop-up window, enter a Role name, then select Create.

-
Under CA certificate configuration, for Automatic certificate registration, choose On. Above that, under CA certificate select the Choose the CA certificates to use dropdown menu.

-
In the dropdown menu, choose the checkbox in front of the CA certificate ID that was listed in the output of the
aws iot register-ca-certificateAWS CLI command that you ran in the previous section. After the CA certificate ID appears on the page, select Next.

-
Under Set provisioning actions, toggle on Automatically create a thing resource when provisioning a device.
(Optional) You can also choose Additional configurations for the Thing type, Searchable thing attributes, Thing groups, and Billing groups.
Select Next.

-
Under Set device permissions, select Create policy to create a new policy for those ExpressLink modules you want to provision. This policy determines the actions that can be run by the ExpressLink modules on AWS IoT Core under your AWS account.

-
On the Create policy page, enter a Policy name.
On the Policy statements tab, under Policy document, for convenience you can enter "*" for both the Policy action and Policy resource. However, this policy will allow any and all actions on any AWS IoT Core resources accessible through MQTT. We recommend that you use a more restrictive policy. The Policy examples tab contains numerous example policy documents that can be applied for different use cases. See the policy documents under that tab or refer to AWS IoT Core policies for additional information.

-
Select Create to create the policy.
-
On the Set device permissions page, refresh your browser (select the icon that looks like a circular arrow pointing to its own starting point). Your policy should now show up in the list under Policies. Choose the checkbox in front of your policy, then select Next.

-
Review the information you have entered to make sure it is correct. In particular, make sure that the CA certificate shown under CA certificate configuration has the same CA certificate ID returned by the AWS CLI command that you ran in a previous step. You can edit a particular section if the information is incorrect. After you verify the information you entered, scroll to the bottom and select Create template.

-
Your JITP template is now created and ready to be applied whenever an ExpressLink module issues a connect request to your AWS account's IoT Core endpoint during onboarding-by-claim.
