Le traduzioni sono generate tramite traduzione automatica. In caso di conflitto tra il contenuto di una traduzione e la versione originale in Inglese, quest'ultima prevarrà.
Monitora la soluzione
Registrazione e notifiche
Instance Scheduler on AWS sfrutta Amazon CloudWatch Logs per la registrazione. Questa soluzione registra le informazioni di elaborazione per ogni istanza etichettata, i risultati della valutazione del periodo per l'istanza, lo stato desiderato dell'istanza durante quel periodo, l'azione applicata e i messaggi di debug. Per ulteriori informazioni, consulta Risorse della soluzione.
I messaggi di avviso ed errore vengono pubblicati anche su un argomento Amazon SNS creato dalla soluzione, che invia messaggi a un indirizzo e-mail sottoscritto. Per ulteriori informazioni, consulta What is Amazon SNS? nella Amazon SNS Developer Guide. Puoi trovare il nome dell'argomento Amazon SNS nella scheda Output dello stack di soluzioni.
File di log
Instance Scheduler on AWS crea un gruppo di log che contiene i file di AWS Lambda log predefiniti e un gruppo di log che contiene i seguenti file di log:
-
InstanceScheduler-yyyymmdd:Registra i messaggi dello scheduler generale -
SchedulingOrchestratorHandler-yyyymmdd:Registra le informazioni generali sull'orchestrazione per l'avvio delle esecuzioni di pianificazione -
SchedulerSetupHandler-yyyymmdd:Registra l'output delle azioni di configurazione -
Scheduler-<service>-<account>-<region>-yyyymmdd:Registra l'attività di pianificazione in ogni servizio, account e regione -
CliHandler-yyyymmdd:Registra le richieste dalla CLI di amministrazione -
Eventbus_request_handler-yyyymmdd:Registra le chiamate alle EventBus risorse, se la soluzione viene distribuita alle organizzazioni. AWS -
CollectConfigurationDescription-yyyymmdd: registra i dati metrici di descrizione della configurazione inviati periodicamente
Dashboard di approfondimenti operativi
Instance Scheduler on AWS è dotato di una dashboard Operational Insights che consente di monitorare il funzionamento della soluzione e ottenere informazioni sulle ore di funzionamento risparmiate utilizzando questa soluzione.
Per utilizzare questa dashboard, assicurati che Operational Monitoring sia impostato su «abilitato» nei parametri dello stack dell'hub della soluzione in. AWS CloudFormation Quindi vai a AWS CloudWatch e seleziona «Dashboards» dal menu di navigazione. Il nome del pannello di controllo sarà {stack-name} -Operational-Insights-Dashboard
La dashboard mostrerà diverse metriche operative sulle operazioni della soluzione, tra cui il conteggio del numero di istanze attualmente gestite dalla soluzione, informazioni su quando e quante istanze sono in esecuzione nel corso della giornata e una stima di quante ore di esecuzione sono state risparmiate chiudendo le istanze. Di seguito sono riportati alcuni esempi di dati:
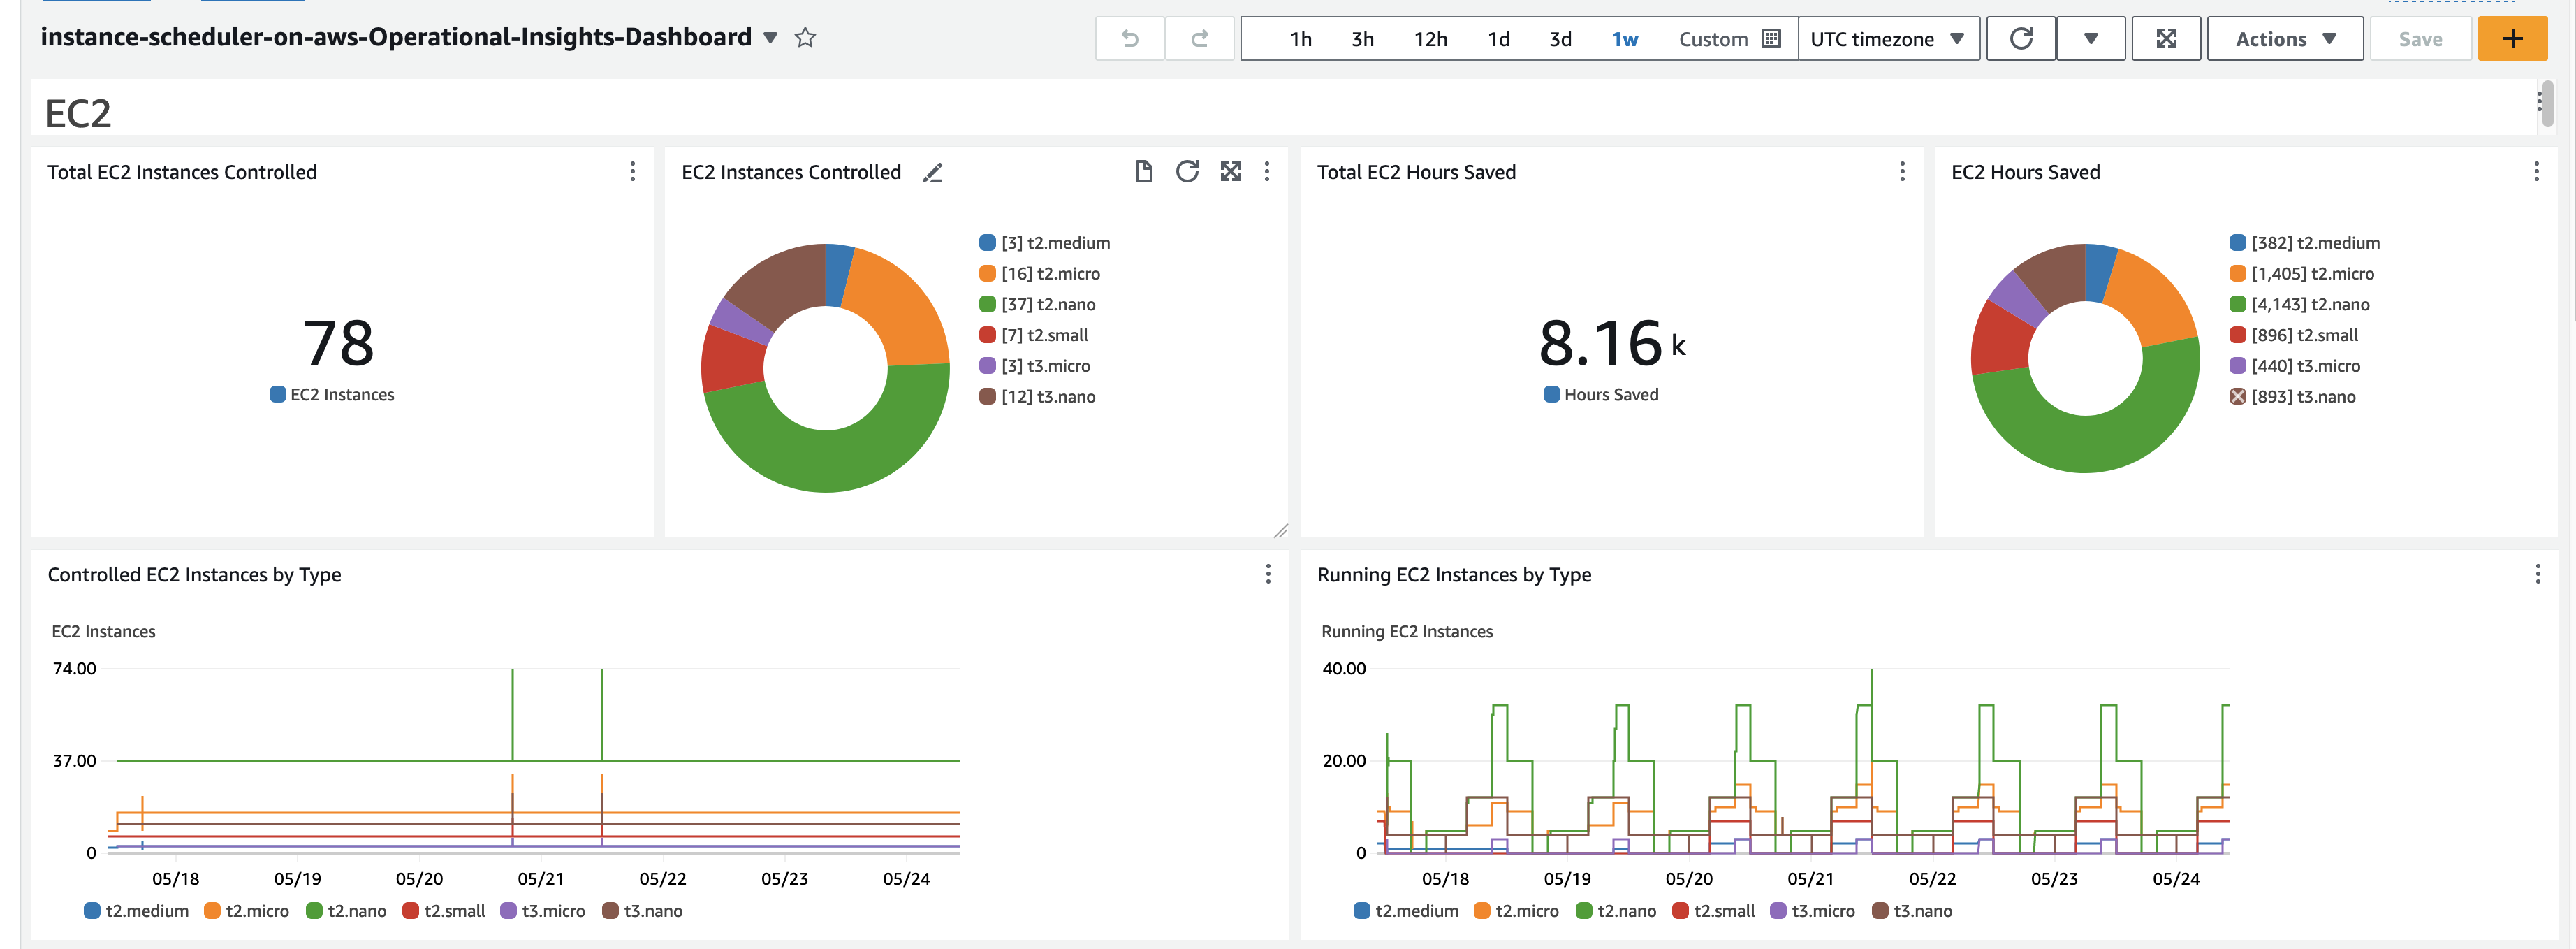
Instance Scheduler AWS stack in CloudWatch
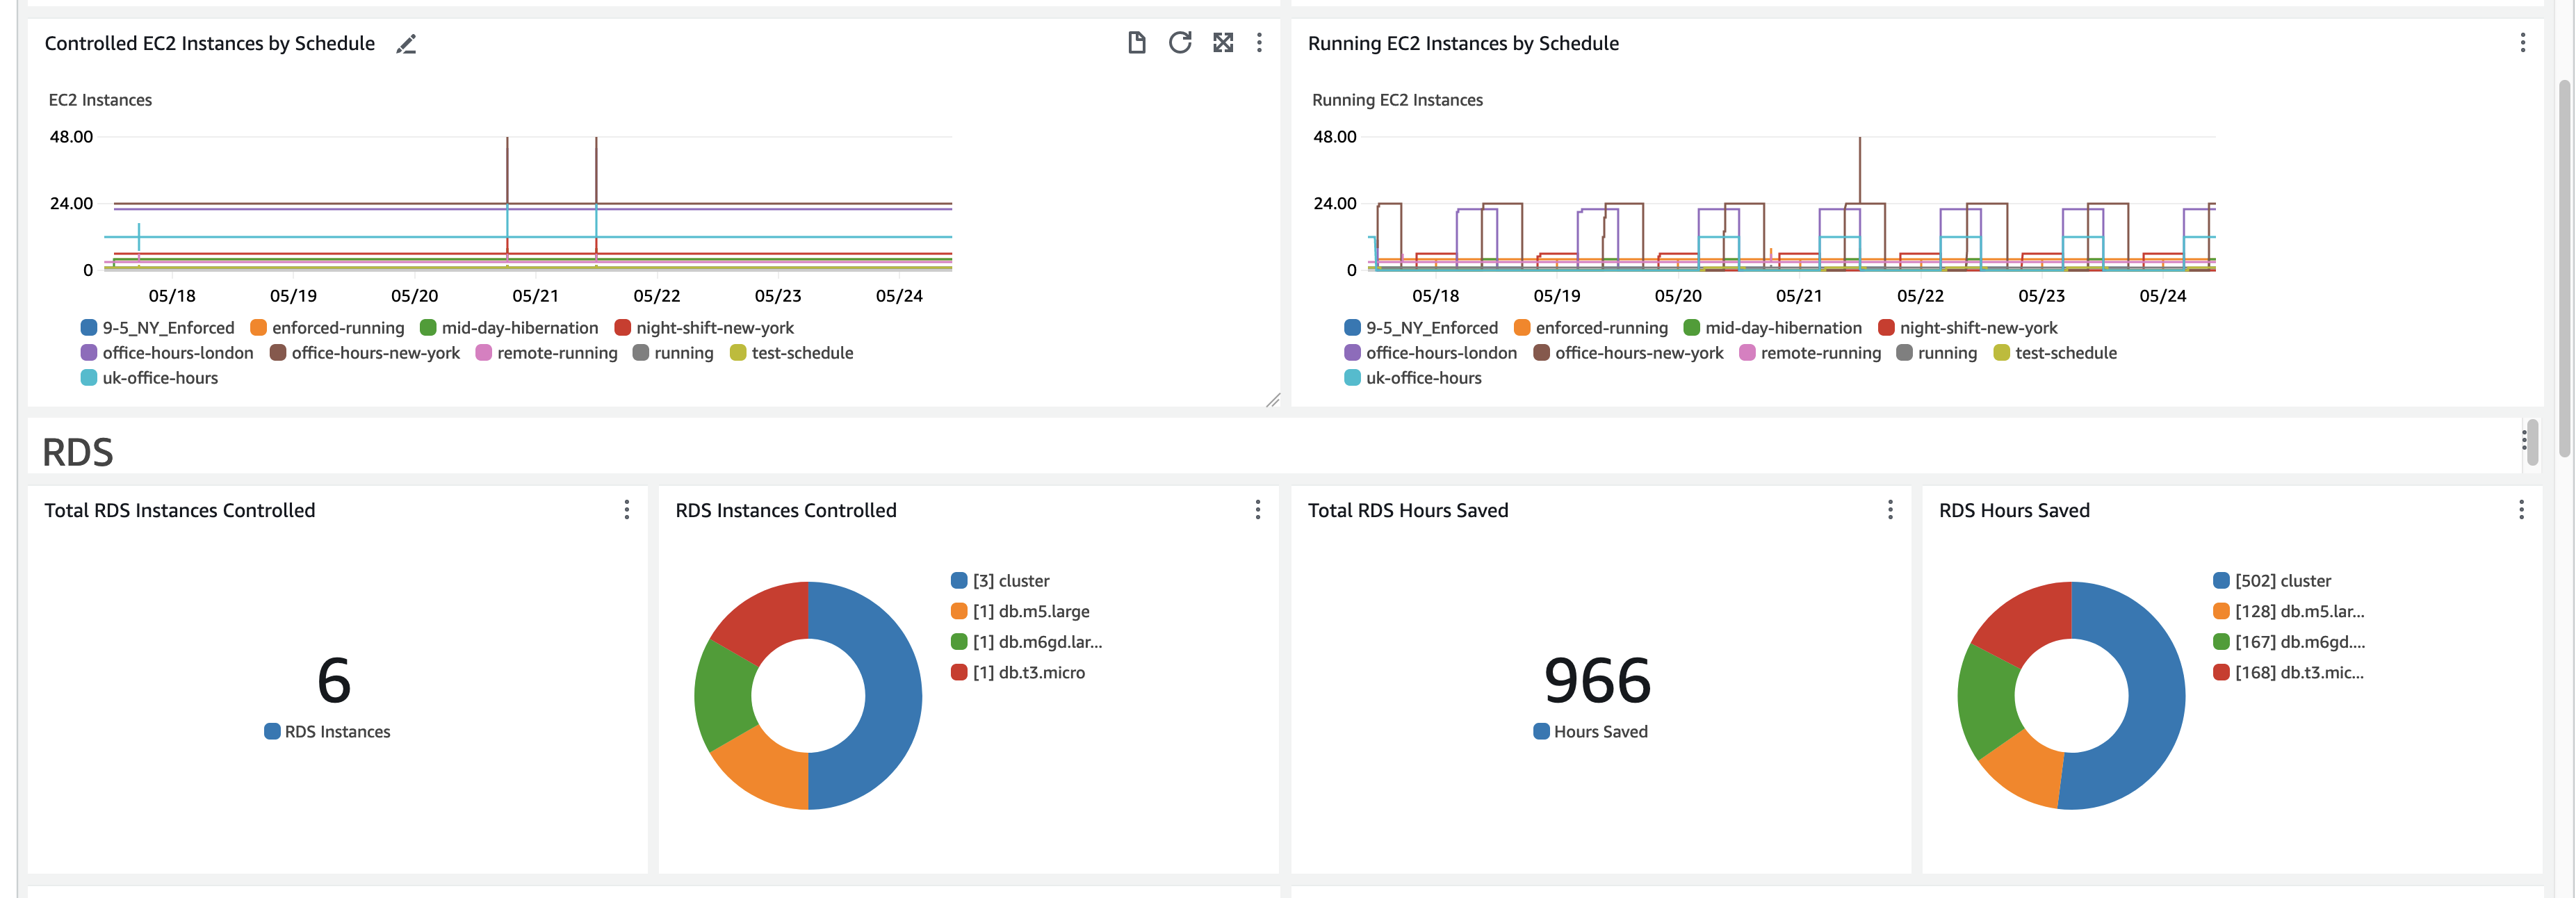
EC2 Istanze controllate tramite Schedule
Nota
Le informazioni contenute in questi grafici dipendono dall'intervallo di pianificazione configurato nello stack del Solution Hub. Quando si aggiorna l'intervallo di pianificazione della soluzione, la dashboard mostrerà solo le metriche di pianificazione successive all'aggiornamento più recente dell'intervallo di pianificazione.
La dashboard fornisce anche informazioni sullo stato delle funzioni Lambda che sono fondamentali per il funzionamento della soluzione. Se la durata media Lambda per una delle funzioni Lambda illustrate inizia ad avvicinarsi alla zona gialla, potrebbe essere il momento di aumentare la proprietà Lambda size nello stack del Solution Hub.

Durata Lambda
Rappresentato: genera AsgHandler errori consistenti nell'arco di più giorni. Ciò indica un potenziale problema con la pianificazione ASG e dovrebbe richiedere ulteriori indagini sui log di quella Lambda
Costi aggiuntivi associati a questa funzionalità
Questa dashboard operativa si basa su CloudWatch metriche personalizzate raccolte dalla soluzione che comporteranno costi aggiuntivi. Questa funzionalità può essere disattivata disabilitando il «Monitoraggio operativo» nello stack dell'hub della soluzione. Questa funzionalità costa 3,00 USD aggiuntivi al mese più costi di scalabilità aggiuntivi in base alle dimensioni dell'implementazione. I costi sono i seguenti:
| CloudWatch Dashboard personalizzata | $3 |
|---|---|
| Metriche per pianificazione | 0,60 USD per programma* |
| Parametri di Per-instance-type | 0,90 USD per tipo di istanza* |
| Utilizzo delle API | ~0,10 $ per account/regione |
* Questi costi vengono registrati per categoria di servizio (. EC2/RDS) and only for schedules/instance types actually used for scheduling. For example, if you have 15 schedules configured, with three for RDS and five for EC2, the total cost will be 8*$0.60 or $4.80/month Le pianificazioni inattive non verranno fatturate.
Monitora la soluzione con Service Catalog AppRegistry
La soluzione include una AppRegistry risorsa Service Catalog per registrare il CloudFormation modello e le risorse sottostanti come applicazione sia in Service Catalog AppRegistry che in AWS Systems Manager Application Manager.
AWS Systems Manager Application Manager offre una visione a livello di applicazione di questa soluzione e delle relative risorse in modo da poter:
-
Monitora le risorse, i costi delle risorse distribuite tra gli stack e Account AWS i log associati a questa soluzione da una posizione centrale.
-
Visualizza i dati operativi per le risorse di questa soluzione nel contesto di un'applicazione, ad esempio lo stato di implementazione, gli CloudWatch allarmi, le configurazioni delle risorse e i problemi operativi.
La figura seguente mostra un esempio della visualizzazione dell'applicazione per Instance Scheduler on AWS stack in Application Manager.
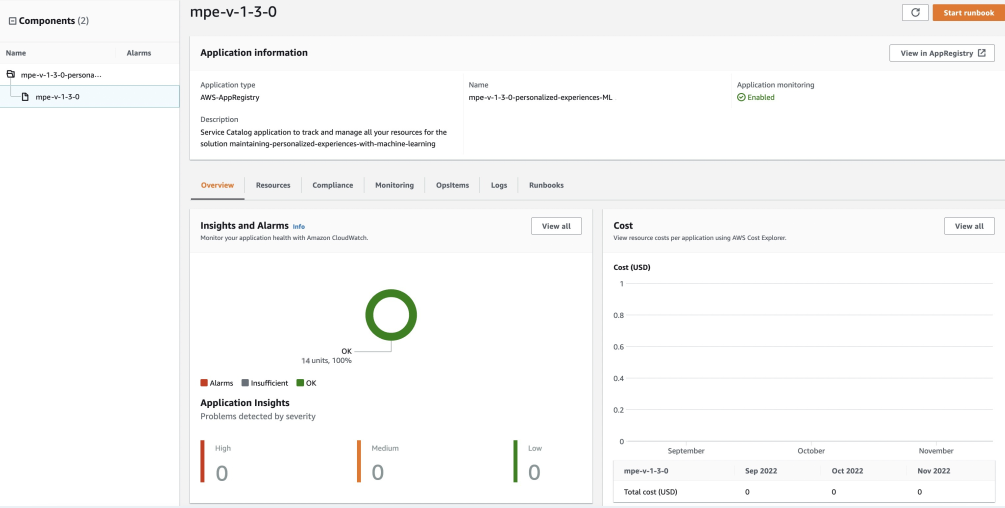
Stack di soluzioni in Application Manager
Nota: è necessario attivare CloudWatch Application Insights e AWS Cost Explorer i tag di allocazione dei costi associati a questa soluzione. Non sono attivati per impostazione predefinita.
Attiva CloudWatch Application Insights
-
Accedere alla console Systems Manager
. -
Nel riquadro di navigazione, scegli Application Manager.
-
In Applicazioni, cerca il nome dell'applicazione per questa soluzione e selezionalo.
Il nome dell'applicazione avrà il registro delle app nella colonna Origine dell'applicazione e avrà una combinazione del nome della soluzione, della regione, dell'ID dell'account o del nome dello stack.
-
Nell'albero dei componenti, scegliete lo stack di applicazioni che desiderate attivare.
-
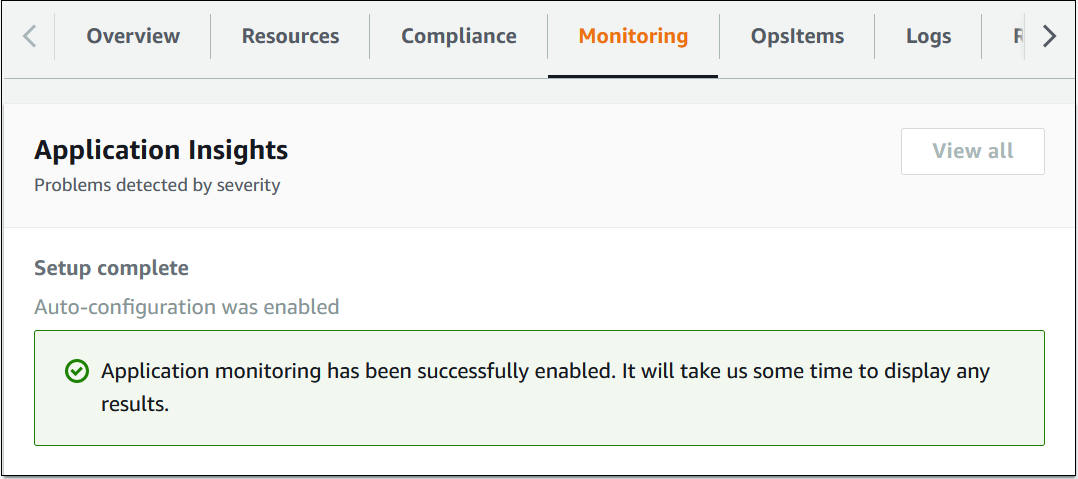
Nella scheda Monitoraggio, in Application Insights, seleziona Configura automaticamente Application Insights.
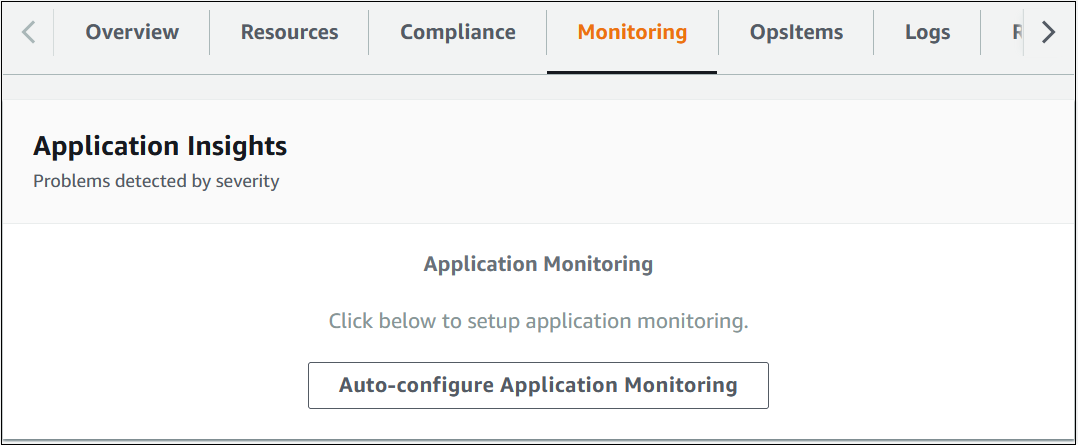
Il monitoraggio delle applicazioni è ora attivato e viene visualizzata la seguente casella di stato:
Conferma i cartellini dei costi associati alla soluzione
Dopo aver attivato i tag di allocazione dei costi associati alla soluzione, è necessario confermare i tag di allocazione dei costi per visualizzare i costi di questa soluzione. Per confermare i tag di allocazione dei costi:
-
Accedere alla console Systems Manager
. -
Nel riquadro di navigazione, scegli Application Manager.
-
In Applicazioni, scegli il nome dell'applicazione per questa soluzione e selezionala.
-
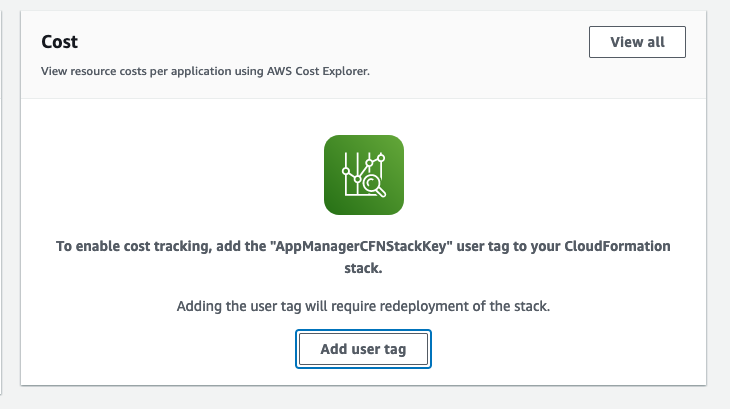
Nella scheda Panoramica, in Costo, seleziona Aggiungi tag utente.
-
Nella pagina Aggiungi tag utente, inserisci
confirm, quindi seleziona Aggiungi tag utente.
Il completamento del processo di attivazione può richiedere fino a 24 ore e la visualizzazione dei dati del tag.
Attiva i tag di allocazione dei costi associati alla soluzione
Dopo aver attivato Cost Explorer, è necessario attivare i tag di allocazione dei costi associati a questa soluzione per visualizzare i costi di questa soluzione. I tag di allocazione dei costi possono essere attivati solo dall'account di gestione dell'organizzazione. Per attivare i tag di allocazione dei costi:
-
Accedi alla console Gestione dei costi e fatturazione AWS and Cost Management
. -
Nel riquadro di navigazione, seleziona Etichette di allocazione dei costi.
-
Nella pagina Tag di allocazione dei costi, filtra il
AppManagerCFNStackKeytag, quindi seleziona il tag dai risultati visualizzati. -
Seleziona Activate (Attiva).
AWS Cost Explorer
È possibile visualizzare la panoramica dei costi associati all'applicazione e ai componenti dell'applicazione all'interno della console di Application Manager tramite l'integrazione, con la AWS Cost Explorer quale deve essere prima attivata. Cost Explorer ti aiuta a gestire i costi fornendo una panoramica dei costi e dell'utilizzo AWS delle risorse nel tempo. Per attivare Cost Explorer per la soluzione:
-
Accedi alla console di gestione dei AWS costi
. -
Nel riquadro di navigazione, seleziona Cost Explorer per visualizzare i costi e l'utilizzo della soluzione nel tempo.
