Granting LF-Tag permissions using the console
The following steps explain how to grant permissions on LF-Tags by using the Grant LF-Tag permissions page on the Lake Formation console. The page is divided into these sections:
-
Permission types – The type of permission to grant.
-
Principals – The IAM users or roles, or SAML users or roles to grant permissions to.
-
LF-Tag key-value pair permissions permissions – The LF-Tag key-value pairs to grant permissions on.
-
LF-Tag permissions – The LF-Tags to grant permissions on.
-
LF-Tag expression permissions permissions – The LF-Tags to grant permissions on.
-
Permissions – The permissions to grant.
Open the Grant LF-Tag permissions page
-
Open the Lake Formation console at https://console.aws.amazon.com/lakeformation/
. Sign in as the LF-Tag creator, a data lake administrator, or as a user LF-Tag permissions or LF-Tag key-value pair permissions on LF-Tags have been granted with the
Grantoption. -
In the navigation pane, choose LF-Tags and permissions, choose LF-Tag permissions section.
-
Choose Grant permissions.
Specify the permissions type
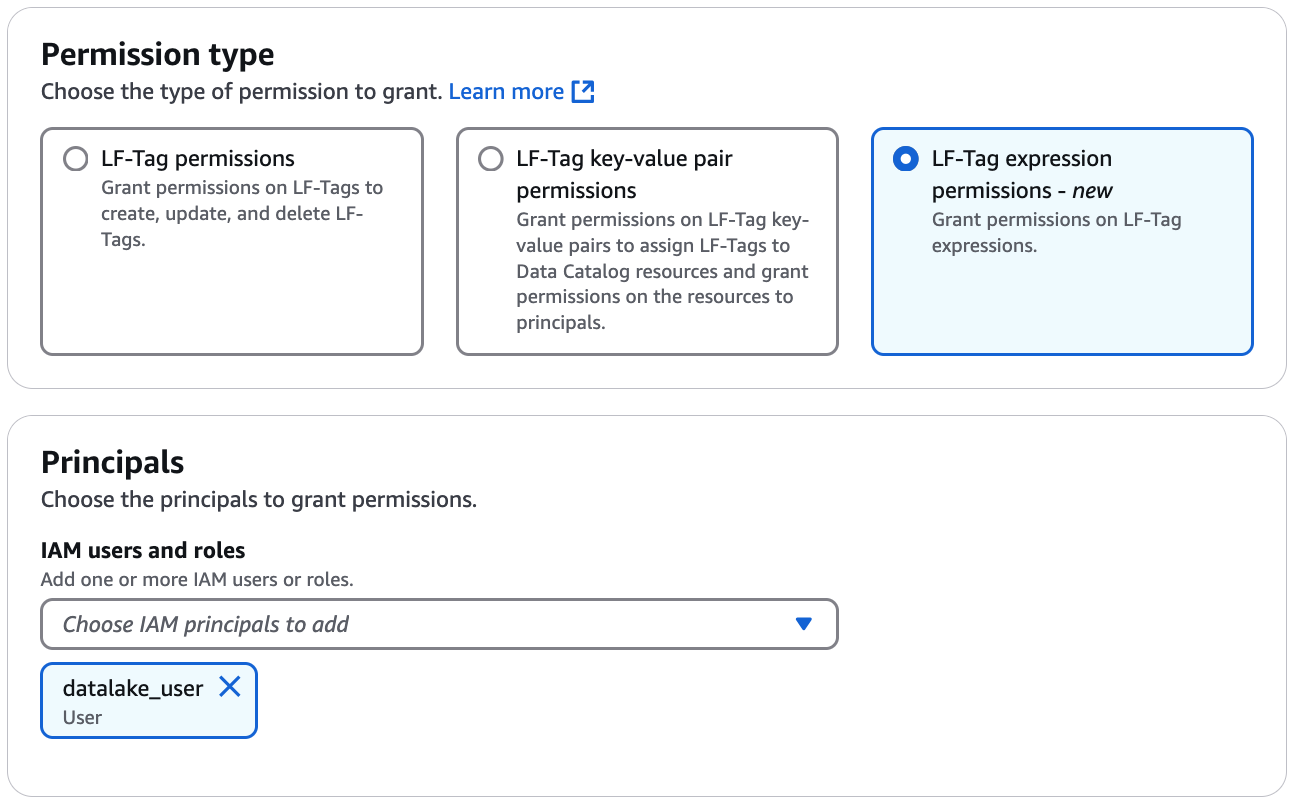
In the Permissions type section, choose a permissions type.
- LF-Tag permissions
-
Choose the LF-Tag permissions to allow principals to update LF-Tag values or delete LF-Tags.
- LF-Tag key-value pair permissions
-
Choose the LF-Tag key-value pair permissions to allow principals to assign LF-Tags to Data Catalog resources, view LF-Tags and values, and grant LF-Tags based permissions on Data Catalog resources to principals.
The options available in the following sections depend on the Permissions type.
- LF-Tag expression permissions
-
Choose the LF-Tag expression permissions to allow principals to update expressions or delete expressions.
Specify the principals
Note
You can't grant LF-Tag permissions (Alter and Drop) to
external accounts or principals in another account.
In the Principals section, choose a principal type and specify principals to grant permissions to.
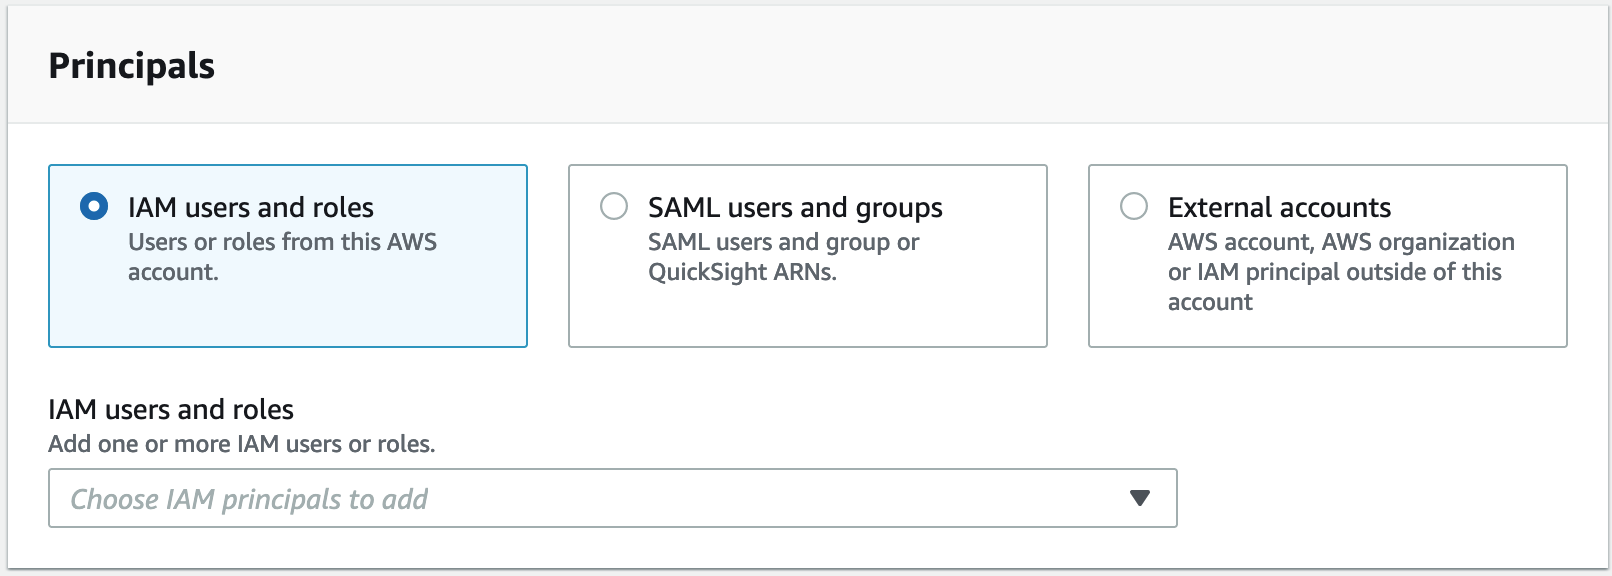
- IAM users and roles
-
Choose one or more users or roles from the IAM users and roles list.
- SAML users and groups
-
For SAML and QuickSight users and groups, enter one or more Amazon Resource Names (ARNs) for users or groups federated through SAML, or ARNs for QuickSight users or groups. Press Enter after each ARN.
For information about how to construct the ARNs, see Lake Formation grant and revoke AWS CLI commands.
Note
Lake Formation integration with QuickSight is supported for QuickSight Enterprise Edition only.
- External accounts
-
For AWS account, enter one or more valid AWS account IDs. Press Enter after each ID.
An organization ID consists of "o-" followed by 10 to 32 lower-case letters or digits.
An organizational unit ID starts with "ou-" followed by 4 to 32 lowercase letters or digits (the ID of the root that contains the OU). This string is followed by a second "-" dash and 8 to 32 additional lowercase letters or digits.
For IAM principal, enter the ARN for the IAM user or role.
Specify the LF-Tags
To grant permissions on LF-Tags, in the LF-Tag permissions section, specify the LF-Tags to grant permissions on.
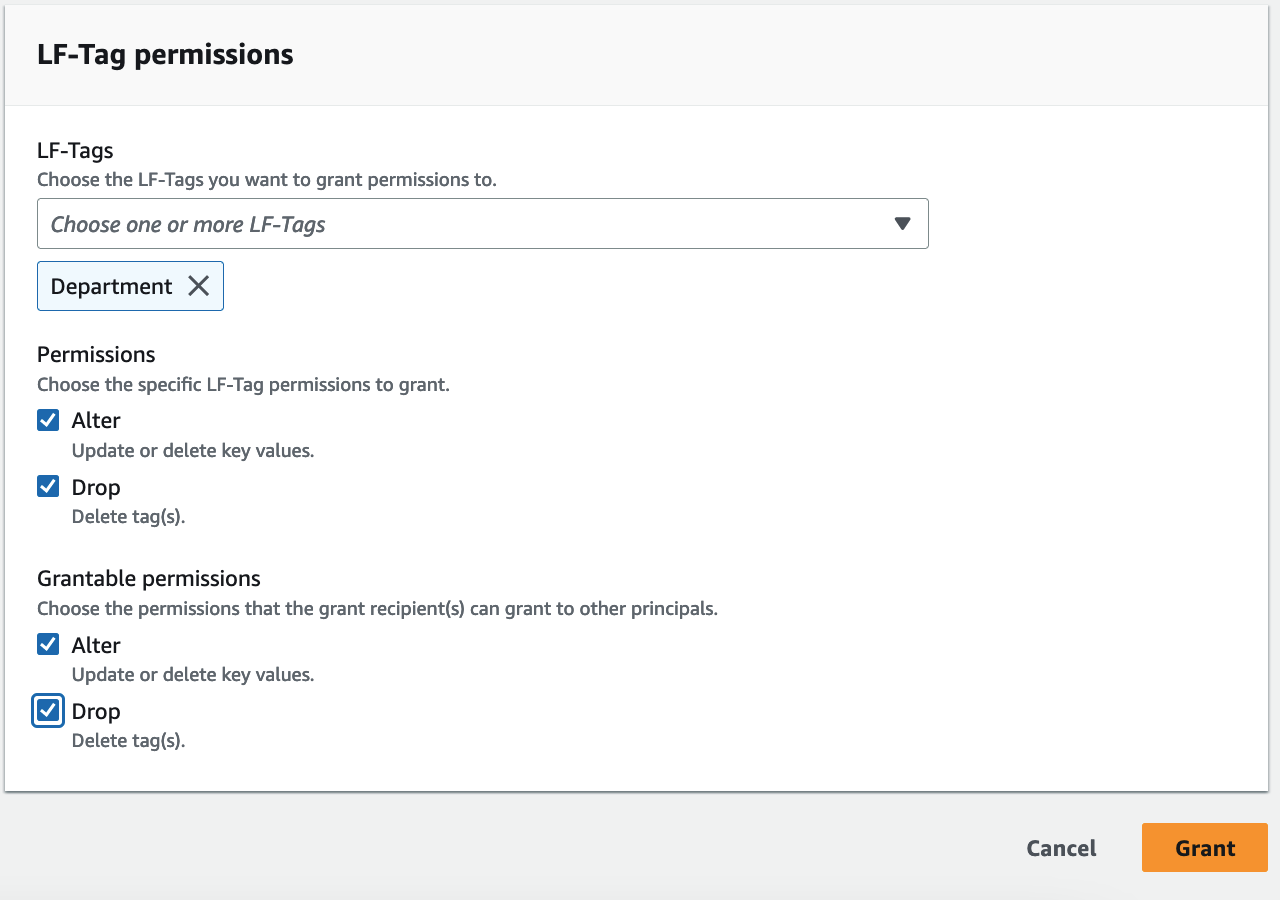
Choose one or more LF-Tag using the drop-down.
Specify the LF-Tag key-value pairs
-
To grant permissions on LF-Tag key-value pairs, (you need to first choose choose LF-Tag key-value pair permissions as the Permission type) choose Add LF-Tag key-value pair to reveal the first row of fields for specifying LF-Tag key and values.

-
Position the cursor in the Key field, optionally start typing to narrow down the selection list, and select a LF-Tag key.
-
In the Values list, select one or more values, and then press Tab or click or tap outside the field to save the selected values.
Note
If one of the rows in the Values list has focus, pressing Enter selects or clears the check box.
The selected values appear as tiles below the Values list. Choose the ✖ to remove a value. Choose Remove to remove the entire LF-Tag.
-
To add another LF-Tag, choose Add LF-Tag again, and repeat the previous two steps.
Specify the LF-Tag expressions
-
To grant permissions on LF-Tag expressions, (you need to first choose choose LF-Tag expression permissions as the Permission type).
-
Choose a LF-Tag expression.
-
The selected expressions appear as tiles below the LF-Tag expressions list. Choose the ✖ to remove an expression.
-
To add another LF-Tag expression, choose another expression.
Specify the permissions
This section shows either the LF-Tag permissions or the LF-Tag value permissions based on the Permission type you chose in the previous step.
Depending on the Permission type you chose to grant, select the LF-Tag permissions or LF-Tag key-value pair permissions, and grantable permissions.
-
Under LF-Tag permissions, select the permissions to grant.
Granting Drop and Alter implicitly grants Describe.
You need to grant Alter and Drop permissions on all tag values.
-
Under LT-Tag key-value value permissions, select the permissions to grant.
Granting Associate implicitly grants Describe. Choose Grant with LF-Tag expression to allow the grant recipient to grant or revoke access permissions on Data Catalog resources using LF-TBAC method.
-
Under LF-Tag expression permissions, select the permissions to grant.
Granting Drop and Alter implicitly grants Describe.
Granting Super permission, grants all available permissions.
-
(Optional) Under Grantable permissions, select the permissions that the grant recipient can grant to other principals in their AWS account.
-
Choose Grant.
