Implementation details
These implementation details describe how AWS Launch Wizard deploys an Exchange Server environment in the AWS Cloud. It provides details about the Exchange nodes including storage, IP addresses, failover clustering for the database availability group (DAG), Edge Transport servers, Elastic Load Balancing, and Amazon EBS encryption.
Storage on the Exchange nodes
Launch Wizard deploys the Exchange nodes using the Amazon EC2 memory-optimized r5.xlarge instance type by
default. Amazon EBS-optimized instances, such as the Amazon EC2 R5 instance type
The Exchange nodes run on EC2 and use Amazon EBS volumes for network-attached disk storage. EBS volumes are placed in a specific Availability Zone where they are automatically replicated to prevent data loss due to failure of any single hardware component. With EBS volumes attached, you can use them as a block device for various use cases, such as running a mailbox database.
By default, on each Exchange node, Launch Wizard deploys three 500-GiB General Purpose SSD (GP2) EBS volumes to store mailbox databases and transaction logs. The database and log partitions are formatted using GUID Partition Table (GPT). The partitions are created using Resilient File System (ReFS), which is the Preferred Architecture (PA) choice for Exchange Server 2016 and Exchange Server 2019. If you set the Enable or disable ReFS parameter to false, the partitions are formatted using NTFS.
General Purpose SSD volumes deliver a consistent baseline of 3 IOPS per 1 GiB provisioned, up to 16,000 IOPS. The default storage configuration provides a total of 1,500 IOPS per volume for Exchange database and transaction log volumes. Provisioned IOPS SSD volumes offer storage with consistent and low-latency performance. They are designed for applications with I/O-intensive workloads, such as databases, that are sensitive to storage performance and consistency.
If you need more IOPS per volume, consider using Provisioned IOPS SSD by changing the Exchange Server Volume Type and Exchange Server Volume IOPS parameters, or use disk striping with a RAID configuration on Windows. You can customize the volume size, and also switch to using dedicated IOPS volumes by modifying the EBS volume.
The default disk layout in this Launch Wizard deployment uses the following EBS volumes:
-
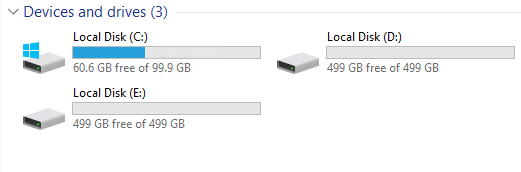
One General Purpose SSD volume (100 GiB) for the operating system (C:)
-
One General Purpose SSD volume (500 GiB) to host the Exchange Server database files (D:)
-
One General Purpose SSD volume (500 GiB) to host the Exchange Server transaction log files (E:)
The following image shows the disk layout on each Exchange Server node:
Note
You can find the installation software on each node in the C:\Exchangeinstall folder. Depending on the instance type you selected for deployment, you might see additional drives for Amazon EC2 instance store (ephemeral) volumes such as (Z:). Data on instance store volumes is intended only for temporary block-level storage on the instance.
IP addresses on the Exchange nodes
Launch Wizard for Exchange Server deploys two Exchange nodes with two IP addresses each by default. The IP addresses perform different functions:
-
The first IP address is used as the primary IP address for the instance.
-
The second IP address is used as the failover cluster IP resource for the instance.
By default, the 10.0.0.0/19 and 10.0.32.0/19 CIDR blocks are used for the two private subnets that are created. If you choose to specify witness or full for the Third AZ parameter, an additional CIDR block of 10.0.64.0/19 is used to create a third private subnet.
Database Availability Group
A failover cluster is automatically created for the database availability group (DAG). Launch Wizard will carry out this task when deploying the second node. The following Windows PowerShell commands to complete this task:
Install-WindowsFeature failover-clustering –IncludeManagementTools
New-DatabaseAvailabilityGroup -Name DAG -WitnessServer FileServer -WitnessDirectory C:\DAG
Add-DatabaseAvailabilityGroupServer -Identity DAG -MailboxServer ExchangeNode1
Add-DatabaseAvailabilityGroupServer -Identity DAG -MailboxServer ExchangeNode2
The first command runs on each instance during the bootstrapping process. It installs the required components and management tools for the failover clustering services. The rest of the commands run near the end of the bootstrapping process on the second node and are responsible for creating the cluster and for defining the server nodes and IP addresses.
By default, Launch Wizard configures an even number of servers in the cluster. You need a third resource to maintain a majority vote to keep the cluster online if an individual server fails. For this, Launch Wizard uses a dedicated file share witness instance, which can be either a domain-joined server, or a third Exchange node, which cannot be part of the DAG itself. Launch Wizard creates a Dedicated Instance in the first Availability Zone to act as the file share witness.
For production environments, you can also set the Third AZ parameter to witness to create a Dedicated Instance with a file share in a third Availability Zone. Alternatively, you can use any domain-joined server for this task, but this configuration option is not included for the deployment. If you set the Third AZ parameter to full, Launch Wizard keeps the quorum settings to the default node majority and creates a third Exchange Server node in the third Availability Zone.
Some AWS Regions support only two Availability Zones. For a current list, see AWS Global Infrastructure
Edge Transport Nodes
Edge Transport nodes relay inbound and outbound emails and provide smart host services within the Exchange organization. The Edge nodes are installed in the public subnets and aren’t domain-joined. However, they do require information from Active Directory, and configuring an Edge sync subscription is needed. Because Edge Transport role nodes aren’t required for end-to-end mail flow, Edge nodes aren’t deployed unless you specify to do so. To deploy Edge Transport resources, you must select yes for the Deploy Edge servers configuration during launch.
If you choose to deploy Edge Transport resources, a pair of Edge servers are deployed in the public subnets, which must already be defined. Also, the Exchange Server Edge Transport role is installed using default settings. The EC2 instances aren’t domain-joined, but the DNS suffix that corresponds to the domain name is configured on the network interface cards (NICs). Also, DNS records are created in Active Directory corresponding to their hostname. The Local Administrator password is reset to the Domain Admin password, and an Edge subscription file is created, which can be found in C:\EdgeServerSubscription.xml. You can copy the subscription file to a mailbox server, and import the subscription, by running the following command:
New-EdgeSubscription -FileData ([byte[]]$(Get-Content -Path "C:\EdgeServerSubscription.xml" -Encoding Byte -ReadCount 0)) -Site "AZ1"
Elastic Load Balancing for Exchange
Exchange servers running with the Client Access/Transport roles are usually situated behind an Network Load Balancer (NLB) with a unified Exchange namespace such as mail.example.com. The namespace resolves to the load balancer, which in turn distributes traffic to the Exchange servers.
Launch Wizard for Exchange Server contains an option to deploy an Application Load Balancer that distributes the traffic to the Exchange nodes. By default, the load balancer isn’t deployed because it requires an existing SSL certificate to be imported in AWS Certificate Manager. For a load balancer to be deployed, you must:
-
Import or generate a certificate in AWS Certificate Manager.
-
Specify the full Amazon Resource Name (ARN) in the CertificateARN option.
-
Select true in Deploy Load Balancer, when configuring the deployment.
Amazon EBS encryption for Exchange
As part of the default setup, Launch Wizard for Exchange Server creates and attaches two EBS volumes to each Exchange node. One EBS volume corresponds to the D:\ drive and holds the Exchange mailbox databases. The other EBS volume corresponds to the E:\ drive and holds the Exchange transaction logs. Optionally, Launch Wizard provides an option to encrypt the EBS volumes with either the default AWS Key Management Service (AWS KMS) encryption key or a custom KMS key.
Note
The root volume of the Exchange nodes (C:\) isn’t encrypted even if Encrypt data volumes is selected.
