Defect Detection App is in preview release and is subject to change.
Setting up an edge device
An edge device is an Industrial PC (IPC) that hosts a Defect Detection App station. The edge device is located where you need to analyze images, such as a production line where you want to find manufacturing flaws on completed circuit boards. The edge device has one or more attached cameras that provide images for analysis with the model.
Topics
Required hardware
Installing Defect Detection App on an edge device requires the following hardware:
-
Personal Computer (PC).
-
Edge device — x86 or ARM64 CPU architecture, such as the Advantech MIC-730AI-10A1. Install an NVME Solid State Ddrive (SSD) with 100GB or greater.
-
(Optional) Graphics Processing Unit (GPU) installed on the edge device. On edge devices with ARM64 CPUs, we support NVIDIA Jetson Xavier Series GPUs. On edge devices with X86_64 CPUs, we support Generic Linux x86 NVIDIA GPUs.
-
Ethernet cables.
-
POE network switch.
-
GigE cameras.
-
USB thumb Drive 8GB or greater.
Required software
We have tested Defect Detection App with the following software configurations:
Operating system
We have tested Defect Detection App with the following CPU and operating system configurations.
ARM64 CPU — Ubuntu 18.04 with and without a GPU.
X86_64 CPU — Ubuntu 20.04 with and without a GPU.
Graphic Processing Unit (GPU) for accelerated workflows
Optionally, you can use a GPU to accelerate the workflows that analyze images on the edge device.
You can use NVIDIA Jetson Xavier GPUs or X86_64 NVIDIA GPUs. We have tested workflows with the following configurations:
NVIDIA Jetson-AGX GPU
 L4T 32.6.1 [ JetPack 4.6 ]
  Ubuntu 18.04.6 LTS
  Kernel Version: 4.9.253-tegra
 CUDA 10.2.300
  CUDA Architecture: NONE
 OpenCV version: 4.1.1
  OpenCV Cuda: NO
 CUDNN: 8.2.1.32
 TensorRT: 8.0.1.6
 Vision Works: 1.6.0.501
 VPI: 1.1.12
 Vulcan: 1.2.70
X86_64 NVIDIA GPU
 CUDA 10.2.89
 CUDA Architecture: NONE
 CUDNN: 7.6.5.32
 TensorRT: 7.0.0.11
Install and configure the solid state drive
You need to install a solid state drive (SSD) into the edge device that hosts the Defect Detection App software.
The following instructions show how install, partition, and mount a M.2 NVME SSDrive on an Advantech MIC-730AI-10A1 edge device.
Before installing the SSD, we recommend that you read the manual
To install the SSD
Install the SSD into the edge device by following the instructions in section 2.2.9 on Pg. 15 of the MIC-730AI manual
. Important
Remember to use an anti-static strap when handling the SSD.
Boot into Ubuntu on the edge device.
Open a terminal window.
Confirm that the SSD is installed by entering the following command.
sudo lshw -class disk -shortYou should see the SSD listed as
/dev/nvme0n1.Create a GUID Partition Table (GPT) by entering the following command.
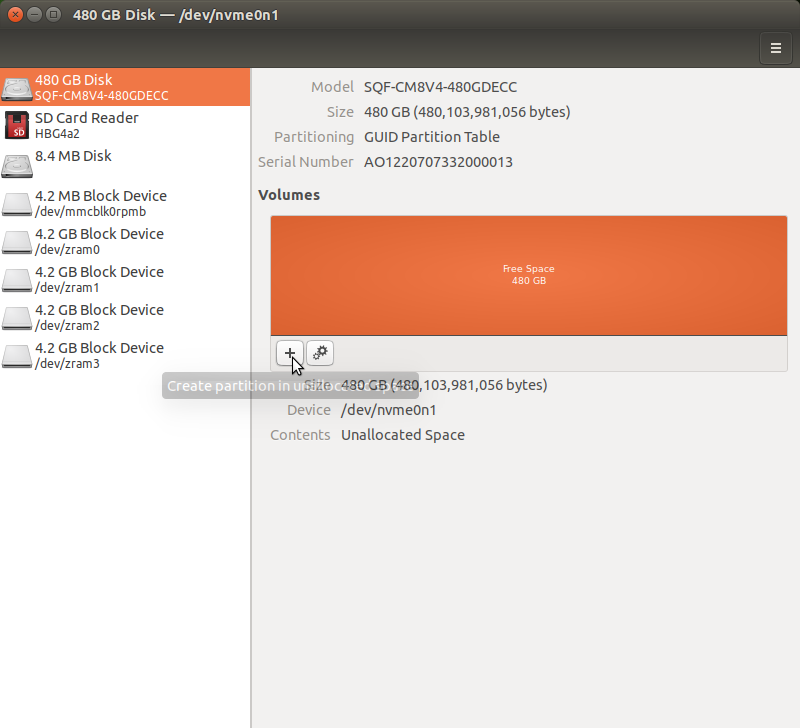
sudo parted /dev/nvme0n1 mklabel gptIn the Ubuntu desktop, open the Disks application.
In the left navigation pane, choose the SSD.
In the Volumes section, choose the + button to start creating a partition.
In the Create partition dialog, Leave the Partition Size unchanged to use the entire disk space for the partition. Leave Free Space Following unchanged.
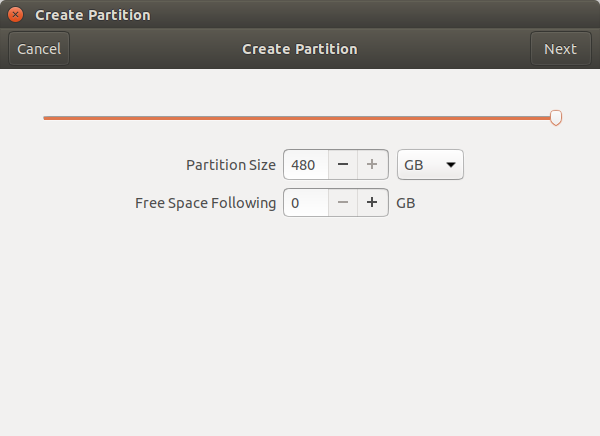
Choose Next
In Format Volume do the following
-
In Volume Name enter
/aws_dda. -
Set Erase to the OFF position.
-
For Type, select Internal disk for use with Linux systems only (Ext4). Don't select Password protect volume (LUKS).
-
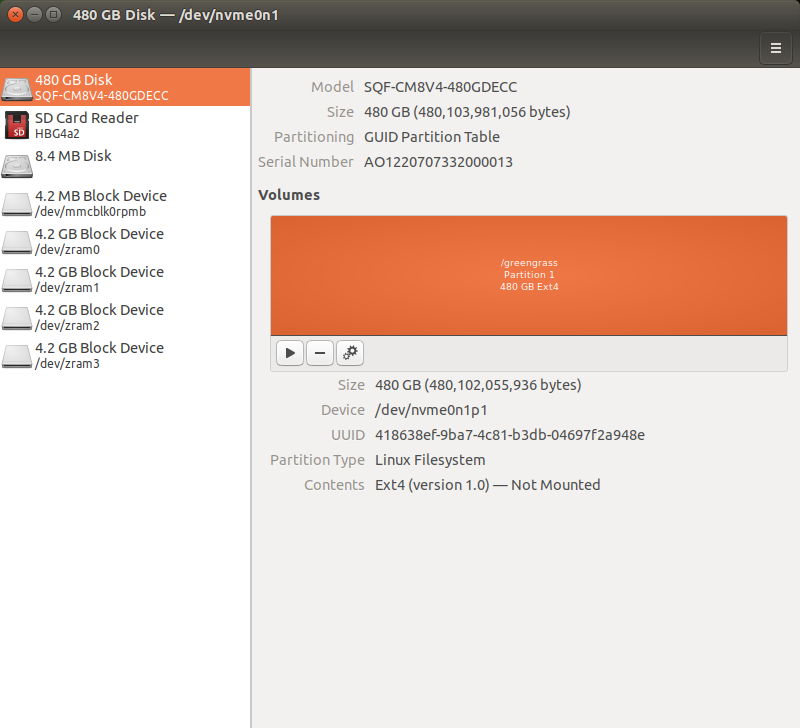
Choose Create to create the disk partition.
The Disks app should look like following image.
-
Back in the terminal window, mount the partition by entering the following commands.
sudo mkdir /aws_dda
sudo mount /dev/nvme0n1p1 /aws_dda
sudo chmod 755 /aws_dda
Once the disk is mounted, return to the Disks app. The mounted mounted disk should be shown, as in the following image.
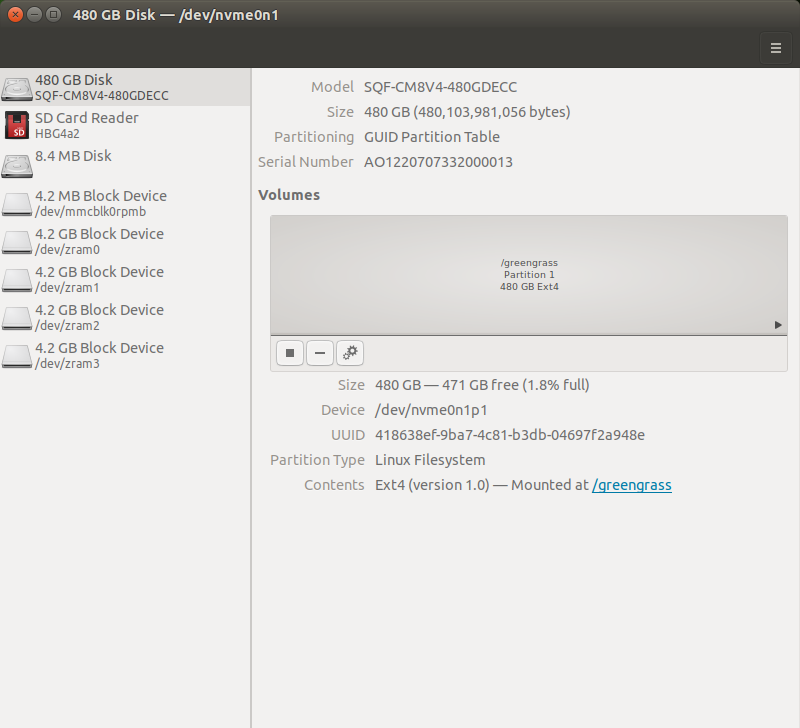
Note the uuid value for the SSD. You need it in the next step.
Make the disk mount persistent through system reboots by doing the following
Backup the existing fstab by entering the following command.
sudo cp /etc/fstab /etc/fstab_bakOpen fstab for editing by entering the following command.
sudo nano /etc/fstabThe fstab file opens as follows
# Copyright (c) 2019, NVIDIA CORPORATION.  All rights reserved.
#
# NVIDIA CORPORATION and its licensors retain all intellectual property
# and proprietary rights in and to this software, related documentation
# and any modifications thereto.  Any use, reproduction, disclosure or
# distribution of this software and related documentation without an express
# license agreement from NVIDIA CORPORATION is strictly prohibited.
#
# /etc/fstab: static file system information.
#
# These are the filesystems that are always mounted on boot, you can
# override any of these by copying the appropriate line from this file into
# /etc/fstab and tweaking it as you see fit.  See fstab(5).
#
# <file system> <mount point>             <type>          <options>                               <dump> <pass>
/dev/root            /                     ext4           defaults                                     0 1
Add the following line to the end of the file. Change uuid to the value you noted in the previous step.
UUID=<uuid> /aws_dda ext4 defaults 0 2The file should look similar to the following
# Copyright (c) 2019, NVIDIA CORPORATION.  All rights reserved.
#
# NVIDIA CORPORATION and its licensors retain all intellectual property
# and proprietary rights in and to this software, related documentation
# and any modifications thereto.  Any use, reproduction, disclosure or
# distribution of this software and related documentation without an express
# license agreement from NVIDIA CORPORATION is strictly prohibited.
#
# /etc/fstab: static file system information.
#
# These are the filesystems that are always mounted on boot, you can
# override any of these by copying the appropriate line from this file into
# /etc/fstab and tweaking it as you see fit.  See fstab(5).
#
# <file system> <mount point>             <type>          <options>                               <dump> <pass>
/dev/root            /                     ext4           defaults                                     0 1
UUID= 418638ef-4c81-b3db-04697f2a948e /greengrass  ext4  defaults  0  2
Save the updated fstab file.
Unmount and remount the SSD.
sudo umount /aws_dda
sudo mount -a
Next step: Installing the cameras on the edge device.
Installing the cameras on the edge device
The edge device hosts one or more cameras that capture images for analysis with a Defect Detection App model. Later, you specify the same amount of cameras when you create a station for the edge device. You also map the cameras to image streams that the station creates for each camera.
The camera must must support either the GeniCam
To set up the cameras on your edge device
-
Connect your camera to the edge device, either through a LAN connection, direct ethernet, or USB.
-
Install your camera using the software that comes with your camera. This includes image settings, such as exposure and gain.
Next step: Signing into the Defect Detection App Console.
