Step 4: Specify the App to Deploy to the Instance
Important
The AWS OpsWorks Stacks service reached end of life on May 26, 2024 and has been disabled for both new and existing customers.
We strongly recommend customers migrate their workloads to other solutions as soon as possible. If you have questions about migration, reach out to the AWS Support Team on AWS re:Post
Tell OpsWorks Stacks about the app that you will deploy to the instance later in this walkthrough. In this context, OpsWorks Stacks defines an app as code you want to run on an instance. (For more information, see Apps.)
The procedure in this section applies to Chef 12 and newer stacks. For information about how to add apps to layers in Chef 11 stacks, see Step 2.4: Create and Deploy an App - Chef 11.
To specify the app to deploy
-
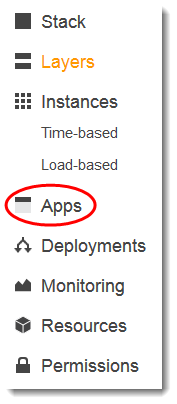
In the service navigation pane, choose Apps:

-
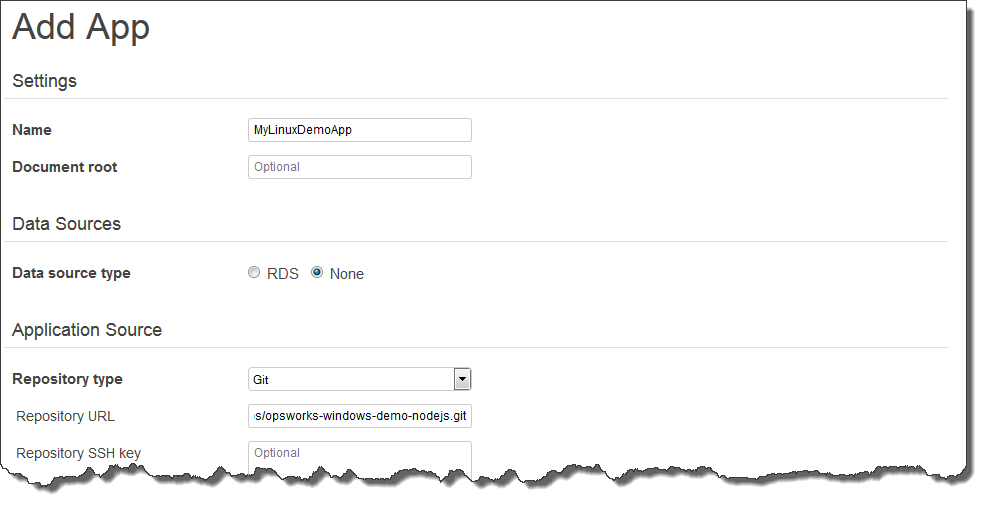
The Apps page is displayed. Choose Add an app. The Add App page is displayed.
-
For Settings, for Name, type
MyLinuxDemoApp. (You can type a different name, but be sure to substitute it forMyLinuxDemoAppthroughout this walkthrough.) -
For Application Source, for Repository URL, type
https://github.com/awslabs/opsworks-windows-demo-nodejs.git -
Leave the defaults for the following:
-
Settings, Document root (blank)
-
Data Sources, Data source type (None)
-
Repository type (Git)
-
Repository SSH key (blank)
-
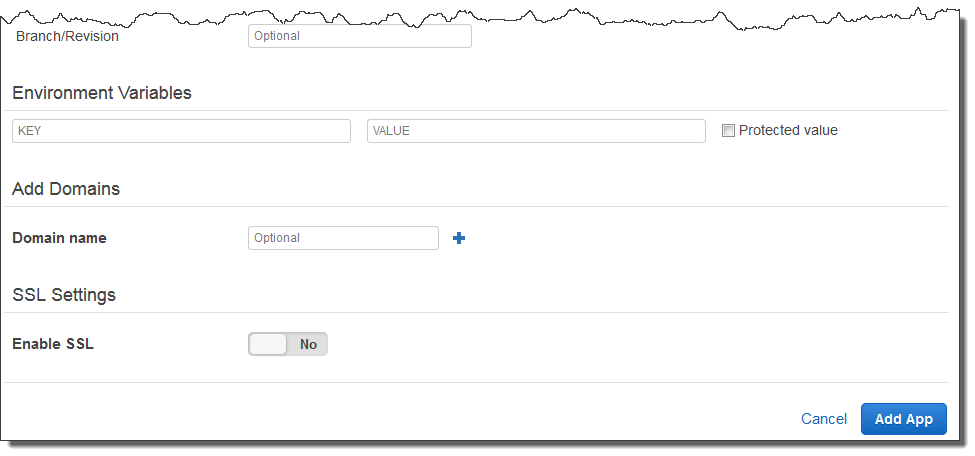
Branch/Revision (blank)
-
Environment Variables (blank KEY, blank VALUE, unchecked Protected Value)
-
Add Domains, Domain Name (blank)
-
SSL Settings, Enable SSL (No)


-
-
Choose Add App. OpsWorks Stacks adds the app and displays the Apps page.
You now have an app with the correct settings for this walkthrough.
In the next step, you will launch the instance.