End of support notice: On October 30, 2026, AWS will end support for Amazon Pinpoint. After October 30, 2026, you will no longer be able to access the Amazon Pinpoint console or Amazon Pinpoint resources (endpoints, segments, campaigns, journeys, and analytics). For more information, see Amazon Pinpoint end of support. Note: APIs related to SMS, voice, mobile push, OTP, and phone number validate are not impacted by this change and are supported by AWS End User Messaging.
Set up Amazon API Gateway for SMS messaging in Amazon Pinpoint
In this section, you create a new API by using Amazon API Gateway as part of the SMS registration for Amazon Pinpoint. The registration form that you deploy in this solution calls this API. API Gateway then passes the information that's captured on the registration form to the Lambda function you created in Create Lambda functions.
First, you have to create a new API in API Gateway. The following procedures show you how to create a new REST API.
To create a new API
Open the API Gateway console at https://console.aws.amazon.com/apigateway/
. -
Choose Create API. Make the following selections:
-
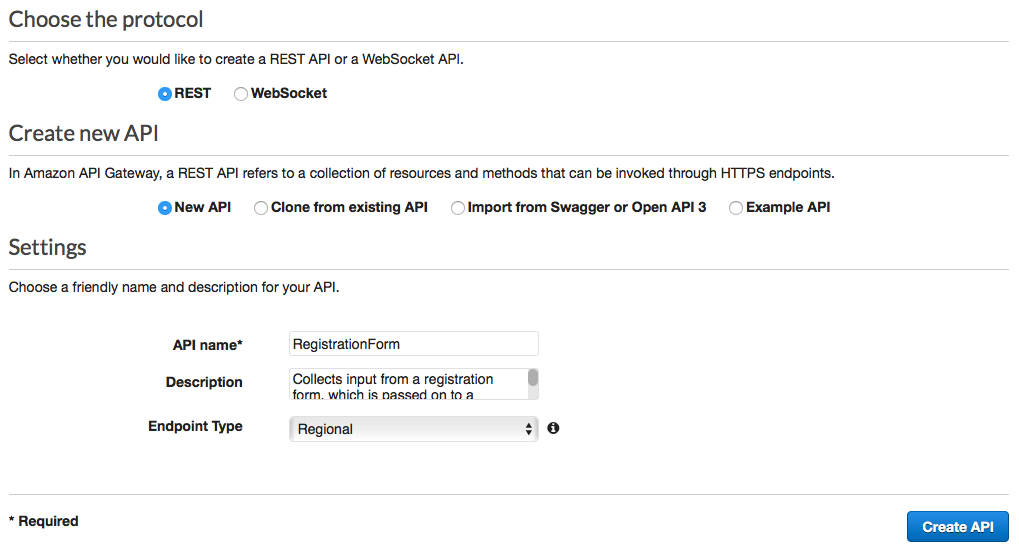
Under Choose the protocol, choose REST.
-
Under Create new API, choose New API.
-
Under Settings, for Name, enter a name, such as
RegistrationForm. For Description, optionally enter some text that describes the purpose of the API. For Endpoint Type, choose Regional. Then, choose Create API.
An example of these settings is shown in the following image.
-
Now that you've created an API, you can start to add resources to it. After that, you add a POST method to the resource, and tell API Gateway to pass the data that you receive from this method to your Lambda function.
-
On the Actions menu, choose Create Resource. In the New Child Resource pane, for Resource Name, enter
register, as shown in the following image. Choose Create Resource.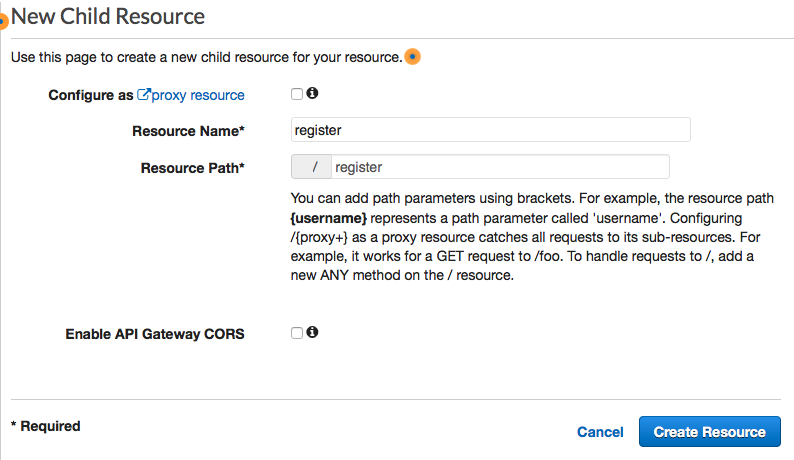
-
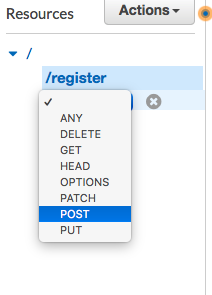
On the Actions menu, choose Create Method. From the menu that appears, choose POST, as shown in the following image. Then choose the check mark button.
-
In the /register - POST - Setup pane, make the following selections:
-
For Integration type, choose Lambda Function.
-
Choose Use Lambda Proxy Integration.
-
For Lambda Region, choose the Region that you created the Lambda function in.
-
For Lambda Function, choose the RegisterEndpoint function that you created in Create Lambda functions.
An example of these settings is shown in the following image.

Choose Save. On the window that appears, choose OK to give API Gateway permission to execute your Lambda function.
-
The API is now ready to use. At this point, you have to deploy it in order to create a publicly accessible endpoint.
-
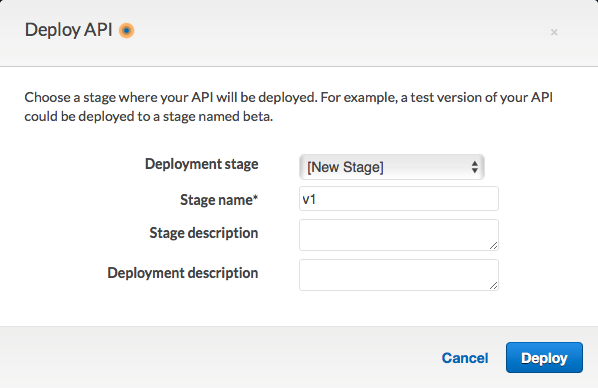
On the Actions menu, choose Deploy API. On the Deploy API window, make the following selections:
-
For Deployment stage, choose [New Stage].
-
For Stage name, enter
v1. -
Choose Deploy.
An example of these selections is shown in the following image.
-
-
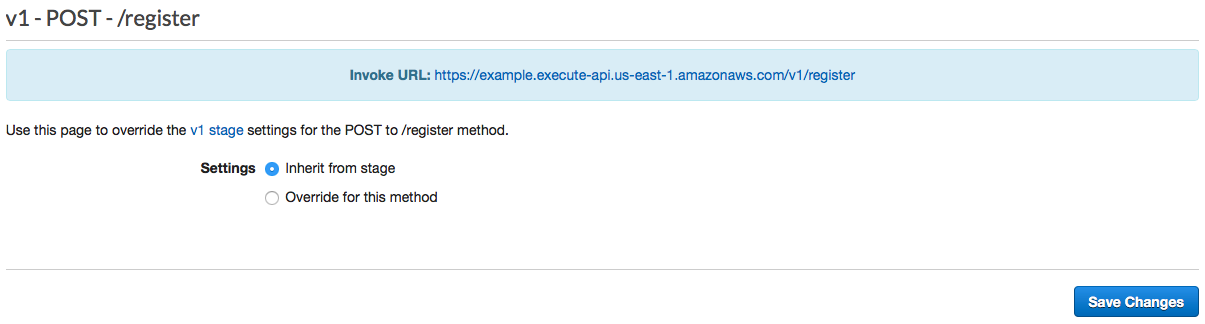
In the v1 Stage Editor pane, choose the /register resource, and then choose the POST method. Copy the address that's shown next to Invoke URL, as shown in the following image.
-
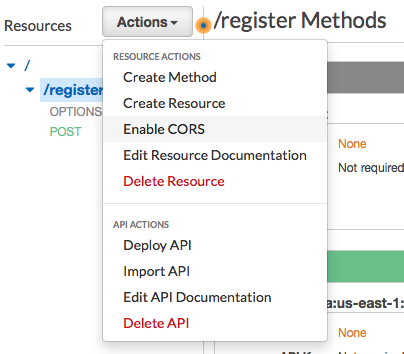
In the navigation pane, choose Resources. In the list of resources, choose the /register resource. Finally, on the Actions menu, choose Enable CORS, as shown in the following image.
-
On the Enable CORS pane, choose Enable CORS and replace existing CORS headers.
Next: Create and deploy the web form
