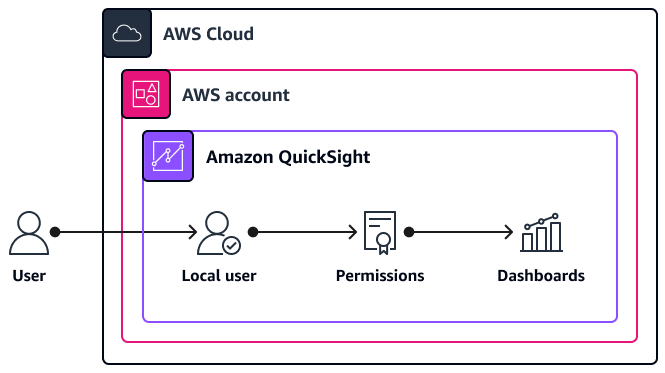
Creating local users in QuickSight
The following are the characteristics of this architecture and access approach:
-
This user has access to Amazon QuickSight only and cannot access other services and resources in your AWS account.
-
The user's password is managed locally in QuickSight.
-
You provision access by inviting the user through their email address.
-
The user must log in directly through the QuickSight console at https://quicksight.aws.amazon.com/
.
Considerations and use cases
This is the most direct way to provision access to QuickSight because it creates a local user record inside the QuickSight user store and doesn't have any external dependencies. This user record exists only in QuickSight and has a password that is also managed in QuickSight.
This type of approach is also probably the most flexible because the only prerequisite is having an email address for the user. You don't have to create and manage users in another service or directory, and it can be a quick way to provision access for third-party vendors or partners who need to access your QuickSight dashboards. This access approach is best suited for users who require access to QuickSight only and don't require access to other services and resources in the AWS account.
Because these are local users in QuickSight, IT operations teams need to establish dedicated processes for managing access requests, provisioning access, and periodically reviewing and auditing access. For example, they cannot use existing access review processes for corporate identities because the user record is independent of other identity management systems.
Prerequisites
-
Administrative permissions in QuickSight or permissions to create QuickSight users (see IAM identity-based policies for Amazon QuickSight: creating users)
-
Email address for the user
Configuring access for a QuickSight local user
For instructions on how to configure a local user, see Inviting users to access Amazon QuickSight. Note the following when configuring this type of user access:
-
Although you can define any username and email address, we recommend that you use values that are consistent with your organization's employee directory. This improves accountability and consistency.
-
For IAM user, choose No.
-
The user has seven days to accept the invitation. If they don't accept within this time period, you can resend the invitation email.
-
When the user accepts the invitation, they are prompted to set and confirm their password.
