Important: We've redesigned the Amazon QuickSight analysis workspace. You might encounter screenshots or procedural text that doesn't reflect the new look in the QuickSight console. We're in the process of updating screenshots and procedural text.
To find a feature or item, use the Quick search bar.
For more information on QuickSight's new look, see Introducing new analysis experience on Amazon QuickSight
Adding a dataset to an analysis
After you have created an analysis, you can add more datasets to the analysis. Then, you can use them to create more visuals.
From within the analysis, you can open any dataset for editing, for example to add or remove fields, or perform other data preparation. You can also remove or replace data sets.
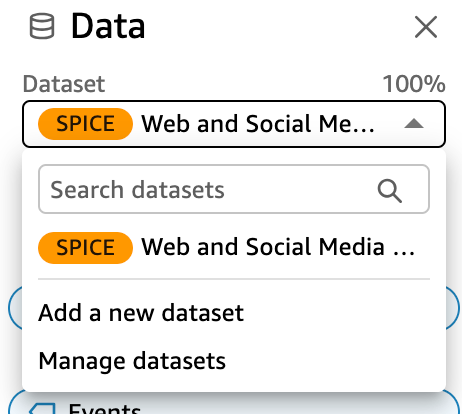
The currently selected dataset displays at the top of the Fields list pane. This is the dataset that is used by the currently selected visual. Each visual can use only one dataset. Choosing a different visual changes the selected dataset to the one used by that visual.
To change the selected dataset manually, choose the dataset list at the top of the Fields list pane and then choose a different dataset. This deselects the currently selected visual if it doesn't use this dataset. Then, choose a visual that uses the selected dataset. Or choose Add on the application bar and then Add Visual to create a new visual using the selected dataset.

If you choose Suggested on the tool bar to see suggested visuals, you'll see visuals based on the currently selected dataset.
Only filters for the currently selected dataset are shown in the Filter pane, and you can only create filters on the currently selected dataset.
Add or edit a dataset
Use the following procedure to add a dataset to an analysis or edit a dataset used by an analysis.
-
On the analysis page, choose the pencil-shaped edit icon at the top of the Fields list pane.
-
Choose Add dataset to add a dataset. Or, choose the pencil-shaped edit icon to edit a dataset. For more information about editing a dataset, see Editing datasets.

-
A list of your datasets appears. Choose a dataset and then choose Select. To cancel, choose Cancel.
Replacing datasets
In an analysis, you can add, edit, replace, or remove datasets. Use this section to learn how to replace your dataset.
When you replace a dataset, the new dataset should have similar columns, if you expect the visual to work the way you designed it. Replacing the dataset also clears the undo and redo history for the analysis. This means you can't use the undo and redo buttons on the application bar to navigate your changes. So, when you decide to change the dataset, your analysis design should be somewhat stable—not in the middle of an editing phase.
To replace a dataset
-
On the analysis screen, choose the pencil icon above the dataset drop-down menu.
-
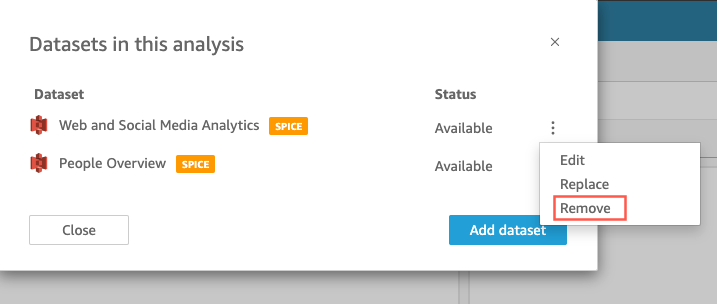
In the Data sets in this analysis page that opens, choose the ellipses next to the dataset that you want to replace, and then choose Replace.

-
In the Select replacement dataset page, choose a dataset from the list, and then choose Select.
Note
Replacing a dataset clears the undo and redo history for this analysis.
-
In the Replacing dataset page, choose Replace.
The dataset is replaced with the new one. The field list and visuals are updated with the new dataset.
At this point, you can choose to add a new dataset, edit the new dataset, or replace it with a different one. Choose Close to exit.
If your new dataset doesn't match
In some cases, the selected replacement dataset doesn't contain all of the fields and hierarchies used by the visuals, filters, parameters, and calculated fields in your analysis. If so, you receive a warning from Amazon QuickSight that shows a list of mismatched or missing columns.
If this happens, you can update the field mapping between the two datasets.
To update the field mapping
-
In the Mismatch in replacement dataset page, choose Update field mapping.
-
In the Update field mapping page, choose the drop-down menu for the field(s) you want to map and choose a field from the list to map it to.
If the field is missing from the new dataset, choose Ignore this field.
-
Choose Confirm to confirm your updates.
-
Choose Close to close the page and return to your analysis.
The dataset is replaced with the new one. The fields list and visuals are updated with the new dataset.
Any visuals that were using a field that's now missing from the new dataset update to blank. You can readd fields to the visual or remove the visual from your analysis.
If you change your mind after replacing the dataset, you can still recover. Let's say you replace the dataset and then find that it's too difficult to change your analysis to match the new dataset. You can undo any changes you made to your analysis. You can then replace the new dataset with the original one, or with a dataset that more closely matches the requirements of the analysis.
Remove a dataset from an analysis
Use the following procedure to delete a dataset from an analysis.
To delete a dataset from an analysis
-
On the analysis page, choose the dataset list at the top of the Fields list pane, and then choose Edit analysis datasets.
-
In the Data sets in this analysis dialog box, choose the dataset that you want to delete, and then choose the delete icon. You can't delete a dataset if it's the only one in the analysis.
-
Choose Close to close the dialog box.
