Using Databricks in QuickSight
Use this section to learn how to connect from QuickSight to Databricks.
To connect to Databricks
-
Begin by creating a new dataset. Choose Datasets from the navigation pane at left, then choose New Dataset.
-
Choose the Databricks data source card.
-
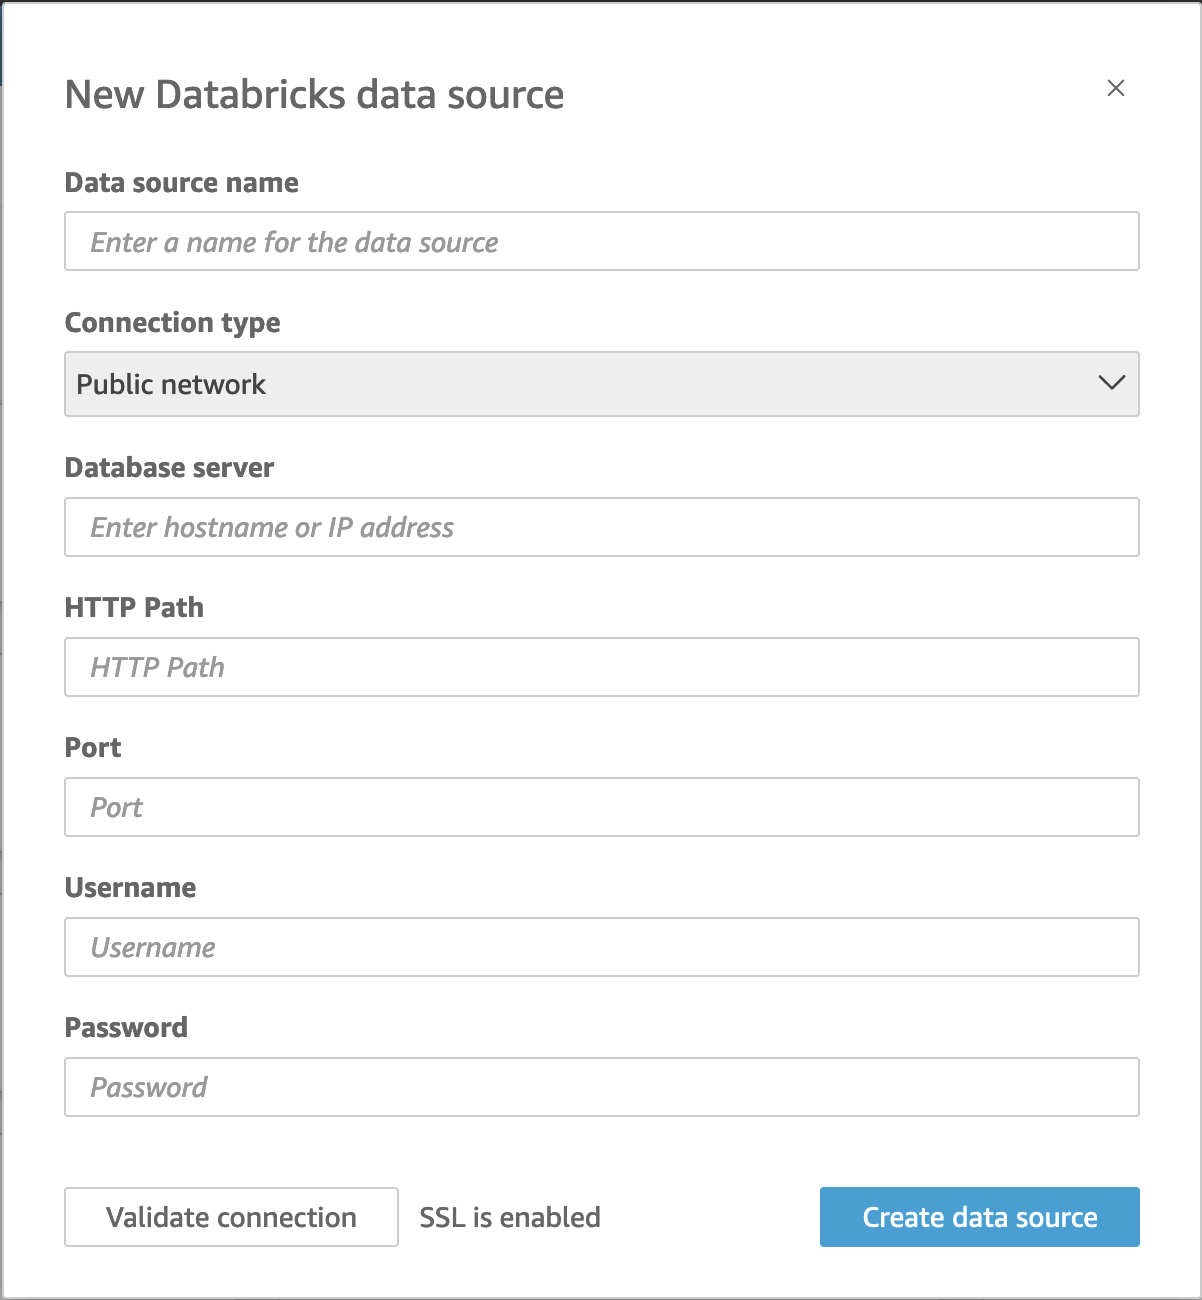
For Data source name, enter a descriptive name for your Databricks data source connection, for example
Databricks CS. Because you can create many datasets from a connection to Databricks, it's best to keep the name simple.The following screenshot shows the connection screen for Databricks.
-
For Connection type, select the type of network you're using.
Public network – if your data is shared publicly.
VPC – if your data is inside a VPC.
Note
If you're using VPC, and you don't see it listed, check with your administrator.
-
For Database server, enter the Hostname of workspace specified in your Databricks connection details.
-
For HTTP Path, enter the Partial URL for the spark instance specified in your Databricks connection details.
-
For Port, enter the port specified in your Databricks connection details.
-
For Username and Password, enter your connection credentials.
-
To verify the connection is working, click Validate connection.
-
To finish and create the data source, click Create data source.
Adding a new QuickSight dataset for Databricks
After you have an existing data source connection for Databricks data, you can create Databricks datasets to use for analysis.
To create a dataset using Databricks
-
Choose Datasets at left, then scroll down to find the data source card for your Databricks connection. If you have many data sources, you can use the search bar at the top of the page to find your data source with a partial match on the name.
-
Choose the Databricks data source card, and then choose Create data set. The following popup displays:

-
To specify the table you want to connect to, first select the Catalog and Schema you want to use. Then, for Tables, select the table that you want to use. If you prefer to use your own SQL statement, select Use custom SQL.
-
Choose Edit/Preview.
-
(Optional) To add more data, use the following steps:
-
Choose Add data at top right.
-
To connect to different data, choose Switch data source, and choose a different dataset.
-
Follow the UI prompts to finish adding data.
-
After adding new data to the same dataset, choose Configure this join (the two red dots). Set up a join for each additional table.
-
If you want to add calculated fields, choose Add calculated field.
-
To add a model from SageMaker AI, choose Augment with SageMaker. This option is only available in QuickSight Enterprise edition.
-
Clear the check box for any fields that you want to omit.
-
Update any data types that you want to change.
-
-
When you are done, choose Save to save and close the dataset.
