Step 1: Choose an example project
In this step you use choose an example project. Amazon Rekognition Custom Labels then creates a project and a dataset for you. A project manages the files used to train your model. For more information, see Managing an Amazon Rekognition Custom Labels project. Datasets contain the images, assigned labels, and bounding boxes that you use to train and test a model. For more information, see Managing datasets.
For information about the example projects, see Example projects.
Choose an example project
Sign in to the AWS Management Console and open the Amazon Rekognition console at https://console.aws.amazon.com/rekognition/
. In the left pane, choose Use Custom Labels. The Amazon Rekognition Custom Labels landing page is shown. If you don't see Use Custom Labels, check that the AWS Region you are using supports Amazon Rekognition Custom Labels.
-
Choose Get started.
Amazon Rekognition Custom Labels section showing Get started, Tutorials with "Example projects" highlighted, Projects, and Datasets.

In Explore example projects, choose Try example projects.
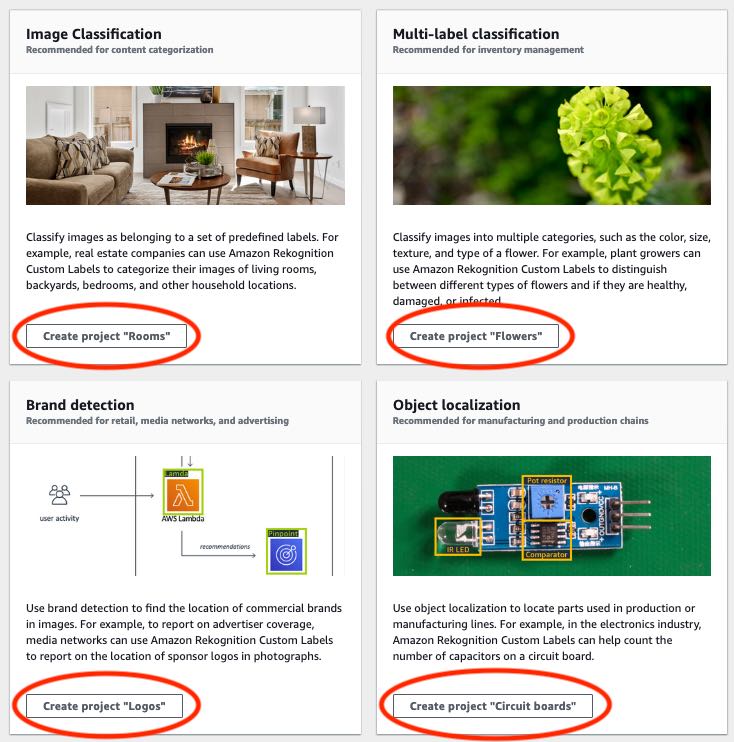
Decide which project you want to use and choose Create project "
project name" within the example section. Amazon Rekognition Custom Labels then creates the example project for you.Note
If this is the first time that you've opened the console in the current AWS Region, the First Time Set Up dialog box is shown. Do the following:
Note the name of the Amazon S3 bucket that's shown.
Choose Continue to let Amazon Rekognition Custom Labels create an Amazon S3 bucket (console bucket) on your behalf. The image of the console below shows examples with "Create project" buttons for Image Classification (Rooms), Multi-label classification (Flowers), Brand detection (Logos), and Object Localization (Circuit boards).
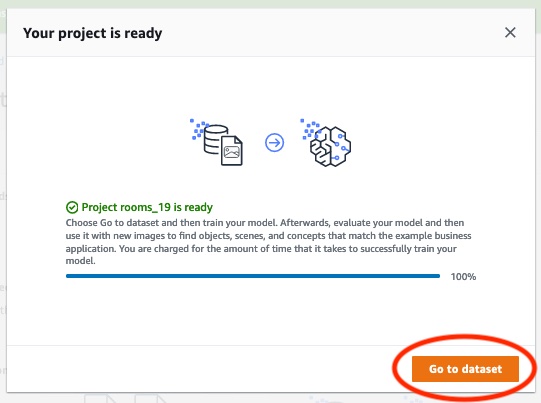
After your project is ready, choose Go to dataset. The following image shows what the project panel looks like when the project is ready.