Custom Moderation adapter tutorial
This tutorial shows you how to create, train, evaluate, use, and manage adapters using the Rekognition Console. To create, use, and manage adapters with the AWS SDK, see Managing adapters with the AWS CLI and SDKs.
Adapters let you enhance the accuracy of Rekognition’s API operations, customizing the model’s behavior to fit your own needs and use cases. After you create an adapter with this tutorial, you’ll be able to use it when analyzing your own images with operations like DetectModerationLabels, as well as retrain the adapter for further, future improvements.
In this tutorial you’ll learn how to:
Create a project using Rekognition Console
Annotate your training data
Train your adapter on your training dataset
Review your adapter’s performance
Use your adapter for image analysis
Prerequisites
Before completing this tutorial it’s recommended that you read through Creating and using adapters.
To create an adapter, you can use the Rekognition Console tool to create a project, upload and annotate your own images, and then train an adapter on these images. See Creating a project and training an adapter to get started.
Alternatively, you can use Rekognition’s Console or API to retrieve predictions for images and then verify the predictions before training an adapter on these predictions. See Bulk analysis, prediction verification, and training an adapter to get started.
Image annotation
You can annotate images yourself by labeling images with the Rekognition console, or use Rekognition Bulk analysis to annotate images which you can then verify have been correctly labeled. Choose one of the topics below to get started.
Topics
Creating a project and training an adapter
Complete the following steps to train your adapter by annotating images using the Rekognition console.
Create a project
Before you can train or use an adapter you must create the project that will contain it. You must also provide the images used to train your adapter. To create a project, an adapter, and your image datasets:
Sign in to the AWS Management Console and open the Rekognition console at https://console.aws.amazon.com/rekognition/.
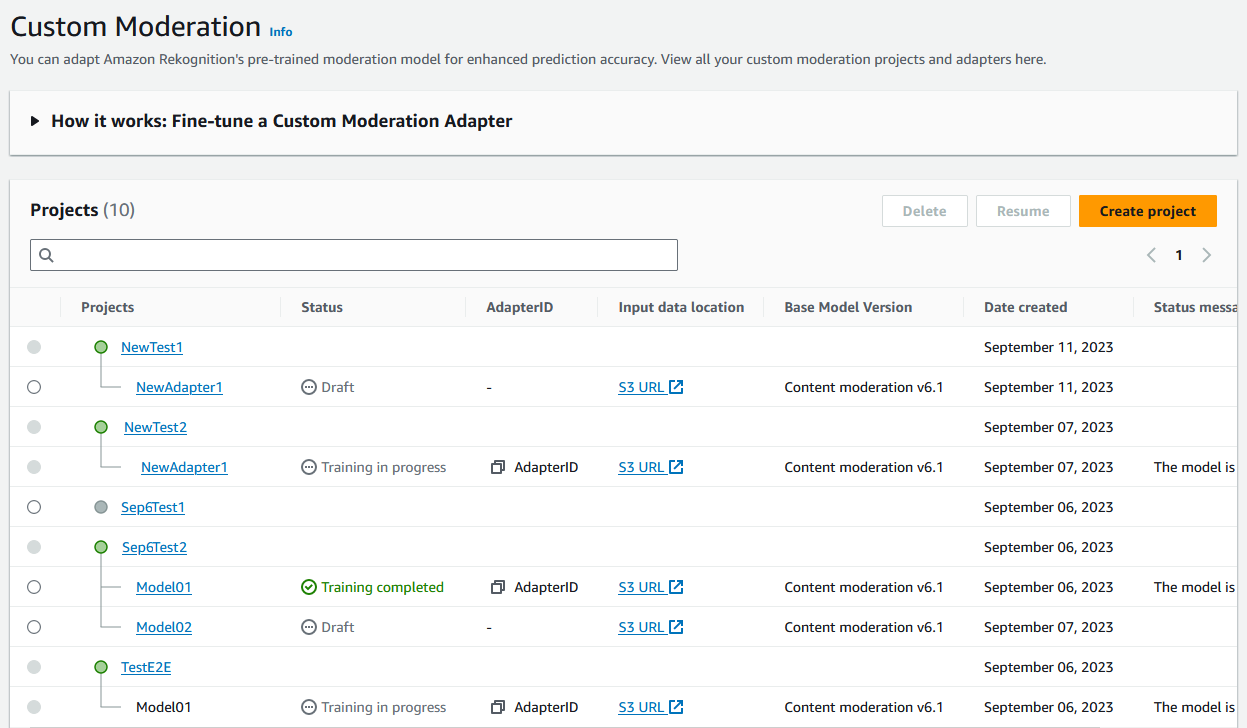
In the left pane, choose Custom Moderation. The Rekognition Custom Moderation landing page is shown.

The Custom Moderation landing page shows you a list of all your projects and adapters, and there is also a button to create an adapter. Choose Create project to create a new project and adapter.
If this is your first time creating an adapter you will be prompted to create an Amazon S3 bucket to store files related to your project and your adapter. Choose Create Amazon S3 bucket.
On the following page, fill in the adapter name and the project name. Provide an adapter description if you wish.
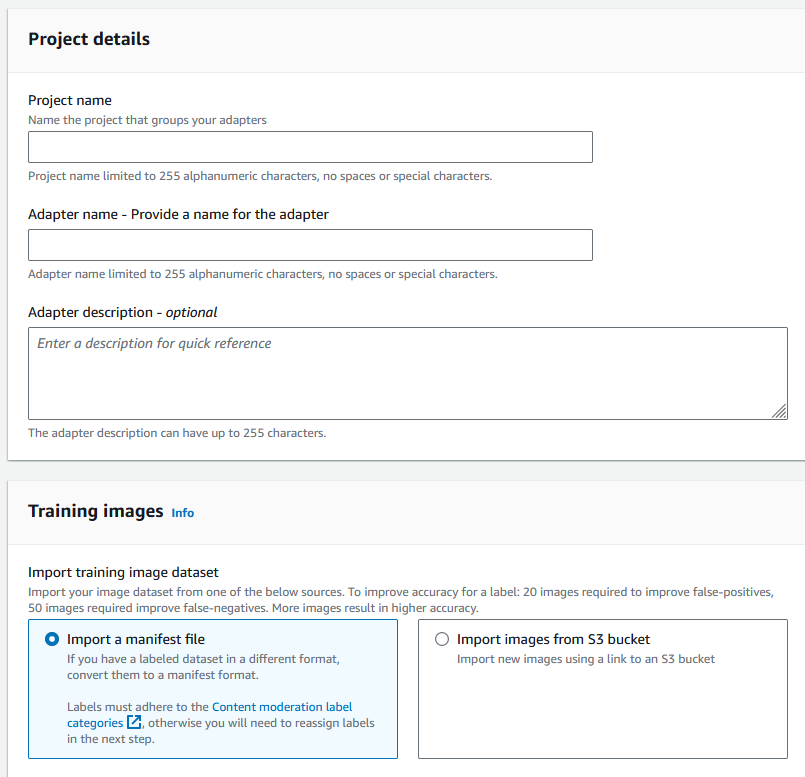
In this step, you’ll also provide the images for your adapter. You can select: Import images from your computer, Import manifest file, or Import images from Amazon S3 bucket. If you choose to import your images from an Amazon S3 bucket, provide the path to the bucket and folder that contains your training images. If you upload your images directly from your computer, note that you can only upload up to 30 images at one time. If you are using a manifest file that contains annotations, you can skip the steps listed below covering image annotation and proceed to the section on Reviewing adapter performance.
In the Test dataset details section, choose Autosplit to have Rekognition automatically select the appropriate percentage of your images as testing data, or you can choose Manually import manifest file.
After filling in this information, select Create Project.
Train an adapter
To train an adapter on your own un-annotated images:
Select the project that contains your adapter and then choose the option to Assign label to images.
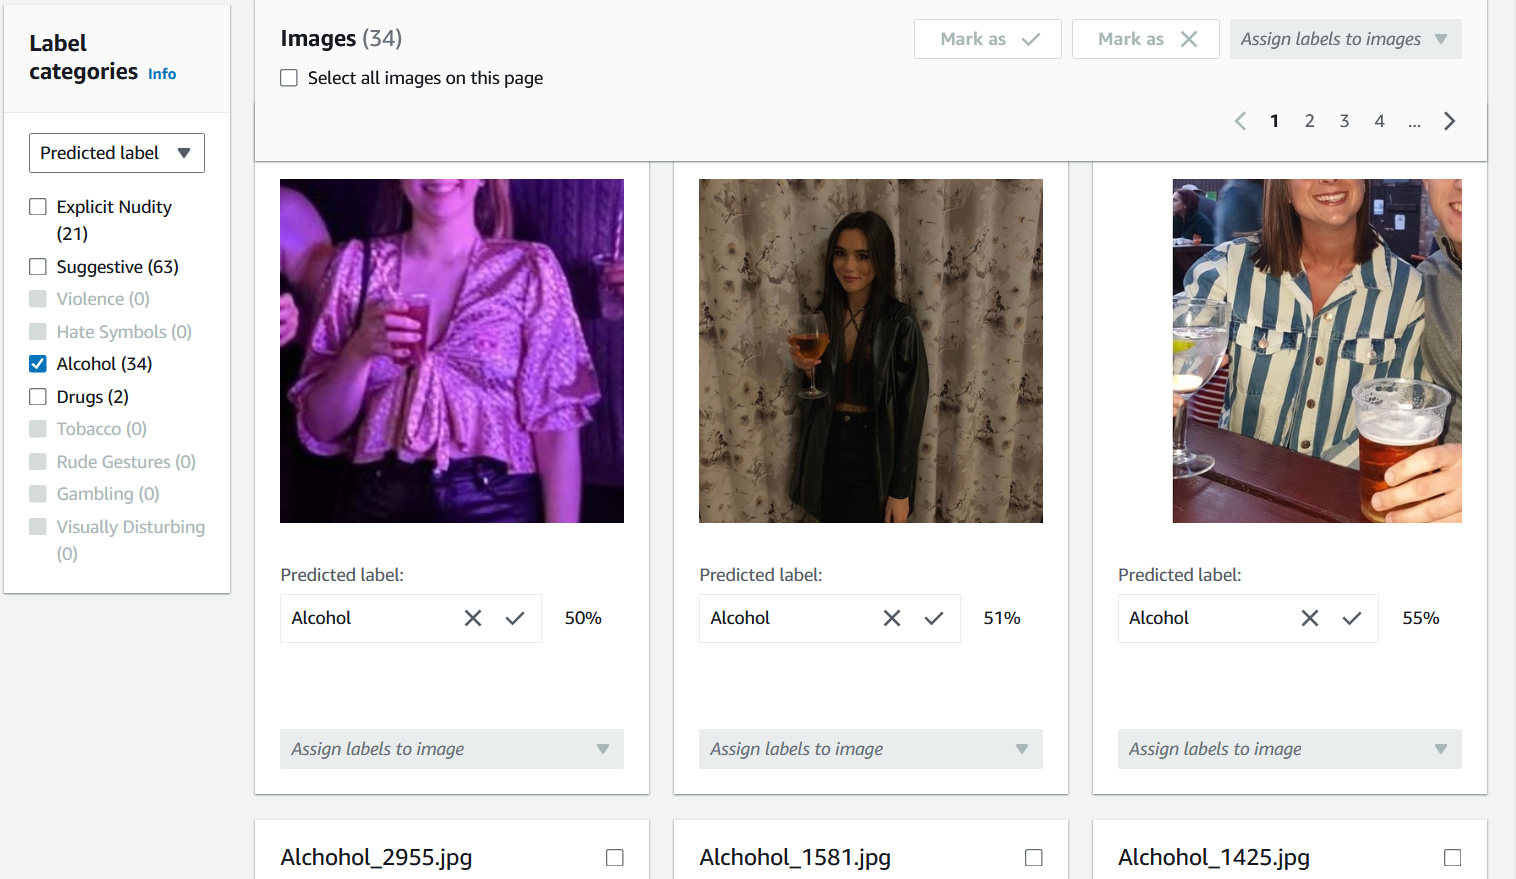
On the Assign label to images page, you can see all the images that have been uploaded as training images. You can filter these images by both labeled/unlabeled status and by label category using the two attribute selection panels on the left. You can add additional images to your training dataset by selecting the Add images button.
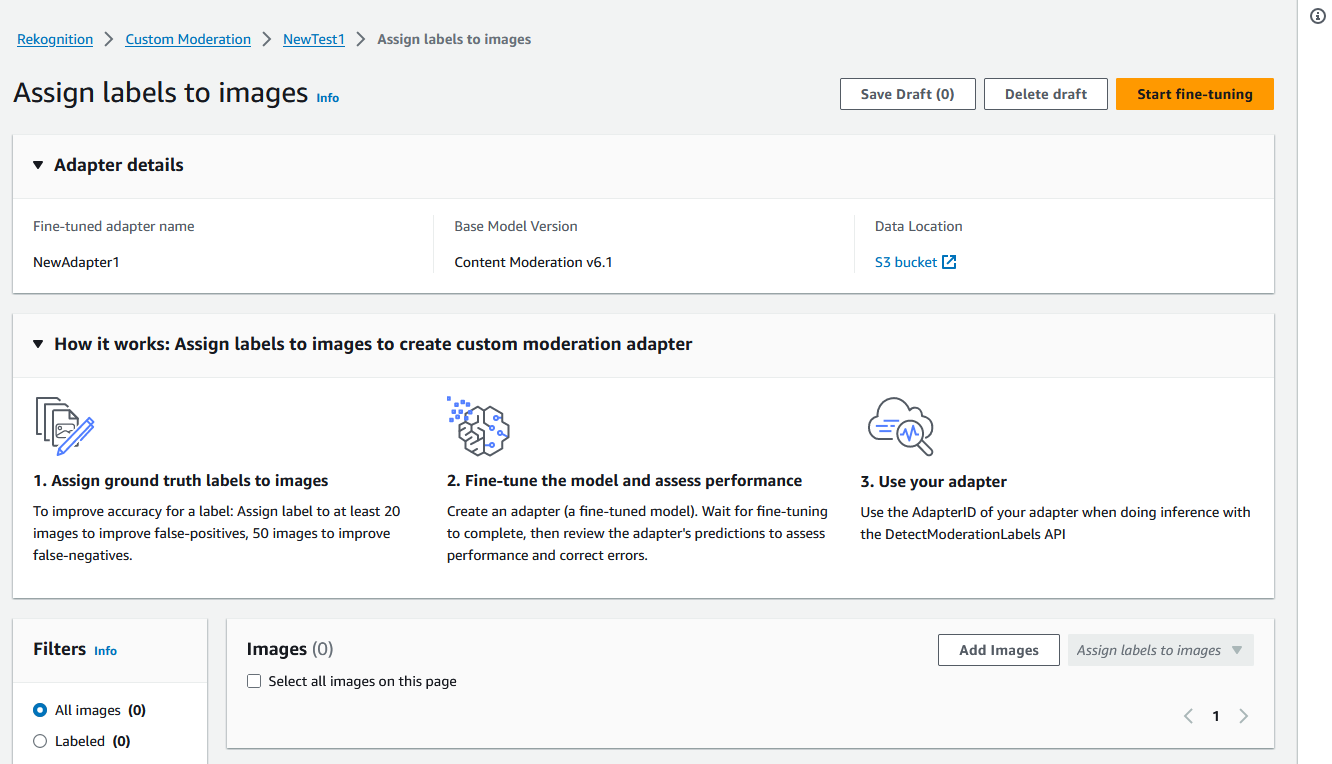
After adding images to the training dataset, you must annotate your images with labels. After uploading your images, the "Assign labels to images" page will update to show the images you’ve uploaded. You will be prompted to select the label appropriate for you images from a drop-down list of labels supported by Rekognition Moderation. You can select more than one label.
Continue this process until you have added labels to each of the images in your training data.
After you have labeled all your data, select Start training to start training the model, which creates your adapter.

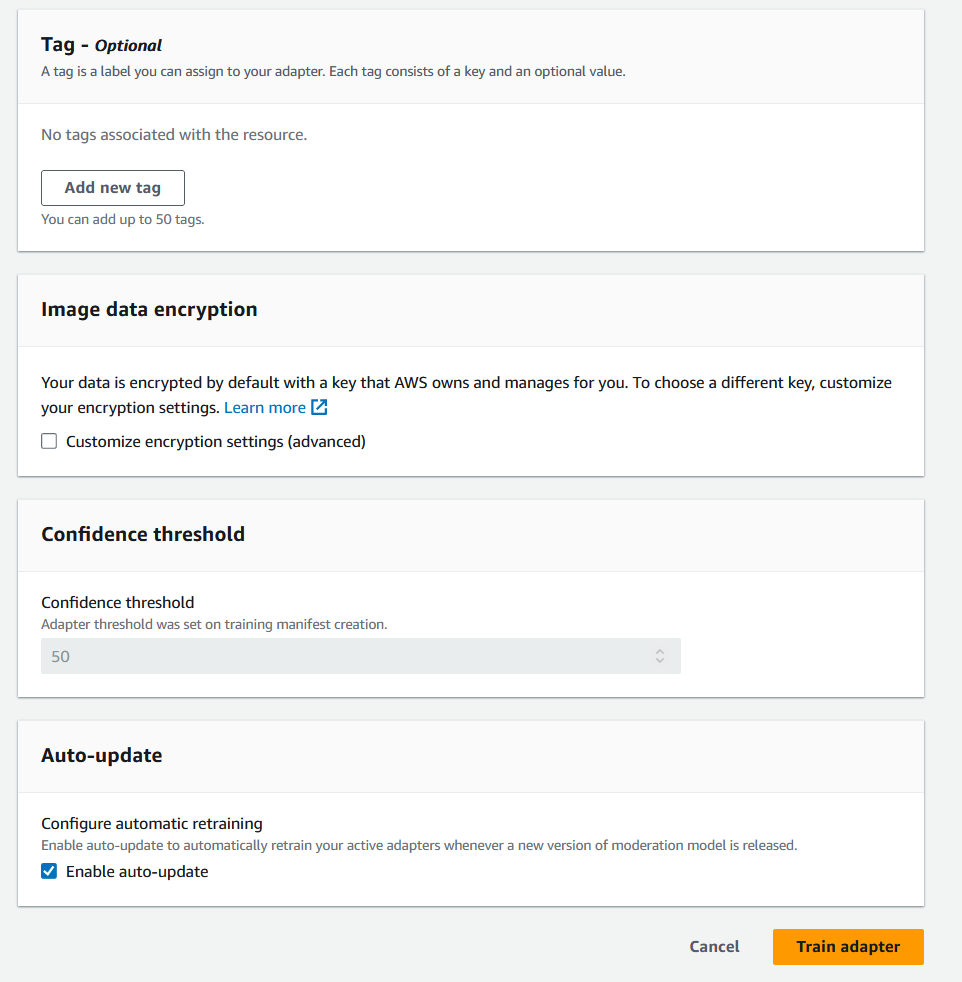
Before you start the training process you can add any Tags to the adapter that you’d like to. You can also provide the adapter with a custom encryption key or use an AWS KMS key. Once you have finished adding any tags you want and customizing the encryption to your liking, select Train adapter to start the training process for your adapter.
Wait for your adapter to finish training. Once training has completed, you’ll receive a notification that your adapter has finished being created.
Once the status of your adapter is “Training completed” you can review your adapter’s metrics
Bulk analysis, prediction verification, and training an adapter
Complete the following steps to train your adapter by verifying bulk analysis predictions from Rekognition’s Content Moderation model.
To train an adapter by verifying predictions from Rekognition’s Content Moderation model, you must:
-
Carry out Bulk analysis on your images
-
Verify the predictions returned for your images
You can obtain predictions for images by carrying out Bulk analysis with Rekognition’s base model or an adapter you have already created.
Run bulk analysis on your images
To train an adapter on predictions you have verified, you must first start a Bulk analysis job to analyze a batch of images using Rekognition’s base model or an adapter of your choice. To run a Bulk analysis job:
-
Sign in to the AWS Management Console and open the Amazon Rekognition console at https://console.aws.amazon.com/rekognition/
. -
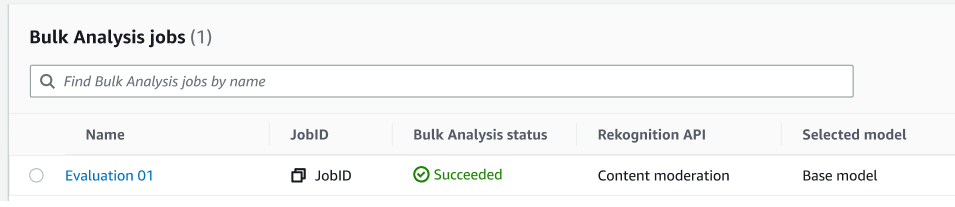
In the left pane, choose Bulk analysis. The Bulk analysis landing page appears. Choose Start Bulk Analysis. The Bulk Analysis feature overview showing steps to upload images, wait for analysis, review results, and optionally verify model predictions. Lists recent Bulk Analysis jobs for Content Moderation using the base model.

-
If this is your first time creating an adapter you will be prompted to create an Amazon Simple Storage Service bucket to store files related to your project and your adapter. Choose Create Amazon S3 bucket.
-
Select the adapter you want to use for the bulk analysis by using the Choose an adapter drop-down menu. If no adapter is chosen the base model will be used by default. For the purposes of this tutorial do not choose an adapter.

-
In the Bulk analysis job name field, fill in the bulk analysis job name.
-
Choose a value for the Minimum confidence threshold. Label predictions with less than your chosen confidence threshold won’t be returned. Note that when you’re evaluating the model’s performance later on, you won’t be able to adjust the confidence threshold below your chosen minimum confidence threshold.
-
In this step, you’ll also provide the images you want to analyze with Bulk analysis. These images may also be used to train your adapter. You can choose Upload images from your computer or Import images from Amazon S3 bucket. If you choose to import your documents from an Amazon S3 bucket, provide the path to the bucket and folder that contains your training images. If you upload your documents directly from your computer, note that you can only upload 50 images at one time.
-
After filling in this information, choose Start analysis. This will start the analysis process using Rekognition’s base model.
-
You can check the status of your Bulk analysis job by checking the Bulk Analysis status of the job on the main Bulk Analysis page. When the Bulk Analysis status becomes “Succeeded”, the results of the analysis are ready for review.
-
Choose the analysis you created from the list of Bulk Analysis jobs.
-
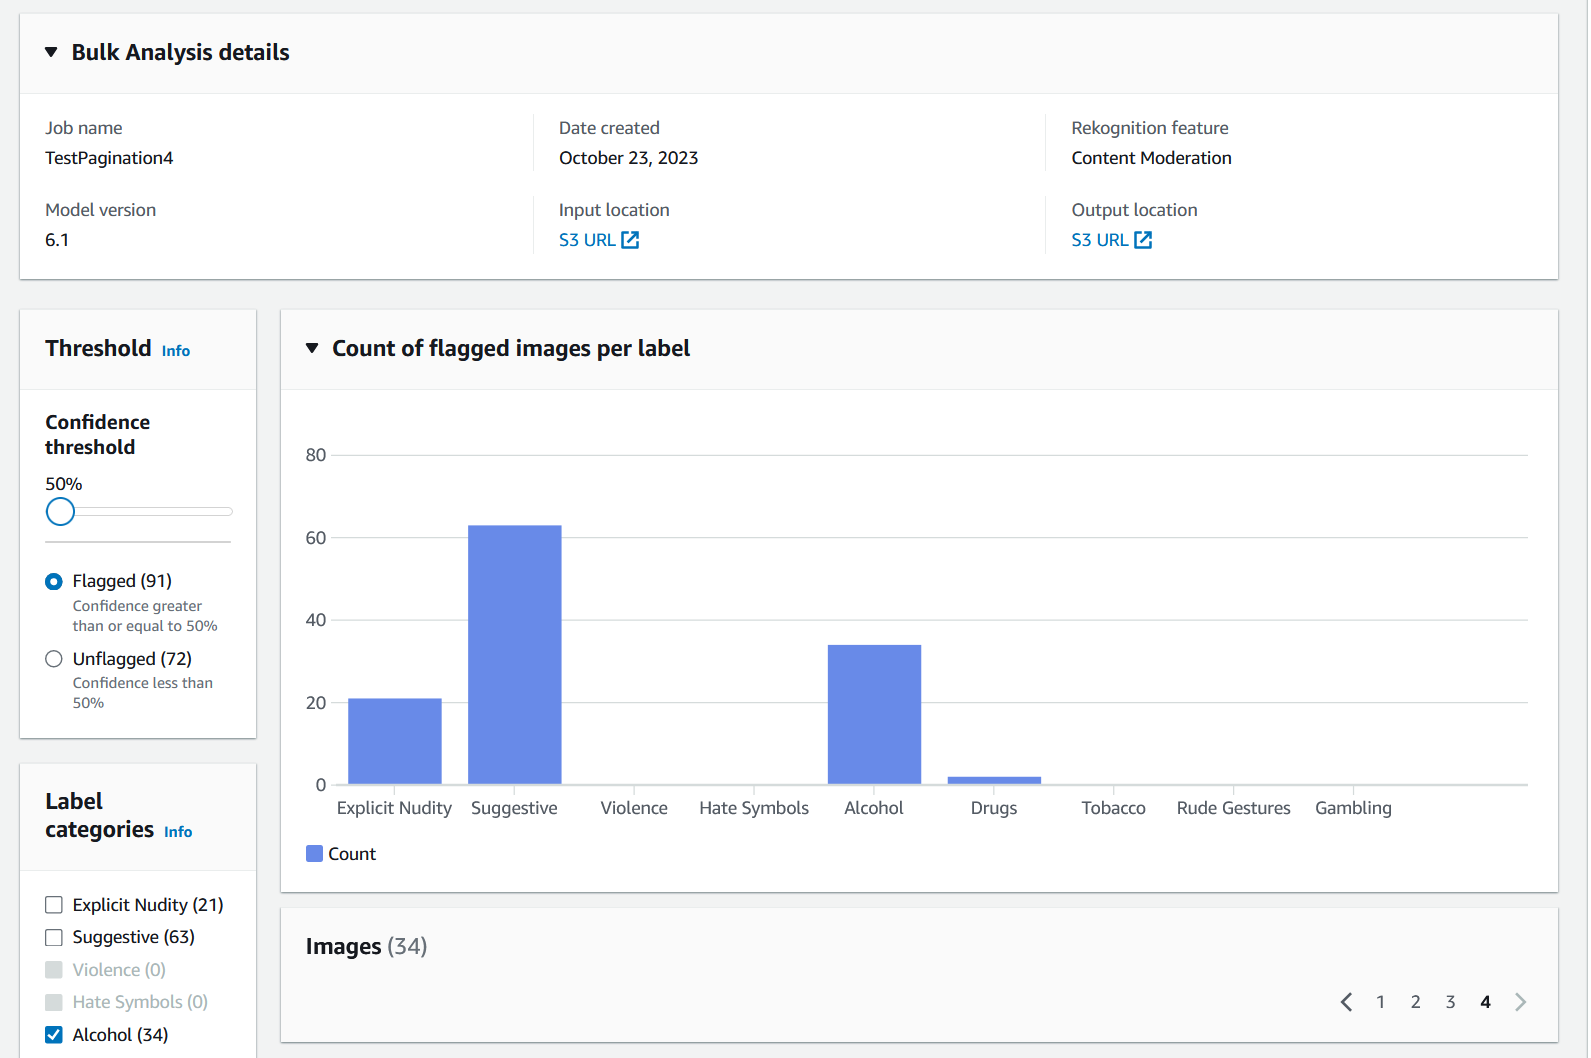
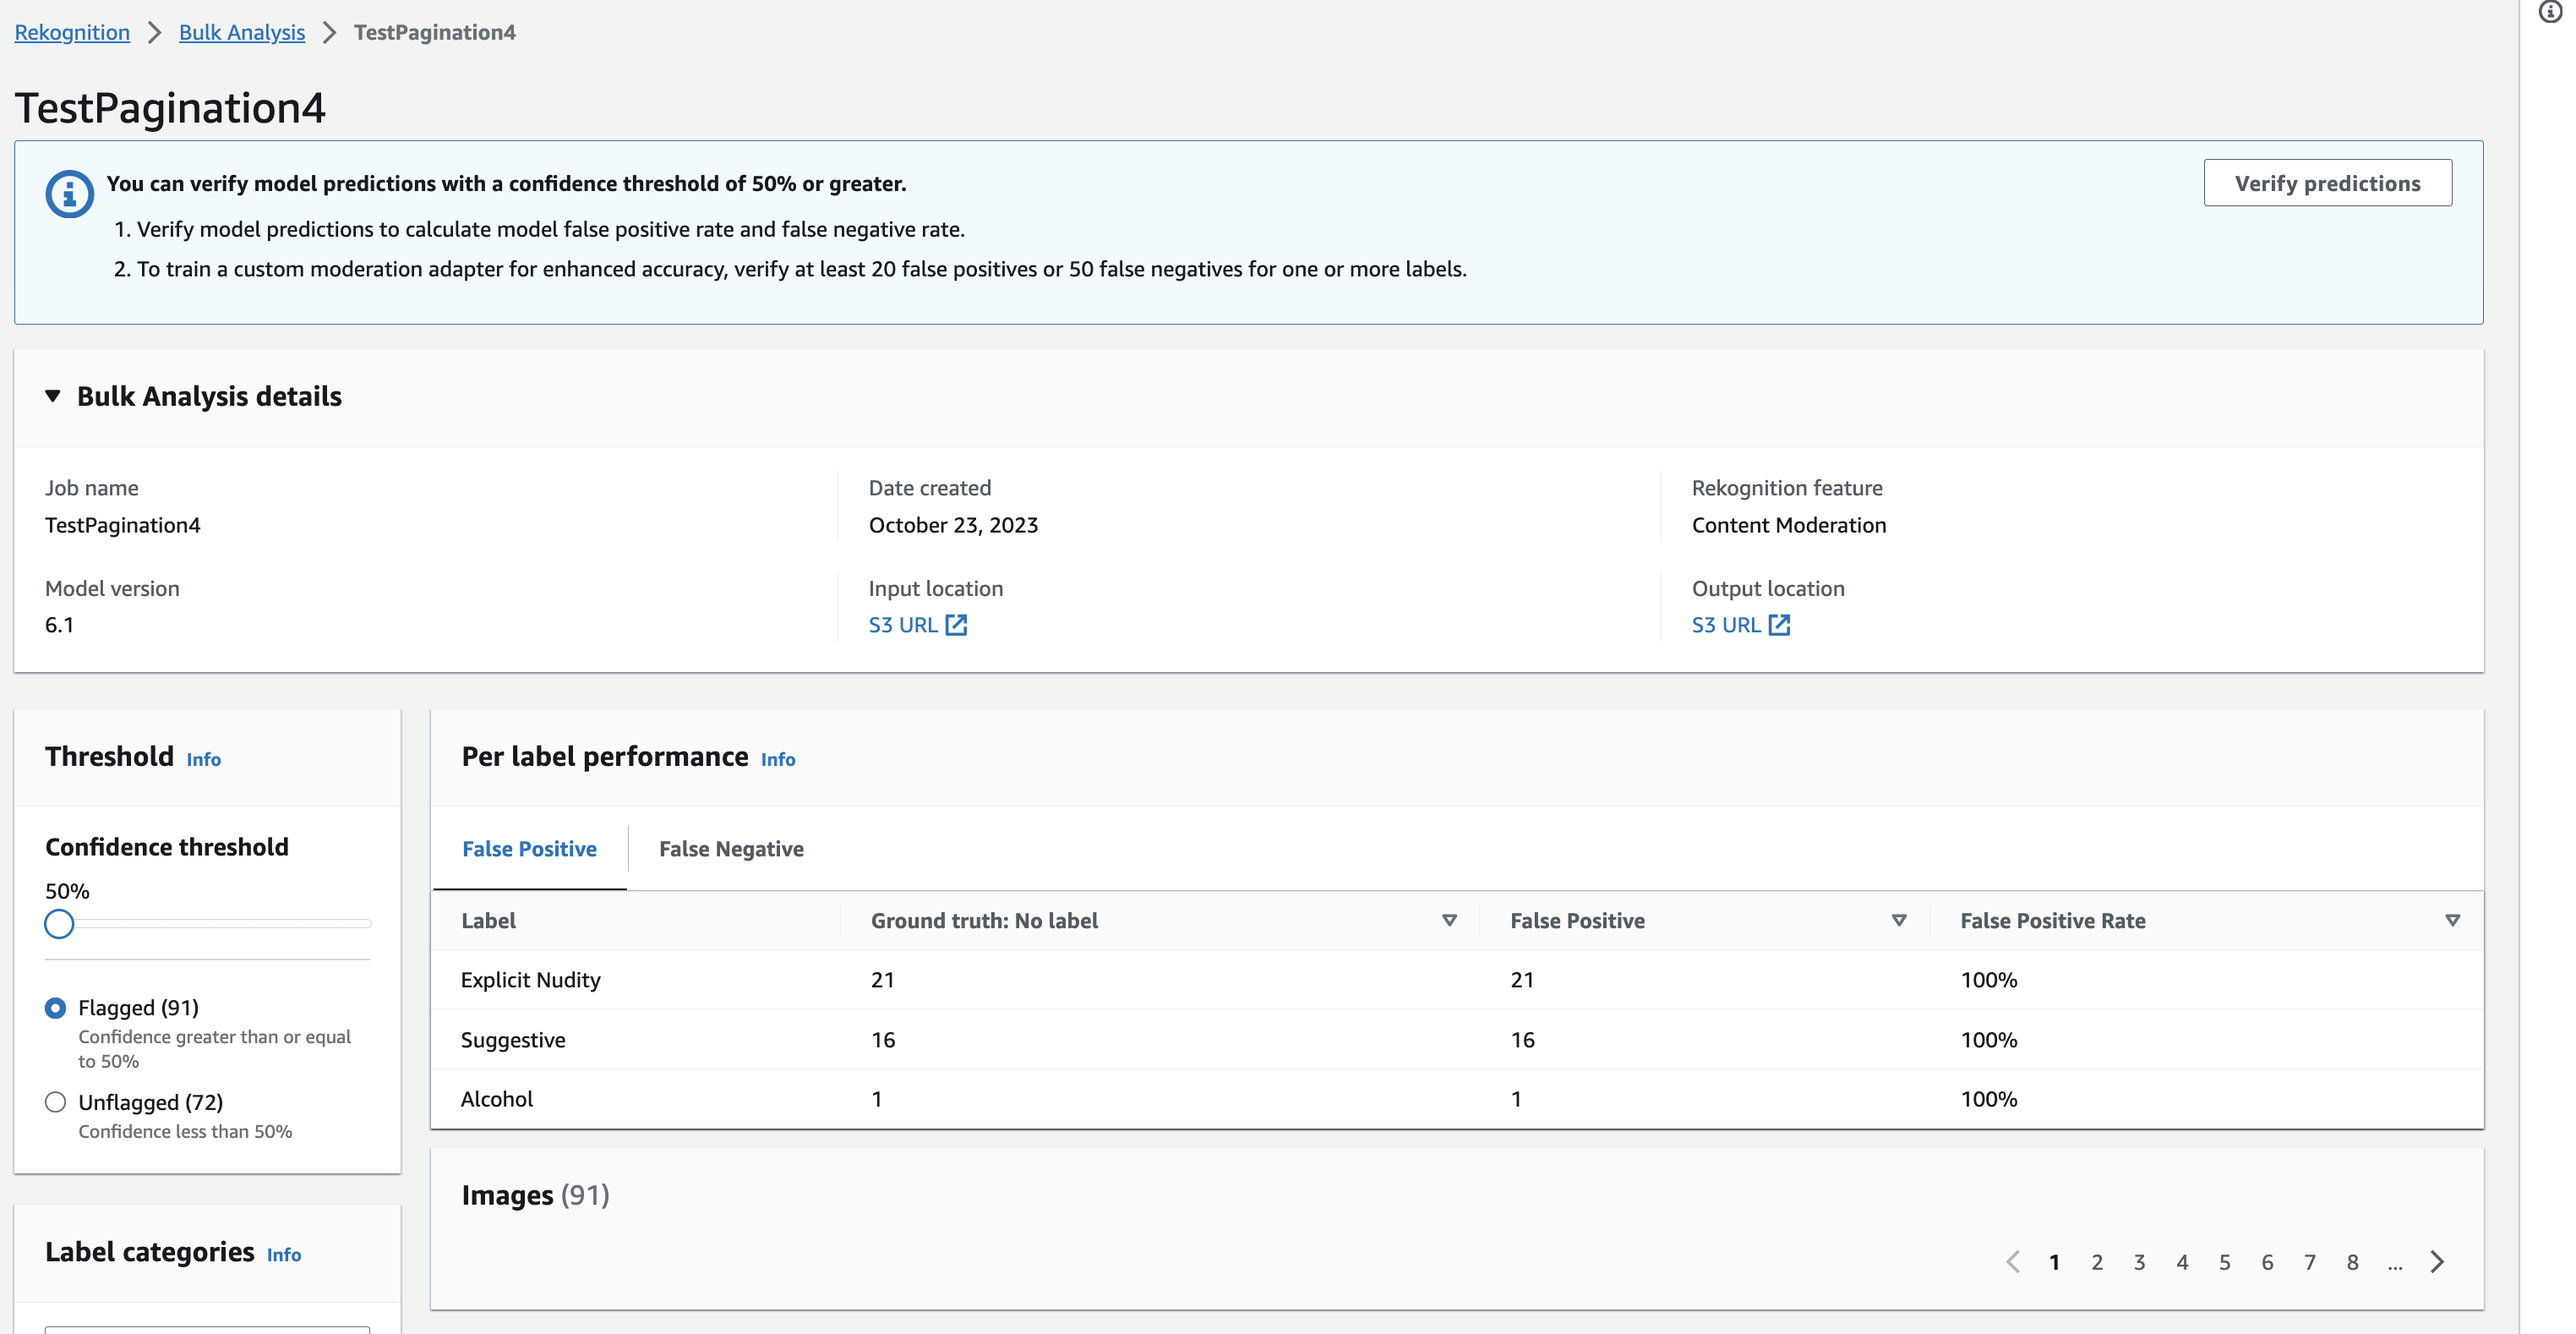
On the Bulk Analysis details page you can see the predictions that Rekognition’s base model has made for the images you uploaded.
-
Review the base model’s performance. You can change the confidence threshold that your adapter must have to assign a label to an image by using the Confidence threshold slider. The number of Flagged and Unflagged instances will change as you adjust the confidence threshold. The Label Categories panel displays the top-level categories that Rekognition recognizes, and you can select a category in this list to display any images that have been assigned that label.
Verify predictions
If you have reviewed the accuracy of Rekognition’s base model or a chosen adapter, and want to improve this accuracy, you can utilize the verification workflow:
-
After you are finished reviewing the base model performance, you will want to verify the predictions. Correcting the predictions will allow you to train an adapter. Choose Verify predictions from the top of the Bulk analysis page.

-
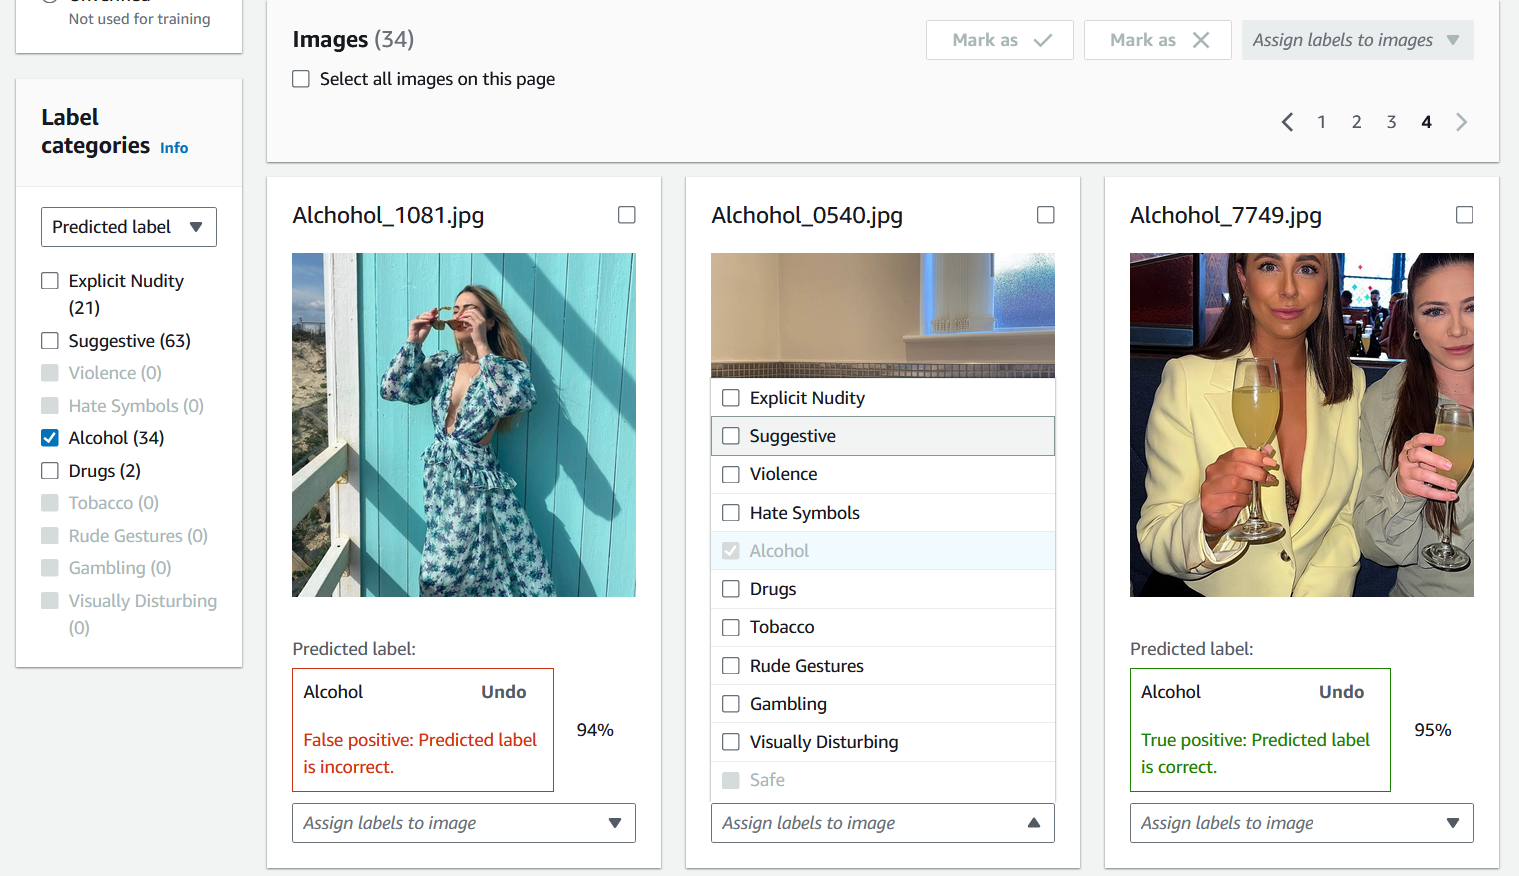
On the Verify predictions page, you can see all the images that you provided to Rekognition’s base model, or a chosen adapter, along with the predicted label for each image. You must verify each prediction as correct or incorrect using the buttons under the image. Use the “X” button to mark a prediction as incorrect and the check-mark button to mark a prediction as correct. To train an adapter you will need to verify at least 20 false-positive predictions and 50 false negative predictions for a given label. The more predictions you verify, the better the adapter’s performance will be.
After you verify a prediction, the text below the image will change to show you the type of prediction you have verified. Once you have verified an image you can also add additional labels to the image using the Assign labels to image menu. You can see which images are flagged or unflagged by the model for your chosen confidence threshold or filter images by category.
-
Once you have finished verifying all the predictions you want to verify, you can see statistics regarding your verified predictions in the Per label performance section of the Verification page. You can also return to the Bulk analysis details page to view these statistics.
-
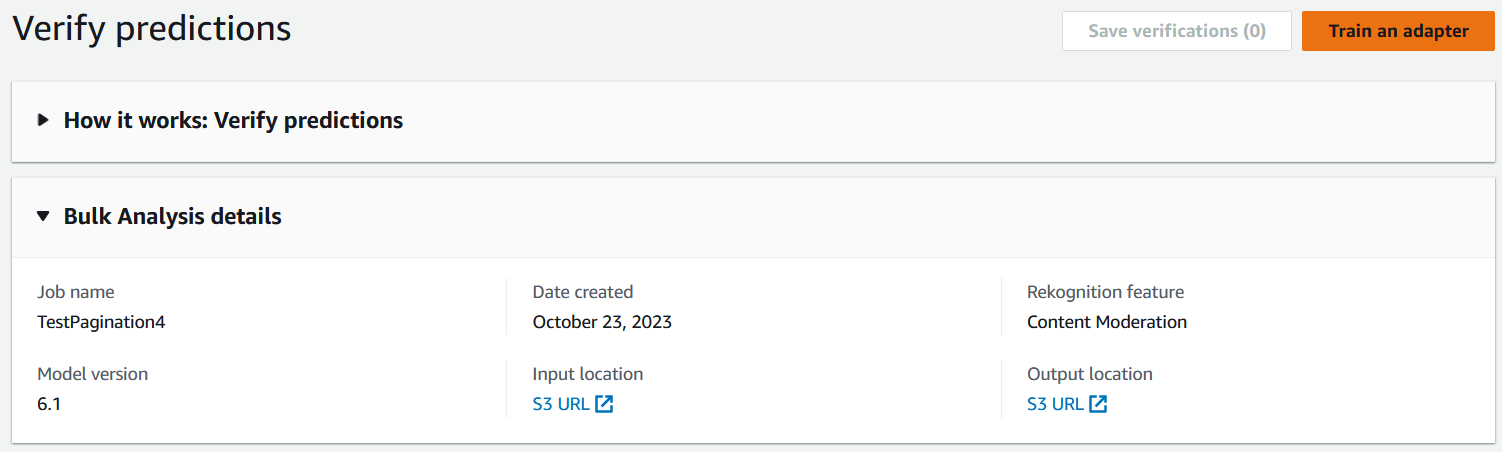
When you are satisfied with the statistics regarding the Per label performance, go to the Verify predictions page again then select the Train an adapter button to begin training your adapter.
-
On the Train an adapter page you will be prompted to create a project or choose an existing project. Name the project and the adapter that will be contained by the project. You must also specify the source of your test images. When specifying the images you can choose Autosplit to have Rekognition automatically use a portion of your training data as test images, or you can manually specify a manifest file. It’s recommended to choose Autosplit.

-
Specify any tags you desire, as well a AWS KMS key if you don’t want to use the default AWS key. It is recommended to leave Auto-update enabled.
-
Choose Train adapter.
-
Once the status of your adapter on the Custom Moderation landing page has become "Training complete", you can review your adapter’s performance. See Reviewing adapter performance for more information.
Reviewing adapter performance
To review your adapter performance:
When using the console, you’ll be able to see the status of any adapters associated with a project under the Projects tab on the Custom Moderation landing page. Navigate to the Custom Moderation landing page.
Select the adapter you want to review from this list. On the following Adapter details page, you can see a variety of metrics for the adapter.

With the Threshold panel you can change the minimum confidence threshold that your adapter must have to assign a label to an image. The number of Flagged and Unflagged instances will change as you adjust the confidence threshold. You can also filter by label category to see metrics for the categories you have selected. Set your chosen threshold.
You can assess the performance of your adapter on your test data by examining the metrics in the Adapter Performance panel. These metrics are calculated by comparing the adapter's extractions to the "ground truth" annotations on the test set.
The adapter performance panel shows the False Positive Improvement and False Negative Improvement rates for the adapter that you created. The Per Label Performance tab can be used to compare the adapter and base model performance on each label category. It shows counts of false positive and false negative predictions by both the base model and the adapter, stratified by label category. By reviewing these metrics you can determine where the adapter needs improvement. For more information on these metrics, see Evaluating and improving your adapter.
To improve the performance, you can collect more training images and then create a new adapter based inside of the project. Simply return to the Custom Moderation landing page and create a new adapter inside of your project, providing more training images for the adapter to be trained on. This time choose the Add to an existing project option instead of Create a new project, and select the project you want to create the new adapter in from the Project name dropdown menu. As before, annotate your images or provide a manifest file with annotations.

Using your adapter
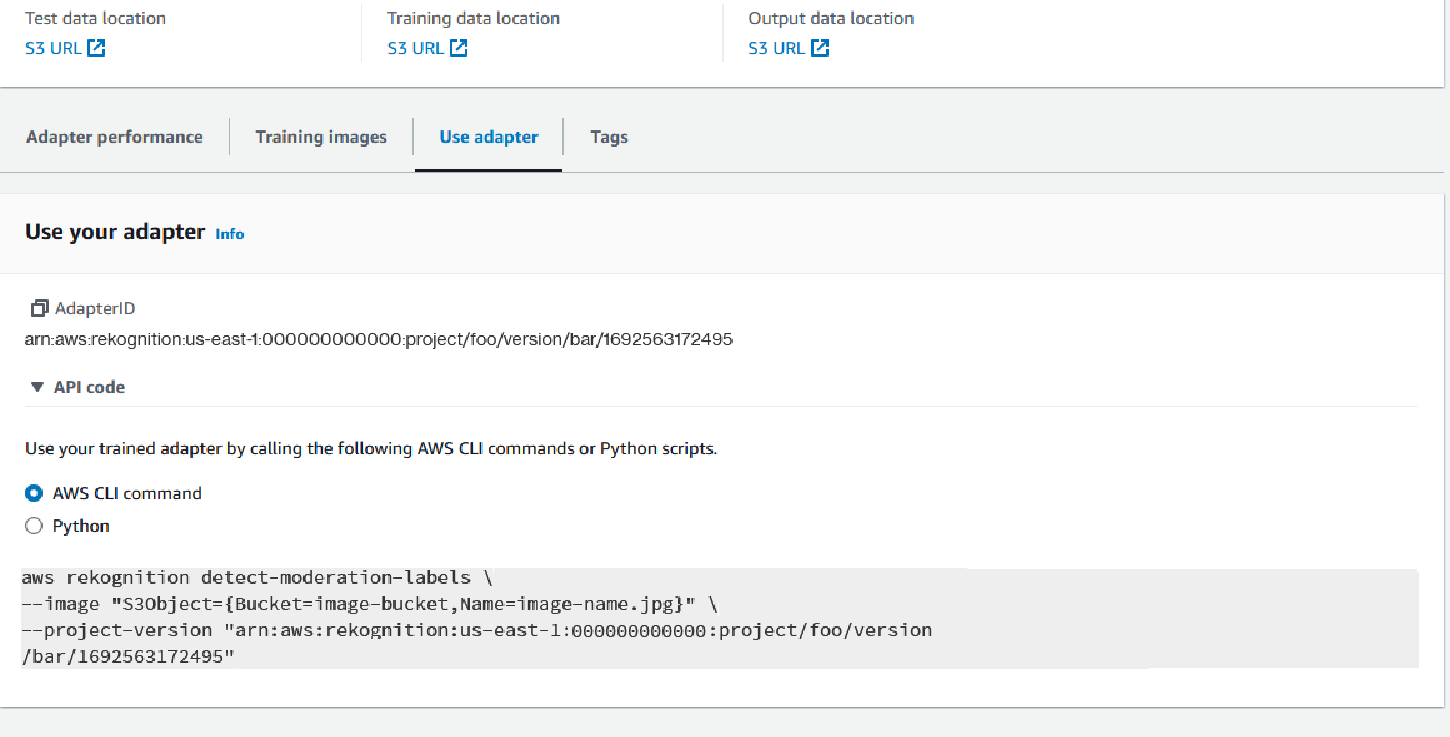
After you have created your adapter you can supply it to a supported Rekognition operation like DetectModerationLabels. To see code samples you can use to carry out inference with your adapter, select the “Use adapter” tab, where you can see code samples for both the AWS CLI and Python. You can also visit the respective section of the documentation for the operation you have created an adapter for to see more code samples, setup instructions, and a sample JSON.
Deleting your adapter and project
You can delete individual adapters, or delete your project. You must delete each adapter associated with your project before you can delete the project itself.
-
To delete an adapter associated with the project, choose the adapter and then choose Delete.
-
To delete a project, choose the project you want to delete and then choose Delete.
