Step 3: Download, Explore, and Transform a Dataset
In this step, you load the Adult Census dataset
To run the following example, paste the sample code into a cell in your notebook instance.
Load Adult Census Dataset Using SHAP
Using the SHAP library, import the Adult Census dataset as shown following:
import shap
X, y = shap.datasets.adult()
X_display, y_display = shap.datasets.adult(display=True)
feature_names = list(X.columns)
feature_names
Note
If the current Jupyter kernel does not have the SHAP library, install it by running the
following conda command:
%conda install -c conda-forge shap
If you're using JupyterLab, you must manually refresh the kernel after the installation and updates have completed. Run the following IPython script to shut down the kernel (the kernel will restart automatically):
import IPython
IPython.Application.instance().kernel.do_shutdown(True)
The feature_names list object should return the following list of
features:
['Age',
 'Workclass',
 'Education-Num',
 'Marital Status',
 'Occupation',
 'Relationship',
 'Race',
 'Sex',
 'Capital Gain',
 'Capital Loss',
 'Hours per week',
 'Country']
Tip
If you're starting with unlabeled data, you can use Amazon SageMaker Ground Truth to create a data labeling workflow in minutes. To learn more, see Label Data.
Overview the Dataset
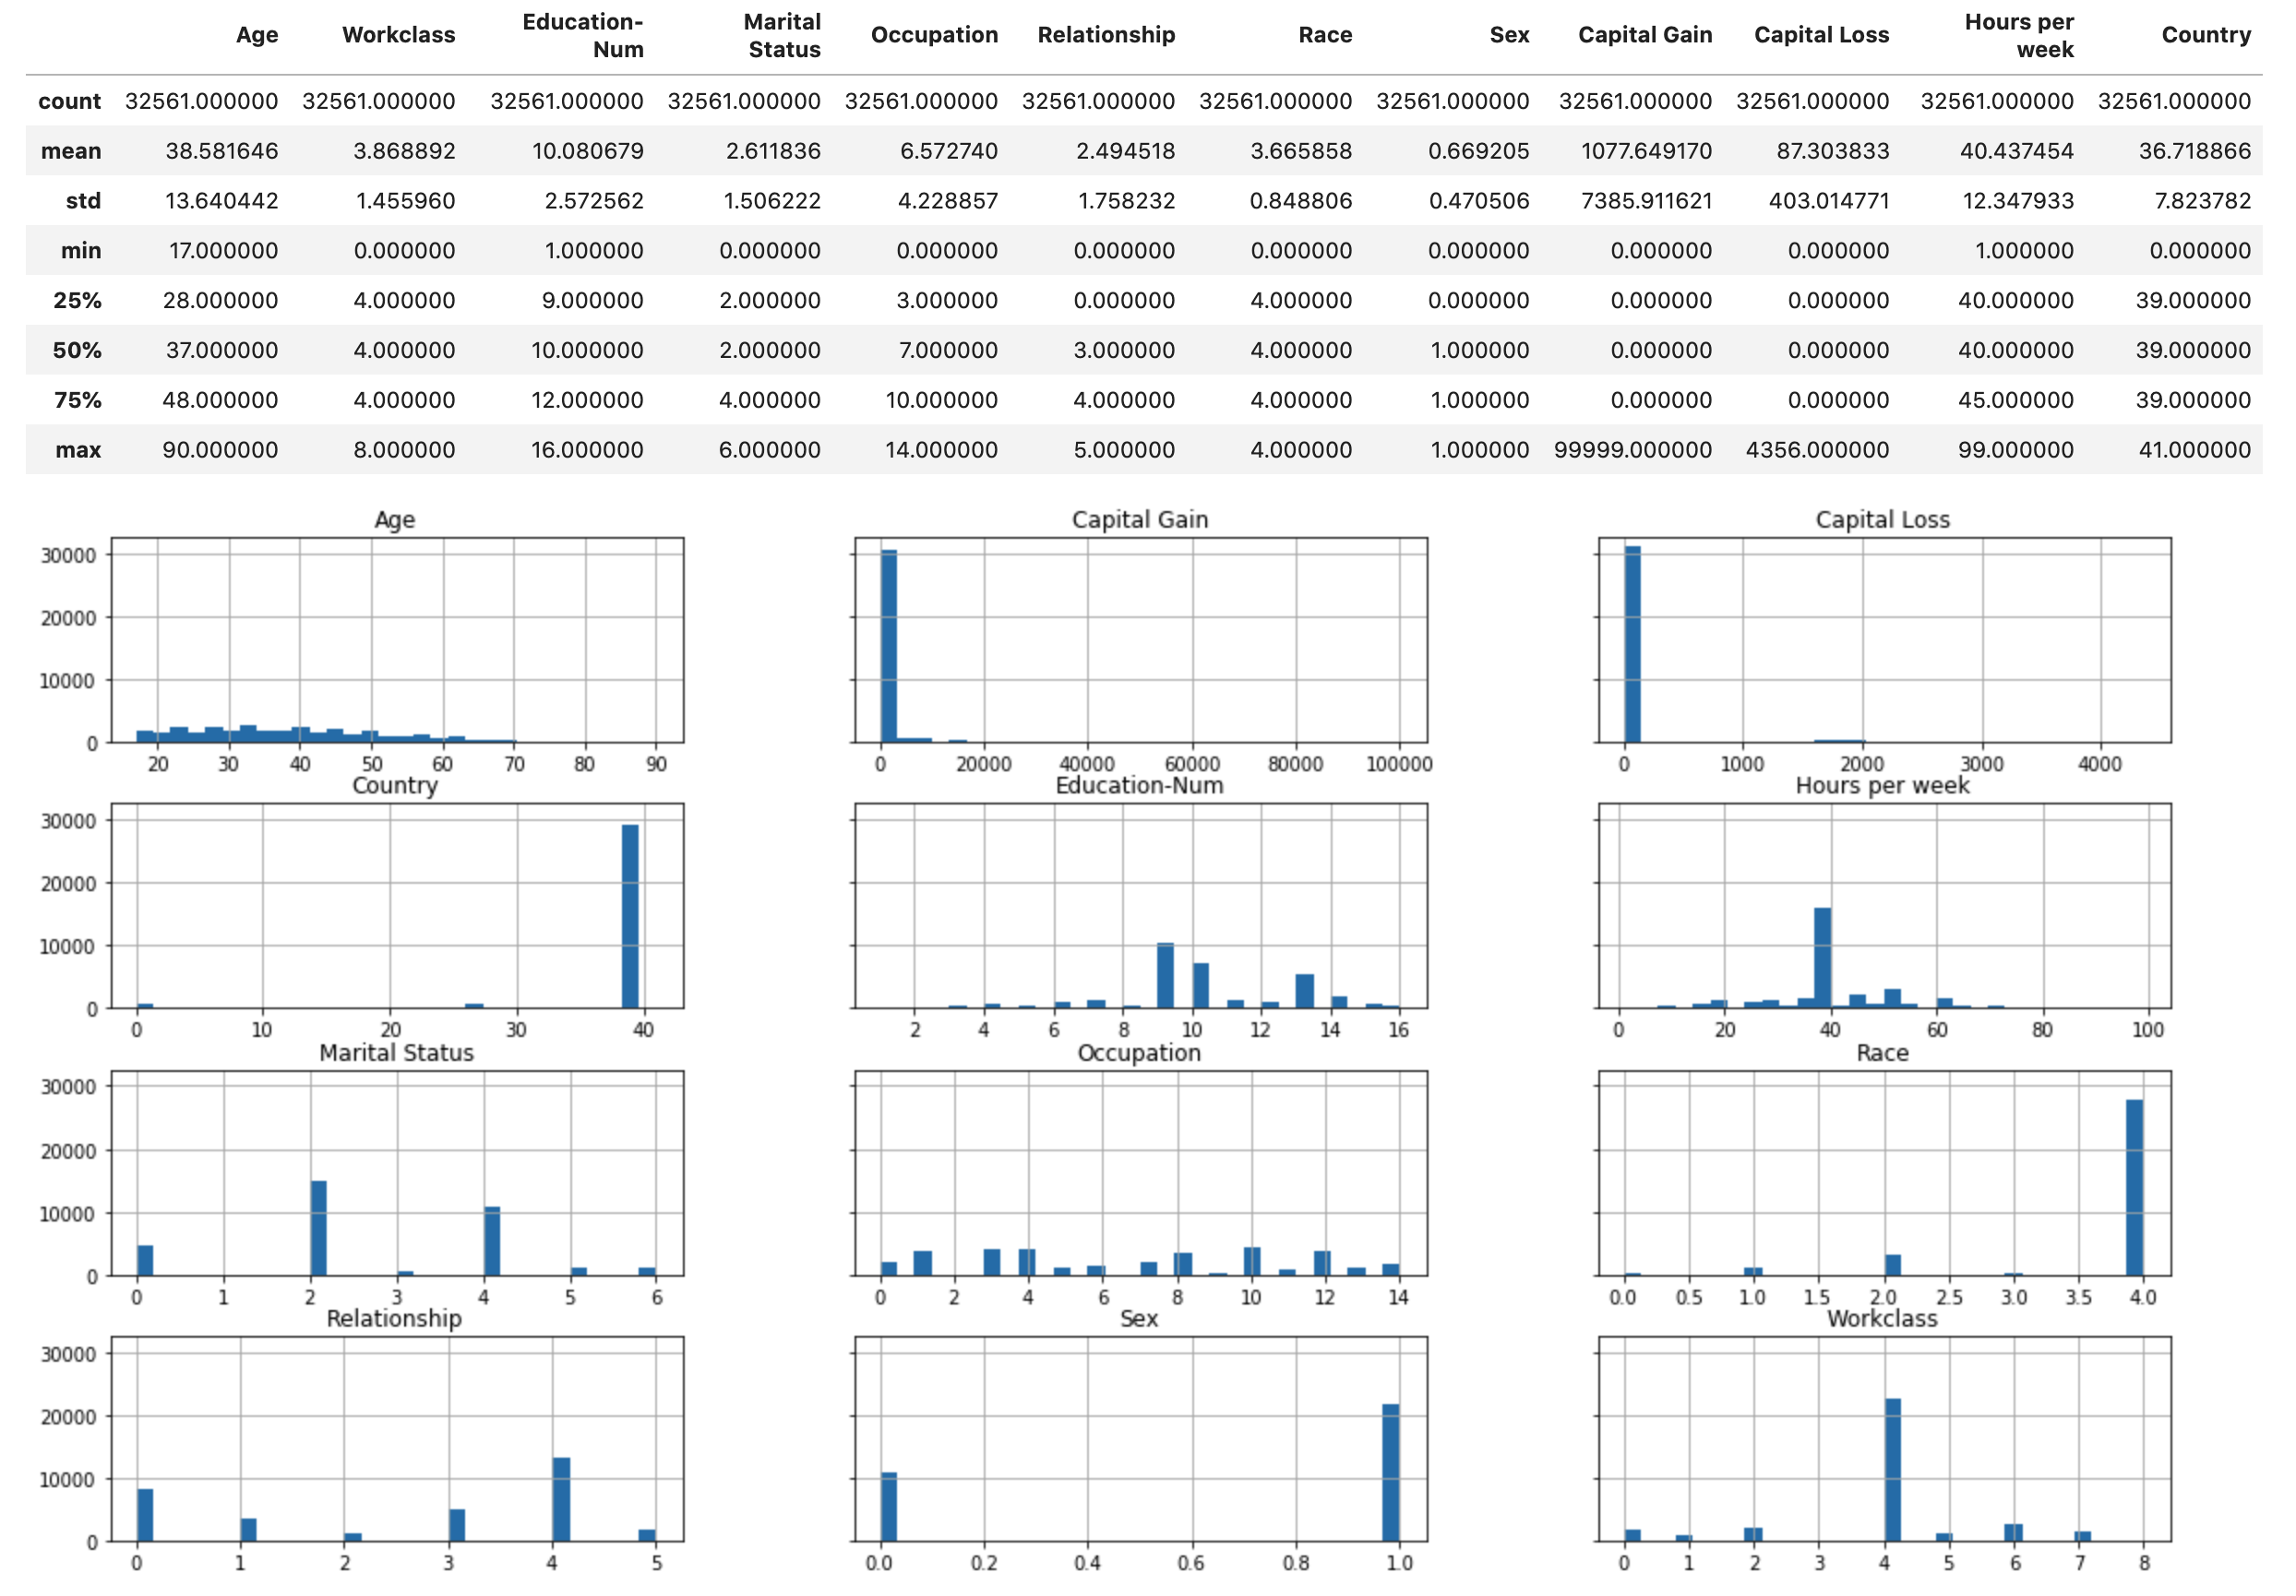
Run the following script to display the statistical overview of the dataset and histograms of the numeric features.
display(X.describe())
hist = X.hist(bins=30, sharey=True, figsize=(20, 10))
Tip
If you want to use a dataset that needs to be cleaned and transformed, you can simplify and streamline data preprocessing and feature engineering using Amazon SageMaker Data Wrangler. To learn more, see Prepare ML Data with Amazon SageMaker Data Wrangler.
Split the Dataset into Train, Validation, and Test Datasets
Using Sklearn, split the dataset into a training set and a test set. The training set is used to train the model, while the test set is used to evaluate the performance of the final trained model. The dataset is randomly sorted with the fixed random seed: 80 percent of the dataset for training set and 20 percent of it for a test set.
from sklearn.model_selection import train_test_split
X_train, X_test, y_train, y_test = train_test_split(X, y, test_size=0.2, random_state=1)
X_train_display = X_display.loc[X_train.index]
Split the training set to separate out a validation set. The validation set is used to evaluate the performance of the trained model while tuning the model's hyperparameters. 75 percent of the training set becomes the final training set, and the rest is the validation set.
X_train, X_val, y_train, y_val = train_test_split(X_train, y_train, test_size=0.25, random_state=1)
X_train_display = X_display.loc[X_train.index]
X_val_display = X_display.loc[X_val.index]
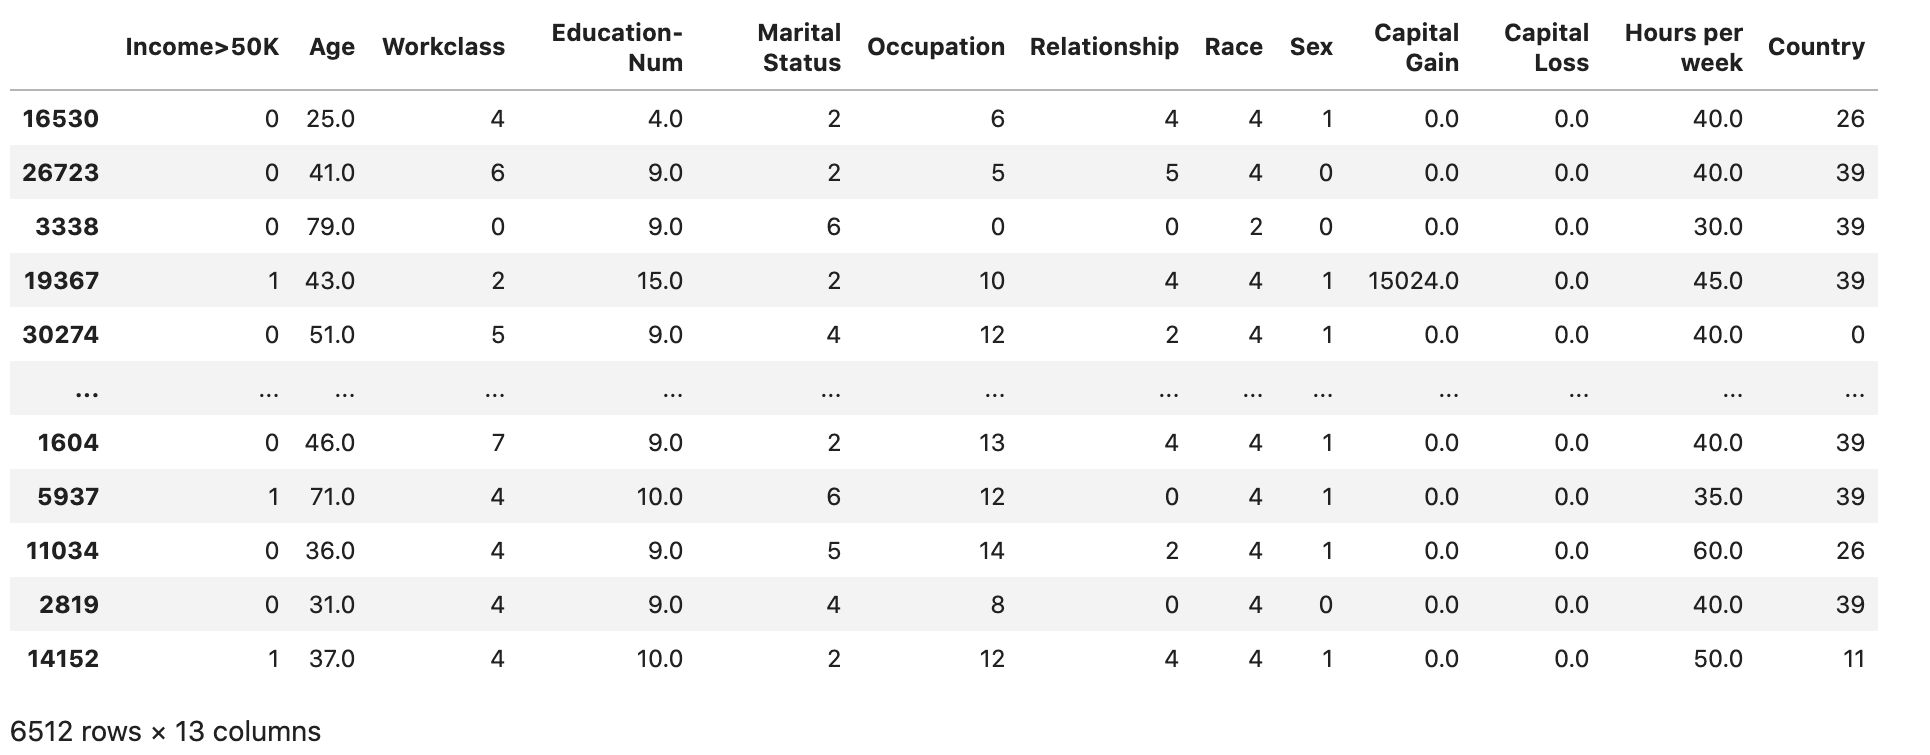
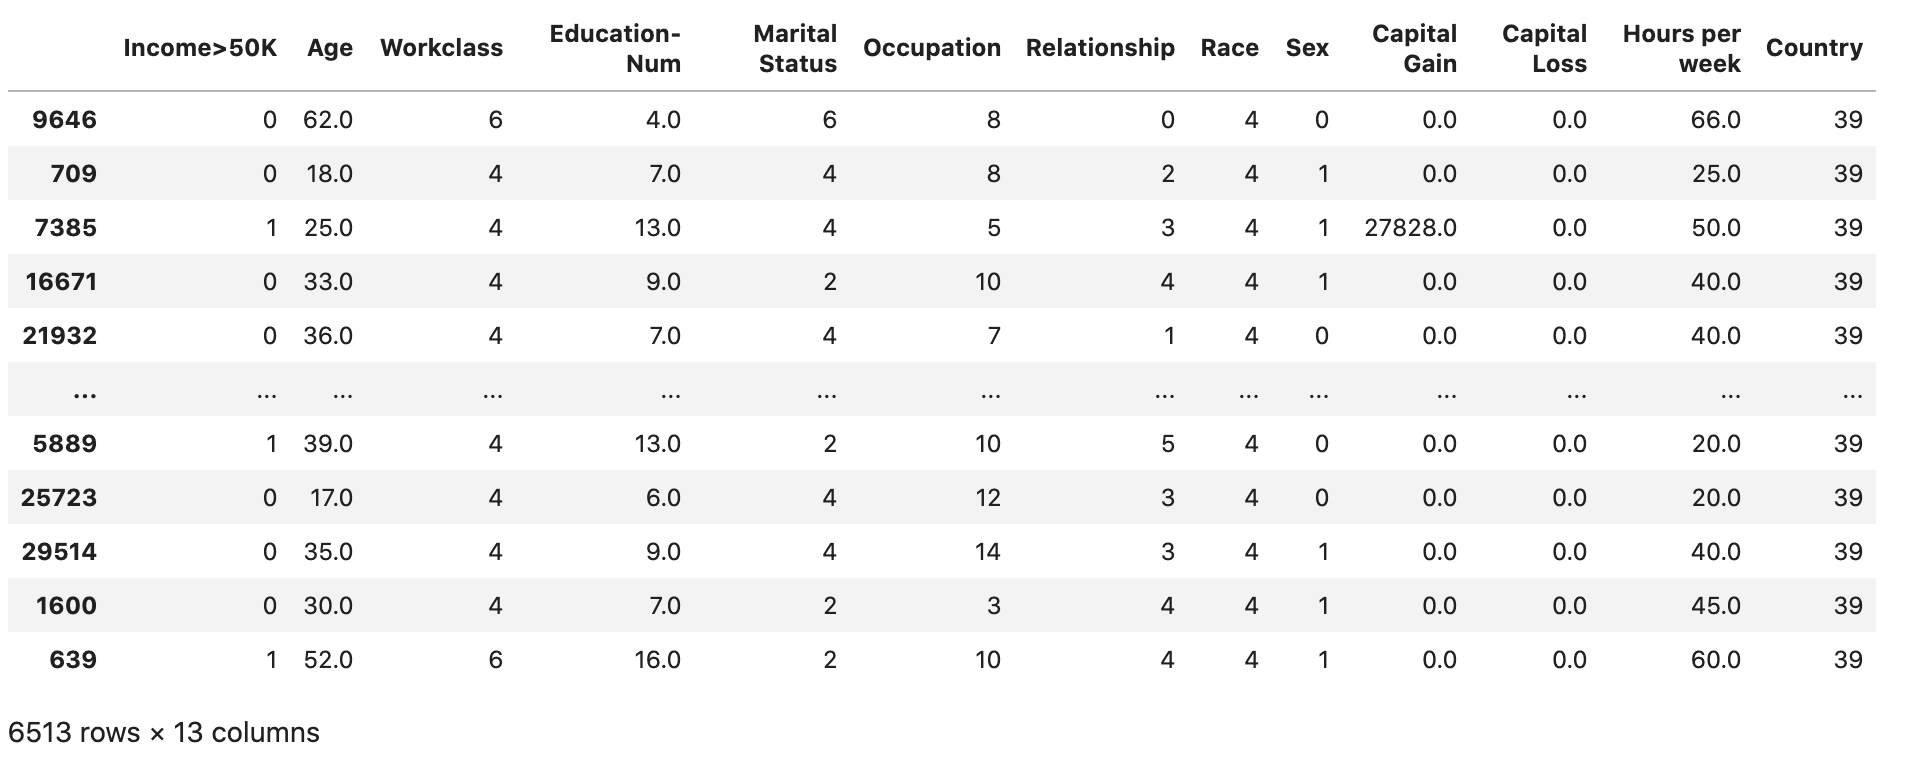
Using the pandas package, explicitly align each dataset by concatenating the numeric features with the true labels.
import pandas as pd
train = pd.concat([pd.Series(y_train, index=X_train.index,
                             name='Income>50K', dtype=int), X_train], axis=1)
validation = pd.concat([pd.Series(y_val, index=X_val.index,
                            name='Income>50K', dtype=int), X_val], axis=1)
test = pd.concat([pd.Series(y_test, index=X_test.index,
                            name='Income>50K', dtype=int), X_test], axis=1)
Check if the dataset is split and structured as expected:
train

validation
test
Convert the Train and Validation Datasets to CSV Files
Convert the train and validation dataframe objects to CSV
files to match the input file format for the XGBoost algorithm.
# Use 'csv' format to store the data
# The first column is expected to be the output column
train.to_csv('train.csv', index=False, header=False)
validation.to_csv('validation.csv', index=False, header=False)
Upload the Datasets to Amazon S3
Using the SageMaker and Boto3, upload the training and validation datasets to the default Amazon S3 bucket. The datasets in the S3 bucket will be used by a compute-optimized SageMaker instance on Amazon EC2 for training.
The following code sets up the default S3 bucket URI for your current SageMaker session,
creates a new demo-sagemaker-xgboost-adult-income-prediction folder, and
uploads the training and validation datasets to the data subfolder.
import sagemaker, boto3, os
bucket = sagemaker.Session().default_bucket()
prefix = "demo-sagemaker-xgboost-adult-income-prediction"

boto3.Session().resource('s3').Bucket(bucket).Object(
    os.path.join(prefix, 'data/train.csv')).upload_file('train.csv')
boto3.Session().resource('s3').Bucket(bucket).Object(
    os.path.join(prefix, 'data/validation.csv')).upload_file('validation.csv')
Run the following AWS CLI to check if the CSV files are successfully uploaded to the S3 bucket.
! aws s3 ls {bucket}/{prefix}/data --recursive
This should return the following output:

