Using the administrator features
Identity Providers
You can set up and allow users to sign in through external federated identity providers.
Note
Only admin users can set up identity providers for other users.
IdP configuration for SAML 2.0
Automated Data Analytics on AWS’s identify federation is backed by Cognito, and most of the configuration is mapped to Cognito directly.
When adding a new identity provider using SAML 2.0, you can find information related to the configuration of the application on the identity provider side (e.g. Okta, Auth0, OneLogin) in the OAuth settings at the bottom of the screen.
-
Domain: For example,
https://[domainPrefix].auth.ap-southeast-2.amazoncognito.com -
Callback / ACS URL / ACS URL Validator: For example,
https://[domainPrefix].auth.[region].amazoncognito.com/saml2/idpresponse -
Audience URI / SP Entity ID: urn:amazon:cognito:sp:[userPoolId]
Note
-
For Audience, replace
userPoolIdwith your user pool ID from the OAuth settings. -
For ACS (Consumer) URL Validator and ACS (Consumer) URL, replace
domainPrefixand region with the values from the OAuth settings.
-
In the Preferred Username field, choose a unique alias that can identify the user. (for example, email, username, or preferredUsername).
-
For Profile Attribute under SAML, enter http://schemas.xmlsoap.org/ws/2005/05/identity/claims/nameidentifier as the External Provider Attribute, and use the corresponding attribute in the User Pool Attribute. For example, to map an email address:
-
In the External Profile Attribute field, enter http://schemas.xmlsoap.org/ws/2005/05/identity/claims/emailaddress.
-
In the User Pool Attribute dropdown, select Email.
-

Profile attribute settings.
Reference: Set up Auth0 as a SAML identity provider
Create an Auth0 application
-
On the Auth0 website
dashboard, choose Applications, and then Create Application. -
In the Create Application dialog box, enter a name for your application. For example, My App.
-
Under Choose an application type, select Single Page Web Applications.
-
Select Create.
Configure SAML settings for Automated Data Analytics on AWS
-
From the left navigation hand pane, choose Applications.
-
Choose the name of the application you created.
-
On the Addons tab, enable SAML2 Web App.
-
In the Addon: SAML2 Web App dialog box, on the Settings tab, for Application Callback URL enter
https://[yourDomainPrefix].auth.[region].amazoncognito.com/saml2/idpresponse. Replace[yourDomainPrefix]found in the OAuth settings.
OAuth settings
-
Under Settings, complete the following:
-
In the audience field, enter urn:amazon:cognito:sp:yourUserPoolId from the OAuth settings.
-
In the mappings and email fields, delete the comment delimiters (//), and any other attributes required by your Amazon Cognito user pool. For more information, refer to configuring user pool attributes.
-
In the nameIdentifierFormat field, delete the comment delimiters (//). Replace the default value (urn:oasis:names:tc:SAML:1.1:nameid-format:unspecified) with urn:oasis:names:tc:SAML:2.0:nameid-format:persistent.
-
-
Select Enable, and select Save.

SAML settings
-
Select the Usage tab, and download the Identity Provider metadata.

Download IdP metadata
-
On the Automated Data Analytics on AWS web UI, from the left hand, select Identity Providers.
-
On the Federated Identity Providers page, select Add Identity Provider.
-
Enter a name and description, and select SAML.
-
Upload the metadata file downloaded in the previous step, and select Next.
-
Enter the preferred name attribute, when adding a SAML attribute, and for the SAML Attribute, enter http://schemas.xmlsoap.org/ws/2005/05/identity/claims/emailaddress
. 
Attribute mappings
-
Review your information and select Submit. This will set up Auth0 as a SAML Identity Provider for Automated Data Analytics on AWS.

Review attribute mappings
On the sign-in page, you can now log in using auth0.

Figure 48: Sign in page
Reference: Set up Auth0 as a SAML identity provider
Create Auth0 application
-
From the Auth0
website, select the Dashboard. -
In the navigation pane, expand Applications on the left pane, and select Create Application.
-
In the dialog box, enter a name for the application. Fox example, App1.
-
Under Choose an application type dropdown, select Single Webpage Applications.
-
Select Create.
Note the client ID, client secret, and domain from the application settings tab of the Auth0 application.
-
In the Allowed Callback URLs section, add the Automated Data Analytics on AWS callback domain. You can find the callback URL on the Automated Data Analytics on AWS Identity providers > OIDC Settings page.

Federated identity providers

Application URIs
Create Identity Provider in Automated Data Analytics on AWS
-
On the Automated Data Analytics on AWS web UI, from the left hand, select Identity Providers.
-
On the Federated Identity Providers page, select Add Identity Provider.
-
On the Create identity provider page, enter the provider name and description.
-
Choose OIDC.
-
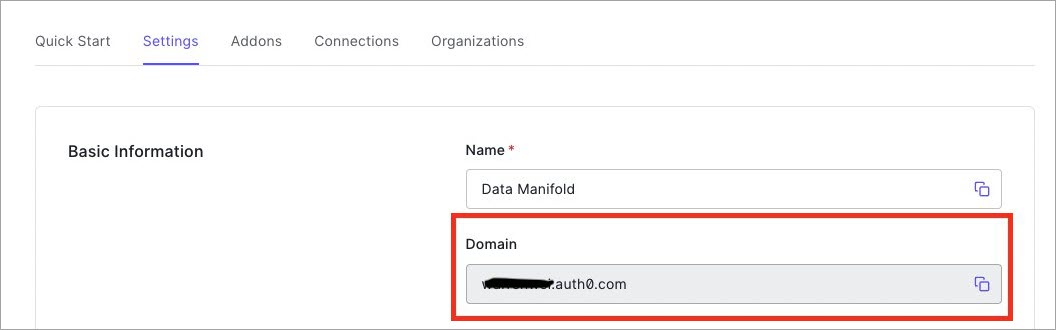
For Issuer, add the domain name from the Auth0 console. For example: https://example.auth0.com
. 
OIDC settings
-
Enter the
Client IDandClient secretfrom the Auth0 application. -
Choose
GETas Attribute Request Method. You can skip Advanced (Optional) field if all the URLs are following OIDC well-known configuration. -
Select Next.
-
For Preferred Username, enter the attribute that maps to a field in the OIDC claim token. (for example, email, username)
-
Select Next to review, and select Submit.
Note
Automated Data Analytics on AWS does not support modifying IdP configuration once saved. You will need to recreate the configuration for changes. Existing users will be not be impacted by this.
Cost Explorer
The solution’s web UI provides a Cost Explorer feature, available to administrators to view
and understand the cost of the solution over time. This feature
gets the account and service level cost details from
AWS Cost Explorer

Cost explorer option
Activating the Cost Explorer feature
To activate this feature in the Web UI, you must enable Cost Explorer from the AWS Management Console and activate the Application tag.
-
Sign in to the AWS Management Console
. -
Open the AWS Cost Explorer
. Navigating to this page automatically activates the AWS Cost Explorer within 24 hours. -
After you activate AWS Cost Explorer, open Cost allocation tags
. -
Select the Application tag, and choose Activate. This activates the Cost Explore feature in the web UI.
Using the Cost Explorer, users can view Account and Service level costs. Account costs are displayed by the last 30, 60, or 90 days. You can refine these figures to different decimals using the Precision dropdown in the upper right-hand side of the table.
Users can also view AWS Service costs by toggling to Service Costs on the upper left-hand side of the table.

Service costs
Budget
Use the Budget page to create a budget with a cost limit to track costs and usage for the Automated Data Analytics on AWS solution, and receive notifications if the costs exceed certain thresholds.
Note
Only admin users can view, create, or modify budgets.
Creating a budget
-
To access the budget feature, from the Automated Data Analytics on AWS home screen, on the left menu, under Admin, select Budget.

Budget
-
To add a budget for the solution, select Create budget. The Create budget page displays.

Create budget
-
On the Create budget page:
-
Enter a cost limit value (in USD) for the budget.
-
Enter a list of subscriber email addresses who will get notified when the thresholds are met.
-
Select percentage threshold values for notifications and the subscribers will be notified when the current spend is greater than these percentages of the budget limit. You can select multiple threshold percentages when you want to get notifications.
-
-
Select Next to save your changes and create a budget. Once a budget is created, the Budget Details page shows the budget amount, budget health and any associated notifications.

Budget details
Editing a budget
-
To edit an existing budget, from the Automated Data Analytics Budget page, select the budget and choose Edit budget. The Edit budget page displays.

Edit budget
-
Update the budget fields as required, and select Next. The budget details are updated and displayed on the Budget details page.
Deleting a budget
-
To delete an existing budget, from the Automated Data Analytics Budget page, select the budget and choose Delete budget. The Delete budget dialog box displays.

Delete budget
-
To confirm deletion, type delete in the text box and select Delete. The budget is now deleted and all associated notifications are removed.
Visualization
Use the Visualization page to deploy Apache Superset as a data analytics and visualization platform for Automated Data Analytics on AWS (ADA) solution.
Note
Only admin users can can deploy Apache Superset for visualization purposes.
Deploying Apache Superset
Before deploying, read the following deployment guides for the solutions that will be installed, and make sure your AWS account is set up for this deployment.
Note
You must deploy the Apache Superset on AWS solution in the same AWS account where the ADA solution is deployed.
-
From the Automated Data Analytics on AWS home screen, on the left menu, under Admin, select Visualization.

Visualization
-
On the Deploy Visualization solution - Apache Superset page, choose Deploy Apache Superset to start the deployment. The deployment takes place in an AWS CodeBuild build. After the deployment is initiated, you can monitor the deployment progress from AWS CodeBuild console.
-
After the deployment is completed, go to the AWS CloudFormation console and navigate to the superset stack to verify that it has been deployed successfully.
For more information on how to connect a data product in ADA and viewing the visualization in Apache Superset, refer to the Apache Superset section in the Extensions guide.
Teardown
Use the Teardown page to permanently remove the Automated Data Analytics on AWS solution from your account.
Note
The Teardown option is only available for users with root_admin access.
For more information, refer to the Teardown using the web UI section.
