Pipeline management
The pipeline manager is a component within Cloud Migration Factory on AWS to support the creation and running of a sequence of tasks automatically. The pipeline manager provides a way for users to do the following:
-
Run a template of predefined tasks for migration and modernization
-
Fully manage the pipelines within the user interface, such as completing manual tasks, retrying a task, or skipping a task as needed
-
View the status of a running pipeline
-
Check the inputs and logs for any tasks for the pipeline
Add a new pipeline
This section provides instructions for adding a new pipeline.
-
Select Automation, then select Pipelines.
-
In the Pipelines table, choose Add.
-
Enter Pipeline Name and Pipeline Description.
-
Select a template from the Pipeline Template.
-
Enter Task Arguments for the selected pipeline template.
-
Choose Save to run the pipeline.
Delete a pipeline
This section provides instructions for deleting a pipeline.
-
Select Automation, then select Pipelines.
-
In the Pipelines table, select one or more pipelines.
-
Choose Delete.
View pipeline status
This section provides instructions for viewing the pipeline status.
-
Select Automation, then select Pipelines.
-
In the Pipelines table, select one pipeline.
-
Select Details, then Pipeline template, and then the Pipeline template tasks tab to view the template information.
-
Select the Manage tab to view the visual representation of the pipeline to where you can manage the tasks and view detailed status.
-
Select the Tasks tab to view and manage the execution status of individual the pipeline tasks.
Manage pipeline tasks
This section provides instructions for managing pipeline tasks from the web interface. You can view tasks inputs and logs as well as update the status of each task.
-
Select Automation, then select Pipelines.
-
In the Pipelines table, select one pipeline.
-
Select the Tasks tab.
From the task list, you can see the high-level status of each task such as task execution status and last modified time.
To manage an individual task, complete the following steps:
-
Select one of the tasks from the list.
-
Select Actions, then select View Inputs and logs to verify the inputs and view logs of that task.
To change the status of the task, such as retry or skip, complete the following steps:
-
Select Actions, then select Update Status.
-
Select one of the statuses from the list to change the status. For example, select Complete to complete a manual task.
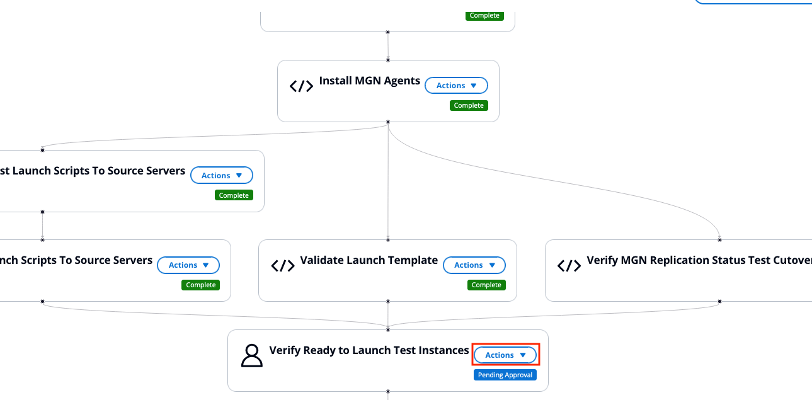
You can also manage pipeline tasks in the visual representation of the pipeline under the Manage tab. As shown in the following diagram, each task is represented by a node on the graph, and on each task you can initiate the actions.
Pipeline showing tasks for Install MGN Agents Validate Launch Template, and Verify Reading to Launch Test Instances.
Conditional Branching
The Conditional Branching feature in Cloud Migration Factory on AWS allows users to control which parts of their migration pipeline to execute. This feature enables skipping pipeline paths that are not required for specific migration waves.
Conditional Branching allows you to:
-
Choose which parts of your pipeline to execute during a migration
-
Skip steps that are not required for a specific migration wave
-
Have more control over your migration pipelines
How It Works
Manual Decision Points
-
To enable conditional branching, you need to add manual approval steps at the start of each potential branch in your pipeline.
-
These steps act as decision points where you can choose which path to take.
Complete or Abandoned
When your pipeline reaches a manual approval step, you have two options:
-
Complete: The branch will continue executing as normal.
-
Abandoned: The branch will not execute, and all tasks in that branch will be skipped.
Automatic Propagation
-
If you abandon a task, all tasks that exclusively depend on it will also be automatically abandoned.
-
This allows you to effectively abandon an entire branch with just one action.
Joining Branches
-
If abandoned and approved branches join later in the pipeline, the joined tasks will still run as long as at least one incoming branch was successful.
-
This ensures that necessary tasks are not skipped unintentionally.
-
A task will only be automatically abandoned when all its predecessors are abandoned.
Using Conditional Branching
-
Prepare Your Pipeline: When creating your pipeline, add manual approval steps at the beginning of each potential branch.
-
Start the Pipeline: Begin your migration pipeline as usual.
-
Make Decisions: When the pipeline reaches a manual approval step:
-
Review the upcoming branch.
-
Decide whether this branch is necessary for your current migration.
-
Choose to either approve or abandon the task.
-
-
Monitor Progress: As the pipeline progresses, you’ll see some branches executing and others marked as abandoned based on your choices.
-
Review Results: At the end of the pipeline, review which branches were executed and which were abandoned to ensure the migration proceeded as intended.
Best Practices
-
Use clear naming conventions for your manual approval steps to easily identify what each branch does.
-
Regularly review your pipeline structure to ensure it allows for efficient decision-making.
Important Notes
-
You can only abandon tasks that are in "Pending Approval" or "Not Started" status.
-
Once a task has started executing, it cannot be abandoned.
-
Abandoned tasks are considered neither successful nor failed - they are simply skipped.
-
You cannot directly abandon automated tasks as they do not wait for approval and immediately go to the In-progress state. Automated tasks are only abandoned through propagation if all their predecessors are abandoned. Also manage pipeline tasks in the visual representation of the pipeline under the Manage tab. As shown in the following diagram, each task is represented by a node on the graph, and on each task you can initiate the actions.
Email notifications
Email notifications are triggered in three scenarios during pipeline execution:
-
When a task fails
-
When a manual task requires user approval
-
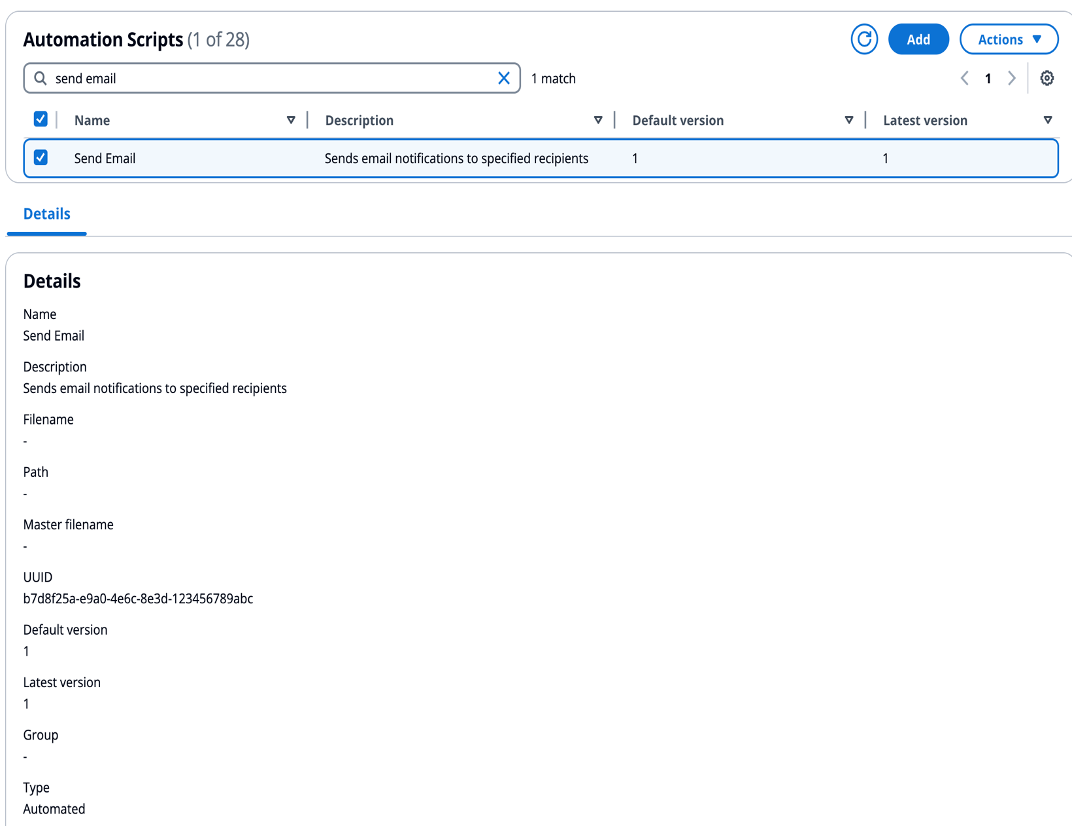
For "Send Email" automation tasks ("Send Email" is a new type of automation that serves the sole purpose of sending an email with a custom body). A "Send Email" task might show a "Complete" status in the UI but this does not guarantee the delivery of the actual email notification. For the user to actually receive email from a email automation task they need to confirm SNS subscription. This is explained further in Email Recipient User Management.
Send Email Automation Task Details
Configuring email notification settings
Email notifications can only be configured during pipeline creation by:
-
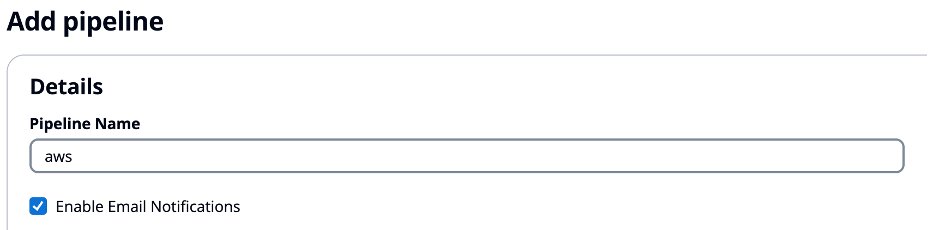
Enabling email notifications (checkbox). If disabled, no emails will be received from this pipeline and no email settings are visible.
Enable Email Notifications Toggle during Pipeline Creation
-
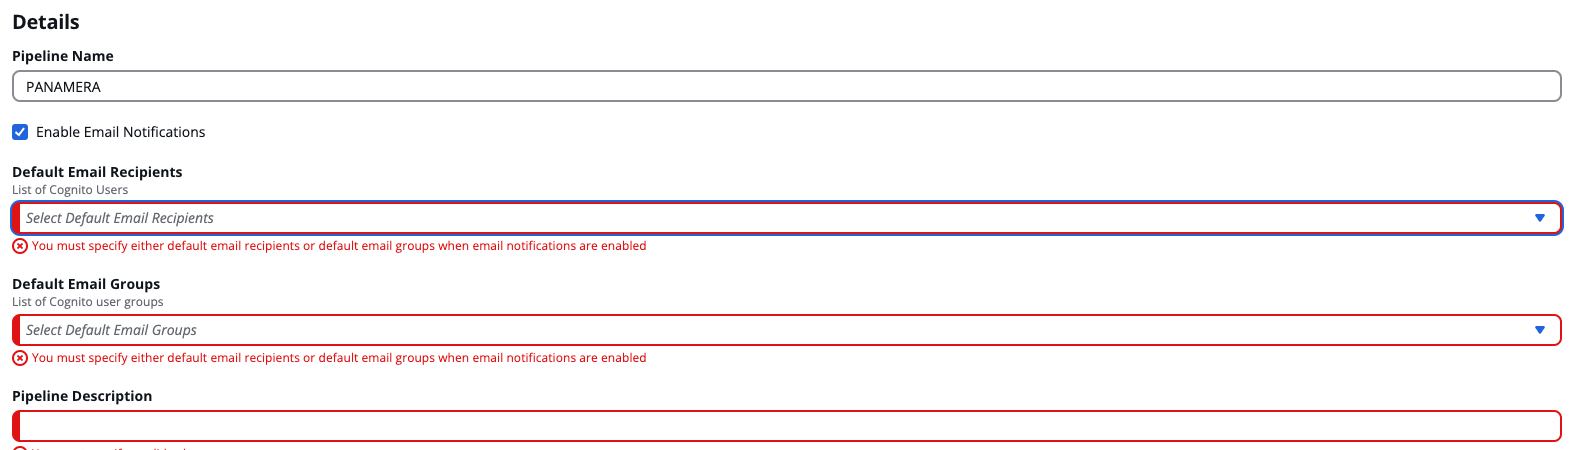
If Enable Email Notifications is set to true, you have to populate at least one of the following default email settings:
-
Default email recipients
-
Default email groups
Email Notification Recipients Configuration
-
-
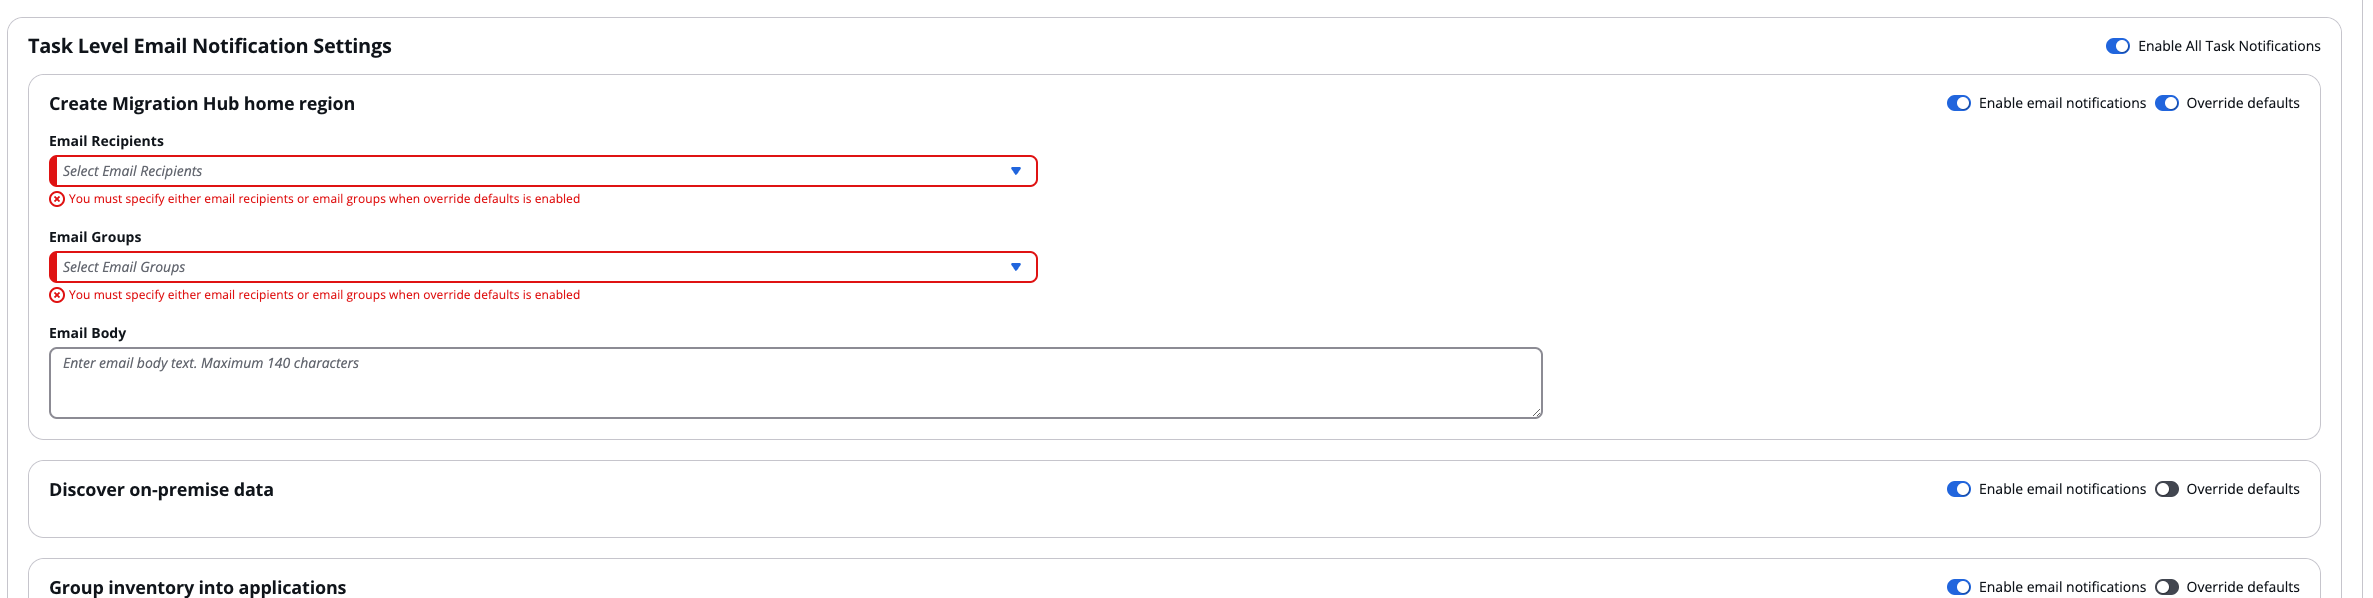
Once email notifications are enabled using the Enable Email Notifications, and a pipeline template is selected, you can enable email notifications for each task individually or all tasks at once. If emails are disabled for all tasks, users will not receive any emails for any tasks despite pipeline level Enable Email Notifications being set to true.
Task Level Email Notification Toggle

-
Once task level email notifications are enabled, you can optionally enable Override Defaults. If Override Defaults is enabled, at least one of the following needs to be populated, and these task level email settings are used, else the default email settings are used:
-
Email recipients
-
Email groups
Task Level Email Recipients Configuration
-
If a custom email body is not provided by the customer, Cloud Migration Factory sends a default email message based on the event that triggered the email. If custom email body is provided, it appears in addition to this default email message.
Example: Task "Create Migration Hub home region" uses task-level email settings. Task "Discover on-premise data" uses default email settings.
Email recipient user management
-
Users are automatically added to the Email SNS topic upon addition to Cognito users list. Users will only receive email notifications if:
-
They are part of the email recipient list
-
They have a valid email address
-
They have confirmed SNS subscription (via email confirmation link).
-
-
When a user’s email address is updated in the Cognito user pool, they have to sign in to Cloud Migration Factory with the new email address to start receiving email notifications to their updated email address.
You can also manage pipeline tasks in the visual representation of the pipeline under the Manage tab. As shown in the following diagram, each task is represented by a node on the graph, and on each task you can initiate the actions.
Pipeline showing tasks for Install MGN Agents Validate Launch Template, and Verify Reading to Launch Test Instances.
