Creating an Activity state machine using Step Functions
This tutorial shows you how to create an activity-based state machine using Java and AWS Step Functions. Activities allow you to control worker code that runs somewhere else from your state machine. For an overview, see Activities in How Step Functions works.
To complete this tutorial, you need the following:
-
The SDK for Java
. The example activity in this tutorial is a Java application that uses the AWS SDK for Java to communicate with AWS. -
AWS credentials in the environment or in the standard AWS configuration file. For more information, see Set Up Your AWS Credentials in the AWS SDK for Java Developer Guide.
Topics
Step 1: Create an Activity
You must make Step Functions aware of the activity whose worker (a program) you want to create. Step Functions responds with an Amazon Resource Name(ARN) that establishes an identity for the activity. Use this identity to coordinate the information passed between your state machine and worker.
Important
Ensure that your activity task is under the same AWS account as your state machine.
-
In the Step Functions console
, in the navigation pane on the left, choose Activities. -
Choose Create activity.
-
Enter a Name for the activity, for example,
get-greeting -
When your activity task is created, make a note of its ARN, as shown in the following example.
arn:aws:states:us-east-1:123456789012:activity:get-greeting
Step 2: Create a state machine
Create a state machine that determines when your activity is invoked and when your worker should perform its primary work, collect its results, and return them. To create the state machine, you'll use the Code editor of Workflow Studio.
-
In the Step Functions console
, in the navigation pane on the left, choose State machines. -
On the State machines page, choose Create state machine.
-
In the Choose a template dialog box, select Blank.
-
Choose Select. This opens Workflow Studio in Design mode.
-
For this tutorial, you'll write the Amazon States Language (ASL) definition of your state machine in the code editor. To do this, choose Code.
-
Remove the existing boilerplate code and paste the following code. Remember to replace the example ARN in this code with the ARN of the activity task that you created earlier in the
Resourcefield.{ "Comment": "An example using a Task state.", "StartAt": "getGreeting", "Version": "1.0", "TimeoutSeconds": 300, "States": { "getGreeting": { "Type": "Task", "Resource": "arn:aws:states:us-east-1:123456789012:activity:get-greeting", "End": true } } }This is a description of your state machine using the Amazon States Language (ASL). It defines a single
Taskstate namedgetGreeting. For more information, see State Machine Structure. -
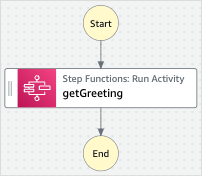
On the Graph visualization pane, make sure the workflow graph for the ASL definition you added looks similar to the following graph.
-
Specify a name for your state machine. To do this, choose the edit icon next to the default state machine name of MyStateMachine. Then, in State machine configuration, specify a name in the State machine name box.
For this tutorial, enter the name
ActivityStateMachine. -
(Optional) In State machine configuration, specify other workflow settings, such as state machine type and its execution role.
For this tutorial, keep all the default selections in State machine settings.
If you've previously created an IAM role with the correct permissions for your state machine and want to use it, in Permissions, select Choose an existing role, and then select a role from the list. Or select Enter a role ARN and then provide an ARN for that IAM role.
-
In the Confirm role creation dialog box, choose Confirm to continue.
You can also choose View role settings to go back to State machine configuration.
Note
If you delete the IAM role that Step Functions creates, Step Functions can't recreate it later. Similarly, if you modify the role (for example, by removing Step Functions from the principals in the IAM policy), Step Functions can't restore its original settings later.
Step 3: Implement a Worker
Create a worker. A worker is a program that is responsible for:
-
Polling Step Functions for activities using the
GetActivityTaskAPI action. -
Performing the work of the activity using your code, (for example, the
getGreeting()method in the following code). -
Returning the results using the
SendTaskSuccess,SendTaskFailure, andSendTaskHeartbeatAPI actions.
Note
For a more complete example of an activity worker, see Example Activity Worker in Ruby. This example provides an implementation based on best practices, which you can use as a reference for your activity worker. The code implements a consumer-producer pattern with a configurable number of threads for pollers and activity workers.
To implement the worker
-
Create a file named
GreeterActivities.java. -
Add the following code to it.
import com.amazonaws.ClientConfiguration;
import com.amazonaws.auth.EnvironmentVariableCredentialsProvider;
import com.amazonaws.regions.Regions;
import com.amazonaws.services.stepfunctions.AWSStepFunctions;
import com.amazonaws.services.stepfunctions.AWSStepFunctionsClientBuilder;
import com.amazonaws.services.stepfunctions.model.GetActivityTaskRequest;
import com.amazonaws.services.stepfunctions.model.GetActivityTaskResult;
import com.amazonaws.services.stepfunctions.model.SendTaskFailureRequest;
import com.amazonaws.services.stepfunctions.model.SendTaskSuccessRequest;
import com.amazonaws.util.json.Jackson;
import com.fasterxml.jackson.databind.JsonNode;
import java.util.concurrent.TimeUnit;


public class GreeterActivities {

    public String getGreeting(String who) throws Exception {
        return "{\"Hello\": \"" + who + "\"}";
    }

    public static void main(final String[] args) throws Exception {
        GreeterActivities greeterActivities = new GreeterActivities();
        ClientConfiguration clientConfiguration = new ClientConfiguration();
        clientConfiguration.setSocketTimeout((int)TimeUnit.SECONDS.toMillis(70));

        AWSStepFunctions client = AWSStepFunctionsClientBuilder.standard()
                .withRegion(Regions.US_EAST_1)
                .withCredentials(new EnvironmentVariableCredentialsProvider())
                .withClientConfiguration(clientConfiguration)
                .build();

        while (true) {
            GetActivityTaskResult getActivityTaskResult =
                    client.getActivityTask(
                            new GetActivityTaskRequest().withActivityArn(ACTIVITY_ARN));

            if (getActivityTaskResult.getTaskToken() != null) {
                try {
                    JsonNode json = Jackson.jsonNodeOf(getActivityTaskResult.getInput());
                    String greetingResult =
                            greeterActivities.getGreeting(json.get("who").textValue());
                    client.sendTaskSuccess(
                            new SendTaskSuccessRequest().withOutput(
                                    greetingResult).withTaskToken(getActivityTaskResult.getTaskToken()));
                } catch (Exception e) {
                    client.sendTaskFailure(new SendTaskFailureRequest().withTaskToken(
                            getActivityTaskResult.getTaskToken()));
                }
            } else {
                Thread.sleep(1000);
            }
        }
    }
}
Note
The
EnvironmentVariableCredentialsProviderclass in this example assumes that theAWS_ACCESS_KEY_ID(orAWS_ACCESS_KEY) andAWS_SECRET_KEY(orAWS_SECRET_ACCESS_KEY) environment variables are set. For more information about providing the required credentials to the factory, see AWSCredentialsProvider in the AWS SDK for Java API Reference and Set Up AWS Credentials and Region for Development in the AWS SDK for Java Developer Guide.By default the AWS SDK will wait up to 50 seconds to receive data from the server for any operation. The
GetActivityTaskoperation is a long-poll operation that will wait up to 60 seconds for the next available task. To prevent receiving aSocketTimeoutExceptionerror, set SocketTimeout to 70 seconds. -
In the parameter list of the
GetActivityTaskRequest().withActivityArn()constructor, replace theACTIVITY_ARNvalue with the ARN of the activity task that you created earlier.
Step 4: Run the state machine
When you start the execution of the state machine, your worker polls Step Functions for activities, performs its work (using the input that you provide), and returns its results.
-
On the
ActivityStateMachinepage, choose Start execution.The Start execution dialog box is displayed.
-
In the Start execution dialog box, do the following:
-
(Optional) To identify your execution, you can specify a name for it in the Name box. By default, Step Functions generates a unique execution name automatically.
Note
Step Functions allows you to create names for state machines, executions, and activities, and labels that contain non-ASCII characters. These non-ASCII names don't work with Amazon CloudWatch. To ensure that you can track CloudWatch metrics, choose a name that uses only ASCII characters.
-
In the Input box, enter the following JSON input to run your workflow.
{ "who": "AWS Step Functions" } -
Choose Start execution.
-
The Step Functions console directs you to a page that's titled with your execution ID. This page is known as the Execution Details page. On this page, you can review the execution results as the execution progresses or after it's complete.
To review the execution results, choose individual states on the Graph view, and then choose the individual tabs on the Step details pane to view each state's details including input, output, and definition respectively. For details about the execution information you can view on the Execution Details page, see Execution Details page – Interface overview.
-
Step 5: Run and Stop the Worker
To have the worker poll your state machine for activities, you must run the worker.
-
On the command line, navigate to the directory in which you created
GreeterActivities.java. -
To use the AWS SDK, add the full path of the
libandthird-partydirectories to the dependencies of your build file and to your JavaCLASSPATH. For more information, see Downloading and Extracting the SDK in the AWS SDK for Java Developer Guide. -
Compile the file.
$ javac GreeterActivities.java -
Run the file.
$ java GreeterActivities -
On the Step Functions console
, navigate to the Execution Details page. -
When the execution completes, examine the results of your execution.
-
Stop the worker.
