Creating an AWS serverless application by using the AWS Toolkit for JetBrains
To complete this procedure, you must first install the AWS Toolkit and, if you haven't yet, connect to an AWS account for the first time. Then with IntelliJ IDEA, PyCharm, WebStorm, or JetBrains Rider already running, do the following."?>
-
With IntelliJ IDEA, PyCharm, WebStorm, or JetBrains Rider already running, do one of the following:
-
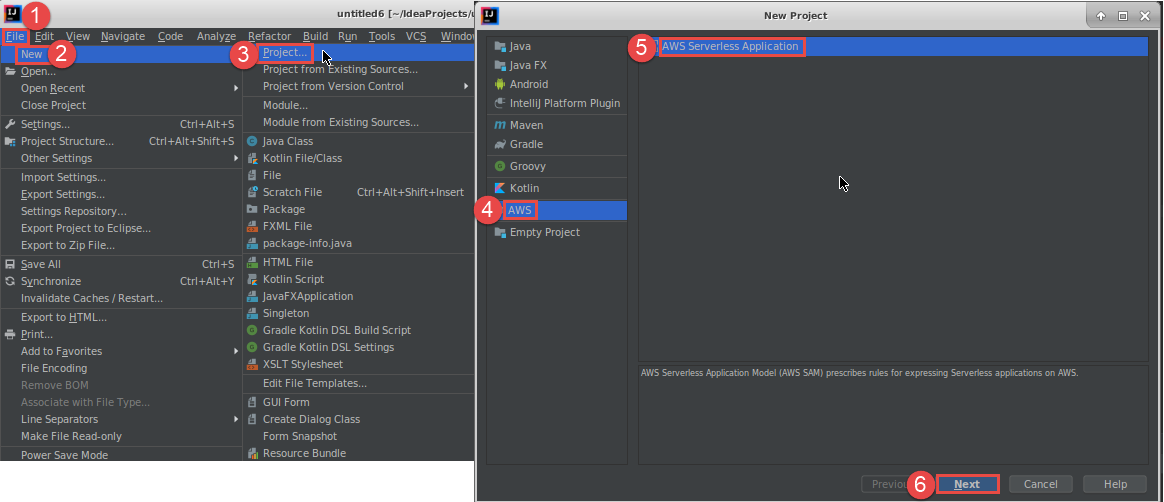
For IntelliJ IDEA or WebStorm, choose File, New, Project.
-
For PyCharm, choose File, New Project.
-
For JetBrains Rider, choose File, New for a new solution. Or right-click an existing solution in the Explorer tool window, and then choose Add, New Project.
-
-
For IntelliJ IDEA, choose AWS, AWS Serverless Application, and then choose Next.
For PyCharm, choose AWS Serverless Application.

For WebStorm, choose AWS Serverless Application.

For JetBrains Rider, choose AWS Serverless Application.

-
Complete the New Project dialog box (or the New Solution dialog box for JetBrains Rider), and then choose Finish (for IntelliJ IDEA) or Create (for PyCharm, WebStorm, or JetBrains Rider). The AWS Toolkit for JetBrains creates the project and adds the serverless application's code files to the new project.
-
If you're using IntelliJ IDEA, with the Project tool window already open and displaying the project that contains the serverless application's files, do one of the following:
-
For Maven-based projects, right-click the project's
pom.xmlfile, and then choose Add as Maven Project.
-
For Gradle-based projects, right-click the project's
build.gradlefile, and then choose Import Gradle project.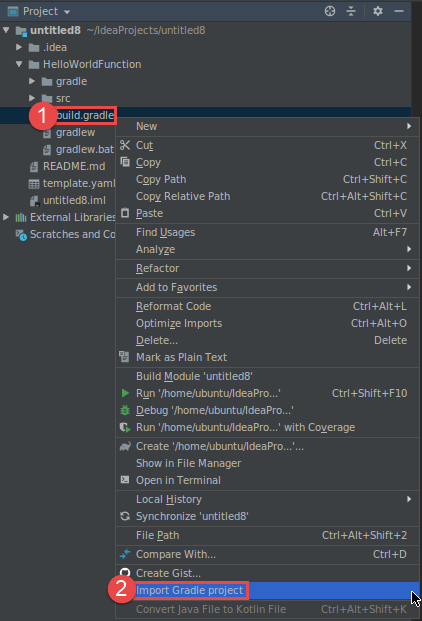
Complete the Import Module from Gradle dialog box, and then choose OK.
-
After you create the serverless application, you can run (invoke) or debug the local version of an AWS Lambda function that is contained in that application.
You can also deploy the serverless application. After you deploy it, you can (invoke) the remote version of a Lambda function that is part of that deployed application.
