Using a custom language model
Once you've created your custom language model, you can include it in your transcription requests; refer to the following sections for examples.
The language of the model you're including in your request must match the language code you specify for your media. If the languages don't match, your custom language model is not applied to your transcription and there are no warnings or errors.
Using a custom language model in a batch transcription
To use a custom language model with a batch transcription, see the following for examples:
-
Sign in to the AWS Management Console
. -
In the navigation pane, choose Transcription jobs, then select Create job (top right). This opens the Specify job details page.
-
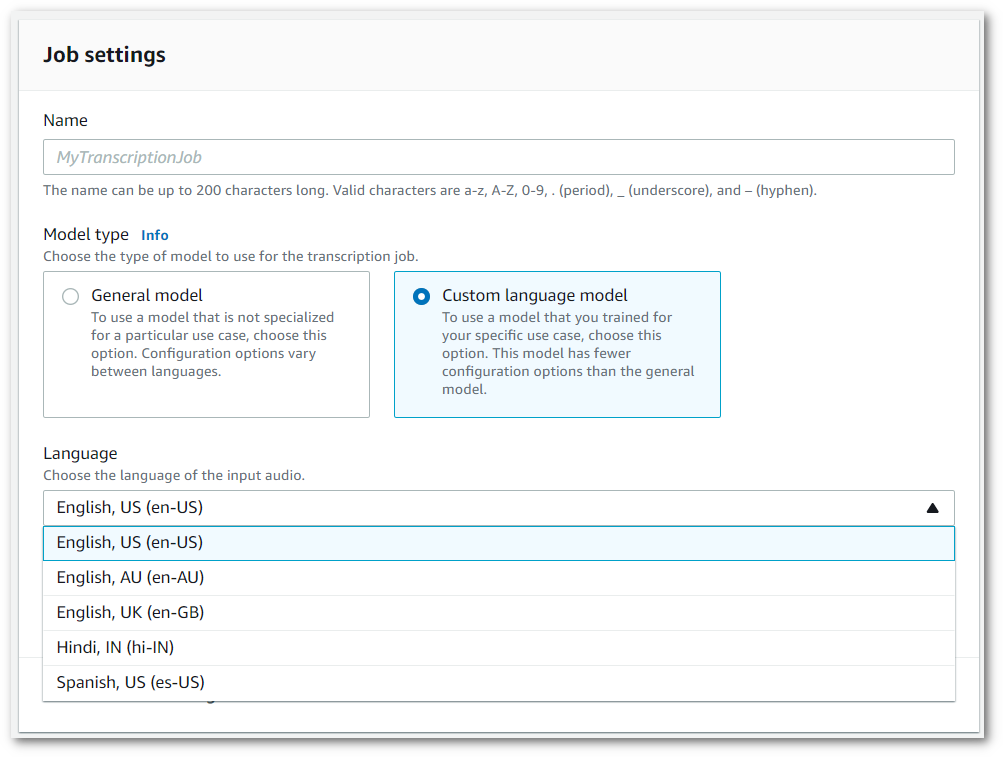
In the Job settings panel under Model type, select the Custom language model box.
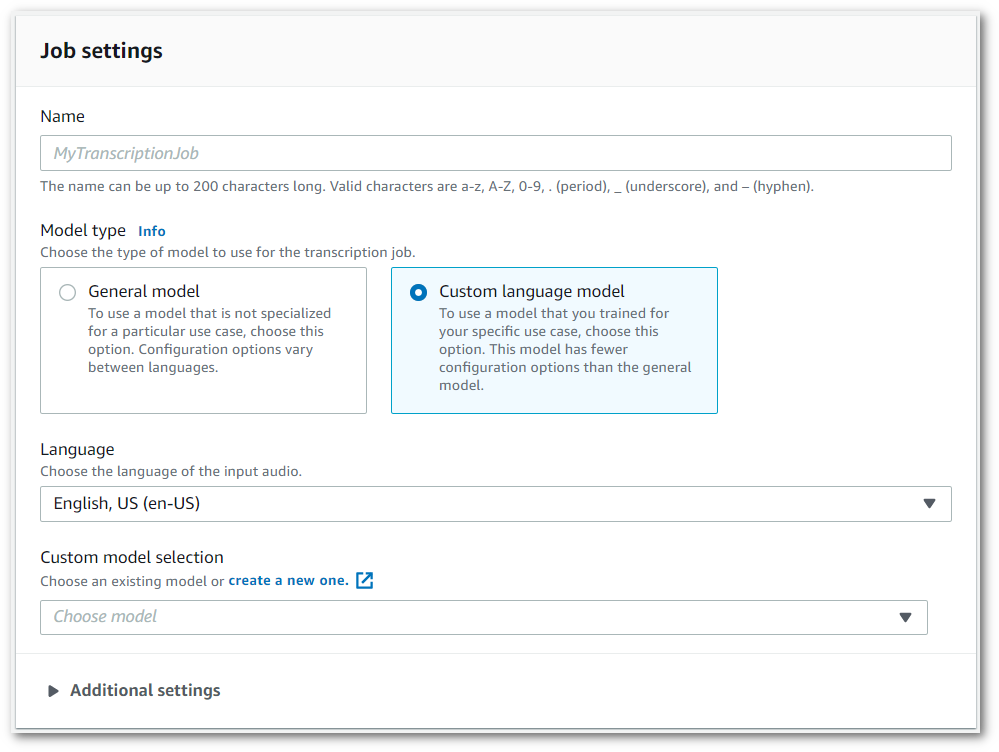
You must also select an input language from the dropdown menu.
-
Under Custom model selection, select an existing custom language model from the dropdown menu or Create a new one.
Add the Amazon S3 location of your input file in the Input data panel.
-
Select Next for additional configuration options.
Select Create job to run your transcription job.
This example uses the start-transcription-jobModelSettings parameter with the VocabularyName
sub-parameter. For more information, see
StartTranscriptionJob and
ModelSettings.
aws transcribe start-transcription-job \ --regionus-west-2\ --transcription-job-namemy-first-transcription-job\ --media MediaFileUri=s3://amzn-s3-demo-bucket/my-input-files/my-media-file.flac\ --output-bucket-nameamzn-s3-demo-bucket\ --output-keymy-output-files/ \ --language-codeen-US\ --model-settings LanguageModelName=my-first-language-model
Here's another example using the start-transcription-job
aws transcribe start-transcription-job \ --regionus-west-2\ --cli-input-json file://my-first-model-job.json
The file my-first-model-job.json contains the following request body.
{
  "TranscriptionJobName": "my-first-transcription-job",
  "Media": {
        "MediaFileUri": "s3://amzn-s3-demo-bucket/my-input-files/my-media-file.flac"
  },
  "OutputBucketName": "amzn-s3-demo-bucket",
  "OutputKey": "my-output-files/",
  "LanguageCode": "en-US",
  "ModelSettings": {
        "LanguageModelName": "my-first-language-model"
   }
}
This example uses the AWS SDK for Python (Boto3) to include a custom language model
using the ModelSettings argument for the
start_transcription_jobStartTranscriptionJob and
ModelSettings.
For additional examples using the AWS SDKs, including feature-specific, scenario, and cross-service examples, refer to the Code examples for Amazon Transcribe using AWS SDKs chapter.
from __future__ import print_function
import time
import boto3
transcribe = boto3.client('transcribe', 'us-west-2')
job_name = "my-first-transcription-job"
job_uri = "s3://amzn-s3-demo-bucket/my-input-files/my-media-file.flac"
transcribe.start_transcription_job(
    TranscriptionJobName = job_name,
    Media = {
        'MediaFileUri': job_uri
    },
    OutputBucketName = 'amzn-s3-demo-bucket',
    OutputKey = 'my-output-files/',
    LanguageCode = 'en-US',
    ModelSettings = {
        'LanguageModelName': 'my-first-language-model'
   }
)

while True:
    status = transcribe.get_transcription_job(TranscriptionJobName = job_name)
    if status['TranscriptionJob']['TranscriptionJobStatus'] in ['COMPLETED', 'FAILED']:
        break
    print("Not ready yet...")
    time.sleep(5)
print(status)
Using a custom language model in a streaming transcription
To use a custom language model with a streaming transcription, see the following for examples:
-
Sign into the AWS Management Console
. -
In the navigation pane, choose Real-time transcription. Scroll down to Customizations and expand this field if it is minimized.

-
Toggle on Custom language model and select a model from the dropdown menu.

Include any other settings you want to apply to your stream.
-
You're now ready to transcribe your stream. Select Start streaming and begin speaking. To end your dictation, select Stop streaming.
This example creates an HTTP/2 request that includes your custom language model. For more
information on using HTTP/2 streaming with Amazon Transcribe, see
Setting up an HTTP/2 stream. For more detail on parameters
and headers specific to Amazon Transcribe, see StartStreamTranscription.
POST /stream-transcription HTTP/2 host: transcribestreaming.us-west-2.amazonaws.com X-Amz-Target: com.amazonaws.transcribe.Transcribe.StartStreamTranscriptionContent-Type: application/vnd.amazon.eventstream X-Amz-Content-Sha256:stringX-Amz-Date:20220208T235959Z Authorization: AWS4-HMAC-SHA256 Credential=access-key/20220208/us-west-2/transcribe/aws4_request, SignedHeaders=content-type;host;x-amz-content-sha256;x-amz-date;x-amz-target;x-amz-security-token, Signature=stringx-amzn-transcribe-language-code:en-USx-amzn-transcribe-media-encoding:flacx-amzn-transcribe-sample-rate:16000x-amzn-transcribe-language-model-name:my-first-language-modeltransfer-encoding: chunked
Parameter definitions can be found in the API Reference; parameters common to all AWS API operations are listed in the Common Parameters section.
This example creates a presigned URL that applies your custom language model to a WebSocket
stream. Line breaks have been added for readability. For more information on using WebSocket
streams with Amazon Transcribe, see Setting up a WebSocket stream. For more detail on parameters, see
StartStreamTranscription.
GET wss://transcribestreaming.us-west-2.amazonaws.com:8443/stream-transcription-websocket? &X-Amz-Algorithm=AWS4-HMAC-SHA256 &X-Amz-Credential=AKIAIOSFODNN7EXAMPLE%2F20220208%2Fus-west-2%2Ftranscribe%2Faws4_request &X-Amz-Date=20220208T235959Z &X-Amz-Expires=300&X-Amz-Security-Token=security-token&X-Amz-Signature=string&X-Amz-SignedHeaders=content-type%3Bhost%3Bx-amz-date &language-code=en-US&media-encoding=flac&sample-rate=16000&language-model-name=my-first-language-model
Parameter definitions can be found in the API Reference; parameters common to all AWS API operations are listed in the Common Parameters section.
