Transcribing with the AWS Management Console
You can use the AWS console for batch and streaming transcriptions. If you're transcribing a media file located in an Amazon S3 bucket, you're performing a batch transcription. If you're transcribing a real-time stream of audio data, you're performing a streaming transcription.
Before starting a batch transcription, you must first upload your media file to an Amazon S3 bucket. For streaming transcriptions using the AWS Management Console, you must use your computer microphone.
To view supported media formats and other media requirements and constraints, see Data input and output.
Expand the following sections for short walkthroughs of each transcription method.
First make sure that you've uploaded the media file you want to transcribe into an Amazon S3 bucket. If you're unsure how to do this, refer to the Amazon S3 User Guide: Upload an object to your bucket.
-
From the AWS Management Console
, select Transcription jobs in the left navigation pane. This takes you to a list of your transcription jobs. 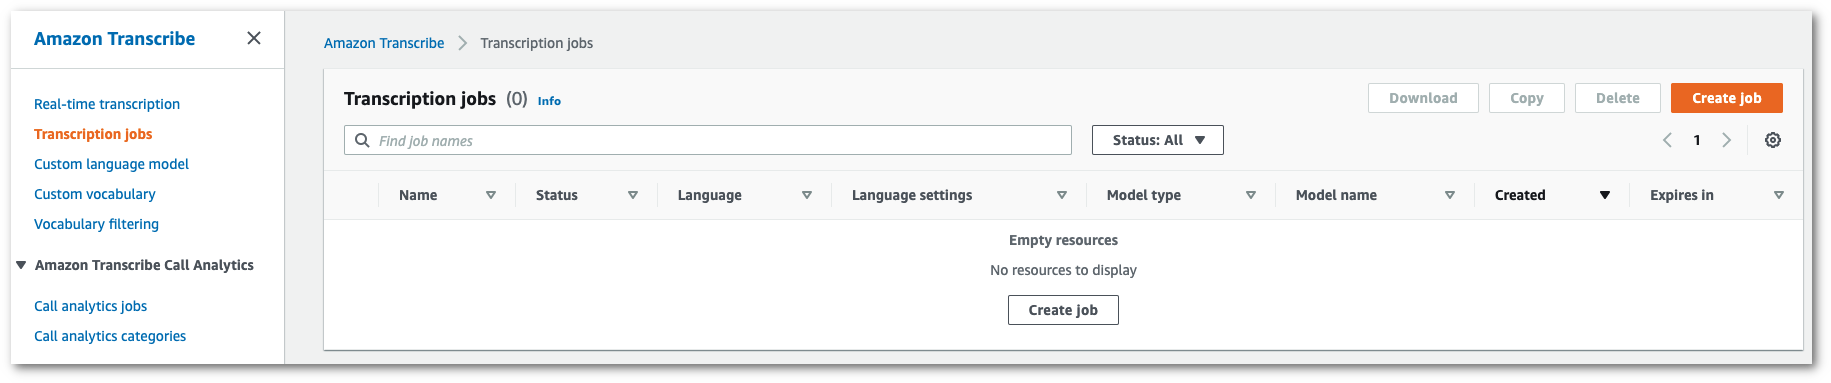
Select Create job.
-
Complete the fields on the Specify job details page.

The input location must be an object within an Amazon S3 bucket. For output location, you can choose a secure Amazon S3 service-managed bucket or you can specify your own Amazon S3 bucket.
If you choose a service-managed bucket, you can view a transcript preview in the AWS Management Console and you can download your transcript from the job details page (see below).
If you choose your own Amazon S3 bucket, you cannot see a preview in the AWS Management Console and must go to the Amazon S3 bucket to download your transcript.
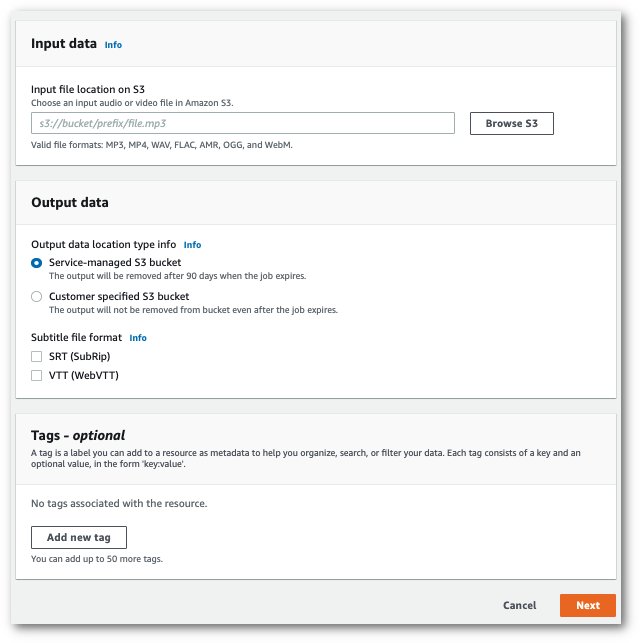
Select Next.
-
Select any desired options on the Configure job page. If you want to use Custom vocabularies or Custom language models with your transcription, you must create these before starting your transcription job.
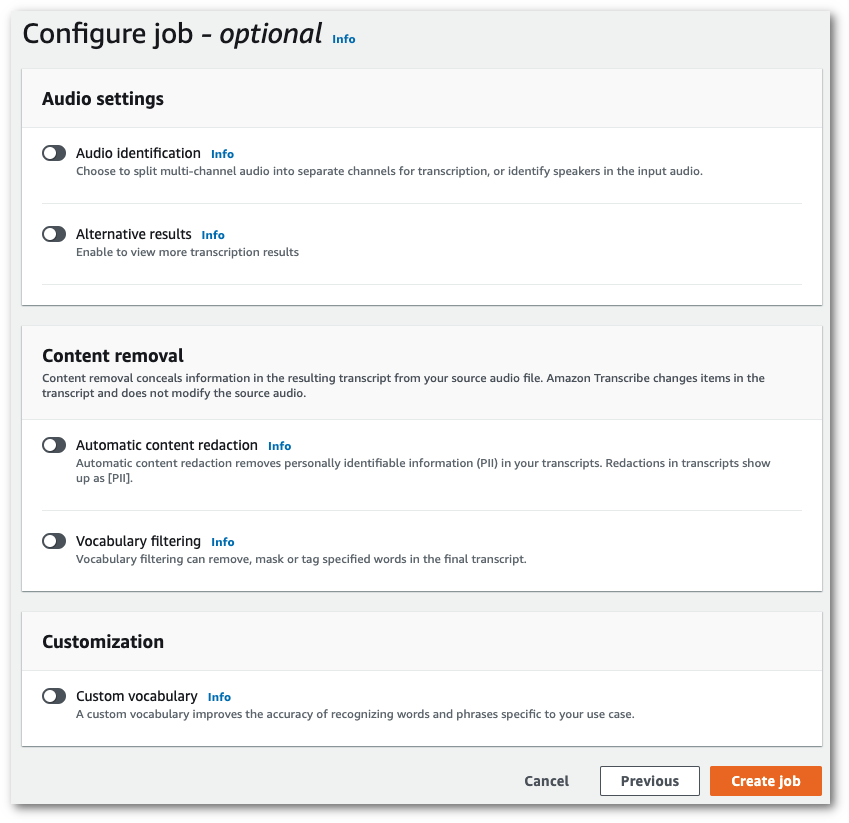
Select Create job.
-
You're now on the Transcription jobs page. Here you can see the status of the transcription job. Once complete, select your transcription.

-
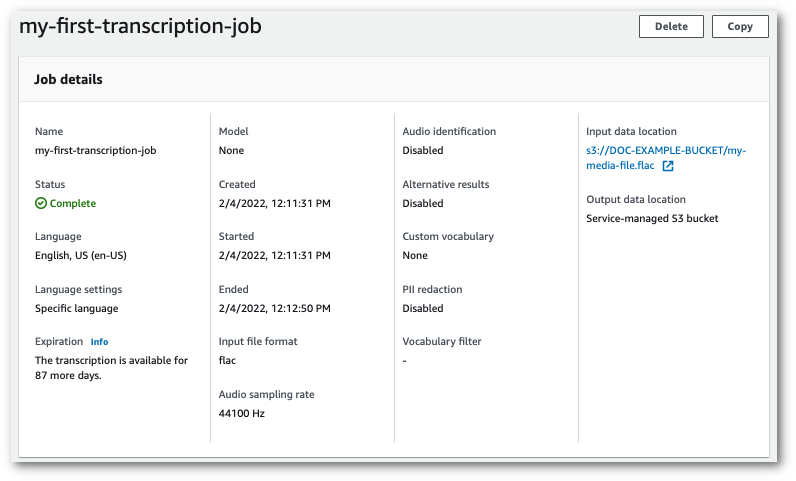
You're now viewing the Job details page for your transcription. Here you can view all of the options you specified when setting up your transcription job.
To view your transcript, select the linked filepath in the right column under Output data location. This takes you to the Amazon S3 output folder you specified. Select your output file, which now has a .json extension.
-
How you download your transcript depends on whether you chose a service-managed Amazon S3 bucket or your own Amazon S3 bucket.
-
If you chose a service-managed bucket, you can see a Transcription preview pane on your transcription job's information page, along with a Download button.
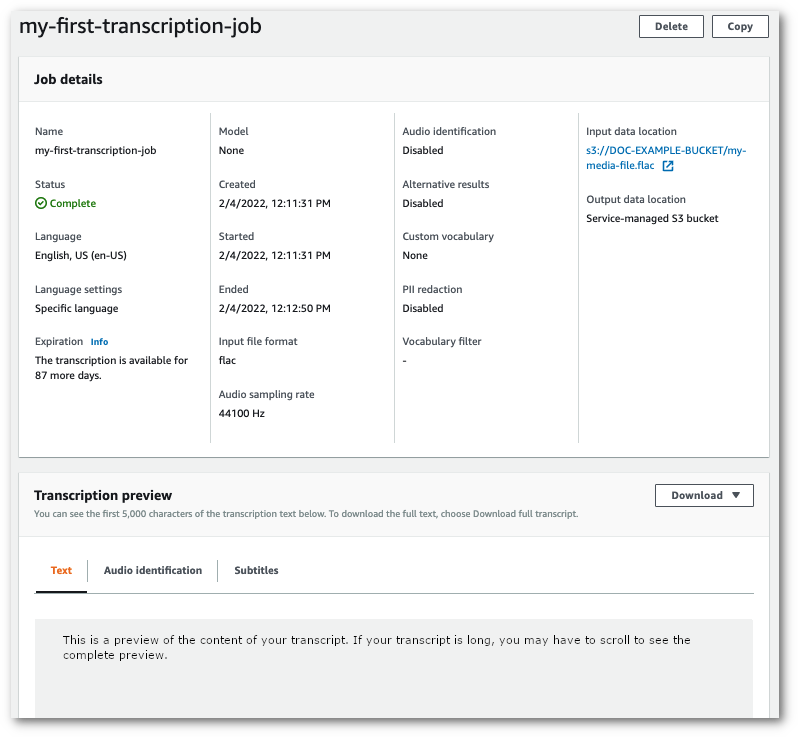
Select Download and choose Download transcript.
-
If you chose your own Amazon S3 bucket, you don't see any text in the Transcription preview pane on your transcription job's information page. Instead, you see a blue information box with a link to the Amazon S3 bucket you chose.
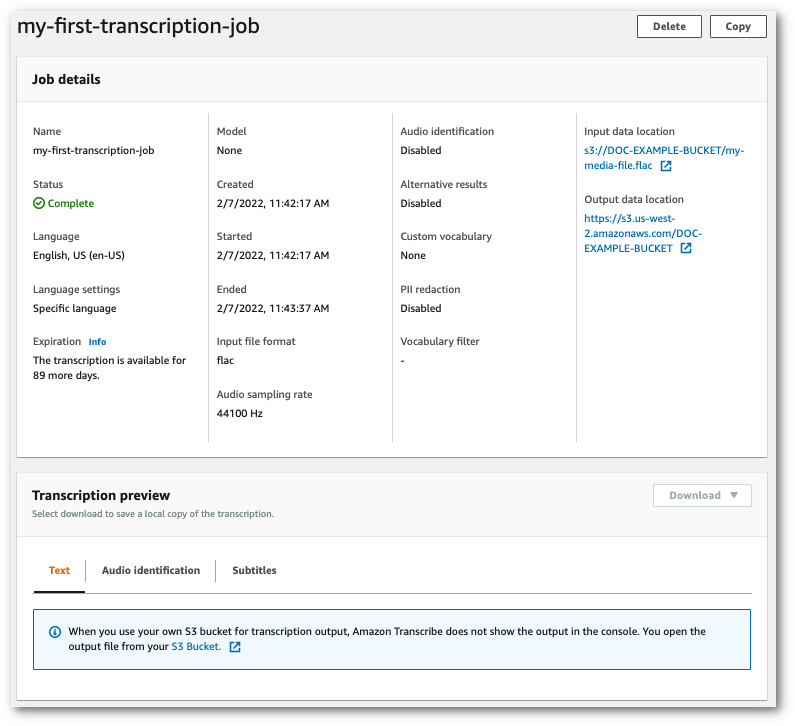
To access your transcript, go to the specified Amazon S3 bucket using the link under Output data location in the Job details pane or the S3 Bucket link within the blue information box in the Transcription preview pane.
-
-
From the AWS Management Console
, select Real-time transcription in the left navigation pane. This takes you to the main streaming page where you can select options before starting your stream. 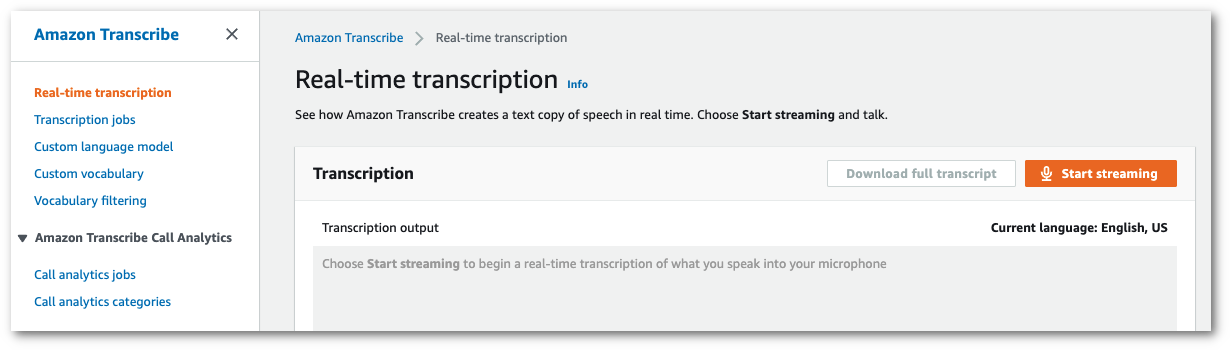
-
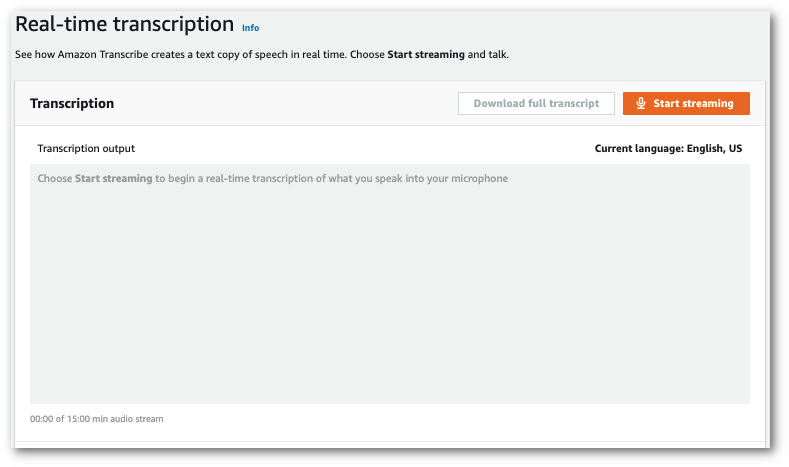
Below the Transcription output box, you have the option to select various language and audio settings.

-
After you've selected the appropriate settings, scroll to the top of the page and choose Start streaming, then begin speaking into your computer microphone. You can see your speech transcribed in real time.
-
When you're finished, select Stop streaming.

You can now download your transcript by selecting Download full transcript.
