Deploying an ASP.NET web app to AWS
The following tutorial demonstrates how to use the AWS Elastic Beanstalk Deploy Application task to deploy a web application to the AWS Cloud from an Azure DevOps build definition.
Prerequisites
-
The AWS Toolkit for Azure DevOps installed in Azure DevOps or on an on-premises Azure DevOps server.
-
An AWS account and preferably an associated IAM user account.
-
An AWS Elastic Beanstalk application and environment.
-
A code project for an ASP.NET Web Application (.NET Framework) or an ASP.NET Core Web Application, which you will push to your Azure DevOps project.
Deploying an ASP.NET application using the AWS Elastic Beanstalk Deploy Application task
Create a new Azure DevOps project and upload your ASP.NET Web Application (.NET Framework) or ASP.NET Core Web Application files to it.
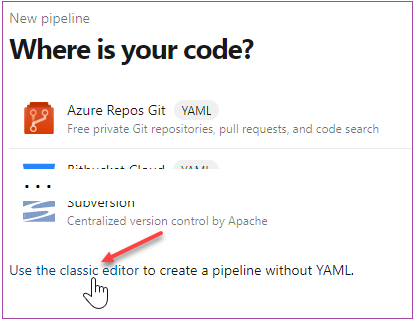
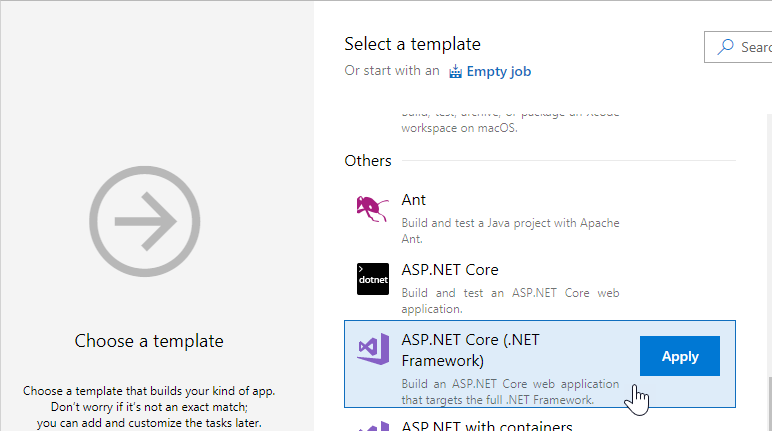
Then, add a new pipeline to the project based on the ASP.NET Core (.NET Framework) template, which will produce a Web Deploy archive for deployment. To follow the screenshots shown, use the classic editor (that is, without YAML).
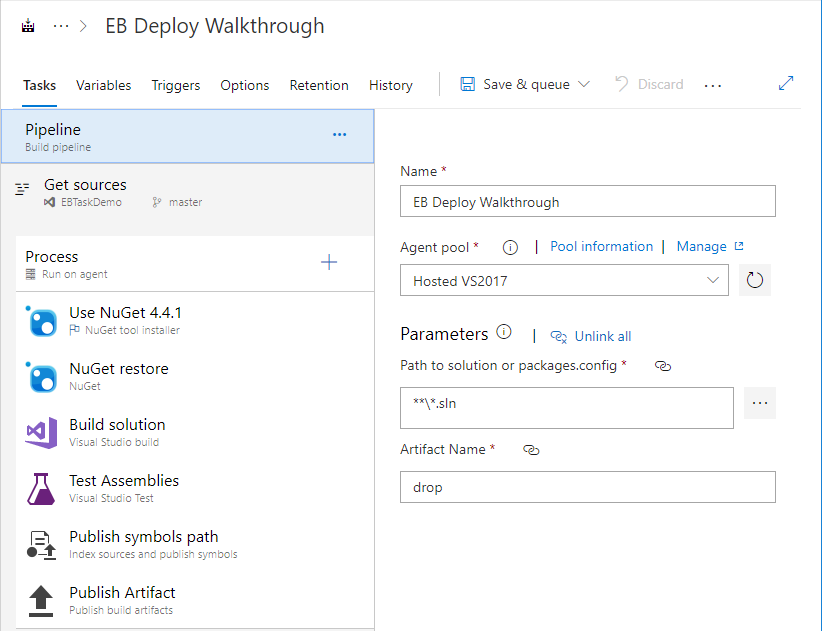
The build process page for this pipeline contains the following default tasks.
Add the AWS Elastic Beanstalk Deploy Application task to the build definition
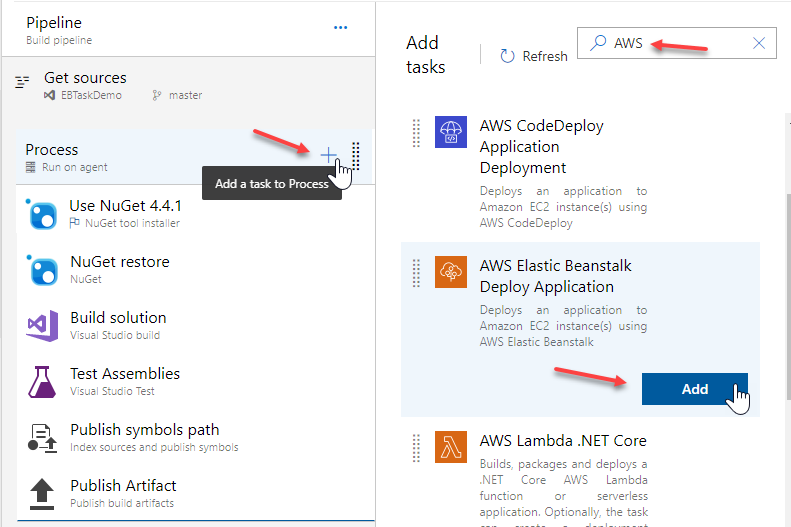
Select the "+" icon at the top of the task list. Optionally, in the panel on the right, enter something in the search box, for example "AWS", and scroll through the available tasks until you see the AWS Elastic Beanstalk Deploy Application task. Select Add to add it to the bottom of the build definition.
Click the new task to see its properties in the right pane.
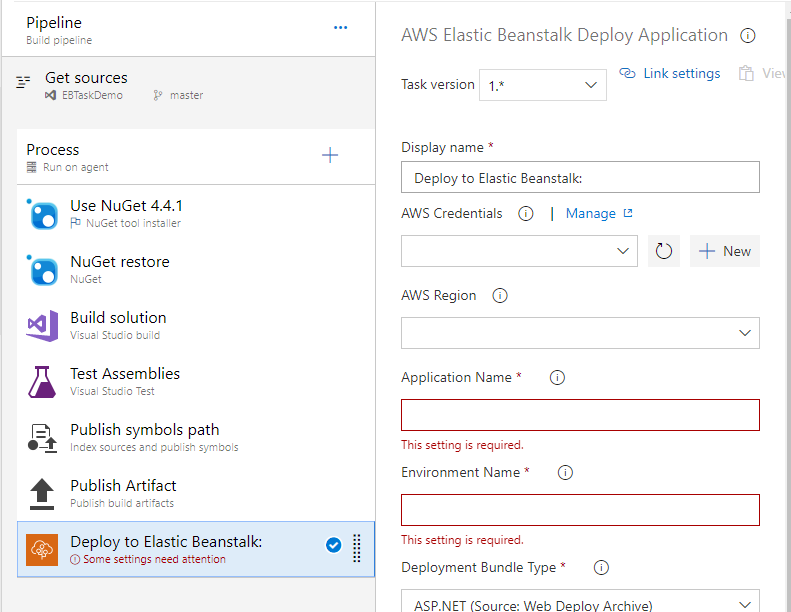
Configure the task properties
-
AWS Credentials
If you have already configured AWS credentials for your project, you can select them from the drop-down list. If not, you can add credentials for this task by choosing New next to the AWS Credentials field. For information about filling out the resulting Add AWS service connection form, see Supply task credentials using a service connection.
This task requires credentials for a user with a policy enabling the user to update an Elastic Beanstalk environment and describe an environment's status and events.
Note
We recommend that you do not use your account's root credentials. Instead, create one or more IAM users, and then use those credentials. For more information, see Best practices for managing AWS access keys in the Amazon Web Services General Reference.
-
AWS Region
Set the AWS Region in which the Elastic Beanstalk environment is running (for example, us-east-1, us-west-2).
-
Application Name
The name you used to create the Elastic Beanstalk application. An Elastic Beanstalk application is the container for the environment for the .NET web application.
-
Environment Name
The name of the Elastic Beanstalk environment that is associated with the Application Name. An Elastic Beanstalk environment contains the actual provisioned resources that are running the .NET web application.
-
Deployment Bundle Type
Leave this field set to the default: ASP.NET (Source: Web Deploy Archive).
-
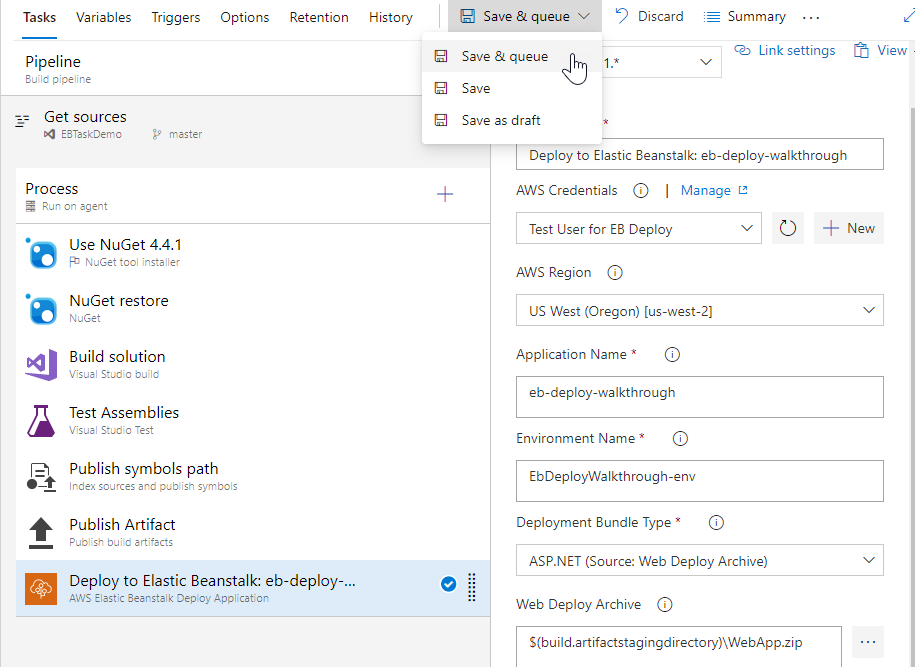
Web Deploy Archive
The full path to the Web Deploy archive, including the file name of the archive file, which has a
.zipextension. The value for this field can be found in the Build Solution task, the DesktopBuildPackageLocation argument in the MSBuild Arguments field. The directory part of the full path is also used in other tasks.If, for example, the project was set up according to the instructions here, the value for this field will be "
$(build.artifactstagingdirectory)\WebApp.zip" (without the quotation marks).Note
Azure DevOps provides a number of variables
that you can use to avoid hard-coded paths. -
Event poll delay (seconds)
The time, in seconds, to wait between calls to retrieve the latest events from the deployment to the environment. The default is 5 seconds. For large deployments or slow connections, you might need to increase this value.
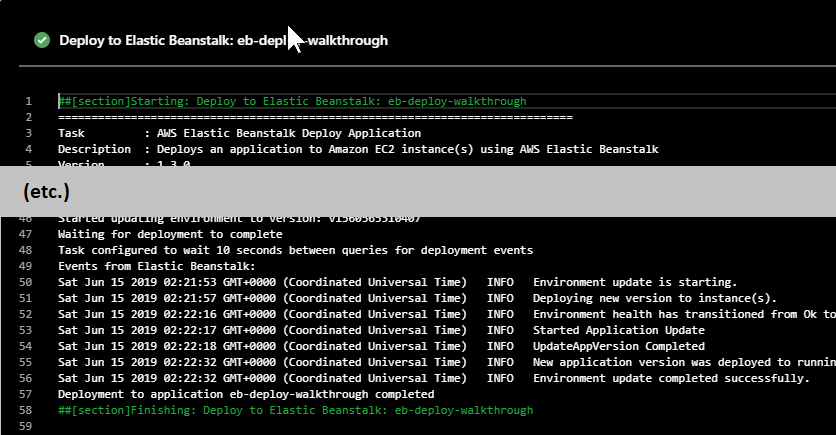
Run the build
With the new task configured, you are ready to run the build. Choose Save & queue.
When the build has completed running, you should see a log similar to the following.