EDI Validation
EDI Validation is the process of confirming whether an EDI file adheres to an EDI standard. EDI standards define how business documents should be organized and ensure smooth communication between trading partners and their systems. AWS B2B Data Interchange performs EDI validation at various points when you interact with the service, such as when transforming an EDI file to XML or JSON.
Validation results communication
Validation errors are communicated through multiple channels to ensure you have comprehensive visibility into validation issues:
- EventBridge Events
-
EventBridge events for transformation completion and failure contain the validation status and, when applicable, the URI of the generated validation report. This allows you to programmatically respond to validation issues in your automated workflows.
- EDI Acknowledgments
-
Validation results appear in EDI acknowledgments, including any errors detected during the validation process. Note that ACK files are generated only for inbound EDI files.
- CloudWatch Logs
-
A CloudWatch log entry that is generated in case of a validation error, which includes the Amazon S3 location of the validation report and a summary of the first 5 validation errors. Example log entry:
Validation report has been generated and written to s3://bucket-name/output-key/VALIDATION_REPORT/filename.validation-errors.txt EventNotes: First 5 validation errors: [Segment ST at position 1 in transaction 1 within functional group 1. For ST-01 transaction type 214, the GS-01 type code should be QM instead of AG., ...] Total errors: 6 - Validation reports in Amazon S3
-
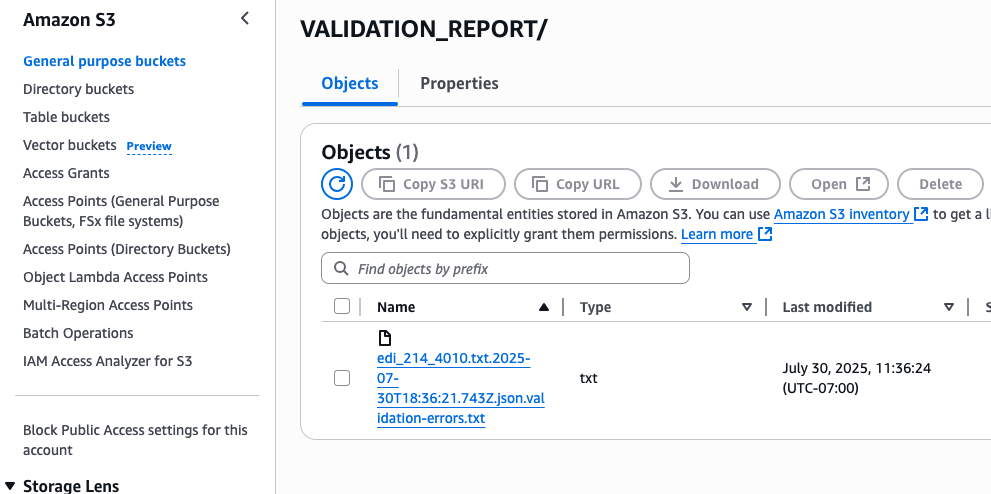
When validation errors exist, a detailed validation report is automatically written to your Amazon S3 bucket in a
VALIDATION_REPORTfolder. The report file ends invalidation-errors.txt
Validation Error Reports
When EDI validation errors occur during transformations, AWS B2B Data Interchange generates detailed validation error reports to help you identify and resolve issues. These reports are automatically created and written to your Amazon S3 bucket.
Report format
Validation error reports provide detailed information about each error found in your EDI document, organized by interchange, functional group, and transaction. The report format includes:
Each error entry in the report includes the following components:
| Component | Description |
|---|---|
| Location information | Interchange, functional group, transaction, and segment position |
| Error type | Missing required elements, invalid codes, length violations, etc. |
| Element details | Specific element ID and position where the error occurred |
| Error description | Clear explanation of what validation rule was violated |
The following example shows the format of a validation error report:
Interchange 1: X12, control# 000000001
  Functional group 1: type QM, control# 1, version 004010
    Transaction 1: type 214, control# 0001
      *** Segment B10 at position 2: Required data element B10-5 is missing.
      *** Segment L11 at position 3: Data element L11-1 with value |SHORT_REF| is too long. Valid length range: 1..8
      *** Segment Q7 at position 6: Data element Q7-1 with value |A| is not in the set of valid codes
3 errors detected
Custom validation rules
In real-world scenarios, trading partners often deviate from standard formats by agreeing on variations that work for their specific needs. Custom EDI Validation enables you to have your EDI documents validated against a tailored format that can deviate from an established standard. You can specify rules that override the standard during validation, allowing you to personalize EDI formats for individual trading partners.
The Custom EDI Validation system supports three types of validation rules that you can apply to both inbound and outbound EDI transformers:
| Rule type | Description |
|---|---|
| Element length rules | Customize minimum and maximum length constraints for specific EDI elements. A rule on an element ID applies to all instances of that element ID in that EDI version. |
| Code list rules | Add or remove allowed codes from element code lists. A rule on an element ID applies to all instances of that element ID in that EDI version. For example, you can add code "0J" or remove codes "001", "002" for element "0098". |
| Element requirement rules | Change element requirements between mandatory and optional. A rule on an element position applies only to that element instance. For example, you can make the element at position 2 in the BGN segment optional or make the element at position 4 required. |
Note
The service prevents you from setting conflicting element requirement rules, such as creating multiple rules that set the same element position to both required and optional. For example, you cannot create one rule that makes BGN segment position 2 required and another rule that makes BGN segment position 2 optional.
Custom validation rules limitations
Custom validation rules have the following limitations and constraints.
Element length rule limitations
-
Element ID format: Must be exactly 4 digits (for example, "1039")
-
Length constraints: Minimum length must be ≥ 1, maximum length must be ≤ 1,000,000
-
Length relationship: Minimum length cannot be greater than maximum length
-
Element existence: Element ID must exist in the X12 model for the specified version and transaction set
-
Single rule per target: Cannot have multiple length rules for the same element
Code list rule limitations
-
Element ID format: Must be exactly 4 digits (for example, "1039")
-
Code operations: At least one of
codesToAddorcodesToRemovemust be non-empty -
Element type restriction: Only works with elements of data type ID
-
Code list size: Maximum 2,000 codes per list
-
Code format: Codes must contain only alphanumeric characters
-
Adding codes: Codes to add must not already exist in the code list
-
Removing codes:
-
codes to remove must exist in the current code list
-
you can't remove from empty code lists
-
you can't remove all codes from a code list unless you are also adding codes as part of the same rule
-
-
Single rule per target: Cannot have multiple code list rules for the same element
Element requirement rule limitations
-
Position format: Element position identifier must be in format "SEGMENT-NN" or "SEGMENT-NN-NN" for sub-elements
-
Requirement values: Requirement must be either MANDATORY or OPTIONAL
-
Element existence: Element position must exist in the X12 model
-
Segment validation: Segment must exist in the transaction set
-
Sub-element support: Supports composite elements with sub-elements, but sub-element position must be valid, cannot reference position 0, and position cannot exceed sub-element count
-
Single rule per target: Cannot have multiple requirement rules for the same element position
Overall limitations
-
Maximum rules: 100 total validation rules per transformer
-
Header segment restrictions: Rules cannot be defined on header segments (ISA/IEA, GS/GE, and ST/SE segments) or element IDs 0143, 0329, 1705
Creating Custom Validation Rules in the Console
You can create custom validation rules during the transformer creation process in the AWS B2B Data Interchange console:
-
Sign in to the AWS Management Console and open the AWS B2B Data Interchange console at https://console.aws.amazon.com/b2bi/
. -
Choose Transformers from the navigation pane.
-
Choose Create transformer.
-
Choose Add rule and select the rule type you want to create:
-
For Element Length Rules, select the element ID, then specify minimum and maximum length constraints.
-
For Code List Rules, select the element ID, then specify codes to add or remove.
-
For Element Requirement Rules, select the segment ID, specify the element position, and set whether it should be required or optional.
-
-
Continue adding rules as needed.
-
Complete the transformer creation process.
When viewing existing transformers, you can see the configured custom validation rules in the transformer details.
Best Practices
Follow these best practices when using custom validation:
-
Document your custom rules - Keep a record of all custom validation rules you create for each trading partner to maintain clarity about your EDI format variations.
-
Test thoroughly - After creating custom validation rules, test with sample documents to ensure the rules work as expected.
-
Use minimal customizations - Limit custom validation rules to only what's necessary to support your trading partner requirements.
-
Monitor validation results - Regularly check EventBridge events and CloudWatch logs to ensure validation is working correctly.
-
Coordinate with trading partners - Ensure your trading partners are aware of any format deviations you're implementing.
