本文属于机器翻译版本。若本译文内容与英语原文存在差异,则一律以英文原文为准。
在 “ WorkSpaces 个人” 中自定义品牌
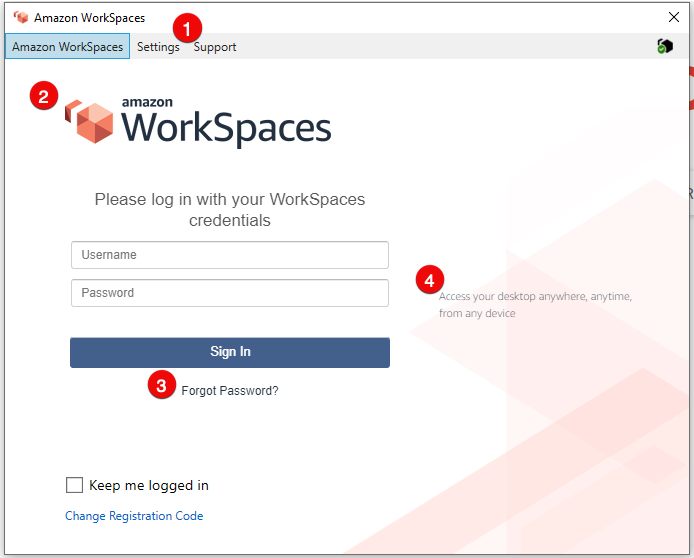
Amazon WorkSpaces 允许您使用自己的品牌徽标、IT 支持信息、忘记密码链接和登录消息自定义登录页面的外观, APIs 从而为用户创造熟悉的 WorkSpaces 体验。 WorkSpace您的品牌将在用户的 WorkSpace 登录页面中显示给他们,而不是默认的 WorkSpaces 品牌。
支持以下客户端:
Windows
Linux
Android
MacOS
iOS
Web Access
注意
要使用 ClientBranding APIs 中的修改品牌元素 AWS GovCloud (US) Region,请使用 WorkSpaces 客户端版本 5.10.0。
导入自定义品牌
要导入您的客户端品牌自定义,请使用包含以下元素的操作 ImportClientBranding。有关更多信息,请参阅 ImportClientBranding API 参考。
重要
客户端品牌属性面向公众。确保您不包含敏感信息。
-
支持链接
-
徽标
-
忘记密码链接
-
登录消息
| 品牌元素 | 描述 | 要求和建议 |
|---|---|---|
| 支持链接 | 允许您指定支持电子邮件链接,供用户联系以寻求帮助 WorkSpaces。您可以使用 SupportEmail 属性或使用 SupportLink 属性提供指向您支持页面的链接。 |
|
| 徽标 | 允许您使用 Logo 属性自定义组织的徽标。 |
|
| 忘记密码链接 | 允许您使用用户忘记密码时可以访问的 ForgotPasswordLink 属性添加网址 WorkSpace。 | 长度限制:长度下限为 1。最大长度为 200。 |
| 登录消息 | 允许您使用登录屏幕上的 LoginMessage 属性自定义消息。 |
|
以下是供使用的 ImportClientBranding示例代码片段。
AWS CLI 版本 2
警告
导入自定义品牌会覆盖您在该平台中使用自定义数据指定的属性。它还会使用默认自定义品牌属性值覆盖您未指定的属性。您必须包含不想覆盖的任何属性的数据。
aws workspaces import-client-branding \
--cli-input-json file://~/Downloads/import-input.json \
--region us-west-2
导入 JSON 文件应与以下示例代码类似:
{
    "ResourceId": "<directory-id>",
    "DeviceTypeOsx": {
        "Logo": "iVBORw0KGgoAAAANSUhEUgAAAAIAAAACCAYAAABytg0kAAAAC0lEQVR42mNgQAcAABIAAeRVjecAAAAASUVORK5CYII=",
        "ForgotPasswordLink": "https://amazon.com/",
        "SupportLink": "https://amazon.com/",
        "LoginMessage": {
            "en_US": "Hello!!"
        }
    }
}
以下 Java 代码段示例将徽标图片转换为 base64 编码的字符串:
// Read image as BufferImage
BufferedImage bi = ImageIO.read(new File("~/Downloads/logo.png"));

// convert BufferedImage to byte[]
ByteArrayOutputStream baos = new ByteArrayOutputStream();
ImageIO.write(bi, "png", baos);
byte[] bytes = baos.toByteArray();

//convert byte[] to base64 format and print it
String bytesBase64 = Base64.encodeBase64String(bytes);
System.out.println(bytesBase64);
以下 Python 代码段示例将徽标图片转换为 base64 编码的字符串:
# Read logo into base64-encoded string
with open("~/Downloads/logo.png", "rb") as image_file:
    f = image_file.read()
    base64_string = base64.b64encode(f)
    print(base64_string)
Java
警告
导入自定义品牌会覆盖您在该平台中使用自定义数据指定的属性。它还会使用默认自定义品牌属性值覆盖您未指定的属性。您必须包含不想覆盖的任何属性的数据。
// Create WS Client
WorkSpacesClient client = WorkSpacesClient.builder().build();

// Read image as BufferImage
BufferedImage bi = ImageIO.read(new File("~/Downloads/logo.png"));

// convert BufferedImage to byte[]
ByteArrayOutputStream baos = new ByteArrayOutputStream();
ImageIO.write(bi, "png", baos);
byte[] bytes = baos.toByteArray();

// Create import attributes for the plateform
DefaultImportClientBrandingAttributes attributes =
        DefaultImportClientBrandingAttributes.builder()
                .logo(SdkBytes.fromByteArray(bytes))
                .forgotPasswordLink("https://aws.amazon.com/")
                .supportLink("https://aws.amazon.com/")
                .build();

// Create import request
ImportClientBrandingRequest request =
        ImportClientBrandingRequest.builder()
                .resourceId("<directory-id>")
                .deviceTypeOsx(attributes)
                .build();

// Call ImportClientBranding API
ImportClientBrandingResponse response = client.importClientBranding(request);
Python
警告
导入自定义品牌会覆盖您在该平台中使用自定义数据指定的属性。它还会使用默认自定义品牌属性值覆盖您未指定的属性。您必须包含不想覆盖的任何属性的数据。
import boto3

# Read logo into bytearray
with open("~/Downloads/logo.png", "rb") as image_file:
    f = image_file.read()
    bytes = bytearray(f)

# Create WorkSpaces client
client = boto3.client('workspaces')

# Call import API
response = client.import_client_branding(
    ResourceId='<directory-id>',
    DeviceTypeOsx={
        'Logo': bytes,
        'SupportLink': 'https://aws.amazon.com/',
        'ForgotPasswordLink': 'https://aws.amazon.com/',
        'LoginMessage': {
            'en_US': 'Hello!!'
        }
    }
)
PowerShell
#Requires -Modules @{ ModuleName="AWS.Tools.WorkSpaces"; ModuleVersion="4.1.56"}

# Specify Image Path
$imagePath = "~/Downloads/logo.png"

# Create Byte Array from image file
$imageByte = ([System.IO.File]::ReadAllBytes($imagePath))

# Call import API
Import-WKSClientBranding -ResourceId <directory-id> `
    -DeviceTypeLinux_LoginMessage @{en_US="Hello!!"} `
    -DeviceTypeLinux_Logo $imageByte `
    -DeviceTypeLinux_ForgotPasswordLink "https://aws.amazon.com/" `
    -DeviceTypeLinux_SupportLink "https://aws.amazon.com/"
要预览登录页面,请启动 WorkSpaces 应用程序或 Web 登录页面。
注意
更改最多可能需要 1 分钟才会显示。
描述自定义品牌
要查看您当前拥有的客户端品牌自定义的详细信息,请使用操作 DescribeCustomBranding。以下是使用的示例脚本 DescribeClientBranding。有关更多信息,请参阅 DescribeClientBranding API 参考。
aws workspaces describe-client-branding \
--resource-id <directory-id> \
--region us-west-2
删除自定义品牌
要删除您的客户端品牌自定义,请使用操作 DeleteCustomBranding。以下是使用的示例脚本 DeleteClientBranding。有关更多信息,请参阅 DeleteClientBranding API 参考。
aws workspaces delete-client-branding \
--resource-id <directory-id> \
--platforms DeviceTypeAndroid DeviceTypeIos \
--region us-west-2
注意
更改最多可能需要 1 分钟才会显示。
