Tutorial 2: Build your first application with Application Composer
In this tutorial, you use AWS Application Composer to create a CRUD serverless application that manages users in a database.
For this tutorial, we use Application Composer in the AWS Management Console. We recommend that you use Google Chrome or Microsoft Edge, and a full-screen browser window.
Are you new to serverless?
We recommend a basic understanding of the following topics:
To learn more, see Serverless concepts.
Topics
- Resource properties reference
- Step 1: Create your project
- Step 2: Add cards to the canvas
- Step 3: Configure your API Gateway REST API
- Step 4: Configure your Lambda functions
- Step 5: Connect your cards
- Step 6: Organize the canvas
- Step 7: Add and connect a DynamoDB table
- Step 8: Review your AWS CloudFormation template
- Step 9: Integrate into your development workflows
- Next steps
Resource properties reference
While building your application, use this table for reference to configure the properties of your Amazon API Gateway and AWS Lambda resources.
| Method | Path | Function name |
|---|---|---|
|
GET |
/items |
getItems |
|
GET |
/items/{id} |
getItem |
|
PUT |
/items/{id} |
updateItem |
|
POST |
/item |
addItem |
|
DELETE |
/items/{id} |
deleteItem |
Step 1: Create your project
To get started with your CRUD serverless application, create a new project in Application Composer and activate local sync.
To create a new blank project
-
Sign in to the Application Composer console
. -
On the Home page, choose Create project.
Application Composer loads a starting application template and opens the visual canvas.

To activate local sync
-
From the Application Composer menu, select Save > Activate local sync.

-
For Project location, press Select folder and choose a directory. This is where Application Composer will save and sync your template files and folders as you design.
The project location must not contain an existing application template.
Note
Local sync requires a browser that supports the File System Access API. For more information, see What is the File System Access API?.
-
When prompted to allow access, select View files.
-
Press Activate to turn on local sync. When prompted to save changes, select Save changes.
When activated, the Autosave indicator will be displayed in the upper-left area of your canvas.
Step 2: Add cards to the canvas
Start to design your application architecture using enhanced component cards, beginning with an API Gateway REST API and five Lambda functions.
To add API Gateway and Lambda cards to the canvas
From the Resources palette, under the Enhanced components section, do the following:
-
Drag an API Gateway card onto the canvas.
-
Drag a Lambda Function card onto the canvas. Repeat until you've added five Lambda Function cards to the canvas.

Step 3: Configure your API Gateway REST API
Next, add five routes within your API Gateway card.
To add routes to the API Gateway card
-
Open the Resource properties panel for the API Gateway card. To open the panel, double-click the card. Or, select the card, and then choose Details.
-
In the Resource properties panel, under Routes, do the following:
Note
For each of the following routes, use the HTTP method and path values specified in the resource properties reference table.
-
For Method, choose the specified HTTP method. For example, GET.
-
For Path, enter the specified path. For example,
/items. -
Choose Add route.
-
Repeat the previous steps until you've added all five specified routes.
-
-
Choose Save.

Step 4: Configure your Lambda functions
Name each of the five Lambda functions as specified in the resource properties reference table.
To name the Lambda functions
-
Open the Resource properties panel of a Lambda Function card. To open the panel, double-click the card. Or, select the card, and then choose Details.
-
In the Resource properties panel, for Logical ID, enter a specified function name. For example,
getItems. -
Choose Save.
-
Repeat the previous steps until you've named all five functions.

Step 5: Connect your cards
Connect each route on your API Gateway card to its related Lambda Function card, as specified in the resource properties reference table.
To connect your cards
-
Click a right port on the API Gateway card and drag it to the left port of the specified Lambda Function card. For example, click the GET /items port and drag it to the left port of getItems.
-
Repeat the previous step until you've connected all five routes on the API Gateway card to corresponding Lambda Function cards.

Step 6: Organize the canvas
Organize the visual canvas by grouping together your Lambda functions and arranging all the cards.
To group together your functions
-
Press and hold Shift, then select each Lambda Function card on the canvas.
-
Choose Group.
To name your group
-
Double-click the top of the group, near the group name (Group).
The Group properties panel opens.
-
On the Group properties panel, for Group name, enter
API. -
Choose Save.
To arrange your cards
On the canvas, above the main view area, choose Arrange.
Application Composer arranges and aligns all cards on the visual canvas, including your new group (API), as shown here:

Step 7: Add and connect a DynamoDB table
Now, add a DynamoDB table to your application architecture and connect it to your Lambda functions.
To add and connect a DynamoDB table
-
From the resource palette (Resources), under the Enhanced components section, drag a DynamoDB Table card onto the canvas.
-
Click the right port on a Lambda Function card and drag it to the left port of the DynamoDB Table card.
-
Repeat the previous step until you've connected all five Lambda Function cards to the DynamoDB Table card.
-
(Optional) To reorganize and realign the cards on the canvas, choose Arrange.

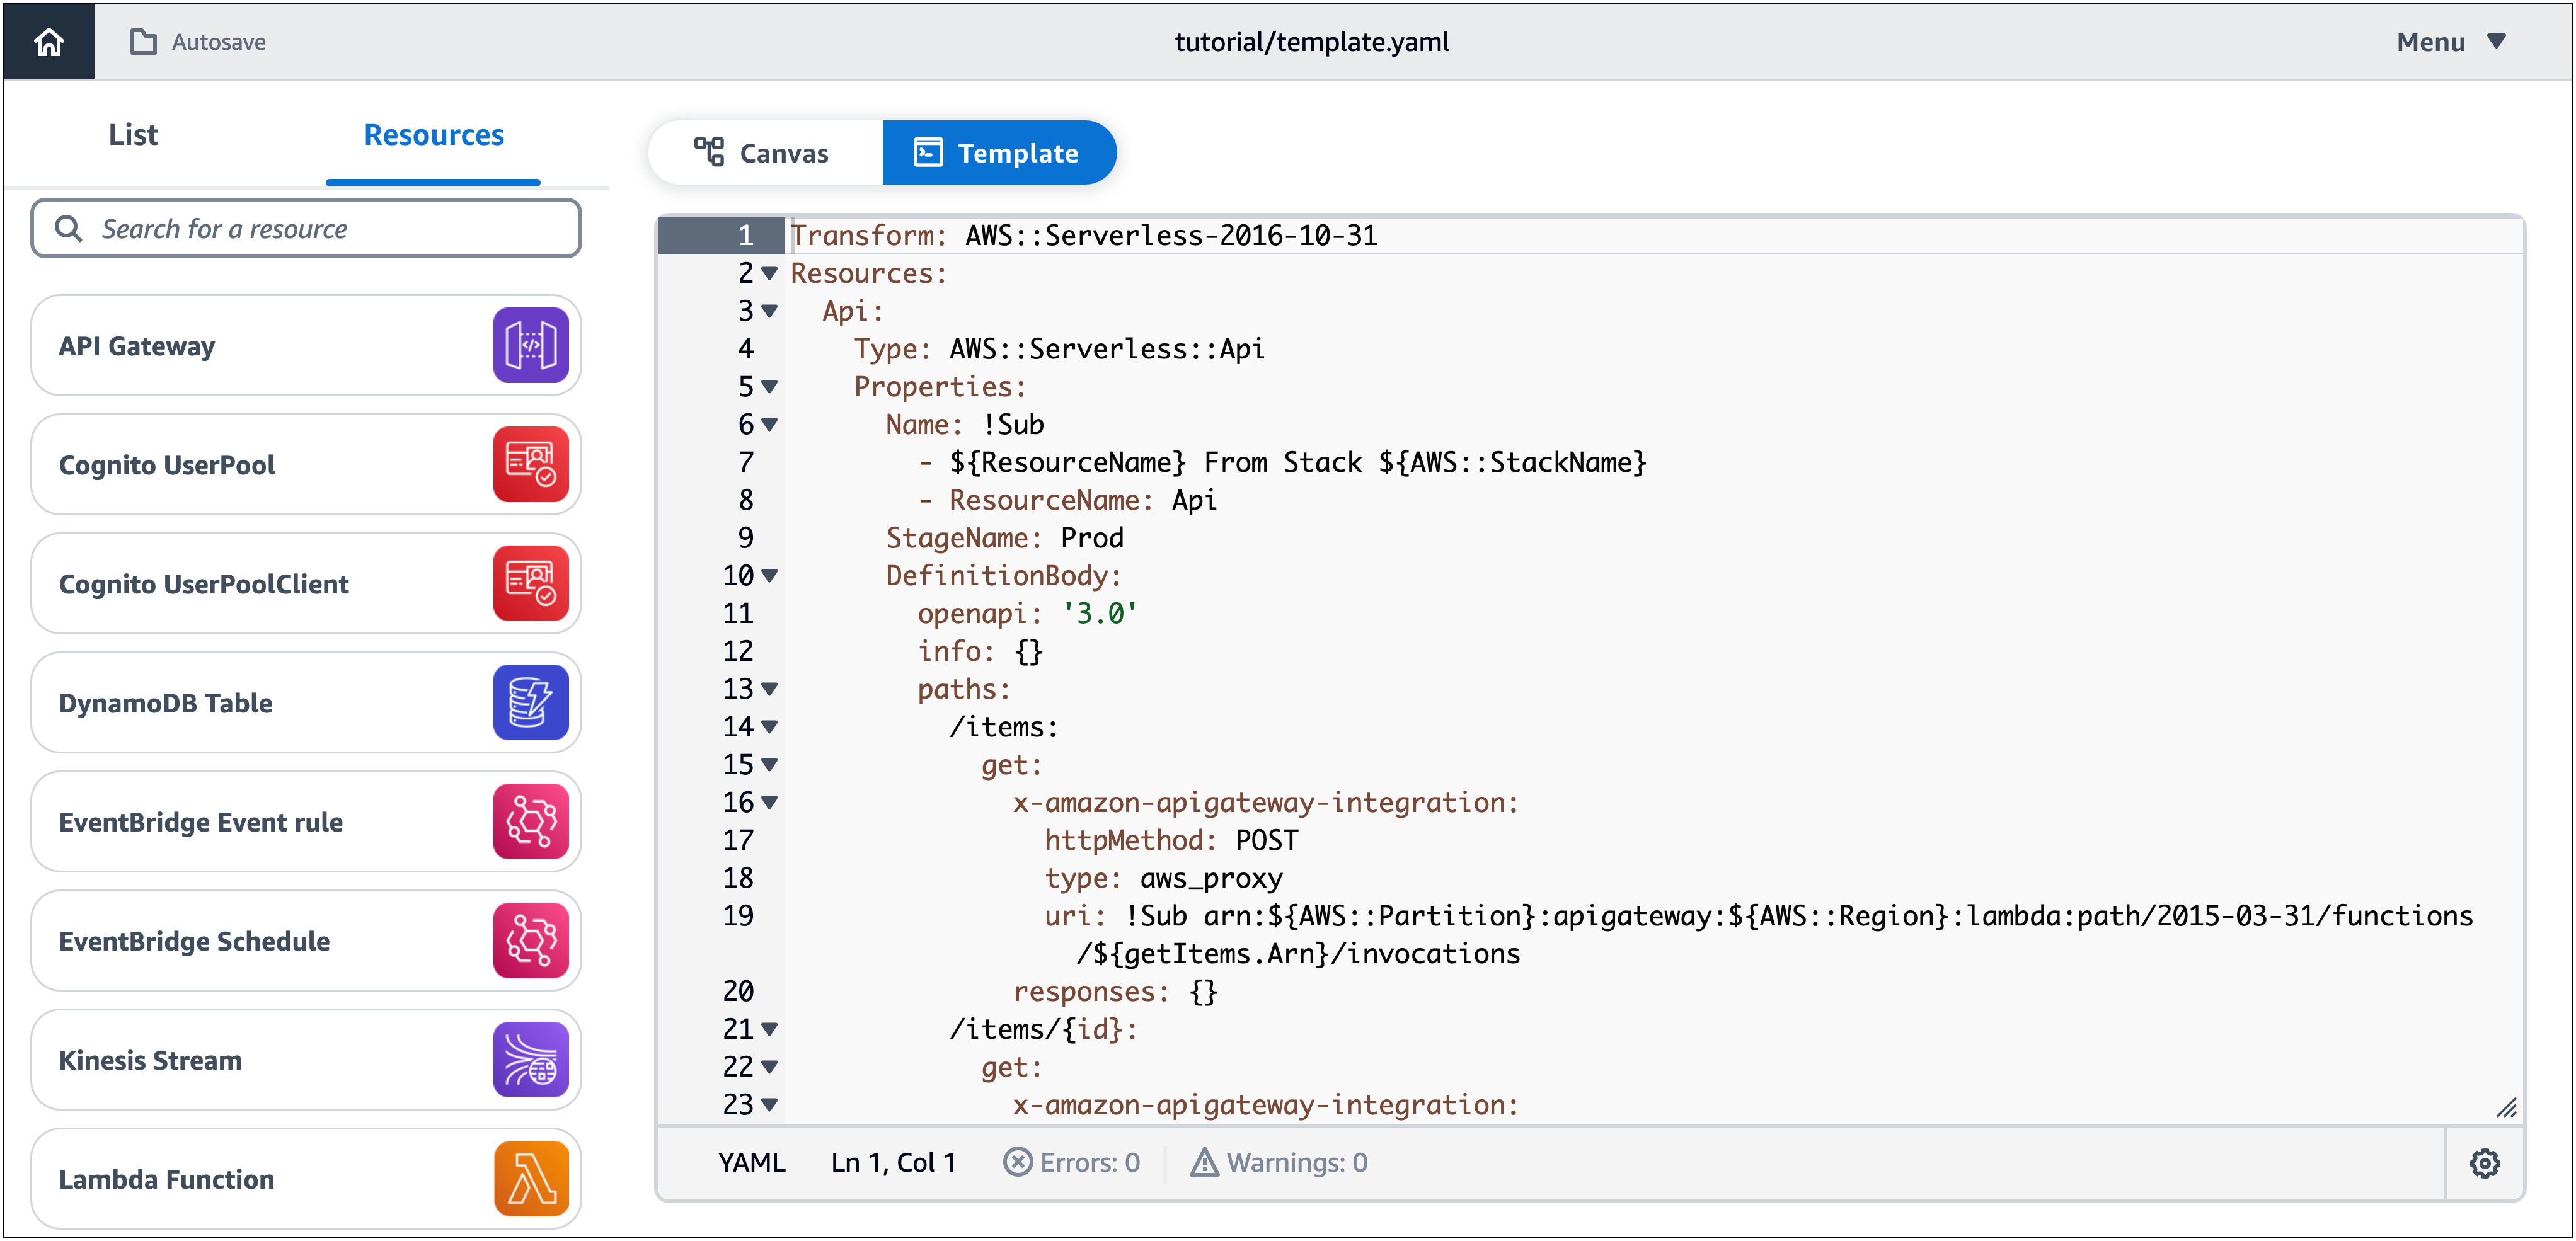
Step 8: Review your AWS CloudFormation template
Congratulations! You've successfully designed a serverless application that's ready for deployment. Finally, choose Template to review the AWS CloudFormation template that Application Composer has automatically generated for you.
In the template, Application Composer has defined the following:
-
The
Transformdeclaration, which specifies the template as an AWS Serverless Application Model (AWS SAM) template. For more information, see AWS SAM template anatomy in the AWS Serverless Application Model Developer Guide. -
An
AWS::Serverless::Apiresource, which specifies your API Gateway REST API with its five routes. -
Five
AWS::Serverless::Functionresources, which specify your Lambda functions' configurations, including their environment variables and permissions policies. -
An
AWS::DynamoDB::Tableresource, which specifies your DynamoDB table and its properties. -
The
Metadatasection, which contains information about your resource group (API). For more information about this section, see Metadata in the AWS CloudFormation User Guide.
Step 9: Integrate into your development workflows
Use the template file and project directories that Application Composer created for further testing and deployment.
-
With local sync, you can connect Application Composer to the IDE on your local machine to speed up development. To learn more, see Using Application Composer with your local IDE.
-
With local sync, you can use the AWS Serverless Application Model Command Line Interface (AWS SAM CLI) on your local machine to test and deploy your application. To learn more, see Use AWS SAM to deploy your application to AWS CloudFormation.
Next steps
You're now ready to build your own applications with Application Composer.
