本文為英文版的機器翻譯版本,如內容有任何歧義或不一致之處,概以英文版為準。
手動連接 Amazon EC2
主題
下列步驟假設您已完成 先決條件主題中的步驟。
步驟 1:建立 Amazon EC2 執行個體
在此步驟中,您將在稍後用來佈建 Amazon DocumentDB 叢集的相同區域和 Amazon VPC 中建立 Amazon EC2 執行個體。 Amazon DocumentDB
-
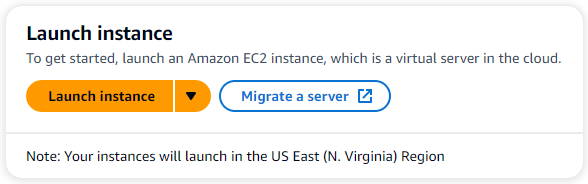
在 Amazon EC2 主控台上,選擇啟動執行個體。
-
在名稱和標籤區段的名稱欄位中輸入名稱或識別符。
-
在 Amazon Machine Image (AMI) 下拉式清單中,找到 Amazon Linux 2 AMI 並選擇它。

-
在執行個體類型下拉式清單中尋找並選擇 t3.micro。
-
在金鑰對 (登入) 區段中,輸入現有金鑰對的識別符,或選擇建立新的金鑰對。
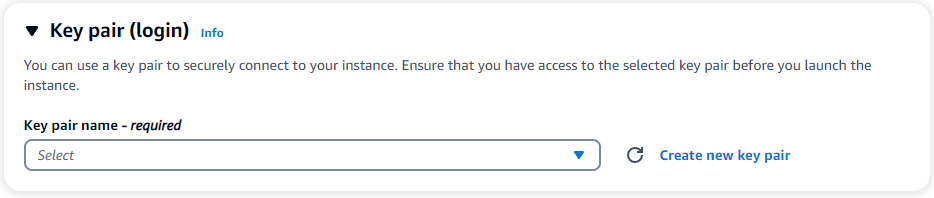
您必須提供 Amazon EC2 金鑰對。
如果您有 Amazon EC2 金鑰對:
-
選取金鑰對,從清單中選擇您的金鑰對。
-
您必須已有私有金鑰檔案 (.pem 或 .ppk 檔案) 可供登入 Amazon EC2 執行個體。
如果您沒有 Amazon EC2 金鑰對:
-
選擇建立新金鑰對,即會顯示建立金鑰對對話方塊。
-
在金鑰對名稱欄位中輸入名稱。
-
選擇金鑰對類型和私有金鑰檔案格式。
-
選擇 Create key pair (建立金鑰對)。
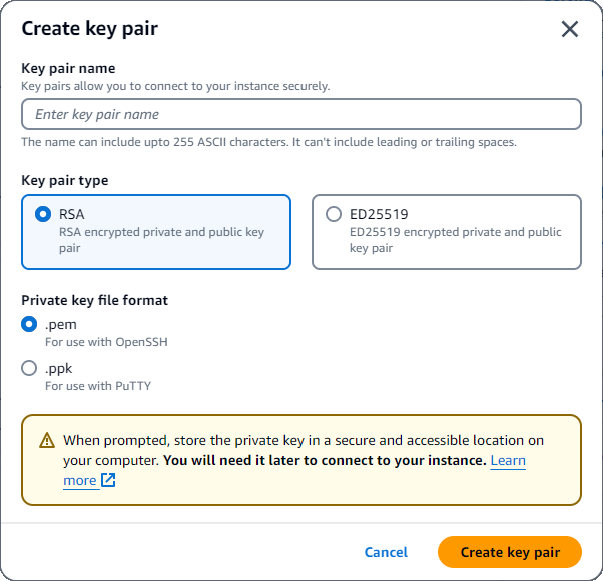
注意
基於安全考量,我們強烈建議針對 SSH 和網際網路連線至 EC2 執行個體,使用金鑰對。
-
-
在網路設定區段的防火牆 (安全群組) 下,選擇建立安全群組或選取現有的安全群組。

如果您選擇選取現有的安全群組,請從常見安全群組下拉式清單中選取一個。
如果您選擇建立新的安全群組,請執行下列動作:
檢查所有流量允許適用於 EC2 連線的規則。
在 IP 欄位中,選擇我的 IP 或選取自訂,從 CIDR 區塊、字首清單或安全群組清單中選擇。我們不建議選擇 Anywhere,除非您的 EC2 執行個體位於隔離的網路上,因為它允許存取 EC2 執行個體的任何 IP 地址。

-
在摘要區段中,檢閱您的 EC2 組態,如果正確,請選擇啟動執行個體。
步驟 2:建立安全群組
您現在將在預設 Amazon VPC 中建立新的安全群組。安全群組demoDocDB可讓您從 Amazon DocumentDB EC2 執行個體連線至連接埠 27017 (Amazon DocumentDB 的預設連接埠) 上的 Amazon DocumentDB 叢集。 Amazon EC2
-
在 Amazon EC2 管理主控台
的網路和安全性下,選擇安全群組。 
-
選擇建立安全群組。

-
在基本詳細資訊區段中:
針對 Security group name (安全群組名稱),輸入
demoDocDB。在描述中,輸入描述。
對於 VPC,接受預設 VPC 的使用。
-
在 Inbound rules (傳入規則) 區段中,選擇 Add rule (新增規則)。
針對類型,選擇自訂 TCP 規則 (預設)。
針對連接埠範圍,輸入
27017。對於 Source (資源),選擇 Custom (自訂)。在旁邊的欄位中,搜尋您剛在步驟 1 中建立的安全群組。您可能需要重新整理瀏覽器,Amazon EC2 主控台才能自動填入來源名稱。

-
接受所有其他預設值,然後選擇建立安全群組。
步驟 3:建立 Amazon DocumentDB 叢集
佈建 Amazon EC2 執行個體時,您將建立 Amazon DocumentDB 叢集。
-
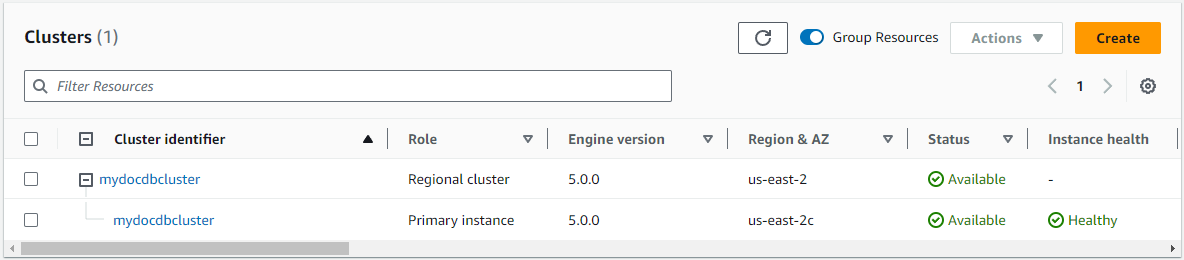
導覽至 Amazon DocumentDB 主控台,然後從導覽窗格中選擇叢集。
-
選擇建立。
-
將叢集類型設定保留為執行個體型叢集的預設值。
-
在叢集組態中,針對叢集識別符輸入唯一名稱。請注意,無論如何輸入叢集名稱,主控台都會將所有叢集名稱變更為小寫。
將引擎版本保留為預設值 5.0.0。
對於叢集儲存組態,請保留 Amazon DocumentDB Standard 的預設設定。
-
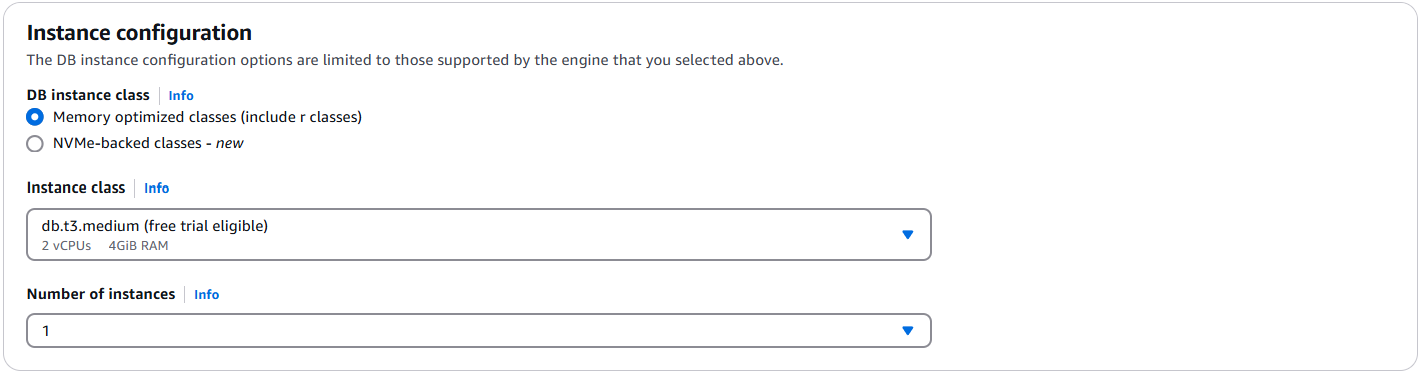
在執行個體組態中:
針對資料庫執行個體類別,選擇記憶體最佳化類別 (包括 r 類別) (這是預設值)。
另一個執行個體選項是 NVMe 支援的類別。如需詳細資訊,請參閱 NVMe 支援的執行個體。
針對執行個體類別,選擇符合您需求的執行個體類型。如需執行個體類別的詳細說明,請參閱 執行個體類別規格。
對於執行個體數量,請選擇最能反映您需求的數字。請記住,數字越低,成本越低,叢集可管理的讀取/寫入磁碟區就越低。
-
對於連線,請保留預設設定 不連線至 EC2 運算資源。
注意
連線至 EC2 運算資源會自動為叢集的連線建立安全群組。由於您在上一個步驟中手動建立這些安全群組,因此您應該選取不要連線到 EC2 運算資源,以免建立第二組安全群組。
-
在身分驗證區段中,輸入主要使用者的使用者名稱,然後選擇自我管理。輸入密碼,然後確認。
如果您改為選擇 中的受管 AWS Secrets Manager,請參閱 使用 Amazon DocumentDB 和 進行密碼管理 AWS Secrets Manager 以取得詳細資訊。
-
選擇 建立叢集。
步驟 4:連線至您的 Amazon EC2 執行個體
連線至 Amazon EC2 執行個體可讓您安裝 MongoDB shell。安裝 mongo shell 可讓您連線至 並查詢 Amazon DocumentDB 叢集。請完成下列步驟:
-
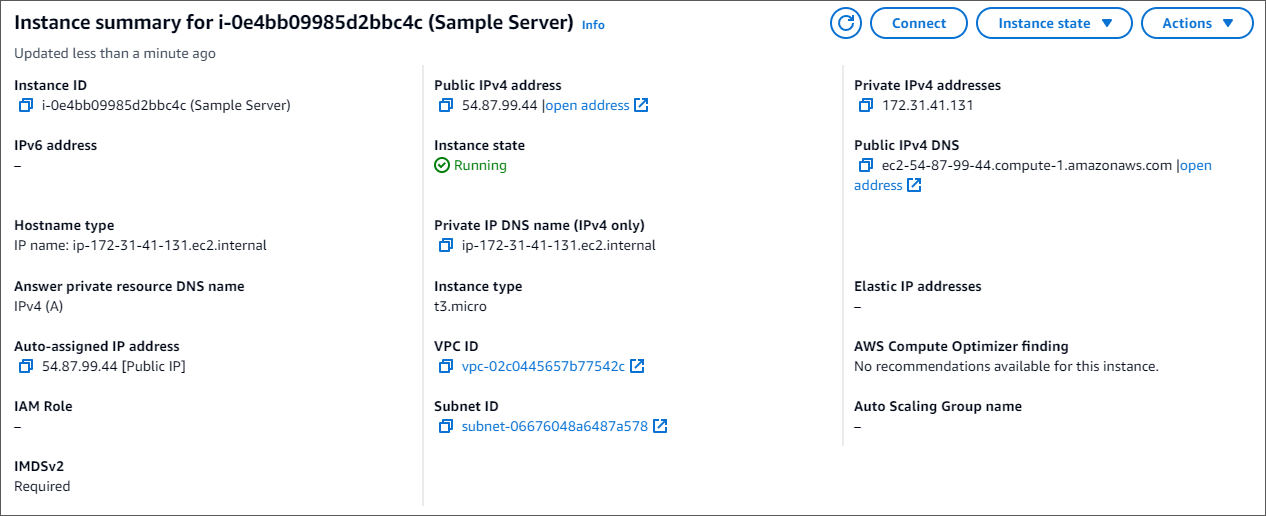
在 Amazon EC2 主控台上,導覽至您的執行個體,並查看您剛建立的執行個體是否正在執行。如果是,請按一下執行個體 ID 來選取執行個體。

-
選擇連線。
-
您的連線方法有四個標籤選項:Amazon EC2 Instance Connect、Session Manager、SSH 用戶端或 EC2 序列主控台。您必須選擇一個 ,並遵循其指示。完成後,請選擇連線。

注意
如果您的 IP 地址在您開始此演練後發生變更,或者您稍後返回您的環境,您必須更新demoEC2安全群組傳入規則,以啟用來自新 API 地址的傳入流量。
步驟 5:安裝 MongoDB Shell
您現在可以安裝 MongoDB shell,這是用來連接和查詢 Amazon DocumentDB 叢集的命令列公用程式。MongoDB shell 目前有兩種版本:最新版本 mongosh 和舊版 mongo shell。
重要
目前 Amazon DocumentDB 的 IAM 身分驗證不支援 6.13.1 版之前的 Node.js 驅動程式有已知的限制。使用 Node.js 驅動程式的 Node.js 驅動程式和工具 (例如 mongosh) 必須升級為使用 Node.js 驅動程式 6.13.1 版或更新版本。
請依照下列指示,為您的作業系統安裝 MongoDB shell。
步驟 6:管理 Amazon DocumentDB TLS
使用下列程式碼下載 Amazon DocumentDB 的 CA 憑證: wget https://truststore.pki.rds.amazonaws.com/global/global-bundle.pem
注意
任何新的 Amazon DocumentDB 叢集預設都會啟用 Transport Layer Security (TLS)。如需詳細資訊,請參閱管理 Amazon DocumentDB 叢集 TLS 設定。
步驟 7:連線至 Amazon DocumentDB 叢集
-
在 Amazon DocumentDB 主控台的叢集下,找到您的叢集。按一下該叢集的叢集識別符,以選擇您建立的叢集。
-
在連線和安全性索引標籤中,在連線方塊中找到使用 mongo shell 連線至此叢集:
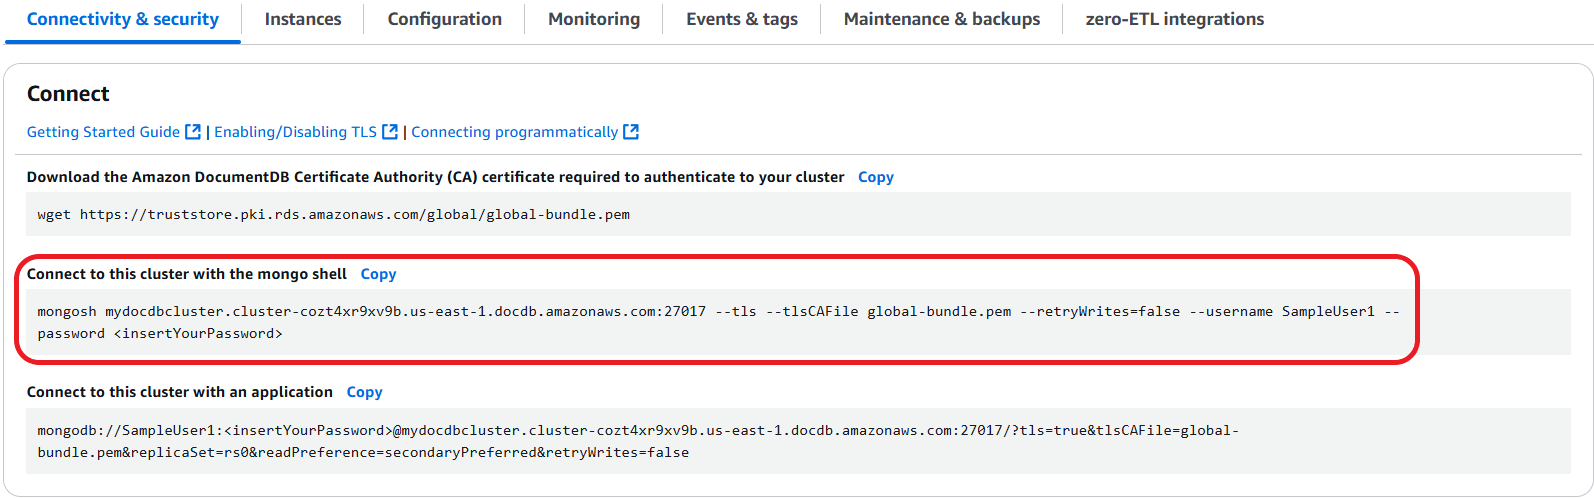
複製提供的連線字串,並將其貼到您的終端機。
對其進行下列變更:
請確定字串中有正確的使用者名稱。
省略 ,
<insertYourPassword>以便在連線時 mongo shell 提示您輸入密碼。選用:如果您使用 IAM 身分驗證,或使用舊版 MongoDB shell,請修改您的連線字串,如下所示:
mongo --ssl --host mydocdbcluster.cluster-cozt4xr9xv9b.us-east-1.docdb.amazonaws.com:27017 --sslCAFile global-bundle.pem --username SampleUser1 --passwordmydocdbcluster.cluster-cozt4xr9xv9b.us-east-1將 取代為來自叢集的相同資訊。
-
在終端機中按 Enter。現在系統會提示您輸入密碼。輸入您的密碼。
-
當您輸入密碼並看到
rs0 [direct: primary] <env-name>>提示時,您已成功連線到 Amazon DocumentDB 叢集。
連線時發生問題? 請參閱疑難排解 Amazon DocumentDB。
步驟 8:插入和查詢資料
現在您已連線至叢集,您可以執行一些查詢,以熟悉如何使用文件資料庫。
-
若要插入單一文件,請輸入下列項目:
db.collection.insertOne({"hello":"DocumentDB"})您會收到下列輸出:
{ acknowledged: true, insertedId: ObjectId('673657216bdf6258466b128c') } -
您可以使用
findOne()命令讀取您撰寫的文件 (因為它只會傳回單一文件)。輸入下列項目:db.collection.findOne()您會收到下列輸出:
{ "_id" : ObjectId("5e401fe56056fda7321fbd67"), "hello" : "DocumentDB" } -
若要執行更多查詢,請考慮遊戲設定檔使用案例。首先,將幾個項目插入標題為 的集合
profiles。輸入下列項目:db.profiles.insertMany([{ _id: 1, name: 'Matt', status: 'active', level: 12, score: 202 }, { _id: 2, name: 'Frank', status: 'inactive', level: 2, score: 9 }, { _id: 3, name: 'Karen', status: 'active', level: 7, score: 87 }, { _id: 4, name: 'Katie', status: 'active', level: 3, score: 27 } ])您會收到下列輸出:
{ acknowledged: true, insertedIds: { '0': 1, '1': 2, '2': 3, '3': 4 } } -
使用
find()命令來傳回設定檔集合中的所有文件。輸入下列項目:db.profiles.find()您會收到與您在步驟 3 中輸入的資料相符的輸出。
-
使用篩選條件對單一文件使用查詢。輸入下列項目:
db.profiles.find({name: "Katie"})您會收到下列輸出:
{ "_id" : 4, "name" : "Katie", "status": "active", "level": 3, "score":27} -
現在,讓我們嘗試尋找設定檔,並使用
findAndModify命令修改它。我們會為使用者 Matt 提供額外 10 點的下列程式碼:db.profiles.findAndModify({ query: { name: "Matt", status: "active"}, update: { $inc: { score: 10 } } })您會收到下列輸出 (請注意,他的分數尚未增加):
{ [{_id : 1, name : 'Matt', status: 'active', level: 12, score: 202}] -
您可以使用下列查詢來驗證他的分數是否已變更:
db.profiles.find({name: "Matt"})您會收到下列輸出:
{ "_id" : 1, "name" : "Matt", "status" : "active", "level" : 12, "score" : 212 }
步驟 9:探索
恭喜您!您已成功完成 Amazon DocumentDB 的 Quick Start 指南。
下一步是什麼? 了解如何充分利用這個功能強大的資料庫及其一些熱門功能:
注意
若要節省成本,您可以停止 Amazon DocumentDB 叢集以降低成本或刪除叢集。根據預設,在閒置 30 分鐘後,您的 AWS Cloud9 環境將停止基礎 Amazon EC2 執行個體。
