Setting up a custom domain name for QnABot content designer and client
This section provides information on how to set up a custom domain name and configure the QnABot on AWS solution to use the custom domain name for the content designer and client user interfaces. The setup and configuration involve the following steps.
Step 1: Set up custom domain name for API Gateway
Use the AWS account and Region where you have deployed the QnABot on AWS solution for the following steps. See Setting up custom domain names for REST APIs in the Amazon API Gateway Developer Guide.
-
Registering a domain name.
-
Creating DNS records.
-
Creating an SSL certificate for the custom domain name.
-
Choosing a security policy. It is best security practice to specify a TLS 1.2 security policy.
-
Creating a custom domain in API Gateway.
Note
Deactivate the default API gateway endpoint since the custom domain name is used.
Step 2: Custom domain API mapping setup in API Gateway
When mapping the API to the custom domain in API Gateway for the QnABot deployment, use the following settings:
Mapping 1
-
API - Select the QnABot deployment you would like to use. The QnABot API takes on the same name as the CloudFormation Stack name you used when you deployed the QnABot on AWS solution.
-
Stage - Use prod. This is the default stage created for the QnABot deployment.
Mapping 2
-
API - Select the QnABot deployment you would like to use. The QnABot API takes on the same name as the CloudFormation Stack name you used when you deployed the QnABot on AWS solution.
-
Stage - Use prod. This is the default stage created for the QnABot deployment.
-
Path - Use prod. This is used for routing requests.
Step 3: Update QnABot API Resources in API Gateway
-
Navigate to the API Gateway console
and select the QnABot API. -
The QnABot API takes on the same name as the CloudFormation Stack name you used when you deployed the QnABot on AWS solution.
-
Navigate to the Resources section from the menu.
Step 3a: Update the /pages/client resource
-
Select the GET method for the
/pages/clientresource. -
Choose Integration Response.
-
Expand the 302 Method Response Status.
-
Edit the location Response header and replace the API Gateway endpoint with your custom domain name The API Gateway endpoint has an endpoint such as:
<api-id>.execute-api.<region>.amazonaws.com. -
Make a note of the URL encoding in the values.
-
Choose the {tick} icon to update the value.
-
Choose Save.
Step 3b: Update the /pages/designer resource
-
Select the GET method for
/pages/designerresource. -
Choose Integration Response.
-
Expand the 302 Method Response Status.
-
Edit the location Response header and replace the API Gateway endpoint with your custom domain name The API Gateway endpoint will have the endpoint such as:
<api-id>.execute-api.[.red]#<region>.amazonaws.com. -
Make note of the URL encoding in the values.
-
Choose the
{tick}icon to update the value. -
Choose Save.
Step 4: Update QnABot Cognito user pool
To access the QnABot content designer user interface, the deployment sets up authentication using Amazon Cognito. Update the user pool settings to update the Callback URLs to use the custom domain name.
-
Navigate to the Amazon Cognito console
. -
Choose User Pools.
-
Choose the QnABot user pool.
-
The QnABot user pool takes on the same name as the CloudFormation stack name you used when you deployed the QnABot on AWS solution. For example,
UserPool-[.red]<stack-name>`` -
Navigate to App Integration | App client settings.
-
Update the callback URLs for app clients:
UserPool-<stack-name>-client`. -
Use the custom domain name instead of the API Gateway endpoint. For example:
https://<your-custom-domain-name>
                     \/prod/static/client.html
. -
Choose Save Changes.
Update the callback URLs for app clients: UserPool-{stackname}-designer
-
Use the custom domain name instead of the API Gateway endpoint. For example:
https://<your-custom-domain-name>/prod/static/index.html. -
Choose Save Changes.
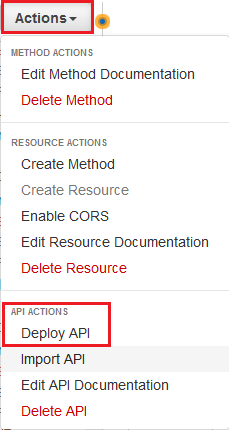
Step 5: Deploy API
Now that we have updated the configurations, we will deploy the API for the changes to take effect.
-
Choose Actions.
-
Choose Deploy API.
Deploy API action
-
Choose the following:
-
Deployment stage: prod.
-
Deployment description: Enter Updated
<location>response header in the GET method for the/pages/designerand the/pages/clientresources.
-
-
Choose Deploy.
Step 6: Update the API Stage variables
Once the API is deployed, the Stage Editor page appears.
-
Choose the Stage Variables tab.
-
Update the values for ClientLoginUrl and DesignerLoginUrl variables to use the custom domain name.
Update stage variables

Step 7: Test the updates using the custom domain name
Launch the QnABot content designer in a new browser session using the custom domain name https://
<your-custom-domain-name>
/prod/pags/designer to test the updates.
Known limitation
A CloudFormation stack update of QnABot on AWS performed after the above steps, will overwrite the changes made in Steps 3, 4, 5, and 6 above. We are looking at better ways to automate this process, but in the meantime, if you perform a stack update after the above steps, you will need to manually re-apply the above steps 3, 4, 5, and 6 again.
