Step 3. Manage your budget and monitor costs
By default, this solution implements comprehensive tagging of cluster resources and allows admin-defined tags during cluster deployment. All Amazon Elastic Compute Cloud (Amazon EC2) resources launched by this solution come with Amazon EC2 tags that can be used to get detailed information about your cluster usage. You can modify and add tags based on your business needs.

Scale-Out Computing on AWS default tags
AWS cost explorer
Use the following procedures to setup cost allocation and budgets to track the costs associated with solution resources running in your account.
Activate cost allocation tags
In the AWS Cost Management console
, select your account name, then select My Billing Dashboard In the left-hand navigation pane, select Cost allocation tags
Search all tags, then select Activate
Note
Tags may take up to 24 hours to activate.
Activate cost explorer
In the AWS Cost Management console
, select My Billing Dashboard. Select Cost Explorer, then select Enable Cost Explorer.
Note
Cost Explorer may take up to 24 hours to be activated.
Query cost explorer
Select Cost Explorer then specify your filters.
The following example shows the EC2-Instance cost group by the day for the node type scheduler.
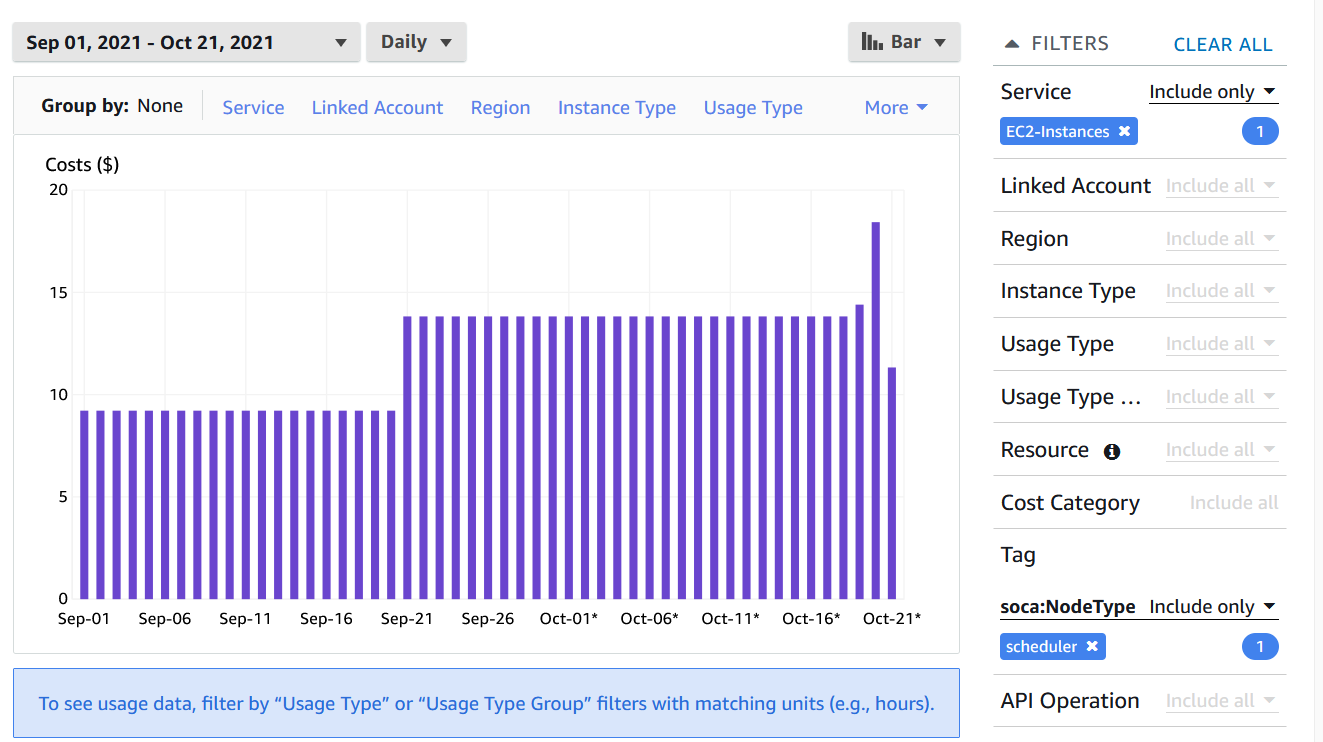
EC2-Instance cost group by day
For more detailed information, select Group By and apply any additional filters.
Select Tag and select the tag soca:JobOwner. The graph will automatically be updated with a cost breakdown by users for the cpus queue.
The following example shows user level information for the cpus queue.
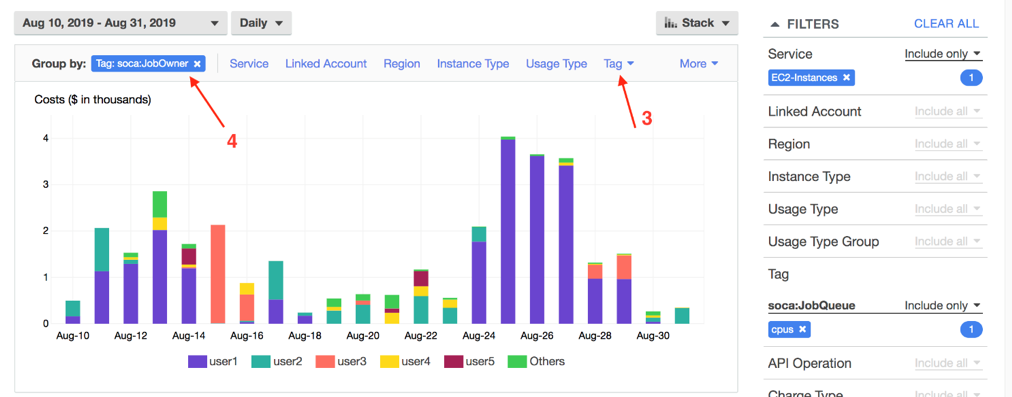
User level information for cpus queue
AWS budgets
In the AWS Budgets console
, select your Billing Dashboard. In the navigation pane, select Budget, then select Create a budget.
Specify your Cost Budget, then apply the tag(s) you want to monitor (i.e. cost center, team, user, and queue or project), and the budget limit you do not want to exceed.
